V-TAC VT-6043-4 User manual

SAFETY INSTRUCTIONS
• Make sure that the mains voltage matches the voltage stated on the rating label of the
appliance.
• Check the power cord regularly for visible damage. If the cord is damaged, it must be
replaced by the official Technical Support Service, in order to avoid any type of danger.
WARNING: Do not use the appliance if its cord, plug, or housing is damaged, nor after it
malfunctions or has been dropped or damaged in any way.
• The appliance is not intended to be used by children under the age of 8. It can be used by
children over the age of 8, as long as they are given continuous supervision.
• This appliance is not intended to be used by persons with reduced physical, sensory, or
mental capabilities, or lack of experience or knowledge, unless they have been given supervi-
sion or instruction concerning the use of the appliance in a safe way by a person responsible
for their safety, and understand the hazards involved.
• Supervise young children to make sure that they do not play with the appliance. Close
supervision is necessary when the appliance is being used by or near children.
• Keep the appliance and its cord out of reach of children under the age of 8.
• Do not try to repair the appliance by yourself. Contact the official Technical Support Service
for advice.
• Cleaning and maintenance must be carried out according to this instruction manual to make
sure the appliance functions properly. Turn off and unplug the appliance before cleaning it.
• Make sure the fan is not placed near drapes, curtains, or any objects that may be drawn into
the fan.
• The minimum distance between the fan blades and the floor must be 2.3 m. The minimum
carrying capacity of the outlet box from which the fan is hung must be 45 kg.
ENGLISH

• Do not use the appliance in confined spaces with explosive or toxic vapours.
• This appliance can be used by children aged from 8 years and above and persons with
reduced physical, sensory or mental capabilities or lack of experience and knowledge if they
have been given supervision or instruction concerning use of the appliance in a safe way and
understand the hazards involved. Children shall not play with the appliance. Cleaning and user
maintenance shall not be made by children without supervision.
• Make sure you install all-poles disconnection switch with a minimum distance of 3 mm
between poles in the supply wiring to the ceiling fan.
• Make sure the installation site will not allow the rotating fan blades to come into contact with
any object and that there is a minimum distance of 150mm (6”) from the blade tip to the wall
or ceiling. Please note that the bigger this distance is, the more airflow the fan will produce.
• Switch off the power before connecting or repairing the fan.
• The electrical wiring must be in accordance with the local regulations.
• The fan must be properly grounded to avoid the risk of electric shocks. Never mount the fan
in a moist or wet room. Be careful when working near the rotating blades.
• This appliance must be installed in accordance with the national electrical installation regula-
tions.
• Ensure that the fan is switched off from the supply mains before removing the guard.
• If unusual oscillating movement is observed, immediately stop using the ceiling fan and con-
tact the manufacturer, its service agent or suitably qualified persons.
• The replacement of parts of the safety suspension system device shall be performed by the
manufacturer, its service agent or suitably qualified persons.
• The mounting of the suspension system shall be performed by the manufacturer, its service
agent or suitably qualified person.
• In order to ensure your children’s safety, please keep all packaging (plastic bags, boxes,
polystyrene, etc.) away from their reach.
ENGLISH

IMPORTANT: Shut off the main electric switch during installation or maintenance. It is recom-
mended to switch off the plug of the automatic switch before the fan (Both mains and fan
switch should be not powered).
• Do not use outdoors. The product must be installed in a dry place, where it is not exposed to
water or moisture.
• Do not connect the fan motor to a dimmer switch. This could result in malfunction or motor
damage.
• It is not recommended that ceiling fans and gas appliances operate in the same room at the
same time.
• The fan must be completely turned off and stopped before reversing the fan direction. This
will prevent the fan motor and controller from getting damaged.
• Do not insert any object into the fan blades during operation. This will damage the blades
and upset the balance of the fan causing the unit to wobble.
• After the fan is completely installed make sure all base and fan blade fixings are secured and
tightened to prevent any problems.
• Some of the connections may loosen due to the fan’s natural movement. Check the support
connections brackets and blade attachments twice a year to make sure they remain secured. If
any are loose, tighten.
• The use of electrical appliances requires notion of somebasic rules, such as:
• Do not touch the appliance with wet hands or feet
• Never expose the appliance to atmospheric conditions (rain, sun, etc.).
• Do not use the device next to potentially explosive or inflammable liquids or gases.
• This product is intended for household use ONLY & not for commercial or outdoor use.
• Keep batteries out of the reach of children and animals, they could cause damage if swal-
lowed. If they were swallowed, contact your doctor immediately.
ENGLISH

INTRODUCTION & WARRANTY
Thank you for selecting and buying V-TAC product. V-TAC will serve you the best. Please read
these instructions carefully before starting the installation and keep this manual handy for
future reference. If you have any another query, please contact our dealer or local vendor from
whom you have purchased the product. They are trained and ready to serve you at the best.
The warranty is valid for 2 years from the date of purchase. The warranty does not apply to
damage caused by incorrect installation or abnormal wear and tear. The company gives no
warranty against damage to any surface due to incorrect removal and installation of the prod-
uct. The products are suitable for 10-12 Hours Daily operation. Usage of product for 24 Hours
a day would void the warranty. This product is warranted for manufacturing defects only.
This marking indicates that this
product should not be disposed
of with other household wastes. Caution, risk of electric shock.
• If any visible signs of damage, holes or deterioration are observed, avoid direct contact
between batteries and skin, eyes or mucous membranes. If batteries leak and get into contact
with eyes, immediately wash them with abundant water. Contact your doctor immediately.
• Please make sure to turn off the power before starting the installation.
• The light source of this luminaire is not replaceable, when the light source reaches its end of
life the whole luminaire should be replaced.
• Installation should only be done by a certified electrician.
ENGLISH

INSTRUCTION MANUAL
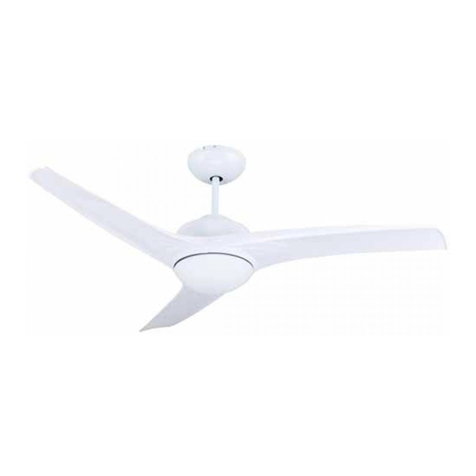
DECORATIVE CEILING FANS (VT-6043-4)
MULTI-LANGUAGE MANUAL QR CODE
Please scan the QR code
to access the manual in
multiple languages.
TECHNICAL DATA
1) 42" (107CM ) Decorative ceiling fan
2) With forward and reverse function
3) 4 MDF blades
4) Powerful Motor: 153*15mm, 2.3kg
5) Revolutions per minute: 220±10 RPM
6) Blade angle 13°
7) 3 speeds and light remote control
8) 15W 3 color LED light
9) Power:220V,50HZ,60W (power of the
motor)
10) G.W.: 6.8KG / N.W.: 6.1KG
ENGLISH

PARTS AND COMPONENTS
Tools and material required (not included)
1. Mounting bracket
2. Down rod and hanging ball
3. Canopy
4. Fan motor housing
5. Light
6. Glass shade
7. Blades
8. Screw kit, mounting bracket hardware
(wire, nuts, rubber washers) and
attachment hardware
9. Remote control
10. Screwdriver
11. Flat-blade screwdriver
12. Adjustable pliers or wrench
13. Step ladder
14. Wire cutter
15. Electrical tape
ENGLISH
FIG 1
FIG 2

1. BEFORE USE
Unpack your ceiling fan carefully then remove all parts and components and lay on a cloth or
soft surface to avoid damage. Do not lay the motor housing on its side, the housing may get
damaged. Before commencing installation, check that all parts are included.
2. PRODUCT ASSEMBLY
WARNING: All electrical tasks should only be undertaken after disconnection of electricity
by removing fuses or turning off the circuit breaker to avoid risk of electric shocks.
ASSEMBLY STEPS:
2.1. INSTALLATION OF THE MOUNTING BRACKET
The hanger bracket must be screwed on to a firm flat surface. The structure to which it is
installed must be able to withstand ten times the static weight of the fan. In case of installing
the ceiling fan to a wooden joist, 2 self-tapping screws provided should be enough to support
the ceiling fan. The washers provided must be placed in the following Order:
screw head > round washer > spring washer > mounting
bracket > ceiling.
Screw the mounting bracket to the ceiling and make sure all
connections are secure to prevent the fan from falling. Loosen
the two canopy screws from the mounting bracket.
NOTE: Self-tapping screws are only suitable for wooden ceilings.
In case of installing the ceiling fan to concrete ceilings or joists,
use a drill for making the holes and stoppers or expansion
screws (not included).
ENGLISH
FIG 3

• Unscrew the screw on the down rod’s hanger ball, then
loosen the hanger ball. Remove the stop pin from inside the
down rod and remove the hanger ball from the rod.
• Remove the clevis pin and hairpin clip from the down rod. If
you prefer using the longer down rod, install the hanger ball on
it and make sure to move the earth wire from one to the other.
Pass the electrical supply leads from the top of the motor all
the way through the down rod until they come out the other
end.
• Insert the down rod into the motor housing’s hole and turn it
in order to align the holes on both sides with the holes on the
down rod.
• Pass the clevis pin through the holes so that it passes through
the down rod too, be careful not to damage any of the wires.
Pass the hairpin clip through the clevis pin so that it is securely
fixed.
• Tighten all the screws set up to the moment. This will ensure
minimum rod and fan tumbling.
2.2. INSTALLATION OF THE DOWN ROD AND HANGER BALL
ENGLISH
FIG 4
FIG 5

• If screws are not properly tightened, the motor might oscillate. This
could be dangerous.
• Once the above steps are all finished, install the hanger ball onto the
down rod, insert the stop pin in the down rod and lift up the hanger
ball. Then, tighten all the screws firmly so that all the elements are
completely and securely fixed.
2.3. HANGING THE FAN TO THE MOUNTING BRACKET AND
ATTACHING THE BLADES
• Lift the fan up to the mounting bracket, insert the hanger ball in the
mounting bracket through the opening and carefully let it rest.
• Rotate the ball and make sure that the tab located in the mounting
bracket is aligned with the hanging ball’s slot.
• When aligned, the fan will automatically sit on its correct position.
This will prevent rotation of the rod and fan when the unit is
operating.
2.4. REMOTE CONTROL AND WIRING INSTRUCTION
• Place the receiver through the hanging bracket and connect the
wires following the colour codes.
• Connect the push connectors from the fan to the remote control as
stated below:
ENGLISH
FIG 6
FIG 7
FIG 8

WIRING DIAGRAM
MOTOR
N(WHITE) N(WHITE) WHITE(neutral)
BLACK(fan connection)
BLUE(light connection)
V(BLACK)
LIGHT(BLUE)
L(BLACK)
SENSOR
• Do not use the appliance in confined spaces with explosive or toxic vapours.
• This appliance can be used by children aged from 8 years and above and persons with
reduced physical, sensory or mental capabilities or lack of experience and knowledge if they
have been given supervision or instruction concerning use of the appliance in a safe way and
understand the hazards involved. Children shall not play with the appliance. Cleaning and user
maintenance shall not be made by children without supervision.
• Make sure you install all-poles disconnection switch with a minimum distance of 3 mm
between poles in the supply wiring to the ceiling fan.
• Make sure the installation site will not allow the rotating fan blades to come into contact with
any object and that there is a minimum distance of 150mm (6”) from the blade tip to the wall
or ceiling. Please note that the bigger this distance is, the more airflow the fan will produce.
• Switch off the power before connecting or repairing the fan.
• The electrical wiring must be in accordance with the local regulations.
• The fan must be properly grounded to avoid the risk of electric shocks. Never mount the fan
in a moist or wet room. Be careful when working near the rotating blades.
• This appliance must be installed in accordance with the national electrical installation regula-
tions.
• Ensure that the fan is switched off from the supply mains before removing the guard.
• If unusual oscillating movement is observed, immediately stop using the ceiling fan and con-
tact the manufacturer, its service agent or suitably qualified persons.
• The replacement of parts of the safety suspension system device shall be performed by the
manufacturer, its service agent or suitably qualified persons.
• The mounting of the suspension system shall be performed by the manufacturer, its service
agent or suitably qualified person.
• In order to ensure your children’s safety, please keep all packaging (plastic bags, boxes,
polystyrene, etc.) away from their reach.
ENGLISH
FIG 9

2.6. INSTALLING THE LED LIGHT AND GLASS SHADE
2.5. BLADE ASSEMBLY
Remove the 3 screws & the LED
from lamp. Do not over tighten the screws as this can damage the
blades. Repeat this process for all blades.
Insert the blades
through the motor
housing’s side slots
and align them with
the 3 holes.
Secure the blades
with 3 blade screws
& ensure that the 3
blade screws are
tightened properly.
NOTE: if installing more than 1 fan, be careful not to mix blades & screws as each model is
designed with specific materials & parts.
ENGLISH
FIG 10 FIG 11

WARNING: Do not over tighten when installing the glass shade.
3. OPERATION
The direction switch on the fan body controls air flow:
• Winter function: press the switch UP for the blades to move warm air near the ceiling around.
• Summer function: press the switch DOWN for blades to create breeze and improve air
circulation.
Connect the LED light’s wires to
the fan motor’s wires. Align the
lamp holder’s screw holes with
those on the motor and attach
both parts by means of the
screws provided.
Carefully install the glass
shade into the main body and
turn it clockwise to lock it.
Lamp fixture removed
screws tighten LED.
ENGLISH
FIG 12 FIG 13 FIG 14

WARNING: Before using the direction switch, turn the fan off and make sure the fan has
stopped rotating in order to prevent possible injuries and motor damage. Change direction by
pushing the switch up or down when the fan is off.
REMOTE CONTROL
Use the remote control to turn the fan on and off and to change speed.
LIGHT ON/OFF
Fan Speed
H - Highest speed
M - Medium speed
L - Lowest speed
FAN STOP
Timer
1H-Fan auto turn off after 1 hour
2H-Fan auto turn off after 2 hours
4H-Fan auto turn off after 4 hours
8H-Fan auto turn off after 8 hours
REPLACING BATTERIES
1. To replace the remote control bat-
teries, press the battery cover and
slide it towards the arrow direction.
2. This remote control requires 1 x
A23 12V battery.
3. Reassemble the battery compart-
ment cover.
ENGLISH
FIG 15

WARNING:
• Always ensure the battery compartment cover is closed properly.
• Never leave the remote control directly exposed to sun light.
• Do not try recharging the discharged batteries by heating them or with a battery charger.
Rechargeable batteries are always specified as so.
• Do not throw batteries into the fire, it could cause explosion.
4. CLEANING AND MAINTENANCE
1. Always disconnect the fan from the power supply and allow it to stop before cleaning it.
2. Clean the outside surface with a soft damp cloth.
WARNING:
• Make sure the power is turned off at the main fuse or circuit panel before you attempt any
repairs.
• Do not immerse then fan in water.
• Never use scouring pads, abrasive or chemical cleaners.
• Clean your fan periodically. Use only a cloth or brush. Metal finishes are finished with a lac-
quer to prevent tarnishing.
• Do not allow the product’s inside parts to get wet (especially the circuit plate), this could be
very dangerous and damage the fan.
• While the product is not in use, make sure it is unplugged from the power supply. To store it,
place it in its original box and save it in a fresh and dry place until it is used again.
• In case of fault or doubt, do not try to repair the fan by yourself to avoid risk of fire or electric
shock.
ENGLISH

5. TROUBLESHOOTING THE FAN DOES NOT START UP
1. Check all the fuses or circuit breakers.
2. Turn off the electrical power and check all wire connections.
THE FAN EMITS NOISES
1. Always allow a few days “break in” time for any new fan at medium or high speed. Try to
diagnose the exact location of the noise by listening carefully from several sides (blades,
motor, light kit, etc.) The fan noise can come from a light kit.
2. Make sure all screws in the fan assembly and light kit are tight and properly threaded. If
not, then turn off the power and tighten the screws. Tighten these screws at least once a year
because they may loosen slowly over time and cause a clicking noise.
3. Make sure the light kit is securely fastened to the fan, and all glass screws are finger tight-
ened only. Do not tighten with pliers or a screw driver.
4. Make sure the mounting bracket is installed snugly to the junction box.
5. Make sure wire nuts in the switch housing or the canopy are not rattling against each other
or against the housing’s wall. Wrap with electrical tape if necessary.
6. Make sure the canopy is not touching the ceiling.
7. Assure that the screws fastening the blade holders to the motor are tight and the lock
washers provided for that purpose have been used.
THE FAN DOES NOT PRODUCE MUCH AIR
1. The fan may be running in reverse, so air is directed upward.
ENGLISH

2. The room may contain items that obstruct the airflow.
3. The fan may be too small for the size of the room.
FAN WOBBLING
NOTE: A small amount of wobble is considered acceptable and should not be considered a
defect.
1. Make sure the mounting bracket is fixed tightly to the ceiling with no movement at all.
Tighten screws if necessary.
2. Make sure all screws holding the blades to the blade support and blade support to motor
are tight. Make sure the light kit and the glass screws are tight.
ENGLISH

CONSIGNES DE SÉCURITÉ
• Assurez-vous que la tension du réseau correspond à celle indiquée sur la plaque signalétique de l'appareil.
• Vérifiez régulièrement si le cordon d'alimentation présente des dommages visibles. Si le cordon est endommagé, il
doit être remplacé par le service d'assistance technique officiel, afin d'éviter tout type de danger.
AVERTISSEMENT: N'utilisez pas l'appareil si son cordon, sa fiche ou son boîtier sont endommagés, ou s'il fonctionne
mal ou s'il est tombé ou a été endommagé de quelque façon que ce soit.
• L'appareil n'est pas destiné à être utilisé par des enfants de moins de 8 ans. Il peut être utilisé par des enfants de
plus de 8 ans, à condition qu'ils soient surveillés en permanence.
• Cet appareil n'est pas destiné à être utilisé par des personnes ayant des capacités physiques, sensorielles ou mental-
es réduites, ou manquant d'expérience ou de connaissances, à moins qu'elles ne soient pas supervisées ou aient reçu
des consignes sur l'utilisation de l'appareil par une personne responsable de leur sécurité et qu'elles comprennent les
risques encourus.
• Surveillez les jeunes enfants pour vous assurer qu'ils ne jouent pas avec l'appareil. Une surveillance stricte est
nécessaire lorsque l'appareil est utilisé par des enfants ou à proximité.
• Gardez l'appareil et son cordon d'alimentation hors de portée des enfants de moins de 8 ans.
• N'essayez pas de réparer l'appareil par vous-même. Contactez le service officiel de support technique pour obtenir
des conseils.
• Le nettoyage et l'entretien doivent être effectués conformément à ce mode d’emploi pour assurer le bon fonctionne-
ment de l'appareil. Éteignez et débranchez l'appareil avant de le nettoyer.
• Assurez-vous que le ventilateur n'est pas placé près de rideaux, de tentures ou de tout autre objet qui pourrait être
aspiré par le ventilateur.
• La distance minimale entre les pales du ventilateur et le sol doit être de 2,3 m. La capacité de charge minimale de la
boîte de sortie à laquelle le ventilateur est suspendu doit être de 45 kg.
• N'utilisez pas l'appareil dans des espaces confinés avec des vapeurs explosives ou toxiques
• Cet appareil peut être utilisé par des enfants âgés de 8 ans et plus et par des personnes ayant des capacités
physiques, sensorielles ou mentales réduites ou manquant d'expérience et de connaissances sous réserve d’être
supervisés ou d’avoir reçu des consignes concernant l'utilisation de l'appareil d'une manière sûre et comprennent les
risques encourus. Les enfants ne doivent pas jouer avec l'appareil. Le nettoyage et l'entretien de la part des utilisa-
teurs ne doivent pas être effectués par des enfants sans surveillance.
FRENCH

• Veillez à installer un sectionneur tous pôles avec une distance minimale de 3 mm entre les pôles dans le câblage
d'alimentation du ventilateur de plafond.
• Assurez-vous que l’endroit d'installation ne permet pas aux pales du ventilateur en rotation d'entrer en contact avec
un objet quelconque et qu'il y a une distance minimale de 150 mm (6") entre l'extrémité des pales et le mur ou le
plafond. Veuillez noter que plus cette distance est grande, plus le ventilateur produira de débit d'air.
• Veuillez vous assurer de couper le courant avant de commencer l'installation
• Le câblage électrique doit être conforme aux réglementations locales.
• Le ventilateur doit être correctement mis à la terre pour éviter les risques de chocs électriques. Ne montez jamais le
ventilateur dans une pièce humide ou mouillée. Faites attention lorsque vous travaillez à proximité des pales en
rotation.
• Cet appareil doit être installé conformément aux réglementations nationales en matière d'installation électrique.
• Assurez-vous que le ventilateur est coupé du réseau avant de retirer le protecteur.
• Si vous constatez un mouvement oscillant inhabituel, arrêtez immédiatement d'utiliser le ventilateur de plafond et
contactez le fabricant, son agent de service ou des personnes qualifiées.
• Le remplacement des pièces du dispositif de sécurité du système de suspension doit être effectué par le fabricant,
son agent de service ou des personnes dûment qualifiées.
• Le montage du système de suspension doit être effectué par le fabricant, son agent de service ou une personne
dûment qualifiée.
• Afin d'assurer la sécurité de vos enfants, veuillez garder tous les emballages (sacs de plastique, boîtes, polystyrène,
etc.) hors de leur portée.
IMPORTANT: Couper l'interrupteur électrique principal pendant l'installation ou l'entretien. Il est recommandé de
débrancher la fiche de l'interrupteur automatique avant le ventilateur (l'interrupteur secteur et l'interrupteur du
ventilateur ne doivent pas être alimentés).
• Ne pas utiliser à l'extérieur. Le produit doit être installé dans un endroit sec, où il n'est pas exposé à l'eau ou à
l'humidité.
• Ne connectez pas le moteur du ventilateur à un gradateur. Cela pourrait entraîner un dysfonctionnement ou des
dommages au moteur.
• Il n'est pas recommandé que les ventilateurs de plafond et les appareils à gaz fonctionnent dans la même pièce en
même temps.
FRENCH

• Le ventilateur doit être complètement éteint et arrêté avant d'inverser le sens de rotation du ventilateur. Cela évitera
d'endommager le moteur du ventilateur et le contrôleur.
• N’insérez pas d'objets dans les pales du ventilateur pendant le fonctionnement. Cela endommagera les pales et
perturbera l'équilibre du ventilateur, ce qui fera osciller l'appareil.
• Une fois que le ventilateur est complètement installé, assurez-vous que toutes les fixations de la base et des pales du
ventilateur sont bien fixées et serrées pour éviter tout problème.
• en raison du mouvement naturel du ventilateur certains raccords peuvent se desserrer. Vérifiez les raccords de
support, les supports et les fixations des pales deux fois par an afin de vous assurer qu'ils restent bien fixés. Si
certains sont desserrés, serrez-les.
• L'utilisation d'appareils électriques nécessite la notion de quelques règles de base, telles que:
• Ne pas toucher l'appareil avec les mains ou les pieds mouillés
• Ne jamais exposer l'appareil aux conditions atmosphériques (pluie, soleil, etc.).
• Ne pas utiliser l'appareil à proximité de liquides ou de gaz potentiellement explosifs ou inflammables.
• Ce produit est destiné à un usage domestique UNIQUEMENT et non à un usage commercial ou extérieur.
• Gardez les piles hors de portée des enfants et des animaux, elles pourraient causer des dommages si elles sont
avalées. Si elles ont été avalées, contactez immédiatement votre médecin.
• Si vous constatez des signes visibles de dommages, de trous ou de détérioration, évitez le contact direct des piles
avec la peau, les yeux ou les muqueuses. Si les piles fuient et entrent en contact avec les yeux, les laver immédiate-
ment avec de l'eau abondante. Contactez votre médecin immédiatement.
• Veuillez vous assurer de couper le courant avant de commencer l'installation.
• La source lumineuse de ce luminaire n'est pas remplaçable, lorsque la source lumineuse atteint sa fin de vie, le
luminaire entier doit être remplacé.
• L'installation ne doit être effectuée que par un électricien certifié.
[FR] INTRODUCTION & GARANTIE
Merci d’avoir choisi et acheté un produit à V-TAC. V-TAC vous offrira le meilleur. Veuillez lire attentivement ces instruc-
tions avant de commencer l’installation et conservez ce manuel à portée de main pour référence ultérieure. Si vous
avez d’autres questions, veuillez contacter notre distributeur ou le fournisseur local auprès duquel vous avez acheté le
produit. Ils sont formés et prêts à vous servir au mieux. La garantie est valable pour une période de 2 ans à compter
de la date d’achat. La garantie ne s’applique pas à des dommages causés par une installation incorrecte ou une usure
anormale. La société ne donne aucune garantie pour des dommages causés à une surface en raison d’un enlèvement
FRENCH

et d’une installation incorrects du produit. Les produits sont convenables pour une exploitation quotidienne de 10-12
heures. L’utilisation du produit pendant 24 heures par jour annule la garantie. Ce produit est couvert par une garantie
pour des défauts de fabrication seulement.
COMPOSANTS ET PIÈCES [FIG 1]
1. Support de montage
2. Tige de descente et boule de suspension
3. Pavillon
4. Corps du moteur du ventilateur
5. Luminaire
6. Abat-jour en verre
7. Pales
8. Kit de vis, matériel de montage du support (fil, écrous,
rondelles en caoutchouc) et matériel de fixation
1. AVANT L'UTILISATION
• Déballez soigneusement votre ventilateur de plafond, puis retirez toutes les pièces et composants et posez-les sur un
chiffon ou une surface douce pour éviter de les endommager. Ne pas poser le corps du moteur sur le côté, le corps
peut être endommagé. Avant de commencer l'installation, vérifiez si toutes les pièces sont présentes.
2. ASSEMBLAGE DU PRODUIT
• AVERTISSEMENT: Toutes les tâches électriques ne doivent être entreprises qu'après avoir coupé l'électricité en
retirant les fusibles ou en fermant le disjoncteur pour éviter les risques de chocs électriques.
ÉTAPES D'ASSEMBLAGE:
2.1. INSTALLATION DU SUPPORT DE MONTAGE
• Le support de suspension doit être vissé sur une surface plane et solide. La structure sur laquelle il est installé doit
pouvoir supporter un poids statique dix fois supérieur à celui du ventilateur. En cas d'installation du ventilateur de
plafond sur une solive en bois, les deux vis autotaraudeuses fournies doivent suffire pour supporter le ventilateur de
plafond. Les rondelles fournies doivent être placées dans l'ordre suivant: tête de vis > rondelle ronde > rondelle
élastique > support de montage > plafond [FIG 3].
• Vissez le support de montage au plafond et assurez-vous que tous les raccords sont bien fixés pour éviter que le
ventilateur ne tombe. Dévissez les deux vis de l'auvent du support de montage [FIG 3].
Outils et matériel requis (non inclus) [FIG 2]
9. Télécommande
10. Tournevis
11. Tournevis à lame plate
12. Pince ou clé ajustable
13. Escabeau
14. Coupe-fil
15. Ruban électrique
FRENCH
Table of contents
Languages:
Other V-TAC Fan manuals

V-TAC
V-TAC VT-8217-3 User manual

V-TAC
V-TAC VT-5022 User manual

V-TAC
V-TAC VT-6042-4 User manual

V-TAC
V-TAC VT-4538 User manual

V-TAC
V-TAC VT-6052-5 User manual

V-TAC
V-TAC VT-4012-3 User manual

V-TAC
V-TAC VT-5566 User manual

V-TAC
V-TAC VT-6552-3 User manual

V-TAC
V-TAC VT-3042-3 User manual

V-TAC
V-TAC VT-6053-5 User manual
Popular Fan manuals by other brands

THERMEx
THERMEx Le Mans Blue quick guide

Arbonia
Arbonia 4050160AR Installation and maintenance manual

Kendal Lighting
Kendal Lighting AC-19242 installation instructions

Harbor Breeze
Harbor Breeze KIAWAH manual

Kichler Lighting
Kichler Lighting Cadence instruction manual

cecotec
cecotec ENERGYSILENCE 2000 COOL TOWER SMART instruction manual