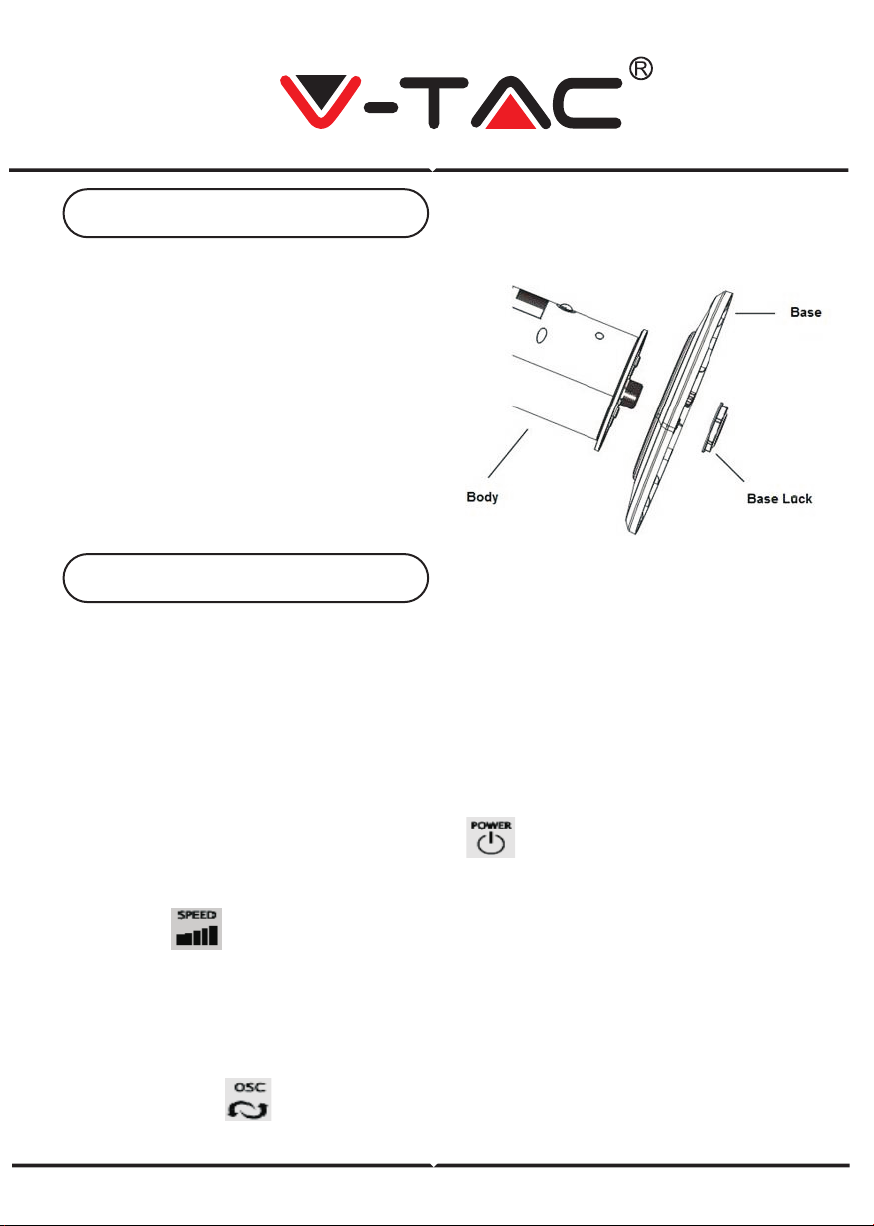
ASSEMBLING
1. Remove the parts from packing.
2. Fix the two parts of base together.
3. Pass the power cord through the
centre of hole of the base, after
fixing the two pieces together.
4. Line up the fan on the base, and fix
with base lock.
No screw(s) is(are) needed to lock the base.
NOTE: Before inserting the plug into a power outlet, make sure that the correct voltage
is being used which corresponds to the information which is indicated on the rating
label, and that the socket has an earth facility.
Caution: Fan must be assembled with the base before use!
Fan can be operated by the control panel located on top of the Fan or by remote control.
1. Place the Fan on a stable and flat surface. Plug the Power Cord into an
AC:220-240V electrical outlet. The LED screen will display the current room tempera-
ture.
2. POWER: Turn the Fan ON by pressing the button, the Fan will start at low
speed.
3. SPEED: Adjust the Fan speed to the desired level from Low to Medium to high by
pressing the button. The speed setting is displayed on the LED screen.
4. MODE: Press the MODE button to set the Fan as Normal, Natural or Sleep mode.
The mode is displayed on the LED screen. a) Normal mode: Speed is constant.
b) Natural mode: Fan speed varies, mimicking natural wind blowing.
c) Sleep mode: Fan speed slows down over time from the original set speed.
As the mode is adjusted, the display cycles through the different icons.
5. OSC: Press the button to allow the Fan to oscillate from left to right. To stop the
oscillation, press the oscillation button again.
Assembly Instruction
Operating Instruction