Installation instructions
Washing machine «Front loader»
One-family household
J267.370-0
25.6.09 ITH
4
For Service and Spare Part Information please contact:
Manfred Schulz, Technical Manager
V-ZUG AUSTRALIA PTY LTD, c/o C.W. Stirling
6th floor 90 William Street, Melbourne, VIC 3000
Tel/ Fax +61 3 9723 5790, Mob +61 400 088336
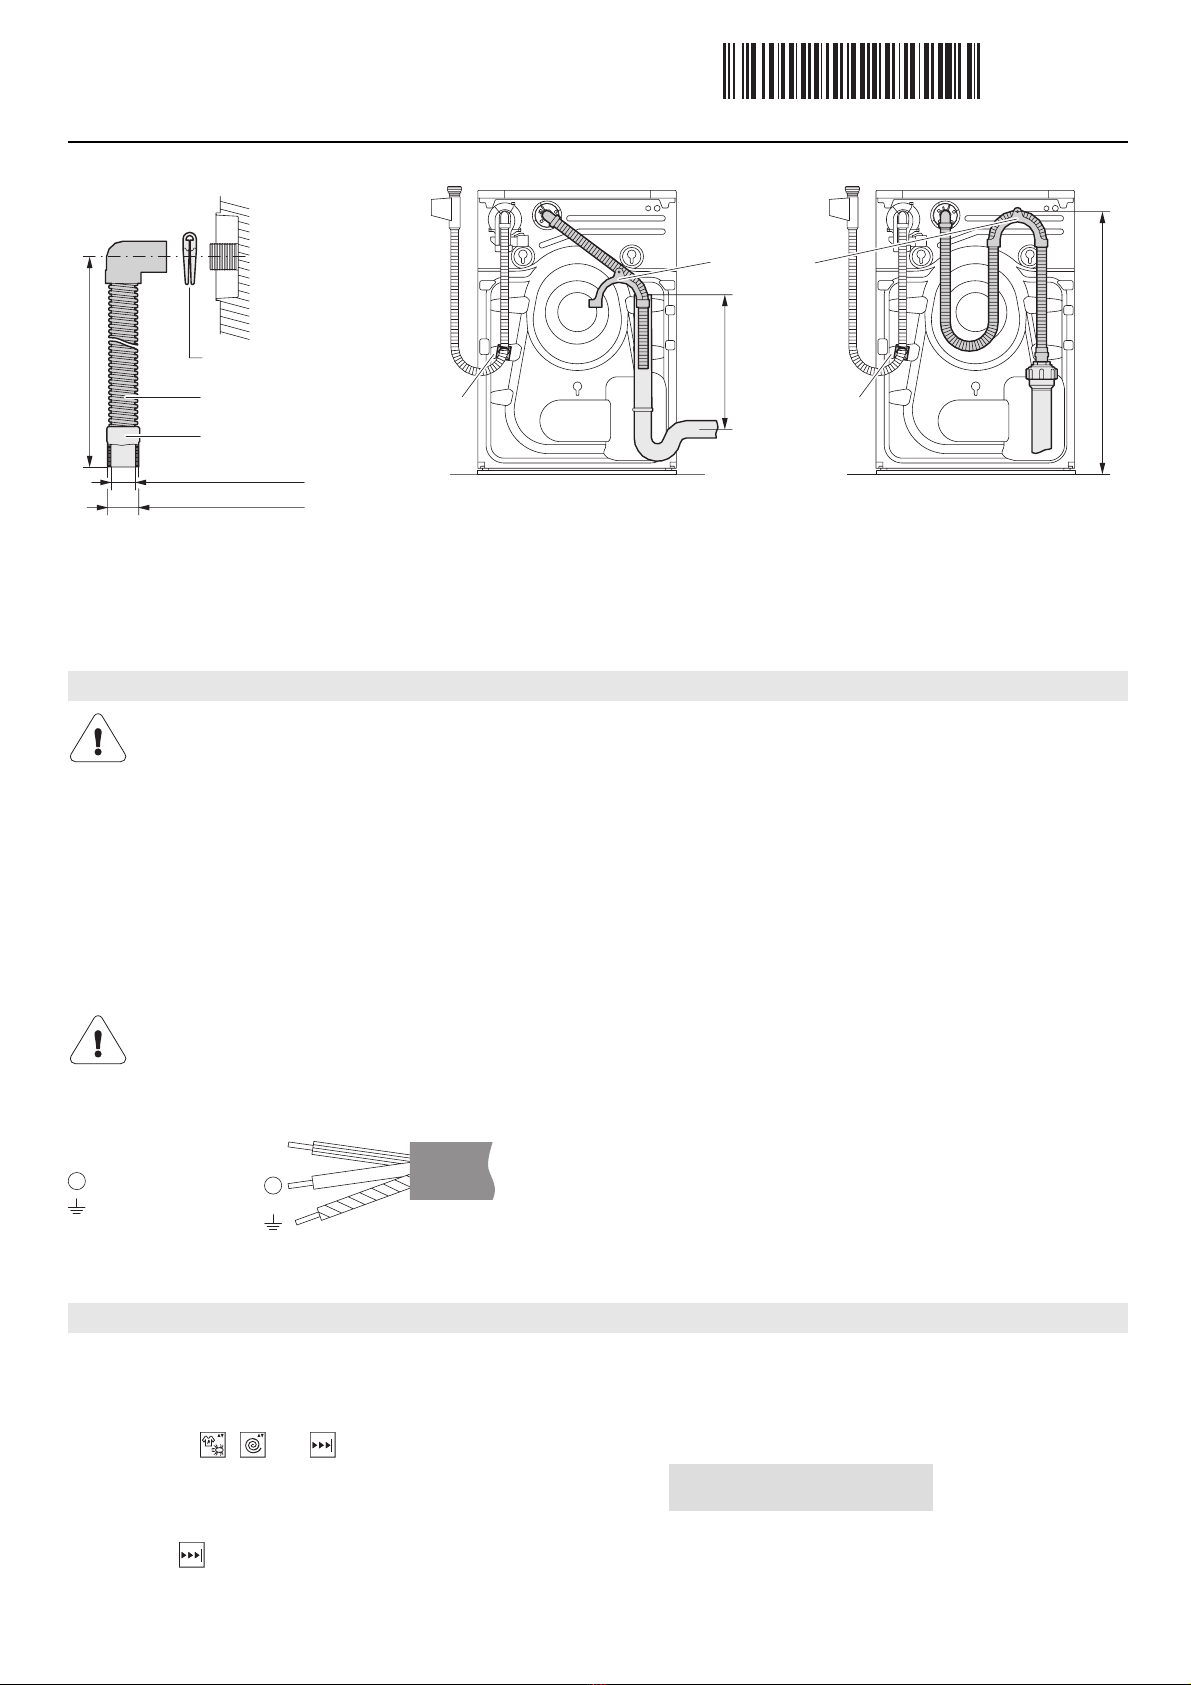
Water outlet
AWhen installing the drain hose, protect it against damage and bending (hot suds will flow through it).
AAssemble the hose clip for all connection variants.
AIf draining into the bath tub, sink etc. use the bend (hose clip) to fix the end of the hose.
AThe drain pump can pump to a max. height of 1.2 m.
AInformation on the necessary mains voltage, type of current and fuse protection is to be obtained from the identification plate.
Connection cable
APlug the appliance in at the mains or turn the wall switch on.
– The appliance switches on.
AIf there are any items in the drum, remove them and then close the appliance door.
ATurn the water tap on.
ADepress the , and buttons simultaneously for 3 seconds.
– The spinning sequence is carried out.
– After about 2 minutes the following appears in the plain text display:
ACheck the stability of the appliance.
– The appliance must stand perfectly vertically with all 4 feet firmly on the floor and must not wobble.
APress the button to complete the initial set-up of the appliance.
– The spinning sequence is finished. The appliance is then drained.
AIf necessary, repeat levelling as explained under point 4.
6. Electrical connections
Electrical connections must be carried out by trained electricians in accordance with the guidelines and standards for low
voltage installations and the specifications of the local electricity supply companies.
A plug-in appliance may only be connected to a socket outlet with earthing contact, installed according to specifications. An
all-pole mains isolating device with 3 mm contact opening should be provided in the house wiring system. Switches, plug and
socket devices, circuit breakers and fusible cut-outs which are accessible after installation and which have all-poles switching
are permissible as isolating devices. Effective earthing and separately installed neutral and earth conductors ensure safe and
fault-free operation. After installation, live parts and cables with basic insulation must not be accessible. Old installations should
always be checked.
If the appliance is supplied from a cord extension set or electrical portable outlet device the cord extension set or electrical
portable outlet device should be positioned so it is not subject to splashing or ingress of moisture.
The connection cable may only be replaced by the manufacturer, the manufacturer’s customer services or a similarly qualified
person.
230 V~ 50 Hz, 10 A
Colour code
L1 brown
blue
yellow/green
7. Using for the first time / stability check
max. 700
min. 350
Hose clamp
Drain hose
Rubber connector
Shorten drainage hose to
required length. Cannot shorten drainage hose!
ø exterior 28.0 mm
ø interior 21.5 mm
Hose clip
(bend)
1.5 m
Adhesive
base Adhesive
base
3 × 1 mm²
N
L1
N
Check stability