Vacuworx RC 10 User manual

VISIT VACUWORX.COM TO DOWNLOAD COMPLETE OPERATION MANUAL

job site preparation RC SERIES
JOB SITE PREPARATION
TRANSPORT THE LIFTER
Always turn the fuel shutoff valve to the OFF position when
transporting or storing the vacuum lifting system.
When transporting the lifter, always securely attach it to the
cradle with the proper hardware.
NOTE: Never transport or store the lifter by setting the pad
directly on the trailer or the ground. Damage to the seal may
result.
PREPARATION OF THE LIFTER
CONNECT THE HYDRAULIC HOSES
We recommend the hydraulic hoses from the vacuum lifting
system be connected to the hydraulic lines used for the
bucket cylinder on the excavator.
NOTE: Always clean the area around the hydraulic fittings
and connections of dirt and debris before connecting or
disconnecting any hydraulic lines or components. Hydraulic
rotators are sensitive to dirt and foreign debris and will be
damaged if dirt is allowed in the hydraulic system.
The hydraulic hoses supplied are extra long to allow them to
be connected to a wide variety of machines. Be sure to secure
the extra hose so not to interfere with the rotator.
1. There are flow control valves (Fig. 1-1, 1) installed on
the hose fittings. There is a flow diagram embossed on
the flow control valve which shows the direction of flow.
2. If the diagram is illegible, there is usually an inverted
dot next to the knob on the flow control valve. The dot
goes toward the excavator and the knob will be toward
the vacuum lifter.
Fig. 1-1
3. Make sure the hoses from the excavator are connected
with the flow in the correct direction.
4. Connect the hoses to the flow control valves. Do no
over-tighten the fittings. Over-tightening will cause
damage to the fittings.
5. Route the hoses along the stick. Clamps are provided
that can be tack-welded to the stick to route and
support the hoses. When securing the hoses, allow
ample slack for hose movement to avoid binding or
pinching.
ATTACH TO THE EXCAVATOR
1. Inspect the adaptor and pin to make sure the proper
pin, bushings, and spacers are used.
2. Inspect the adaptor, pin, bushings, and spacers to
ensure proper fit.
3. Attach the adaptor to the excavator arm using the pin
(Fig. 1-2, 1). Use the correct spacers (Fig. 1-2, 2) to
center the arm between the adaptor.
Fig. 1-2
4. Apply grease to the pin, where applicable, daily to
ensure proper lift functions and smooth movement.
ADJUST ROTATION SPEED
Rotation speed should be slow to maintain control and
operate the vacuum lifter safely.
The flow control valves (Fig. 1-1, 1) on the hydraulic fittings
are “one way open – other way restricted” type. They can be
adjusted to increase or decrease the rotation speed.
1. For initial start-up, turn the valves clockwise all the
way to close them. To open the valves, turn them
counterclockwise one complete turn. Make sure both
valves are adjusted equally.
1
1
2

RC series OPERATION
DO NOT USE UNSAFE EQUIPMENT
Perform all the daily checks in the maintenance section
before starting the engine. See Daily Maintenance Checks
in the full Operations Manual.
Do not operate a vacuum lifting system with unapproved or
missing parts, or if it is damaged or malfunctioning. Correct
any problems before operating equipment.
NOTE: Do not make alterations or modifications to the lifter.
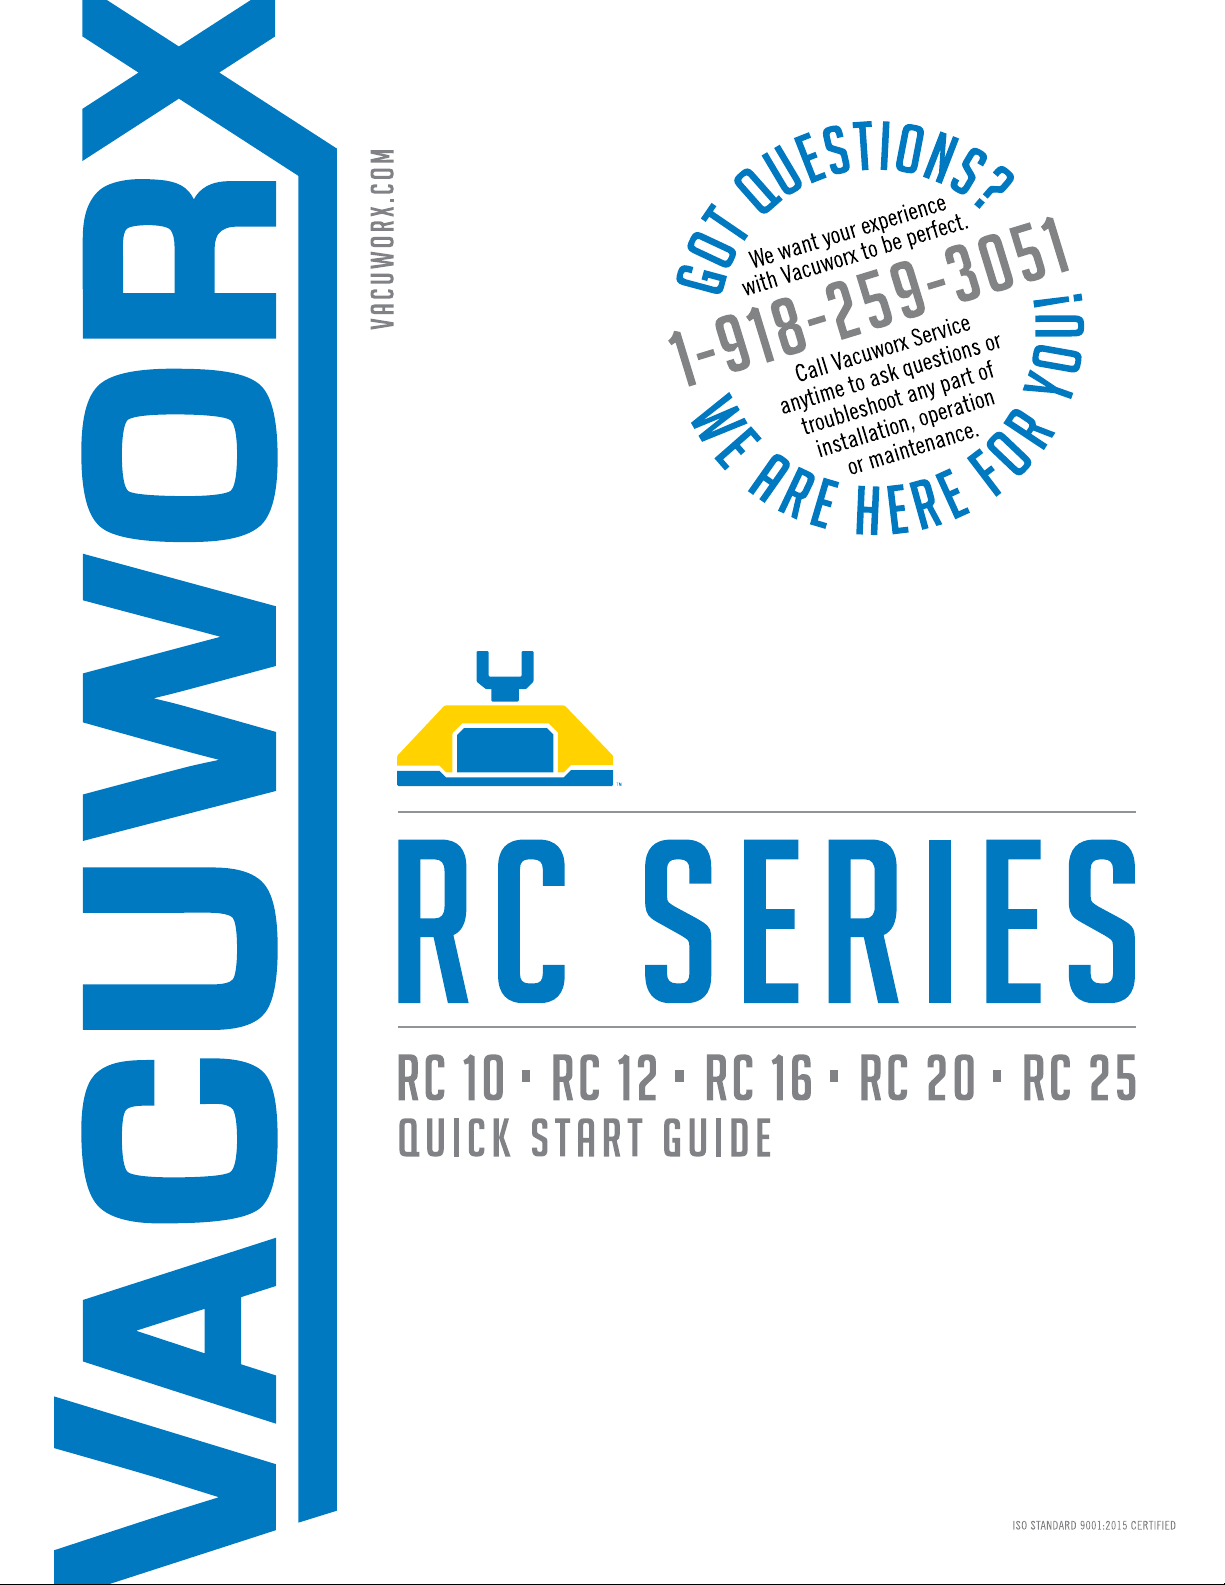
Always inspect the lifting pad and pad seal for any damage
prior to each shift.
KEEP PERSONNEL AWAY
Keep personnel a safe distance away from the load and
excavator when lifting.r objects.
PROPERLY POSITION THE VACUUM PAD
Do not operate until the vacuum pad is properly positioned
on the pipe. Place lifter slowly onto pipe. This will allow the
guide wheels to locate the pad properly on the pipe. The
guide wheels will help align the vacuum pad on the pipe.
LIFT, LOWER, AND ROTATE SLOWLY
Always lift the load slowly. Make sure the area is clear when
moving the pipe. All bystanders must be kept at a safe
distance. Rotate the pipe slowly, and carefully lower it
into position.
Never release the vacuum while the load is being lifted.
Make sure the pipe is properly supported before releasing
the vacuum.
KEEP LOADS LOW
Do not lift loads higher than necessary. Always keep loads
close to the ground when possible. Never leave a suspended
load unattended. Always lower the load to the ground when
not in use. Never attempt to lift pipe with rope around it.
You will not be able to get the proper vacuum to safely lift.
Remove the rope or reposition the pad away from the rope.
LIFT PIPE NEAR CENTER
Lift the pipe as close to the center as possible to keep the
load balanced. Marking the center of the pipe before lifting
is safe and more efficient, and can speed up the operation.
2. Keep this setting before adjusting the valves again. The
more the valves are open, the faster the rotation speed
will be.
3. Geographical and environmental conditions, the size of
the excavator and the load being lifted will all affect
the rotation speed. Always start out slow and gradually
increase the rotation speed.
NOTICE
Do not exceed 26 GPM (98.4 LPM) or 3600 psi (248.2 bar).
Exceeding 26 GPM (98.4 LPM) or 3600 psi (248.2 bar) may
damage rotator and void your warranty.
ROTATE THE LIFTER
1. Make sure the area is clear of any bystanders or
obstacles.
2. Slowly rotate the vacuum lifting system in each
direction for a recommended minimum of 30 rotations.
This will bleed the air out of the hydraulic system so it
can be rotated smoothly and safely. Never operate at
full pressure.
HYDRAULIC SERIES
On fully hydraulic models there are 2 additional hoses to run
the motor.
1. Connect these 2 hoses (without flow control valves)
to the auxiliary lines.
2. Set excavator controls to 1-way or hammer mode.
AUXILIARY HYDRAULICS
For the auxiliary hydraulics running the drive, recommended
operating pressure is 3000 psi/20.68 MPA. Pump capacity
should be 10.6 to 23.8 GPM.
OPERATION
OPERATING TIPS
The following information does not include all conditions that
may be encountered in standard operations, but is intended
to supplement any operational and safety training (which is
the responsibility of the owner or contractor). Contact your
Vacuworx representative for additional training information.
Before operating this equipment, read the entire Operator’s
Manual and become familiar with the operating controls and
their functions.

BEFORE STARTING THE UNIT
1. Perform all the daily checks in the maintenance section
before starting the engine. See Daily Maintenance
Checks in the full Operation Manual.
2. Once attached, do not start engine until unit has been
lowered onto a pipe. If pipe is not available, block the
vacuum pad hole with a piece of cardboard to prevent
dirt from entering the vacuum reservoir until vacuum
is built.
STARTING THE ENGINE (GLOW PLUG ON MACHINE)
1. If the temperature is 40°F (4°C) or below, push
and hold the glow plug button (Fig. 1-3, 1) for 10
seconds. The glow plug indicator light (Fig. 1-3, 2)
will illuminate when the glow plug button is pushed.
2. Turn the key (Fig. 1-3, 1) to the right to the START
position. Once the engine starts, release the key.
Fig. 1-3
3. If any of the red lights on the switch panel (Fig. 1-3,
2) light up, shut the engine off, determine what the
problem is, and repair it before operating lifter.
The engine speed is preset at the factory. Do not attempt to
adjust the engine speed. Tampering with the engine speed
will void the warranty on the engine and pump.
STARTING THE ENGINE (GLOW PLUG ON KEY SWITCH)
4. If the temperature is 40°F (4°C) or below, turn the
engine starting key clockwise to GP and hold for 10
seconds. After 10 seconds, it is safe to start the engine.
VACUUM GAUGES
Always position lifter so that the operator can see both the
lifter and pad gauges.
The reservoir gauge should always read in the green range
(Fig. 1-4, 1) when operating. If the gauge is in the yellow
range (Fig. 1-4, 2), lower the load and allow the vacuum to
build up in the reservoir. We recommend you do not use the
lifter below -18 inHg (-61 kPa) of vacuum. If the gauge drops
into the red range (Fig. 1-4, 3), immediately stop, determine
what the cause is, and correct it before continuing.
Fig. 1-4
NOTE: When working in extreme altitudes, please contact
Vacuworx Technical Service +1-918-259-3051 for additional
information.
The gauge on the vacuum pad always reads zero until
vacuum has been activated. When vacuum is activated, the
pad gauge should build to the green range. If it does not,
check to see if the pad is sealing properly on the material.
operation RC SERIES
1 2
2
1
3

RC SERIES operation
WIRELESS REMOTE TRANSMITTER
OPERATION (PRODUCTION)
TURNING ON THE REMOTE
The wireless remote transmitter should be located in a
convenient place inside the cab.
1. To turn on hold red button (Fig. 1-5, 1), then hold green
button (Fig. 1-5, 2), then release red button and green
button in succession.
Fig. 1-5
STARTING THE LIFTER ENGINE
2. Make sure the remote is on (may take up to 30 seconds
to sync with the lifter). When sync is complete, the
green or amber light will come on the lifter. Leave the
key in the off position. Press and hold the bottom left
button (Fig. 1-5, 3).
LIFTING AND RELEASING LOADS
3. To lift load hold green button (Fig. 1-5, 2) for 1-2
seconds to create vacuum on the pad. Monitor gauge
until it reaches green area. Then it is safe to lift the load.
4. To release load hold top 2 circle shaped buttons (Fig.
1-5, 4) simultaneously for 4 seconds to start releasing
vacuum. When gauge hits zero, it is safe to remove pad
from the load.
For safety purposes, there will be approximately a three-second
delay on the release function.
TURNING OFF THE LIFTER
5. Press and hold the middle 2 circle shaped buttons (Fig.
1-5, 5) simultaneously for approximately 5 seconds,
until the lifter’s engine powers down completely.
TURNING OFF THE REMOTE
6. To turn off press the red button (Fig. 1-5, 1) or device
will automatically shut off after 24 hours of inactivity.
7. The wireless remote transmitter and the receiver are
a matched system and can not be used with other
systems.
NOTICE
2
1
4
5
3

WIRELESS REMOTE TRANSMITTER
OPERATION (LEGACY)
The wireless remote transmitter should be located in a
convenient place inside the cab.
1. Push the green button (Fig. 1-6, 1) to turn the wireless
remote transmitter on.
Fig. 1-6
2. Press the top left button (Fig. 1-6, 3) to create vacuum
on the pad and lift the load.
3. To release the load, press and hold the top left and the
top right buttons (Fig. 1-6, 3 and 4) at the same time.
For safety purposes, there will be approximately a three-second
delay on the release function.
4. To turn the wireless remote transmitter off, push the red
button (Fig. 1-6, 2).
5. The wireless remote transmitter and the receiver are
a matched system and can not be used with other
systems.
operation RC SERIES
NOTICE
1
2
3 4
LIFT A LOAD
Do not activate vacuum when pad is not on material to be
lifted. If pad is not properly placed on material when vacuum
is activated, the vacuum in the reservoir might be lost.
Therefore, watch the pad gauge when activating vacuum.
Shutting off vacuum quickly could prevent vacuum loss and
time loss.
1. Properly position the vacuum pad on the material to be
lifted before activating vacuum.
Fig. 1-7
2. With wireless remote transmitter (Legacy) on, press
the top left button to activate vacuum. With wireless
remote transmitter (Production) on, press the green
button to activate vacuum.
3. Both the reservoir gauge and the pad gauge readings
should be approximately in the same range. Do not
attempt to lift if the gauge is in the red.
4. If the pad gauge does not read in the green, shut off
vacuum and inspect if the pad is correctly sealing on
the load.
5. Slowly lift the load up. If traveling with the load,
always carry it low.
6. Do not lift the load over anyone. When rotating,
always rotate slowly.

RC SERIES operation
Fig. 1-8
7. When load is at the designated spot, slowly lower the
load. Never release the vacuum when the load is off
the ground.
8. When in the correct position, press and hold the top
left and right buttons (Legacy) or top 2 circle shaped
buttons (Production) to release the load. There will be a
3 second delay and then the load will release.
9. Allow sufficient time for vacuum to release before
lifting the vacuum system off of the load.
SHUTDOWN AND STORAGE
When finished, the vacuum lifting system must be properly
shut down and stored.
1. If attached to excavator always store the lifter with
the pad on material. If detaching the lifter from the
excavator, store the lifter on the shipping cradle.
Never store the pad on the ground.
2. If storing on material, slightly tilt the lifter away from
the cab of the excavator. Sometimes the hydraulics can
bleed down and this will keep the lifter from falling off
the material.
3. Turn the engine key switch to the OFF position.
4. Press the OFF button on the wireless remote
transmitter.
5. Make sure doors are attached and in place.

PT1102-004 09/18
COPYRIGHT © 2018 VACUWORX®
This manual suits for next models
5
Table of contents
Other Vacuworx Lifting System manuals
Popular Lifting System manuals by other brands

MAHLE
MAHLE CAL-10 Operation manual

Morris and Alexander
Morris and Alexander SET-32 Fitting and User Instructions

Ergoswiss
Ergoswiss SLA VD Series operating instructions

Nubbaum Hebetechnik
Nubbaum Hebetechnik 2.50 SE Operating Instruction and Documentation

Southworth
Southworth Dura-Dock DDL5-59M manual

SATA
SATA AE5105 user manual