Vahterus Plate & Shell Fully Instruction manual

OPERATION &
MAINTENANCE MANUAL
ENGLISH
for Vahterus Plate & Shell Heat Exchangers

All rights reserved. It is not permitted to copy, photograph or publish in any other way this
manual for any purpose without the permission of Vahterus Oy. Plate & Shell is registered
trademarks of Vahterus Oy.
C303-3-rev.6 /16.4.2018

3
1 GENERAL...................................................................................................... 5
1.1 INTRODUCTION ............................................................................................... 5
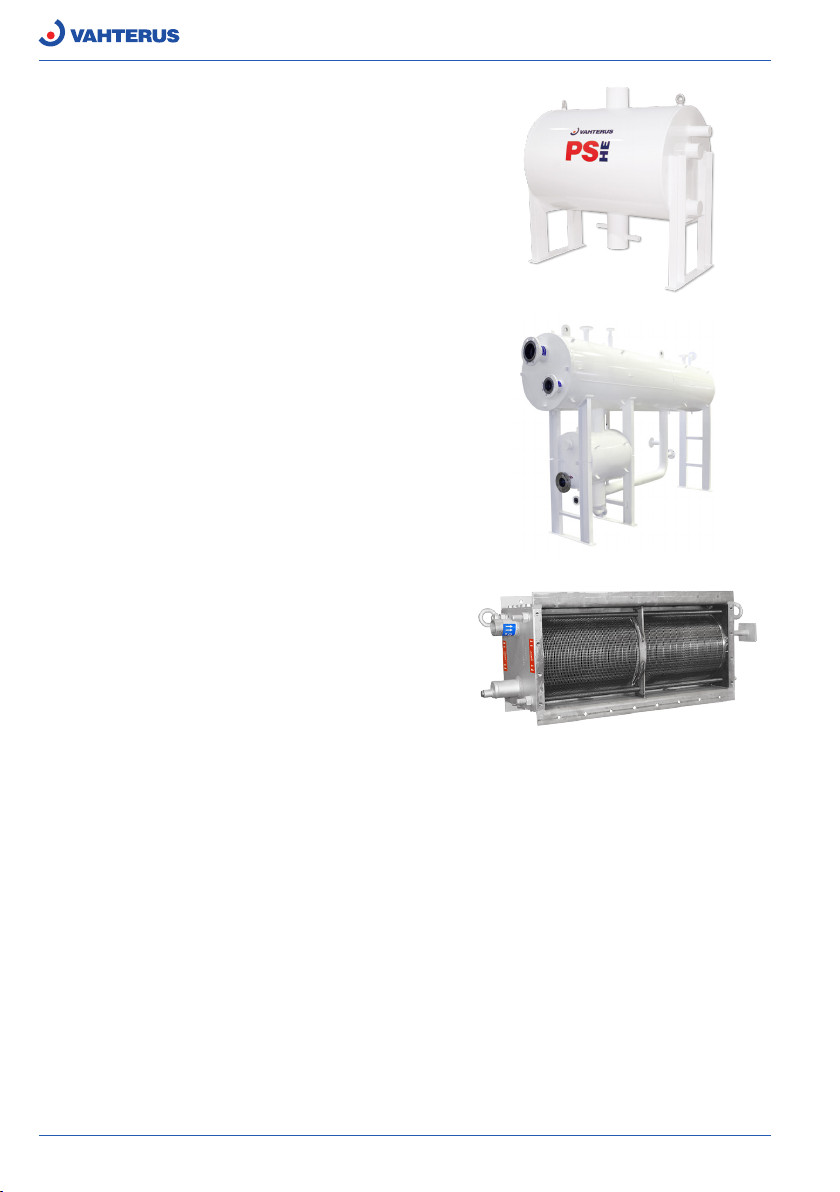
1.2 PRODUCTS ...................................................................................................... 5
1.3 STRUCTURE..................................................................................................... 6
1.4 TECHNICAL CHARASTERISTICS.................................................................... 6
2 ASSEMBLY OF THE HEAT EXCHANGER.............................................................. 7
2.1 LIFTING............................................................................................................. 7
2.2 PIPES................................................................................................................ 8
2.2.1 GENERAL............................................................................................. 8
2.2.2 STEAM APPLICATIONS (CONDENSER) ............................................. 9
2.3 INSULATION ................................................................................................... 10
2.4 PRESSURE TEST........................................................................................... 10
2.5 MOUNTING BRACKETS................................................................................. 10
3 PERMITTED CONDITIONS FOR OPERATING.................................................10
3.1 DESIGN........................................................................................................... 10
3.2 FLUIDS.............................................................................................................11
3.3 FLOW RATES.................................................................................................. 12
4 OPERATION ................................................................................................ 12
4.1 PRINCIPLE OF THE HEAT EXCHANGER...................................................... 12
4.1.1 LIQUID – LIQUID ................................................................................ 13
4.1.2 CONDENSER ..................................................................................... 14
4.1.3 DX-EVAPORATOR.............................................................................. 14
4.1.4 FLOODED EVAPORATOR.................................................................. 15
4.1.5 DROPLET SEPARATOR ..................................................................... 15
4.1.6 STEAM GENERATOR (KETTLE)........................................................ 16
4.1.7 EXHAUST GAS ECONOMICER (EGE) .............................................. 16
4.2 GENERAL START-UP ..................................................................................... 16
4.3 GENERAL SHUT DOWN ................................................................................ 17
4.4 START-UP AND SHUT DOWN OF STEAM APPLICATIONS .......................... 17
4.5 RECOMMENDED PERIODICAL INSPECTIONS OF PSHE
HEAT EXCHANGERS ..................................................................................... 20
5 CLEANING THE HEAT EXCHANGER......................................................... 20
5.1 GENERAL ....................................................................................................... 20
5.2 RECOMMENDATIONS FOR CLEANING........................................................ 21
5.2.1 BACKWARDS FLOW .......................................................................... 21
5.2.2 CHEMICAL CLEANING ...................................................................... 22
5.2.3 MECHANICAL CLEANING ................................................................. 23
5.2.4 ANALYZE AFTER CLEANING ............................................................ 23

4
5.3 OPENABLE MODEL ....................................................................................... 23
5.3.1 PREPARATIONS................................................................................. 23
5.3.2 OPENING THE EXCHANGER AND REMOVING THE PLATE PACK. 24
5.3.3 MOUNTING THE PLATE PACK .......................................................... 25
5.3.4 BOLT/ NUT TIGHTENING PATTERN.................................................. 25
6 EXPANDABLE PLATE PACK ...................................................................... 26
7 SPARE PARTS / SPECIAL TOOLS ............................................................. 26
8 PACKING AND STORAGE .......................................................................... 26
9 TROUBLESHOOTING ................................................................................. 28
9.1 COMPLAINTS REPORT ................................................................................. 30
9.2 MEASURES FOR REPLACEMENT ................................................................ 30
9.3 INFORMATION ABOUT THE REPAIR ............................................................ 30
9.4 CRITERIA OF LIMITING CONDITIONS FOR THE EQUIPMENT................... 30
10 RECYCLING................................................................................................. 31

5
1 GENERAL
1.1 INTRODUCTION
Operating instructions of the Vahterus Plate &Shell Heat Exchangers (PSHE) contain Technical
Data Sheet, Dimensional drawing and this Operation & Maintenance manual.
This manual is your general guide to the proper installation, operation and maintenance of the
Vahterus Plate and Shell Heat Exchanger and PSHE droplet separator. Please read it and fol-
low the instructions given. PSHE is a totally welded plate heat exchanger without any gaskets
between the plates. Vahterus accepts no liability for damage caused through the incorrect instal-
lation, operation or maintenance of the unit.
1.2 PRODUCTS
Plate & Shell Fully welded
Fully welded model – a welded pack of circular plates
inside a welded pressure vessel. The applications for
this type are liquid–liquid, condenser, evaporator and
cascade. This model cannot be opened. This heat ex-
changer can be single or multi pass. (See Chapter 4.1.:
Principle of heat exchanger)
Plate & Shell Openable
Openable model. Fully welded plate pack inside an open-
able shell. The plate pack can be taken out of the shell.
Plate & Shell Compact
All connections are on the end plate. Can be single or
multi pass.

6
Plate & Shell Combined
Heat exchanger with combined droplet separator.
Plate & Shell VES
Heat exchanger with external dropled separator.
Plate & Shell EGE
Exhaust gas economizer.
1.3 STRUCTURE
Vahterus Plate and Shell Heat Exchangers are designed and manufactured in compliance with
legislation relating to pressure equipment.
The design code used is given on the Vahterus Technical Data sheet.The codes generally used are:
• ASME VIII Div.1, based on an individual design for each heat exchanger.
• Pressure Equipment Directive (CE): the design is based on PED classication and modules
e.g. type approvals by NoBo.
1.4 TECHNICAL CHARASTERISTICS
General range of parameters:
Volume: from 0.0002 m3to 5 m3.
Temperature: from -196°C to +600°C.

7
Pressure:
• 10 / 16 / 25 / 40 / 60 bar(g) standard range
• up to 170 bar(g) on request
Materials:
• Carbon Steel (P235GH, P265GH, P355NL2, SA516Gr70, SA333 etc.)
• AISI 316/316L, 1.4404 / 304L, 1.4403
• Titanium Gr. 1
• Hastelloy (C22 & C276)
• Nickel 201
• SMO 254, EN 1.4547
• AISI 904, EN 1.4539
• Duplex, EN 1.4462
• other materials on request
Working mediums:
• Liquid of all groups
• Gas of all groups
• Steam (superheated & saturated) of all groups
• 2 phase mediums (i.e. liquid-gaseous mixture) of all groups
• Refrigerants group 1
• R170 (ethane)
• R1150 (ethylene)
• R290 (propane)
• R717 (ammonia)
• R1270 (propylene)
• Refrigerants group 2
• R134a
• R744 (CO2)
• R404a
• R410a
• R407F
• R507a
• all the other refrigerants from group 2
2 ASSEMBLY OF THE HEAT EXCHANGER
2.1 LIFTING
Plenty of space should be provided around the heat exchanger for mounting, insulation and
maintenance. With the openable model, there should be available space equal to the total length
at the front in order to remove the plate pack.
Ensure that there is adequate space above the heat exchanger in order to lift it freely.
The heat exchangers are provided with welded lifting lugs or lifting eye lugs. If lifting lugs are not
assembled, lift the heat exchanger with textile belt around the shell.

8
Lifting (eye) lug Lifting force
(direct lift)
1T (WELDED) 1,000 kg
3T (WELDED) 3,000 kg
5T (WELDED) 5,000 kg
7T (WELDED) 7,000 kg
M16 (DIN 582) 700 kg
M20 (DIN 582) 1,200 kg
!NB!
When heat exchangers are combined with droplet separators you should take account of
their considerable overall weight and lifting gear and used lifting lugs are in the range. It is
essential that the entire unit is supported by crane or hoist by the lifting lugs until it is bolted in
position.
If necessary the combination can have permanent extra support by the lifting lugs in the sur-
rounding support structures.
Do not use the mounting brackets or nozzles to lift the heat exchanger.
Vahterus will assist in planning of the liftings if needed, and separate lifting instructions are
available at Vahterus. Please contact Vahterus Service.
!WARNING
Do not weld anything to the heat exchanger (including the shell, end plates and the sides
of the pipes) without the manufacturer’s permission, since this could harm the durability of
pressure envelope and internal structures of the heat exchanger.
2.2 PIPES
2.2.1 GENERAL
Install the unit so that the piping and heat exchanger can be drained easily.
The heat exchanger is not normally provided with separate drain and ventilation connections. If
the client’s process requires these, they should be installed in the pipelines as close as possible

9
to the heat exchanger, or, if they are being installed in the exchanger, they should be specied
separately when the exchanger is being ordered.
Check the following:
1. All piping to be xed to the exchanger is to be ushed prior to connecting the unit.
2. All connections are marked and should be connected according to the GA drawing.
3. The piping system must be exible so that thermal expansion does not overload the noz-
zles and so that heat exchanger is not subjected to vibration.
4. All pipe connections to and from the heat exchanger must be equipped with shut-off
valves. It is recommended to use valves with slow valve action. It should be possible to
increase ow rates gradually and reduce them gradually when the system is being shut
down or start up.
5. If there are solids in the process uids, the use of lters is recommended. Further informa-
tion is available from Vahterus Service.
6. The piping must be equipped with a relief valve to prevent unintentional excess of design
pressure.
7. If multiple units are being arranged in parallel, you should ensure that ow is evenly
distributed to the exchangers.
Openable model
Connections between the plate pack on the openable model and the pipes must be made either
with ange or threaded connections.
2.2.2 STEAM APPLICATIONS (CONDENSER)
The pipelines should be manufactured according to good steam ow manufacturing practices.
In steam applications the unit is placed horizontally to prevent condensate from remaining on the
surface of the plates.
It is recommended, where necessary, to install a steam trap (drain) in front of and behind the
heat exchanger and a droplet separator in front of it. The separators in front of the exchanger are
installed before the valve. These will prevent condensate from accumulating behind the valve.
When the water vapour is on the shell side, the heat exchanger is provided with a striker plate,
which is welded to the HOT IN connection to prevent water hammer. However, the customer
should also try other ways to prevent water hammer in the heat exchanger.
!WARNING
When the valve is closed, condensate might accumulate in the steam pipeline if no atten-
tion has been paid to drainage. When the valve is opened, accumulated water passes into
the heat exchanger at high speed, possibly resulting in mechanical damage.
!NB!
If the exchanger is operating in a partial vacuum or where the pressure on the steam side is
able in some cases to lower the pressure on the condensate side, the use of a condensate
pump should be considered.

10
When a condensate side control is being used, the condensation temperature on the hot side
must not be any higher than the evaporating temperature on the cold side; e.g. if there is water on
the cold side, the pressure of the steam must be lower than the pressure of the water, to prevent
the water from boiling.
2.3 INSULATION
If the temperature on the shell side is below -10°C or above 65°C, insulation is recommended to
avoid burns or frostbite.
2.4 PRESSURE TEST
All PSHE units have been pressure-tested, as follows:
a) all plate packs – leak test (pneumatic pressure test under water)
b) whole unit – pressure test (hydraulic pressure test)
If you need to perform a pressure test prior to using the heat exchanger, the test pressure is
given on the Technical Data sheet and on the nameplate. The pressure shall increased slowly
to prevent pressure schocks. During manufacturing in certain cases the water as pressurizing
media is not acceptable for the media (refrigerant or oils) in the user`s process, the pressure test
is waived and made additional NDT to the welds.
!NB!
Pressure testing of the plate pack in the openable heat exchanger should always be carried
out with the plate pack positioned in the shell and the bolts on the cover plate tightened, in
accordance with the instructions in this manual.
When pneumatic leak or pressure testing is being carried out, ensure that conditions are safe,
given the possibility that there could be a pressure discharge similar to an explosion should the
heat exchanger or testing equipment get broken.
Never apply pressure to the plate pack outside the shell.
2.5 MOUNTING BRACKETS
Vahterus standard brackets are only designed to bear the weight of the heat exchanger. The
design does not allow for specic requirements, such as stress and strain caused by the piping,
wind load or earthquakes.
3 PERMITTED CONDITIONS FOR OPERATING
3.1 DESIGN
The design pressures and temperatures are marked on the nameplate and Technical Data sheet.
Never exceed the design pressures or temperatures. Ambient temperatures may not be higher/
lower than the design temperature range.

11
Environmental load, load on connections caused by the piping, wind load and earthquakes are
not taken account of in the (design) strength calculations, unless mentioned separately.
The pipework in the heat exchanger and the mounting brackets must not be loaded down by
external forces, unless mentioned separately in the strength calculations.
Corrosion allowance is indicated in the strength calculations: for carbon steel it is at least 1 mm.
Any greater corrosion allowance requirement must be stated when the heat exchanger is being
ordered.
Fatigue: 500 full pressure cycles allowed without separate calculations. If this number is exceed-
ed, the customer should test the heat exchanger (pressure test and possible NDE tests) with
reference to local laws.
Possible risk of external re: the customer should advise the manufacturer.
Safety appliances should be specied/designed and acquired by the customer, as they are not
provided by Vahterus Oy.
3.2 FLUIDS
The structural materials are selected based on the information (media, temperatures, ows)
provided by the customer. You can also contact Vahterus for material and ow director material
options.
If the heat exchanger is used in conditions that differ from what it has been designed for (tech-
nical data sheet), its ability to function needs to be checked. For example, if the viscosity of the
uid varies according to conditions and differs from the information on the Technical Data sheet
and could result in a difference in pressure of more than 200 kPa between the exchanger and the
incoming and outgoing connectors, Vahterus should be contacted to re-assess the load situation.
When the customer approves the heat exchanger materials, he needs to ensure that they will
stand up to the conditions they will be subjected to during his process. Acid-resistant steel is
even prone to forms of corrosion, e.g. intergranular corrosion, pitting corrosion, stress corrosion
and biological corrosion. The chloride content of water can cause corrosion in AISI 316L/ 1.4404
plate materials in a short space of time. When water is boiling, in particular, it causes chloride
precipitation and this can lead to corrosion at quite small concentrations.
Other factors causing a risk of corrosion are pH, the liquid’s ow rate, dirt on the plate, impurities,
etc., whose effect should be assessed for each individual process. If there is a risk of corrosion,
more durable materials such as AISI 904L, SMO 254, Duplex or titanium should be considered.
!NB!
For special instructions regarding the quality of water in steam generators, contact Vahterus
Sales. The customer should inform the manufacturer if unstable uids are used in the
process.

12
General recommendation for water quality when AISI 316L
plate material is used in +20 °C.
Variable Unit Recommended quality limits for water for
AISI 316L
Hydrogen ion
concentration pH 6-9
Alkalinity (as CaO3) mg/l < 300
Chloride mg/l
< 500 mg/l at 25°C
< 200 mg/l at 50°C
< 60 mg/l at 80°C
0 mg/l, when T > 100°C
Sulphate mg/l < 100
KMn04 -
consumption mg/kg < 20
Aluminium mg/l < 0,3
Iron (Fe) mg/l < 0,3
Manganese mg/l < 0,1
Sodium +
Potassium mg/l < 200
Conductivity mS/m < 200
Calcium mg/l < 20
3.3 FLOW RATES
Flow rates should be kept as near as possible to the design values.Lower ow rates can cause
unexpected changes to the heat exchanger and make the plate surfaces dirty. If you want to use
a heat exchanger with essentially greater ow rates, the suitability of the exchanger should be
checked with the manufacturer.
4 OPERATION
4.1 PRINCIPLE OF THE HEAT EXCHANGER
The purpose of a heat exchanger is to transfer heat from one to another ow of uid via a corru-
gated heat transfer plate.
The construction is such that the ows alternate through the plate pack. The ows can be con-
trolled as counter-current, co-current or cross-ow.

13
Structure of the Vahterus Plate and Shell® heat exchanger:
The plate and shell® heat exchanger consists of circular plates welded into a pack, which is then
mounted in a pressure vessel.
The ow on the plate side is through the connections on the end plates via the plate pack.
The ow on the shell side is through the shell connections via the plate pack using a ow director.
The construction may be either fully welded or openable. The openable type has a removable
cover plate so that the plate pack can be removed, to clean it, for example.
These are the various applications of a PSHE exchanger:
4.1.1 LIQUID – LIQUID
1-pass
2, 4-pass
1, 3-pass
1-pass openable
In liquid - liquid applications, the hot and cold sides can be mounted to either side of the exchang-
er. In general, the hot side would be on the plate side and the cold liquid on the shell side. The
hot and cold sides are clearly marked on the drawings and heat exchangers.
General recommendation for ow directions are hot side down and cold side up, however special
directions can be stated during heat exchanger heat transfer calculation.

14
4.1.2 CONDENSER
HOT IN
COLD OUT
COLD IN
HOT OUT
In condensing applications, the steam is on the shell side, with the cold side on the plate side.
Shell side (steam) ow enters the exchanger at the top of the shell and the condensate exits at
the bottom. Plate side ow is counter-current: the exchanger is operating on the counter-current
principle. Steam on the end plate side/cold side in the shell and vent condenser designs are also
possible.
4.1.3 DX-EVAPORATOR
HOT IN HOT IN
COLD IN
COLD OUTCOLD OUT
HOT OUTHOT OUT
COLD IN
Evaporation always takes place on the plate side and cooling on the shell side.

15
4.1.4 FLOODED EVAPORATOR
HOT IN
COLD OUT
HOT OUT
COLD IN
1-pass eccentric
Evaporation generally takes placed on the shell side. With special applications, however, it can
take place on the pack side.
4.1.5 DROPLET SEPARATOR
The heat exchanger system is the same as in 4.1.4, with the
addition of a droplet separator and recirculation pipe.
In the combined heat exchanger the droplet separator is
integrated with the exchanger’s shell.

16
4.1.6 STEAM GENERATOR (KETTLE)
Plate pack positioned in large shell. Steam generator application.
4.1.7 EXHAUST GAS ECONOMICER (EGE)
COLD IN
COLD OUT
HOT IN HOT OUT
For cooling or heating gases.
4.2 GENERAL START-UP
Following instructions are general and process specic demands have to take in count by the user.
Check the following before start-up:
• Pipe connections comply with the drawings and are properly supported/fastened.
• Drain valves are closed.
• The Heat Exchanger and pipelines are properly vented.
• Any safety appliances are properly connected.
• There are no risk factors in the pipes that could cause shock pressure (water hammer) or
sudden changes in pressure.
First start the ow on the cold side, and then start and gradually increase the ow on the hot
side. However if there is a risk of freezing or the liquid being used has high viscosity the start up
sequency has to check and determine by the user according to process requirements.

17
General heating rate is max. 5°C/minute.
The pressure may be increased to operating gradually. See also section 3.2.
Check system for pressure pulses caused by pumps or controls valves. Continuous pulsing and
vibration may cause fatigue in the plates.
To start the heat exchanger process, follow steps a–f, starting rst on the cold side. Then repeat
for the hot side.
a) Close the inlet shut-off valve.
b) Open the outlet shut-off valve.
c) Open the vent valve, if the heat exchanger is provided with one; otherwise vent from the
nearest vent valve to the heat exchanger in the pipework.
d) Start the pump.
e) Slowly open the inlet valve according to the instructions.
f) Close the vent valve when all the air has been removed from the system.
If the heat exchanger is working properly it can used on an ongoing basis.
Openable model
When the openable model is being started up, always check the bolts and tighten them if nec-
essary.
4.3 GENERAL SHUT DOWN
If the heat exchanger process is to be halted, follow steps a-d below, starting rst on the hot side.
Then repeat for the cold side.
a) Slowly close the inlet valves.
b) Switch off the pumps.
c) Close the outlet valves.
d) Drain and vent the heat exchanger.
Gradually decrease the ow on the hot side until it stops completely. Then close the cold
side.
!NB!
Valves must be set to open gradually. Sudden opening and closing of the valves will subject
the exchanger to thermal shock and may cause material fatigue.
In steam applications, never leave hot side on when the liquid side is turned off. Turn the steam
OFF rst and ON last.
In steam process it must be noted that cooling water side pressure must be higher than stem
pressure in condensate side controlled unit. If pressure is lower, cooling water can evaporate and
there is a risk for plate damage.
4.4 START-UP AND SHUT DOWN OF STEAM APPLICATIONS
It is necessary to vent air off from the heat exchanger before starting the operation. The following
procedure can be followed:

18
Air venting process
1. Close the inlet shut-off valve
2. Open the outlet shut-off valve
3. Open the vent valve, if the heat exchanger is provided with one: otherwise vent from the
nearest vent valve to the heat exchanger in the pipeline
4. Start up the pump
5. Slowly open the inlet valve according to the instructions.
6. Close the vent valve when all the air has been removed from the system
7. Start the actual start-up procedure
After the venting procedure, please check the additional information for different units.
Steam condenser with steam side control:
Be aware! If cold side ow is turn fully on before opening the steam valve, steam side start-up will
lead to vacuum condition when starting up.
1. Partly open the cooling water side. All valve openings must be made gradually to prevent
thermal shocks to the heat exchangers.
2. Check that the heat exchanger and steam lines are empty of condensate if the system is
steam side controlled. Also the condensate outlet pipe needs to be empty from condensate.
To be able to have safety start-up, good condensate level control in the system is recom-
mended.
3. Open steam valve gradually allowing condensing to start. The temperature increase has
to be done step by step, max. 20°C/step and then let it stabilize (the temperature increas-
ing rate at start-up is max. 5°C/minute).The temperature is increased by increasing steam
pressure.
4. If the unit is cold (below 0°C), the correct heating rate is 100°C/hour for the rst 100°C.
After that, the heating rate can be according to the position 3.
5. Full capacity is reached by opening the both side gradually to full open position.
Steam condenser with condensate side control:
1. Unit steam side needs to lled with water when starting up the unit
2. Check that the steam lines are empty of condensate
3. Open the cooling water side partly. Valves must be opened gradually to prevent thermal
shocks to the heat exchangers.
4. Open steam condensate valve gradually allowing condensing to start. The temperature
increase has to be done step by step, max. 20°C/step and then let it stabilize (the temper-
ature increasing rate at start-up is max. 5°C/minute). The temperature is increased with
increasing pressure. The steam side pressure must always be lower than the cooling side
pressure. (Figure 1 and 2)
5. If the unit is cold (below 0°C), the correct heating rate is 100°C/hour for the rst 100°C.
After that, the heating rate can be according to the position 3.
!ATTENTION!
• It is not possible to measure the condensate level over the Vahterus PSHE unit
• In condensate controlled units, the capacity control is made by controlling the conden-
sate level inside the unit according the cold side outlet temperature. Condensate tempera-

19
ture cannot be used to control the condensate level inside the unit.
Fig. 1. When the rate of temperature increase is higher than 5°C/minute, the time between the
incremental steps has to be taken into account.
Fig. 2. When the rate of temperature increase is lower than 5°C/minute, the temperature can be
increased immediately after it has reached the adjusted temperature.
Steam generator:
1. Check that the heat exchanger cold side is ooded with the condensate before opening
the secondary side ow.
2. First, open the hot side to start heating up. Open the valve gradually to prevent thermal

20
shocks.
3. Open inlet valve of the primary side allowing liquid to enter the generator. After that, open
the outlet valve (start-up valve if any).
4. If the unit is cold. The correct heating speed is 100°C/hour for the rst 100°C.After that the
heating rate can be doubled.
5. Gradually open more the hot/cold side valves to reach the required capacity.
Shut down
If the process is to be stopped, follow the steps below. Begin shutting down the hot side following
the steps below, then repeat the same for the cold side.
1. Slowly close the inlet valves. Gradually decrease the ow until it stops completely.
2. Switch off the pumps
3. Close the outlet valve
4. Drain and vent the heat exchanger
4.5 RECOMMENDED PERIODICAL INSPECTIONS OF PSHE
HEAT EXCHANGERS
Fully welded heat exchangers:
Inspection period 5 years
• Internal inspection of shell chamber with endoscope
Inspection period 10 years
• Pressure test
Openable heat exchangers:
Inspection period 5 years
• Internal inspection of shell chamber with endoscope
Inspection period 10 years
• Pressure test
• Internal inspection by opening the unit
• Visual check of shell chamber and plate pack
The user of the heat exchanger shall check local requirements for pressure vessel inspections.
The inspection periods shall be re-evaluated by the inspector after every inspection according to
the ndings and shortened if necessary.
5 CLEANING THE HEAT EXCHANGER
5.1 GENERAL
The rules and requirements for cleaning a heat exchanger vary from type to type. If there is a risk
of fouling, the unit’s performance should be monitored by measuring temperature and pressure
loss. When losses are greater than permitted, the heat exchanger should be cleaned.
This manual suits for next models
6
Table of contents
Other Vahterus Industrial Equipment manuals