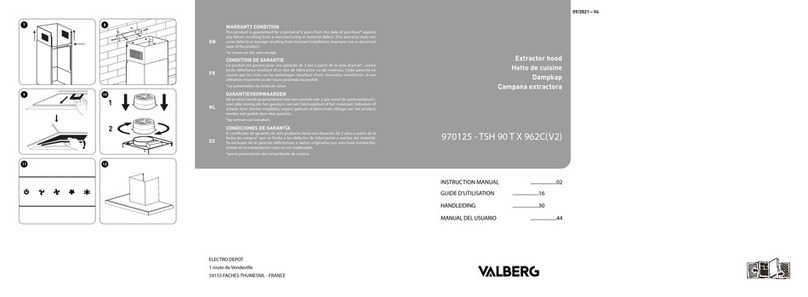
VALBERG TSH 90 T BG 962C(V2) User manual


ELECTRO DEPOT
1 route de Vendeville
59155 FACHES-THUMESNIL - FRANCE
EN
WARRANTY CONDITION
This product is guaranteed for a period of 2 years from the date of purchase* against
any failure resulting from a manufacturing or material defect. This warranty does not
cover defects or damage resulting from incorrect installation, improper use or abnormal
wear of the product.
*as shown on the sales receipt.
FR
CONDITION DE GARANTIE
Ce produit est garanti pour une période de 2 ans à partir de la date d’achat*, contre
toute défaillance résultant d’un vice de fabrication ou de matériau. Cette garantie ne
couvre pas les vices ou les dommages résultant d’une mauvaise installation, d’une
utilisation incorrecte ou de l’usure anormale du produit.
*sur présentation du ticket de caisse.
NL
GARANTIEVOORWAARDEN
Dit product wordt gegarandeerd voor een periode van 2 jaar vanaf de aankoopdatum*,
voor elke storing die het gevolg is van een fabricagefout of het materiaal. Gebreken of
schade door slechte installatie, onjuist gebruik of abnormale slijtage van het product
worden niet gedekt door deze garantie.
*op vertoon van kassabon.
ES
CONDICIONES DE GARANTÍA
El certificado de garantía de este producto tiene una duración de 2 años a partir de la
fecha de compra* que se limita a los defectos de fabricación y averías del material.
Se excluyen de la garantía deficiencias o daños originados por una mala instalación,
errores en la manipulación o por un uso inadecuado.
*previa presentación del comprobante de compra.

11/2021 – V4
970126 - TSH 90 T BG 962C(V2)
Extractor hood
Hotte de cuisine
Dampkap
Campana extractora
INSTRUCTION MANUAL .....................02
GUIDE D'UTILISATION .....................18
HANDLEIDING .....................34
MANUAL DEL USUARIO .....................50


2 EN2 EN
Thanks!
Thank you for choosing this VALBERG product.
Chosen, tested and recommended by ELECTRO DEPOT,
the products of the VALBERG brand are easy to use,
reliable and of an impeccable standard.
Thanks to this appliance, you can be sure that each
use will bring you satisfaction.
Welcome to ELECTRO DEPOT.
Visit our website: www.electrodepot.fr

3FR
Utilisation de l’appareil
B
3 EN
Table of contents
ABefore use
the appliance
CCleaning and
care
BUsing
the appliance
Features
Intended use
Installation
Use
Cleaning and care
Safety Instructions
DDisposal Disposing of your old appliance

4EN
Before using the appliance
A
Safety information
PLEASE READ THE INSTRUCTIONS CAREFULLY BEFORE
USING THE APPLIANCE AND KEEP THEM FOR FUTURE
REFERENCE.
•Caution : if you use the extraction hood in the same room
as a burner or fireplace fuelled with a form of energy other
than electricity, you could create a "reverse flow" problem.
•In this case, the hood extracts the air required for
combustion. The low pressure in the premises must not
exceed 4 Pa (4x10⁻⁵ bar). Remember to provide adequate
ventilation in the premises to ensure that the equipment
can operate safely. Please refer to the regulations in force
in your country for external extraction.
Before connecting the hood to the electric power
distribution:
•Refer to the data on the label (affixed inside the hood)
to check whether the voltage and power correspond to
those of the network. You should also check that the plug
is suitable.
•Contact a qualified electrician in case of doubt.
•If the power cable is damaged, it must be replaced by
the manufacturer, its after-sales department or similarly
qualified persons to avoid any danger.
•Connect the device to the mains using a plug with a 3 A
fuse or to the 2 two-phase wires protected by a 3 A fuse.
CAUTION! Household appliances may be dangerous in
certain circumstances:
•Do not attempt to check the condition of the filters when
the hood is running.

5EN
Before using the appliance
A
• Never touch the lights and adjacent areas when the
light has been on for an extended period or immediately
afterwards.
• You must never flambée food under the hood.
•Avoid flames: they are dangerous for the filters and could
cause a fire.
•Frying must be supervised at all times to prevent the oil
from overheating and catching fire.
•Beforecarrying out any maintenance work, disconnect the
hood from the power supply.
•This appliance may be used by children of at least 8 years
of age and by people with reduced physical, sensory or
mental capacities or without prior experience or knowledge,
if they are properly supervised or if they have been given
instructions on how to use the appliance safely and are
aware of the risks involved. Children shall not play with
the appliance. Cleaning and maintenance should not be
performed by children without supervision.
•The room must be properly ventilated when the hood is
used in the presence of appliances running on gas or other
fuels.
•Failure to clean the appliance according to the instructions
could create a fire hazard.
•The room must be sufficiently ventilated when the hood
is used at the same time as appliances running on gas or
other fuels (not applicable to appliances which release air
to the back of the room).
•Air must not be released in a conduit which is used to
extract steam from appliances running on gas or other
fuels (not applicable to appliances which release air to
the back of the room).
•CAUTION : the accessible parts may be hot when it is used
with cooking appliances.

6EN
Before using the appliance
A
•The regulations concerning the discharging of air must be
respected.
•Refer to the following paragraph of the instructions for
information on the installation, cleaning and replacement
of lights.
•We do not accept responsibility for any damage which may
be caused due to failure to observe the above-mentioned
instructions.
•For safety reasons, you should only use screws of the same
dimensions as those indicated.
•Warning: Failure to follow the instructions for the
installation of screws or attachment devices could cause
electrical hazards.
•Use a DSR-1.5-S-68 light or an
equivalent alternative (code ILCOS
D according to the IEC 61231
standard).
• LED modules
• Maximum electrical power: 1.5 W
• Voltage range : 12 V
• Dimensions 68 x 20 mm

7EN
Before using the appliance
A
Replacement the lamp
Light source in this product can only be replaced by qualified
professionals.
Please contact after-sales service if the light source fails.
The light source shall be removed at the end of the product's
useful life, with sorting and recycling done separately.

8EN
Using the appliance
B
Features
Product information sheet
Measurements taken according to EU regulations N° 65/2014 & 66/2014 of the European Commission
and standard EN 61591.
Trademark Valberg
Model identification TSH 90 T BG 962C(V2)
Product code 970126
Annual energy consumption hood AEC 39.0 kWh/a
Energy efficiency class C
Fluid-dynamic efficiency) hood FDE 10.3
Fluid-dynamic efficiency class E
Light efficiency hood LE 34 lux/Watt
Light efficiency class A
Grease filtration efficiency class hood GFE 72.4 %
Grease filtration efficiency class D
Air flow at minimum speed with normal operation 319.6 m3/h
Air flow at maximum speed with normal operation 433.1 m3/h
Acoustic power level at minimum speed with normal operation Lwa 55 dB(A)
Acoustic power level at maximum speed with normal opera-
tion
Lwa 61 dB(A)
Electricity consumption measured in "off" mode Po 0.44 w
Electricity consumption measured in "standby" mode PS / w
Symbol Value Unit

9EN
Using the appliance
B
Technical documentation and additional information
Electro-Dépôt, 1 Route de Vendeville, 59155 Faches-
Thumesnil (France] Symbol Value Unit
Energy efficiency index hood EEI 75.4
Growth factor over time f1.6
Air flow measured at maximum output point Qbep 277.9 m3/h
Air pressure measured at maximum output point Pbep 84 Pa
Electric power input measured at maximum output point Wbep 63.1 W
Average lighting of lighting system on cooking surface Average E 102 lux
Nominal power of lighting system Wl 3 (2 x 1.5) W
Maximum air flow 477.0 m3/h
Technical features Symbol Value Unit
Assigned voltage 220-240 V
Type of current ~
Assigned frequency 50/60 Hz
Electrical protection class I
Type of lighting LED
module
Lighting power 2 x 1.5 W
Lighting replaceable by user No
Motor power 100 W
Total assigned power 103 W
Net Weight 14 Kg

10 EN
Using the appliance
B
The appliance has been designed for use in extraction mode (evacuation of air outside) and
filtration mode (air returning inside).
Installation
1The minimum distance between the support surface for cooking vessels on the cooking
device and the lowest part of the extraction hood must be 65 cm.
Power supply connection
• Check that the socket is still accessible after the appliance has been installed. If the
appliance comes with a cable without a plug, you will need to add a multiple-pole switch
between the mains and the appliance with a contact opening distance of at least 3 mm,
which is sized for the load and compliant with the applicable regulations.
• Connecting the appliance to the power circuit:
BROWN = L line
BLUE = N neutral
Intended use
CAUTION
Make sure that your product is installed in accordance with
the instruction manual to reduce its overall environmental
impact of the cooking process (e.g. energy consumption).
Keep the area in which the appliance is used well ventilated.
Keep the extraction conduit straight and make sure that it
is as short as possible.
CAUTION
• Specialist staff must be called upon for assembly and
electrical connections.
• Use protective gloves when carrying out assembly
operations.

11 EN
Using the appliance
B
• If you need to use a connector pipe consisting of at least two parts, the upper part must be
outside the lower one. Do not connect the outlet pipe from the hood to a conduit containing
warm air or which is used to discharge steam from appliances supplied with energy other
than electricity.
• An air discharge opening must be provided for extractor hoods.
• We recommend using an air discharge pipe with the same diameter as the air outlet
opening. Smaller diameters could reduce the product performance and increase the
noise level.
Extractor version
2
With this type of installation, the appliance releases vapours outside through an outer
wall or an existing pipe.
Recycling version
Contact your supplier to obtain active carbon filters to transform the extractor hood into a
recycling hood.
Installing the active carbon filter (cassette)
• Check that the diameter of the active carbon filter corresponds the outlet diameter.
• If necessary, remove the pre-installed diameter adapter.
• Position the active carbon filter on the outlet and attach it in place by turning anticlockwise.

12 EN
Using the appliance
B
Installing the active carbon filter (cut-out)
• The metal filter has to be removed before the active carbon filter is installed.
• To open the metal filter, press on the locking device and pull the filter downwards.
• Place the precut filter on top of the metal filter. Hold in position using the metal rods
(supplied according to the model).
• Replace the metal filter in its original position.
3
Make three 8 mm holes in the wall in the required position and assemble the wall
bracket. Attach using the screws and dowels provided.
4Lift the hood and attach it to the wall bracket.
5Connect the discharge duct
6
Slide the upper part of the chimney inside the lower part and then pull the upper part
upwards to the required height.
7Connect the two parts together once the chimney has been positioned at the correct
height.
8Make three 8 mm holes for the wall bracket. Attach it to the wall using the 2 screws
provided. Assemble the chimney onto the hood and attach them together with 2 screws.

13 EN
Using the appliance
B
Recycling version
Contact your supplier to obtain active carbon
filters to transform the extractor hood into
a recycling hood.
Installing the active carbon filter (cassette)
• Check that the diameter of the active
carbon filter corresponds the outlet
diameter.
• If necessary, remove the pre-installed
diameter adapter.
• Position the active carbon filter on the
outlet and attach it in place by turning
anticlockwise.
Installing the active carbon filter (cut-out)
• The metal filter has to be removed before
the active carbon filter is installed.
• To open the metal filter, press on
the locking device and pull the filter
downwards.
• Place the precut filter on top of the
metal filter. Hold in position using the
metal rods (supplied according to the
model).
• Replace the metal filter in its original
position.
Installation without external opening
This manual suits for next models
1
Table of contents
Languages:
Other VALBERG Ventilation Hood manuals
Popular Ventilation Hood manuals by other brands

Whirlpool
Whirlpool RHH2600 SERIES Installation and operating instructions

Miele
Miele DA 239 operating instructions

Zanussi
Zanussi Master 642306 Brochure & specs

Thermador
Thermador H Series installation instructions

Smeg
Smeg KSEG90X-1 installation instructions

Monogram
Monogram ZV950 installation instructions