VALERA 530 Operation manual

Stamp and signature of delear
Stempel und Unterschrift des Händlers
Cachet et signature du commerçant
Timbro e firma del rivenditore
Sello y firma del proveedor
Stempel en handtekening van de handelaar
Tampila i semnãtura vãnzãtorului
Satıcının mühür ve imzası
Guarantee card
Garantiekarte
Carte de garantie
Certificato di garanzia
Tarjeta de garantià
Garantiekarte
Garancialevél
Garanti sertificası
00060635-11/12
Hairdryer
Haartrockner
Sèche-cheveux
Asciugacapelli
Secador
Haardroger
INSTRUCTIONS FOR USE AND INSTALLATION
BEDIENUNGSANLEITUNG UND MONTAGEANWEISUNG
INSTRUCTIONS D’UTILISATION ET DE MONTAGE
ISTRUZIONI PER L’USO E PER IL MONTAGGIO
INSTRUCCIONES DE USO Y MONTAJE
GEBRUIKAANWIJZINGEN EN INSTALLATIEAANWIJZINGEN
INSTRUCT
,IUNI DE FOLOSIRE SI INSTRUCT
,IUNI DE INSTALARE
GRECO
KULLANIM VE MONTAJ TALIMATLARI
UCRAINO
ИНСТРУКЦИИ ПО ЭКСПЛУАТАЦИИ И УСТАНОВКЕ
Made by Ligo Electric SA - 6853 Ligornetto - Switzerland
Valera is a registered trademark of Ligo Electric S.A. - Switzerland
Type: 530.. 533.. 542.. 554.. 561..
561.20
561.22
Type: 032.01
032.01/L
032.02 032.04
032.04/L
Wall holder
Wandhalter
Support mural
Supporto a muro
Soporte de pared
Muursteun
Suport de perete
Duvara monte
Настенный держатель
Uscător de păr
Saç kurutma makinasi
Фен
Фен
ϝΎϤόΘγϻϭ ΐϴϛήΘϟ ΕΎϤϴϠόΗ
ήόθϟ ϒϔΠϣ
ΔϴτΎΣ ΔϣΎϋ
Ω
GB Hairdryer -
Wall holder
Translation from original instructions 4
DHaartrockner -
Wandhalter
Übersetzung der Originalanweisungen 7
FSèche-cheveux -
Support mural
Traductions à partir des instructions d'origine 10
IAsciugacapelli -
Supporto a muro
Istruzioni originali 13
ESecador -
Soporte de pared
Traducción de las instrucciones originales 16
NL Haardroger -
Muursteun
Vertaling van de originele instructies 19
RO
Uscător de păr -
Suport de perete
Traducerea instrucţiunilor originale 22
GR -
μεταφράσεις από τις αρχικές οδηγίες 25
TR
Saç kurutma makinasi - Duvara monte
Orijinal talimatların çevirisi 28
UK
Фен -
Переклад з оригінальних інструкцій 31
RU
Фен -
Настенный держатель
Перевод с оригинальных инструкций 34
SA -37
ΔϴϠλϷ ΕΎϤϴϠόΘϟ Ϧϣ ΔϤΟήΗ
ΔϴτΎΣ ΔϣΎϋ
Ω
00060635 cop nov2012:Layout 1 06/11/2012 8.05 Pagina 1

English
a
b
c
All measures are in mm
032..
Ø 6 mm
192 mm
106 mm
53
7217
19
20
42
150
22
17
53
1
14
032.01
A
032.01
B
4
2
3
5
7
6
9
10
8
6
12
11
13
032.02
A
4
2
3
5
7
6
032.04 - 032.04/L
A
032.04 - 032.04/L
B
Mod. Nr.
Date of purchase
Kaufdatum
Date d’achat
Data d’acquisto
Fecha de adquisición
Datum aankoop
Data cumpãrãrii
Satın alma tarihi
Name and full address of purchaser
Name und vollständige Anschrift des Käufers
Nom et adresse completè de l’acheteur
Nome e indirizzo completo dell’acquirente
Nombre y dirección completa del comprador
Naam en adres van de consument
Numele i adresa completa˘ a compãrãtorului
Alıcının tam ismi ve adresi
Ligo Electric SA - 6853 Ligornetto - Switzerland
4
ASSEMBLY AND OPERATING INSTRUCTIONS
Read these instructions thoroughly
CAUTION
• For additional protection, the installation of a residual
current device (RCD) having a rated residual
operating current not exceeding 30mA is advisable
in the electrical circuit supplying the bathroom. Ask
your installer for advice.
• Make sure the unit is perfectly dry before using it.
• WARNING: Do not use this appliance near
bathtubs, showers, basins or other vessels
containing water.
• This appliance can be used by children from 8 years
of age and over, and by persons with limited
physical, sensory or mental abilities or who lack the
relevant experience and knowledge, if they are
suitably supervised or have been educated to use
the appliance safely and made aware of the
associated risks.
• Do not allow children to play with the appliance.
• Children must not perform cleaning and
maintenance procedures unless supervised.
• Plug the hairdryer into an alternating current outlet only, and make sure that the voltage of your electricity supply is the same
as that indicated on the rating plate of the appliance.
• Do not immerse in water or other liquids.
• Never put the appliance in a place where it could fall into water or in other liquids.
• Do not try to recover an electric appliance fallen into water, but unplug it immediately from the mains supply.
• Turn the unit off when you put it down.
• Unplug the appliance when not in use, but never do it by pulling the cord.
• Remember to check regularly that the air inlet and outlet grills are clean.
• Allow your appliance to cool before storing away and do not wrap the supply cord around the hairdryer in storage.
• Do not use the dryer if it does not work properly, if it dropped or if the supply cord is damaged. And do not try to repair an
electric appliance by yourself, but apply to an authorized Service Centre.
• If the hair dryer is going to be used in a bathroom, disconnect it from the mains power supply after use, since vicinity to
water may represent a hazard even if the appliance is switched off.
00060635 cop nov2012:Layout 1 06/11/2012 8.05 Pagina 2

5
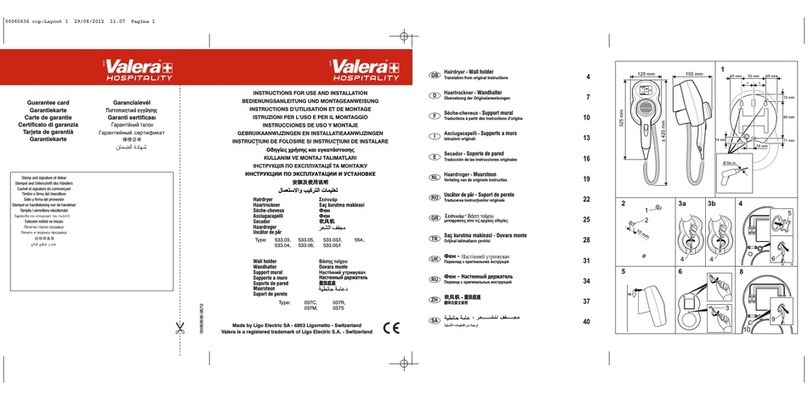
INSTALLATION INSTRUCTIONS
Wall holder model 032.01 - 032.02
032.04 - 032.04/L
Model 032.01
Standard model with on/off switch
Model 032.02
Model with standard European socket 2P + earthing 16A and
hairdryer on/off switch
Model 032.04 - 032.04/L
Model with universal shaver socket and hairdryer on/off switch.
A safety transformer insulates the shaver socket from the mains
and a protection device inhibits the operation of appliances with a
load higher than 20VA.
Installation of wall holder
This work should only be carried out by a suitably qualified
electrical engineer, in order to comply with the existing national
safety regulations. When the spiral cord is extended to its
maximum length, the hairdryer shall not be reached by a person
using the bath or the shower.
There are two possible methods of installation:
A = connection to wall mains wiring
B = connection to surface mains wiring
Attention: before installing the hairdryer
always switch off the general switch
of your mains electricity.
For each pole a switch with a minimum break distance between
contacts of 3 mm must be fitted up-line of the appliance.
Each time the appliance is opened, the switch must be used to
disconnect the appliance.
Method A (connection to wall mains wiring)
for wall holder model 032.01 - 032.02
032.04 and 032.04/L
The connection wiring from the mains must be at least
3x1,5 mm2for wall holder model 032.02.
The connection wiring from the mains must be at least
2x1,0 mm2for wall holder models 032.01, 032.04 and 032.04/L
1. Separate the cover (1) of the wall holder from the back plate
by loosening the screw (14).
2. Remove the knockout (2) provided in the back plate of the
wall holder.
3. Feed the mains supply cable (3) coming out of the wall into
the hole in the back plate left after removing the knockout (2).
4. Secure the back plate of the wall holder to the wall using the
plugs and screws provided.
5. Remove the terminal connector (4), connect the mains
supply cable (3) to the terminal connector (4), as shown
in the picture, and then secure again the terminal
connector (4).
6. Model 032.01, 032.04 and 032.04/L are double insulated and
no earth connection is provided. Model 032.02 (with
standard European socket 2P + earthing): the earth cable
from the wall must be connected to the terminal connector.
The cables shall withstand 16A.
7. Fit the front cover of the wall holder, taking care to locate the
cable sleeve (6) properly.
8. Secure the front cover with the screw (14).
9. Switch on the general switch of your mains electricity. The
hairdryer is ready for use.
Method B: (connection to surface mains
wiring) only for wall holder model
032.01 - 032.04 and 032.04/L
The connection wiring must be at least type H05VV-F 2x1,0 mm2
1. Separate the cover (1) of the wall holder from the back plate
by loosening the screw (14).
2. Remove the knockout (8) provided in the base of the back
plate of the wall holder for feeding the cable sleeve (11).
3. Secure the back plate of the wall holder to the wall using the
plugs and screws provided.
4. Feed cable sleeve (11) over end of mains cable (13), remove
the terminal connector (9), connect the mains supply cable
(13) to the terminal connector (9), as shown in the picture,
and then secure again the terminal connector (9). Secure the
cable grip (10) with the screws provided.
5. Locate the cable sleeves (6) and (11) in the slot provided in
the base of the back plate.
6. Fit the front cover of the wall holder, taking care to locate the
cable sleeves (6) and (11) properly.
7. Secure the front cover with the screw (14).
8. Switch on the general switch of your mains electricity. The
hairdryer is ready for use.
INSTRUCTIONS FOR USE
Control Switches
Control switch on wall holder 0-1 = Off/On
Hairdryer Mod. 530.02 - 530.15 - 530.22
533.03 - 533.05 - 540.05 - 540.06 - 542.05
and 542.06
Blue pushbutton: ON = On/Off (pressure must
be maintained to
operate the hairdryer)
Slide Switch Cool = (low power)
1 = (medium power)
2 = (maximum power)
Hairdryer
Type 554.02 - 554.05 - 554.08 - 554.11
554.13
Pushbutton:
ON=On/Off (pressure must be maintained to operate the hairdryer)
Slide Switch
1=(low power)
2=(maximum power)
Hairdryer
Type 554.03 - 554.06 - 554.09 - 554.12
Slide Switch
0=(OFF)
1=(low power)
2=(maximum power)
00060635 int ott2012:Layout 1 30/10/2012 13.11 Pagina 5

6
The symbol on the product or on its packaging indicates
that this product may not be treated as household waste. Instead
it shall be handed over to the applicable collection point for the
recycling of electrical and electronic equipment. By ensuring this
product is disposed of correctly, you will help prevent potential
negative consequences for the environment and human health,
which could otherwise be caused by inappropriate waste
handling of this product. For more detailed information about
recycling of this product, please contact your local city office,
your household waste disposal service or the shop where you
purchased the product.
VALERA is a registered trade mark
of Ligo Electric S.A. - Switzerland
Hairdryer Mod. 530.03 - 530.14 - 530.16
530.23 - 533.04 - 533.06 - 554.01 - 554.04
554.07 - 554.10
Grey pushbutton = On / Off (pressure must
be maintained to
operate the hairdryer)
Hairdryer Mod. 561.02 - 561.17 - 561.20
561.22
Pushbutton ON = On/off (pressure must be
maintained to operate the
hairdryer)
Left switch 0 = Off
1 = Low air speed
2 = High air speed
Right switch Cool = Low air temperature
1 = Medium air temperature
2 = High air temperature
PRODUCT CARE
When not in use, the mains switch on the wall holder should be
in the “Off” position. The hairdryer requires no special care or
attention.
You can clean your appliance with a cloth dampened with water.
The cleaning of hairdryers with detergents, solvents, alcohol and
other chemical products is strictly prohibited.
When necessary, the air inlet grill should be cleaned with a soft
brush or by vacuum cleaner.
Important
This hairdryer conforms to the safety regulations regarding
electrical appliances. This hairdryer has a safety cut-out which
will operate in case of overheating. The dryer will re-set itself
after being left to cool for a few minutes, but please check air
inlet and outlet grills are clear before continuing to use the dryer.
This appliance conforms to European Directives 2004/108/EC,
2006/95/EC, 2009/125/EC and Regulation (EC) No. 1275/2008.
GUARANTEE
VALERA guarantees the appliance you have bought at following
conditions:
1. The guarantee conditions for this appliance are as defined by
our dealer in the country of sale. In Switzerland and in the
countries subject to the European directive 44/99/CE the
guarantee period is 24 months for domestic use and 12
months for professional or similar use. The guarantee period
starts from the date of purchase as stated on the present
guarantee card regularly filled out and stamped by the dealer
or on the sale’s invoice.
2. The guarantee is applicable only against submission of the
present guarantee card or the sale’s invoice.
3. The guarantee covers the elimination of all defects arisen
during the guarantee period resulting from proven faults in
material or workmanship. The elimination of the defects will
be made either by repairing the appliance or exchanging it.
The guarantee does not cover any damage arising from
incorrect connection to the power supply, improper use,
breakage, normal wear and non-compliance with the
Instructions for Use.
4. All other claims of any nature, including those for eventual
damages outside of the appliance, are excluded, unless our
liability is legally mandatory.
5. The guarantee service is carried out free of charge; it does not
affect the expiry date of the guarantee.
6. The guarantee becomes void if repairs are under-taken by
unauthorized persons.
For UK only: this guarantee in no way affects your rights under
statutory law.
In case of defect, please return the appliance well packed and
together with the guarantee card regularly dated and stamped
to one of our Valera Service Centres or to the dealer who will
send it to the official importer for the guarantee service.
00060635 int ott2012:Layout 1 30/10/2012 13.11 Pagina 6

7
Deutsch
MONTAGE- UND GEBRAUCHSANWEISUNGEN
Anweisungen bitte sorgfältig durchlesen
SICHERHEITSHINWEISE
•Wichtig: als zusätzlicher Schutz wird die Installation
einer Fehlerstromschutzeinrichtung (FI) mit einem
Bemessungauslösestrom von nicht mehr als 30 mA
im Badezimmerstromkreis empfohlen. Lassen Sie
sich von Ihrem Elektroinstallateur beraten.
•Stellen Sie sicher, dass das Gerät völlig trocken ist,
bevor Sie es benutzen.
•Diese Geräte können von Kindern ab 8 Jahren
sowie von Personen mit reduzierten
physischen, sensorischen oder mentalen
Fähigkeiten oder Mangel an Erfahrung und/oder
Wissen benutzt werden, wenn sie beaufsichtigt
oder bzgl. des sicheren Gebrauchs des Gerätes
unterwiesen wurden und die daraus
resultierenden Gefahren verstanden haben.
•Kinder dürfen nicht mit dem Gerät spielen.
•Reinigung und Wartung dürfen nicht durch Kinder
durchgeführt werden, es sei denn sie sind
beaufsichtigt.
•Die Reinigungs- und Wartungsarbeiten dürfen nicht
von unbeaufsichtigten Kindern durchgeführt
werden.
00060635 int ott2012:Layout 1 30/10/2012 13.11 Pagina 7

8
• Schliessen Sie Ihren Haartrockner nur an eine Wechselstromleitung
an und stellen Sie sicher, dass die Anschlussspannung auch
tatsächlich der am Gerät angegebenen Spannung entspricht.
• Tauchen Sie Ihr Gerät nie in Wasser oder andere Flüssigkeiten.
• Legen Sie Ihr Gerät nie so ab, dass es in Wasser oder eine
andere Flüssigkeit fallen kann.
• Sie sollten nie versuchen, ein in Wasser oder eine andere
Flüssigkeit gefallenes Elektrogerät wieder herauszuholen,
solange es an den Stromkreis angeschlossen ist, sondern
sollten sofort den Netzstecker ziehen.
• Legen Sie den Haartrockner nicht beiseite, solange er
eingeschaltet ist.
• Achten Sie darauf, dass die Luftansaug- und Austrittsöffnungen
stets frei sind.
• Benutzen Sie Ihr Gerät nicht, wenn Sie daran eine
Unregelmässigkeit feststellen, wenn es zu Boden gefallen ist
oder wenn die Geräteschnur beschädigt ist.
• Reparaturen an Elektrogeräten sind nur von Fachkräften
auszuführen.
• Wenn die Netzanschlussleitung dieses Gerätes beschädigt
wird, muss sie durch den Hersteller oder seinen Kundendienst
oder eine ähnlich qualifizierte Person ersetzt werden, um
Gefährdungen zu vermeiden.
•
Bringen Sie den Kindern den sicheren Umgang mit
Elektrogeräten bei.
• Wird der Haartrockner in Badezimmern verwendet, muss er
nach dem Gebrauch von der Stromversorgung getrennt
werden, da die Nähe zu Wasser auch bei ausgeschaltetem
Haartrockner eine Gefahr darstellen kann.
• Wenn das Gerät in einem Badezimmer benutzt wird, ziehen Sie
den Netzstecker, wenn Sie es nicht mehr benutzen, da die Nähe
von Wasser auch bei ausgeschaltetem Gerät eine Gefahr darstellt.
MONTAGEANWEISUNG
Wandhalter Type 032.01 - 032.02
032.04 - 032.04/L
Modell 032.01
Basismodell mit Ein/Aus-Schalter für den Haartrockner.
Modell 032.02
Modell mit Schukosteckdose 16A und Ein/Aus-Schalter für den
Haartrockner.
Modell 032.04 - 032.04/L
Modell mit universal Rasiersteckdose und Ein/Aus-Schalter für den
Haartrockner. Ein Sicherheits-Trenntrafo isoliert die Rasiersteckdose
vom Netz und verhindert die Benutzung von angeschlossenen
Geräten mit einer Leistung von mehr als 20VA.
Montageanweisung für Wandhalter
Mit der Montage ist ein Fachmann zu beauftragen, damit gewährleistet
ist, dass der Wandhalter unter Beachtung der bestehenden nationalen
Sicherheitsvorschriften angeschlossen wird.
Bei grösstem Auszug des Spiralkabels darf der Haartrockner für
eine sich im Bad oder in der Dusche befindende Person nicht
erreichbar sein.
Je nach Art der Stromzuführung bestehen zwei verschiedene
Montagemöglichkeiten, d.h.:
A = Bei Unterputz-Zuleitung
Diese Montageart ist für Wandhalter 032.01, 032.02 und gestattet
B = Bei Aufputz-Zuleitung
Diese Montageart ist für Wandhalter 032.01 gestattet
Achtung:Vor der Montage den
Hauptnetzschalter immer ausschalten.
(Freischalten)
Dem Gerät muss netzseitig eine allpolige Trennvorrichtung mit
einer Mindestkontaktöffnungsweite von 3 mm vorgeschaltet
werden. Vor jedem Öffnen muss das Gerät freigeschaltet werden.
Montagereihenfolge A (bei Unterputz-
Zuleitung) Modelle 032.01 - 032.02
032.04 und 032.04/L
Die Zuleitung für die Wandhalter 032.02 muß min. 3x1,5 mm2sein.
Die Zuleitung für die Wandhalter 032.01, 032.04 und 032.04/L
muß min. 2x 1,0 mm2sein.
1. Schraube (14) lockern und Gehäuse (1) von der Rückwand
des Wandhalters abnehmen.
2. Die sich in der Rückwand des Wandhalters befindliche
Leitungsdurchführung (2) durchbrechen.
3. Die aus der Wand heraustretenden Leitungsdrähte (3) durch
die durchbrochene Durchführung (2) ziehen.
4. Rückwand mit den mitgelieferten Dübeln und Schrauben an
der Wand befestigen.
5. Zuleitung (3) gemäss Anschlusschema an der Klemme (4)
anschließen.
6. Modell 032.01, 032.04 und 032.04/L sind doppelt
schutzisoliert und deshalb ohne Schutzleiteranschluss. Modell
032.02 (mit Schukosteckdose): der Schutzleiter muss an der
Schutzleiterklemme (4) angeschlossen werden. Die Zuleitung
muss für mindestens 16A vorgesehen werden.
7. Wandhaltergehäuse aufsetzen, Knickschutztülle (6) richtig
einlegen.
8. Gehäuse mit Schraube (14) befestigen.
9. Hauptnetzschalter einschalten. Der Haartrockner ist
betriebsbereit.
Montagereihenfolge B: (Aufputz-
Zuleitung ) nur für Wandhalter 032.01
032.04 und 032.04/L
Die Zuleitung muß min. H05VV-F 2x1 mm2sein.
1. Schraube (14) lockern und Gehäuse (1) von der Rückwand
des Wandhalters abnehmen.
2. Die sich im unteren Rand der Rückwand befindliche
Membrane (8) für die Aufnahme der zweiten Knickschutztülle
(11) ausbrechen.
3. Rückwand mit den mitgelieferten Dübeln und Schrauben an
der Wand befestigen.
4. Knickschutztülle (11) über bewegliche Zuleitung (13) ziehen
und Anschlussleitung (12) gemäss Anschlusschema an der
Klemme (9) anschließen.
5. Beide Knickschutztüllen (6) und (11) in die dafür
vorgesehenen Sitze am unteren Rand der Rückwand des
Wandhalters einlegen.
6. Wandhaltergehäuse aufsetzen, Knickschutztüllen (6) und (11)
auf richtigen Sitz überprüfen.
7. Gehäuse mit Schraube (14) befestigen.
8. Hauptnetzschalter einschalten. Der Haartrockner ist
betriebsbereit.
BEDIENUNGSANLEITUNG
Schaltstufen
Schalter am Wandhalter: 0-1 = Aus/Ein
00060635 int ott2012:Layout 1 30/10/2012 13.11 Pagina 8

9
Haartrockner Type 530.02 - 530.15
530.22 - 533.03 - 533.05 - 540.05 - 540.06
542.05 - 542.06
Blauer Druckschalter: ON = Ein/Aus (Gerät
funktioniert nur, solange
dieTaste gedrückt wird)
Schiebetaste Cool = (niedrige Leistung)
1 = (mittlere Leistung)
2 = (höhere Leistung)
Haartrockner
Type 554.02 - 554.05 - 554.08 - 554.11
554.13
Druckschalter:
ON=Ein/Aus (Gerät funktioniert nur, solange die Taste
gedrückt wird)
Schiebetaste
1=(niedrige Leistung)
2=(höhere Leistung)
Haartrockner
Type 554.03 - 554.06 - 554.09 - 554.12
Schiebetaste
0=(AUS)
1=(niedrige Leistung)
2=(höhere Leistung)
Haartrockner Type 530.03 - 530.14
530.16 - 530.23 - 533.04 - 533.06 - 554.01
554.04 - 554.07 - 554.10
Grauer Druckschalter = Ein / Aus (Gerät funktioniert nur,
solange die Taste gedrückt wird)
Haartrockner Type 561.02 - 561.17
561.20 - 561.22
Blauer Druckschalter: ON = Ein/Aus (Gerät funktioniert nur,
solange dieTaste gedrückt wird)
Schiebetaste links 0 = Aus
1 = niedrige Luftmenge
2 = höhere Luftmenge
Schiebetaste rechts Cool = niedrige Temperatur
1 = mittlere Temperatur
2 = höhere Temperatur
DIE PFLEGE
Generell muss dabei der Schalter am Wandhalter in “Aus”-Stellung
gebracht werden. Das Gerät bedarf keiner besonderen Pflege.
Sie können das Gerät mit einem feuchten Tuch abwischen.
Die Reinigung der Haartrockner mit Reinigern, Lösungsmitteln,
Alkohol und sonstigen Chemikalien ist streng verboten.
Gegebenenfalls sollte das Lufteinlassgitter mit einem Pinsel
gereinigt oder einfach mit dem Staubsauger abgesaugt werden.
Wichtig
Der Haarfön ist mit einem Sicherheitsthermostat ausgestattet
und schaltet sich bei Überhitzung automatisch selbst ab. Nach
einer kurzen Betriebspause schaltet sich das Gerät automatisch
wieder ein. Dennoch sollten Sie sich vergewissern, dass die
Lufteinlass- und -austrittsöffnungen völlig frei sind.
Das Symbol auf dem Produkt oder seiner Verpackung weist
darauf hin, dass dieses Produkt nicht als normaler
Haushaltsabfall zu behandeln ist, sondern an einem
Sammelpunkt für das Recycling von elektrischen und
elektronischen Geräten abgegeben werden muss. Durch Ihren
Beitrag zum korrekten Entsorgen dieses Produktes schützen Sie
die Umwelt und die Gesundheit Ihrer Mitmenschen. Umwelt und
Gesundheit werden durch falsches Entsorgen gefährdet. Weitere
Informationen über das Recycling dieses Produkts erhalten Sie
von Ihrem Rathaus, Ihrer Müllabfuhr oder dem Geschäft, in dem
Sie das Produkt gekauft haben.
VALERA ist eine eingetragene Schutzmarke der
Ligo Electric S.A. - Schweiz
Dieses Gerät erfüllt die Bestimmungen der europäischen
Richtlinien 2004/108/EG, 2006/95/EG, 2009/125/EG und der
Verordnung (EG) Nr. 1275/2008.
GARANTIEBEDINGUNGEN
VALERA leistet für dieses Gerät – zusätzlich zu der gesetzlichen
Gewährleistung des Händlers aus Kaufvertrag – dem
Endabnehmer gegenüber eine Garantie zu nachstehenden
Bedingungen:
1. Für dieses Gerät gelten die Garantiebedingungen unseres
Händlers im Verkaufsland. In der Schweiz und in den
Ländern, wo die europäische Verordnung 44/99/CE gilt,
beträgt die Garantiezeit 24 Monate bei privatem Gebrauch
und 12 Monate bei gewerblichem oder einem solchen
gleichzusetzenden Gebrauch. Die Garantiezeit beginnt am
Kauftag des Gerätes, der durch die ausgefüllte Garantiekarte
oder einen sonstigen Kaufbeleg nachzuweisen ist.
2. Die Garantie wird nur bei Vorlage der Garantiekarte oder eines
Kaufbeleges geleistet.
3. Die Garantieleistung umfasst die Behebung aller innerhalb der
Garantiezeit auftretenden Mängel des Gerätes, die
nachweislich auf Material- oder Fertigungsfehlern beruhen.
Die Behebung der Mängel kann nach unserer Wahl durch
Instandsetzung oder durch Umtausch des Gerätes erfolgen.
Nicht unter Garantie fallen Mängel oder Schäden, die durch
nicht vorschriftsmässigen elektrischen Anschluss, durch
unsachgemässe Handhabung sowie durch
Nichtbeachtung der Gebrauchsanleitung entstanden sind.
4. Weitere Ansprüche irgendwelcher Art, insbesondere solche
auf Ersatz ausserhalb des Gerätes entstandener Schäden,
sind – soweit die Haftung nicht zwingend gesetzlich
angeordnet ist – ausgeschlossen.
5. Die Garantieleistungen werden ohne Berechnung
durchgeführt; sie bewirken weder eine Verlängerung noch
einen Neubeginn der Garantiezeit.
6. Diese Garantie erlischt bei Eingriff nicht autorisierter Stellen.
Sollten Sie die Garantie in Anspruch nehmen müssen, dann
senden Sie bitte das defekte Gerät gut verpackt an eine unserer
autorisierten Service-Stellen. Vergessen Sie nicht, unbedingt die
Garantiekarte und/oder den Kaufbeleg beizufügen, da ohne diese
keine Garantieleistung erfolgen kann.
ng erfolgen kann.
00060635 int ott2012:Layout 1 30/10/2012 13.11 Pagina 9

10
Français
INSTRUCTIONS D’UTILISATION ET DE MONTAGE
Lire attentivement les instructions
CONSEILS DE SÉCURITÉ
•Important: pour garantir une protection optimale, il
est conseillé d’installer dans l’installation électrique
alimentant l’appareil un interrupteur différentiel avec
une prise de courant différentielle ne dépassant pas
30 mA. Contactez votre électrotechnicien de
confiance pour tout renseignement complémentaire.
•Vérifier que l’appareil soit complètement sec avant
de l’utiliser
•ATTENTION: ne pas utiliser cet appareil à
proximité de baignoires, de lavabos ou autres
récipients contenant de l'eau.
•Il est requit un âge minimum de 8 ans pour
l’utilisation de cet appareil.
L’utilisation de cet appareil par des personnes aux
capacités physiques, sensorielles ou mentales
réduites est fortement déconseillée à moins qu’elles
soient surveillées ou qu’elles aient été instruites
correctement quant à l’utilisation de l’appareil de la
part de tiers
•Cet appareil doit être tenu hors de portée des
enfants.
•Le nottoyage et l’entretien de l’appareil ne doivent
pas être effectuées par des enfants non surveillés.
• Branchez votre sèche-cheveux sur du courant alternatif uniquement et vérifiez que la tension sur laquelle votre appareil est
branché est identique à celle de l’appareil.
• N’immergez jamais votre appareil dans l’eau ou dans un autre liquide.
00060635 int ott2012:Layout 1 30/10/2012 13.11 Pagina 10

11
• Ne posez, ni rangez votre appareil à un endroit d’où il pourrait
tomber dans l’eau ou dans un autre liquide.
• Ne tentez jamais de rattraper un appareil électrique tombé à
l’eau mais débranchez-le immédiatement.
• Débranchez toujours votre appareil après l’utilisation.
• Veillez à ne jamais obstruer les entrées et les sorties d’air de
l’appareil.
• N’utilisez pas votre appareil s’il présente une défaillance, s’il
est tombé ou si le cordon d’alimentation est endommagé.
• Ne tentez pas de réparer un appareil électrique par vous-
même mais confiez-le à un réparateur agréé.
• Afin d’éviter tout danger, si le câble d’alimentation de cet appareil
était endommagé, il devra être réparé par le producteur, par le
Service Technique Agréé ou par un technicien qualifié.
• Apprenez aux enfants les dangers pouvant dériver des
appareils électriques ainsi que les règles de la sécurité
électrique correspondantes.
• Si le sèche-cheveux est utilisé dans une salle de bains, le
débrancher après l’usage car la proximité de l’eau peut
constituer un danger même quand l’appareil est éteint.
INSTRUCTIONS DE MONTAGE
Support mural pour sèche-cheveux
mod. 032.01 - 032.02 - 032.04 - 032.04/L
Modèle 032.01
Modèle de base avec interrupteur.
Modèle 032.02
Modèle avec prise standard européenne 16A et interrupteur pour
sèche-cheveux.
Modèle 032.04 - 032.04/L
Modèle avec prise rasoir universelle et interrupteur pour le sèche-
cheveux. Un transformateur de sécurité isole la prise rasoir de
l’installation électrique du secteur et une protection empêche
l’utilisation d’appareils de puissance supérieure à 20 VA.
Installation du support mural
Cette tâche doit être confiée exclusivement à un électricien
qualifié, conformément aux normes de sécurité en vigueur en la
matière. Le sèche-cheveux ne doit pas être à la portée d’une
personne prenant un bain ou une douche, même avec le câble
à l’extension maximale.
Il existe deux méthodes d’installation:
A = connexion directe au secteur
B = connexion au secteur au moyen d’un câble extérieur
Attention:avant de procéder au
montage, actionnez l’interrupteur
général pour disjoncter le réseau
Installez en amont de l’appareil un interrupteur avec une
ouverture entre contacts d’au moins 3 mm pour chaque pôle.
Chaque fois que vous ouvrez l’appareil, l’interrupteur doit être
actionné pour ouvrir le circuit.
Méthode A (connexion directe au secteur)
pour les modèles 032.01 - 032.02 - 032.04
et 032.04/L
Les câbles d’alimentation pour le support mural 032.02 doivent
être au moins 3 x 1,5 mm2.
Les câbles d’alimentation pour le support de paroi 032.01,
032.04 et 032.04/L doivent être au moins 2 x 1,0 mm2.
1. Retirez le cache (1) du support mural par la partie avant, en
desserrant la vis (14).
2. Percez la membrane en plastique (2) qui se trouve sur la
partie avant du support mural.
3. Introduisez le câble principal d’alimentation qui sort du mur
(3) dans le perçage ainsi obtenu dans la membrane (2).
4. Fixez au mur la partie arrière du support en utilisant les
tampons et les vis fournies.
5. Retirez la borne (4), connectez le câble d’alimentation (3) à
la borne (4), tel que l’illustre le dessin et remettez la borne (4)
en place par la suite.
6. Los modèles 032.01, 032.04 et 032.04/L sont équipés de
double isolation et ne nécessitent pas de mise à la terre. Dans
le modèle 032.02 avec prise europeenne standard, le fil
conducteur de terre de l’installation doit être connecté à la
borne (4). Dans ce cas, vérifiez également que l’installation
convient à une charge de 16A.
7. Appliquez le couvercle du support mural, en veillant à
positionner convenablement la traversée de ligne (6) et fixez-
le à l’aide de la vis (14).
8. Actionnez l’interrupteur d’alimentation: le sèche-cheveux est
désormais prêt pour l’utilisation.
Méthode B (connexion au secteur
au moyen d’un câble extérieur) pour
les modèles 032.01 - 032.04 et 032.04/L
Le câble d’alimentation doit être au moins du type H05VV-F2x1 mm2.
1. Retirez le cache (1) du support mural par la partie avant en
desserrant la vis (14).
2. Percez la membrane en plastique (8) qui se trouve sur le bord
inférieur à gauche du support mural pour introduire ainsi la
seconde traversée de ligne.
3. Fixez au mur la partie arrière du support en utilisant les
tampons et les vis fournies.
4. Dénudez environ 200 mm du câble de connexion au secteur
(13), introduisez la traversée de ligne (11), retirez la borne
(9), connectez le câble (13) à la borne (9) et remettez la
borne (9) en place par la suite. Positionnez attentivement la
partie dénudée du câble tel que l’illustre le dessin. Fixez la
traversée de ligne (10) à l’aide des vis correspondantes.
Attention:cet appareil est équipé de double isolation mais il
est dépourvu de mise à la terre.
5. Positionnez les traversées de ligne (6) et (11) dans leurs
logements.
6. Positionnez le couvercle du support mural en veillant à
positionner convenablement les traversées de ligne (6) et (11).
7. Fixez le couvercle à l’aide de la vis (14).
8. Actionnez l’interrupteur d’alimentation:le sèche-cheveux est
ainsi prêt pour l’utilisation.
MODE D’EMPLOY
Commutation
Interrupteur du support mural 0-1= éteint/allumé
Sèche-cheveux mod. 530.02 - 530.15
530.22 - 533.03 - 533.05 - 540.05 - 540.06
542.05 et 542.06
Bouton du sèche-cheveux ON = allumé/éteint (maintenez-le
enfoncé pour faire
fonctionner l’appareil)
00060635 int ott2012:Layout 1 30/10/2012 13.11 Pagina 11

12
Commutateur Cool = (puissance minimale)
1 = (puissance moyenne)
2 = (puissance maximale)
Sèche-cheveux
Type 554.02 - 554.05 - 554.08 - 554.11
554.13
Bouton du sèche-cheveux
ON=allumé/éteint (maintenez-le enfoncé pour faire
fonctionner l’appareil)
Commutateur
1=( puissance minimale)
2=(puissance maximale)
Sèche-cheveux
Type 554.03 - 554.06 - 554.09 - 554.12
Commutateur
0=(éteint)
1=(puissance minimale)
2=(puissance maximale)
Sèche-cheveux mod. 530.03 - 530.14 -
530.16 - 530.23 - 533.04 - 533.06 - 554.01
554.04 - 554.07 - 554.10
Bouton interrupteur = allumé / éteint(le maintenir
enfoncé pour faire
fonctionner l’appareil)
Sèche-cheveux mod.561.02 - 561.17
561.20 - 561.22
Bouton du sèche-cheveux ON = allumé/éteint (maintenez-le
enfoncé pour faire
fonctionner l’appareil)
Commutateur gauche 0 = Eteint
1 = Basse vitesse
2 = Haute vitesse
Commutateur droit Cool = Température faible
1 = Température moyenne
2 = Température élevée
ENTRETIEN
Si le sèche-cheveux n’est pas utilisé, l’interrupteur du support
mural doit être positionné sur “éteint”(0). Cet appareil ne
demande pas de soins particuliers.
Vous pouvez nettoyer votre appareil à l’aide d’un chiffon imbibé d'eau.
Il est formellement interdit de nettoyer les sèche-cheveux avec
des détergents, des solvants, de l'alcool et des produits chimiques.
S’il était nécessaire, nettoyez la grille d’entrée de l’air avec un
pinceau ou un aspirateur.
Important
Ce sèche-cheveux est conforme aux normes de sécurité
relatives aux appareils électriques. Cet appareil est muni d’un
thermostat de sécurité. En cas de surchauffe, il s’arrête
automatiquement. Après un court délai, il se remet en marche.
Cependant, avant toute nouvelle utilisation, vérifiez que les
entrées et les sorties d’air de l’appareil sont parfaitement
propres. Cet appareil est conforme aux directives européennes
2004/108/CE, 2006/95/CE, 2009/125/CE et au règlement (CE)
N. 1275/2008.
Le symbole sur le produit ou son emballage indique que ce
produit ne peut être traité comme déchet ménager. Il doit être
remis au point de collecte prèvu à cet effet (collecte et recyclage
du matériel électrique et électronique).
En procédant à la mise à la casse réglementaire de l’appareil,
nous préservons l’environnement et notre sécurité, s’assurant
ainsi que le déchets seront traités dans des conditions
appropriées. Pour obtenir plus de détails sur le recyclage de ce
produit, veuillez prendre contact avec les services de votre
commune ou le magasin où vous avez effectué l’achat.
VALERA est une marque enregistrée par
Ligo Electric S.A. - Suisse
GUARANTIE
VALERA garantit l’appareil que vous venez d’acheteraux
conditions suivantes:
1. Les conditions de garantie applicables sont celles qui sont
définies par notre distributeur officiel dans le pays d’achat.
En Suisse et dans les pays où la directive européenne
44/99/CE est envigueur, la période couverte par la garantie
est de 24 mois pour un usage domestique et de 12 mois pour
un usage professionnel ou assimilé. La période de garantie
commence à courir à compter de la date d’achat de
’l’appareil. La date d’achat est la date qui figure sur le présent
certificat de garantie dûment rempli et portant de cachet du
vendeur ou sur la facture d’achat.
2. La garantie n’est applicable que sous présentation de ce
certificat de garantie ou du document d’achat.
3. La garantie couvre l’élimination de tous les défauts s’étant
vérifiés lors de la période de garantie dérivant de défauts de
matériaux ou de fabrication prouvés. L’élimination des défauts
de l’appareil peut s’effectuer soit en le réparant soiten le
remplaçant. La garantie ne couvre pas les défauts ni les
dommages provoqués par un branchement au réseau
électrique non conforme aux normes, par un usage incorrect
du produit et par le non-respect des Normes d’Utilisation.
4. Toute autre revendication, de quelque nature que ce soit, est
exclue, en particulier celle concernant le remboursement
d’éventuels dommages en dehors de l’appareil, à l’exception
de l’éventuelle responsabilité expressément définie par les
lois envigueur.
5. Le service de garantie est réalisé gratuitement. Il ne
représente pas une prolongation ni un nouveau départ de la
période de garantie.
6. La garantie échoit si l’appareil est altéré ou réparé par des
personnes non autorisées.
En cas de panne, renvoyer l’appareil correctement emballé avec
le certificat de garantie correctement daté et timbré par le
vendeur à l’un de nos Centres d’Assistance agréés ou au
magasin d’achat qui l’enverra à l’importateur officiel pour la
réparation sous garantie.
00060635 int ott2012:Layout 1 30/10/2012 13.11 Pagina 12

13
ISTRUZIONI PER IL MONTAGGIO E PER L’USO
Leggere attentamente queste istruzioni per I’uso
AVVERTENZE DI SICUREZZA
•Importante: per garantire una protezione supplementare si
consiglia di installare nell’impianto elettrico, con il quale
viene alimentato l’apparecchio, un interruttore differenziale
con una corrente di intervento non superiore a 30 mA. Per
maggiori informazioni rivolgersi all’elettrotecnico di fiducia.
•Assicurarsi che l’apparecchio sia perfettamente asciutto
prima di utilizzarlo.
•ATTENZIONE: Non utilizzare questo apparecchio in
prossimità di vasche da bagno, lavelli o altri recipienti
che contengano acqua.
•Il presente apparecchio può essere utilizzato dai bambini
a partire da 8 anni di età e da persone dalle ridotte
capacità fisiche, sensoriali o mentali, oppure con
mancanza di esperienza e di conoscenza se si trovano
sotto adeguata sorveglianza, oppure se sono stati istruiti
circa l’uso dell’apparecchio in modo sicuro e se si
rendono conto dei pericoli correlati.
•I bambini non devono giocare con l’apparecchio.
•Le operazioni di pulizia e di manutenzione non devono
essere effettuate dai bambini senza sorveglianza.
• Collegate I’apparecchio solo a corrente alternata e controllate che la tensione di rete corrisponda a quella indicata sull’apparecchio.
• Non immergete mai I’apparecchio nell’acqua o in altri liquidi.
• Non appoggiate I’apparecchio in un Iuogo dove potrebbe cadere nell’acqua o in un altro liquido.
Italiano
00060635 int ott2012:Layout 1 30/10/2012 13.11 Pagina 13

14
• Non cercate di recuperare un apparecchio elettrico caduto
nell’acqua, ma staccate subito la spina dalla presa di corrente.
• Spegnete sempre I’apparecchio quando viene appoggiato.
• Adoperate I’asciugacapelli in modo che le griglie di entrata e
di uscita dell’aria non vengano mai ostruite.
• Non utilizzate il vostro apparecchio se presenta un’anomalia,
se è caduto o se il cordone è danneggiato.
• Non cercate di riparare un apparecchio elettrico da soli, ma
rivolgetevi ad un tecnico autorizzato.
• Se il cavo di alimentazione di questo apparecchio venisse
danneggiato, deve essere sostituito dal produttore, dal
Servizio Tecnico autorizzato o da un tecnico qualificato, per
evitare pericoli.
ISTRUZIONI PER IL MONTAGGIO
Supporto a muro per asciugacapelli
mod. 032.01 - 032.02 - 032.04 - 032.04/L
Modello 032.01
Modello base con interruttore.
Modello 032.02
Modello con presa standard europea 16 A e interruttore per
l’asciugacapelli.
Modello 032.04 - 032.04/L
Modello con presa rasoio universale e con interruttore per
l’asciugacapelli. Un trasformatore di sicurezza isola la presa
rasoio dall’impianto elettrico di rete ed una protezione impedisce
l’utilizzo di apparecchi di potenza superiore a 20 VA.
Installazione del supporto a muro
Questo lavoro deve essere eseguito esclusivamente da un
elettricista qualificato, in modo che sia conforme alle normative
di sicurezza vigenti. L’asciugacapelli non deve essere
raggiungibile da una persona che stia utilizzando la vasca da
bagno o la doccia, anche alla massima estensione del cavo.
Ci sono due diversi metodi di installazione:
A = collegamento diretto alla rete di alimentazione
B = collegamento alla rete di alimentazione per mezzo di
un cavo esterno
Attenzione: prima del montaggio
spegnere l’interruttore generale della rete
A monte dell’apparecchio deve essere installato un interruttore
con un’apertura dei contatti di almeno 3 mm per ogni polo. Ogni
volta che si apre l’apparecchio, l’interruttore deve essere
azionato per aprire il circuito.
Metodo A (collegamento diretto alla rete
di alimentazione) per i modelli 032.01
032.02 - 032.04 - 032.04/L
I cavi di alimentazione per il supporto a muro mod. 032.02
devono essere almeno 3x1,5 mm2.
I cavi di alimentazione per il supporto a muro mod. 032.01,
032.04 e 032.04/L devono essere almeno 2x1,0 mm2.
1. Togliere il coperchio (1) del supporto a muro dalla parte
posteriore allentando la vite (14).
2. Rompere la membrana in plastica (2) che si trova nella parte
posteriore del supporto a muro.
3. Infilare il cavo principale di alimentazione che esce dalla parete
(3) nel foro in corrispondenza della membrana aperta (2).
4. Fissare alla parete la parte posteriore del supporto a muro
utilizzando i tasselli e le viti accluse.
5. Togliere il morsetto (4), collegare il cavo di alimentazione (3)
al morsetto (4), come indicato nell’illustrazione, e
riposizionare il morsetto (4).
6. I modelli 032.01, 032.04 e 032.04/L sono dotati di doppio
isolamento e non necessitano di messa a terra. Nel modello
032.02 con presa standard europea, il conduttore di terra
dell’impianto di rete deve essere collegato al morsetto (4). In
questo caso deve anche essere verificato che l’impianto di
rete sia previsto per un carico di 16A.
7. Applicare il coperchio del supporto a muro, facendo
attenzione di posizionare esattamente il passacavo (6), e
fissarlo con la vite (14).
8. Accendere l’interruttore di rete. L’asciugacapelli è pronto per
l’uso.
Metodo B (collegamento alla rete di
alimentazione per mezzo di un cavo
esterno) per i modelli 032.01 - 032.04
032.04/L
Il cavo di alimentazione deve essere almeno del tipo H05VV-F
2x1 mm2.
1. Togliere il coperchio (1) del supporto a muro dalla parte
posteriore allentando la vite (14).
2. Rompere la membrana in plastica (8) che si trova sul bordo
inferiore nella parte sinistra del supporto a muro per
l’inserimento del secondo passacavo.
3. Fissare alla parete la parte posteriore del supporto a muro
utilizzando i tasselli e le viti accluse.
4. Sguainare il cavo di collegamento alla rete di alimentazione
per circa 200 mm. (13), inserire il passacavo (11), togliere il
morsetto (9), collegare il cavo (13) al morsetto (9), e
riposizionare il morsetto (9). Posizionare accuratamente la
parte sguainata del cavo come indicato nell’illustrazione.
Fissare il pressacavo (10) con le apposite viti. Attenzione:
questo apparecchio è dotato di doppio isolamento e non è
provvisto di messa a terra.
5. Posizionare i passacavi (6) e (11) nell’ apposita sede.
6. Applicare il coperchio del supporto a muro, facendo
attenzione di posizionare esattamente i passacavi (6) e (11).
7. Fissare il coperchio con la vite (14).
8. Accendere l’interruttore di rete. L’asciugacapelli è pronto per
l’uso.
ISTRUZIONI PER L’USO
Commutazione
Interruttore del supporto a muro: 0-1 = spento/acceso
Asciugacapelli Mod. 530.02 - 530.15
530.22 - 533.03 - 533.05 - 540.05 - 540.06
542.05 e 542.06
Pulsante dell’asciugacapelli: ON = acceso/spento
(tenere premuto per far
funzionare l’apparecchio)
Commutatore: Cool = (potenza minima)
1 = (potenza media)
2 = (potenza massima)
00060635 int ott2012:Layout 1 30/10/2012 13.11 Pagina 14

15
Il simbolo sul prodotto o sulla confezione indica che il
prodotto non deve essere considerato come un normale rifiuto
domestico, ma deve essere portato nel punto di raccolta
appropriato per il riciclaggio di apparecchiature elettriche ed
elettroniche. Provvedendo a smaltire questo prodotto in modo
appropriato, si contribuisce a evitare potenziali conseguenze
negative per l’ambiente e per la salute, che potrebbero derivare
da uno smaltimento inadeguato del prodotto. Per informazioni
più dettagliate sul riciclaggio di questo prodotto, contattare
l’ufficio comunale, il servizio locale di smaltimento rifiuti o il
negozio in cui è stato acquistato il prodotto.
VALERA è un marchio registrato della
Ligo Electric S.A. - Svizzera
GARANZIA
VALERA garantisce l’apparecchio da Voi acquistato alle seguenti
condizioni:
1. Sono valide le condizioni di garanzia stabilite dal nostro
distributore ufficiale nel paese di acquisto. In Svizzera e nei
paesi dove è in vigore la direttiva europea 44/99/CE il periodo
di garanzia è di 24 mesi per un uso domestico e di 12 mesi
per un uso professionale o analogo. Il periodo di garanzia
parte dalla data di acquisto dell’apparecchio. Come data di
acquisto fa stato la data risultante o dal presente certificato
di garanzia debitamente compilato e timbrato dal venditore o
dal documento di acquisto.
2. La garanzia è applicabile solo dietro presentazione del
presente certificato di garanzia o del documento di acquisto.
3. La garanzia copre l’eliminazione di tutti quei difetti insorti
durante il periodo di garanzia dovuti a comprovati difetti di
materiali o di fabbricazione. L’eliminazione dei difetti
dell’apparecchio puó avvenire o riparandolo o sostituendo il
prodotto stesso. La garanzia non copre difetti o danni causati
da allacciamento alla rete elettrica non conforme alle norme,
da uso improprio del prodotto come anche da non
osservanza delle Norme d’Uso.
4. È esclusa ogni altra rivendicazione di qualsiasi natura, in
particolare di risarcimento di eventuali danni al di fuori
dell’apparecchio, eccettuata la eventuale responsabilità
espressamente stabilita dalle leggi vigenti.
5. Il servizio di garanzia viene eseguito senza addebito; esso
non costituisce un prolungamento o un nuovo inizio del
periodo di garanzia.
6. La garanzia decade se l’apparecchio viene manomesso o
riparato da persone non autorizzate.
In caso di guasto, ritornate l’apparecchio ben imballato e con il
certificato di garanzia regolarmente datato e timbrato dal
venditore a uno dei nostri Centri Assistenza autorizzati o al
Vostro negoziante che provvederà a inviarlo all’importatore
ufficiale per la riparazione in garanzia.
Asciugacapelli Mod. 554.02 - 554.05
554.08 - 554.11 - 554.13
Pulsante dell’asciugacapelli: ON = acceso/spento
(tenere premuto per far
funzionare l’apparecchio)
1 = (potenza minima)
2 = (potenza massima)
Asciugacapelli
Type 554.03 - 554.06 - 554.09 - 554.12
Commutatore
0=(spento)
1=(potenza minima)
2=(potenza massima)
Asciugacapelli Mod. 530.03 - 530.14
530.16 - 530.23 - 533.04 - 533.06 - 554.01
554.04 - 554.07 - 554.10
Pulsante interruttore = acceso / spento
(tenere premuto per far
funzionare l’apparecchio)
Asciugacapelli Mod. 561.02 - 561.17
561.20 - 561.22
Pulsante dell’asciugacapelli ON = acceso/spento (tenere
premuto per far funzionare
l’apparecchio)
Commutatore sinistro 0 = Spento
1 = Flusso d’aria medio
2 = Flusso d’aria forte
Commutatore destro Cool = Temperatura bassa
1 = Temperatura media
2 = Temperatura alta
MANUTENZIONE
Quando l’asciugacapelli non viene usato, l’interruttore del
supporto a muro deve essere posizionato su “spento” (0).
L’apparecchio non richiede cure particolari.
Pulire l'apparecchio con un panno inumidito con acqua.
ATTENZIONE: È assolutamente vietata la pulizia dell'asciugacapelli
con detergenti, solventi, alcool e prodotti chimici vari.
Se necessario, pulite la griglia di entrata dell’aria con un pennello
o un aspirapolvere.
Importante
Questo asciugacapelli risponde alle norme di sicurezza per gli
apparecchi elettrici. Questo asciugacapelli è munito di un
termostato di sicurezza. In caso di surriscaldamento si arresta
automaticamente. Dopo un breve periodo di tempo riprende a
funzionare. Prima di ogni utilizzo verificate che le griglie di entrata
e di uscita dell’aria dell’apparecchio siano perfettamente pulite.
Questo apparecchio è conforme alle direttive europee
2004/108/CE, 2006/95/CE, 2009/125/CE ed al regolamento
(CE) N. 1275/2008.
00060635 int ott2012:Layout 1 30/10/2012 13.11 Pagina 15

16
Español
INSTRUCCIONES DE MONTAJE Y USO
Lea atentamente estas instrucciones
CONSEJOS DE SEGURIDAD
•Importante: para garantizar una protección
suplementaria, se aconseja colocar en la instalación
eléctrica de alimentación del aparato, un interruptor
diferencial con una corriente de intervención que no
supere los 30 mA. Para mayores informaciones,
dirigirse al electrotécnico de confianza.
•Antes de usar el aparato, controle que esté bien
seco.
•ATENCIÓN: no utilizar este aparato cerca de
bañeras, lavabos u otros recipientes que
contengan agua.
•Este aparato puede ser utilizado por niños a partir
de los 8 años de edad y también por personas con
capacidades físicas, sensoriales o mentales
reducidas, o carentes de experiencia y de
conocimiento, siempre que lo hagan bajo las
instrucciones y la vigilancia de una persona que les
haya explicado el modo de uso del aparato y los
peligros que puede implicar.
•Los niños no deben jugar con el aparato.
•La limpieza y el mantenimiento no deben ser
efectuados por los niños sin vigilancia.
• Conecte el aparato sólo a corriente alterna y compruebe que la tensión de red corresponda a la indicada en el aparato.
• No sumerja el aparato en agua o cualquier otro líquido.
00060635 int ott2012:Layout 1 30/10/2012 13.11 Pagina 16

17
• No apoye el aparato en un lugar desde donde pueda caer en
el agua o en otro líquido.
• Si el aparato se cayera en el agua, no intente recuperarlo, sino
desenchúfelo inmediatamente.
• Desconecte siempre el aparato antes de dejarlo apoyado.
• Utilice el secador de manera que las rejillas de entrada y salida
del aire no queden obstruidas.
• No utilice el aparato si presentara alguna anomalía, si se
hubiera caído o si el cable estuviera dañado.
• No intente reparar el aparato y diríjase a un técnico autorizado.
• Con el fin de evitar peligros, si se dañara el cable de
alimentación de este aparato, la sustitución del mismo debe
ser realizada por el fabricante, un Servicio Técnico autorizado
o un técnico cualificado.
• Si el secador está instalado en un cuarto de baño,
desenchúfelo al terminar de utilizarlo porque la presencia de
agua puede ser peligrosa incluso cuando el secador está
apagado.
INSTRUCCIONES DE MONTAJE
Soporte de pared para secador
mod. 032.01 - 032.02 - 032.04 - 032.04/L
Modelo 032.01
Modelo básico con interruptor.
Modelo 032.02
Modelo con enchufe estándar europeo 16A e interruptor para secador.
Modelo 032.04 - 032.04/L
Modelo con enchufe para maquinilla de afeitar universal y con
interruptor para el secador. Un Modelo transformador de seguridad
aísla el enchufe para la maquinilla de afeitar de la instalación
eléctrica y una protección impide la utilización de aparatos con
potencia superior a 20 VA.
Instalación del soporte de pared
Esta tarea debe ser realizada exclusivamente por un electricista
cualificado, de conformidad con las normativas de seguridad
vigentes. El secador no debe poder ser alcanzado por una
persona que esté en la bañera o la ducha, incluso extendiendo
al máximo elcable.
Existen dos métodos de instalación:
A = conexión directa a la red de alimentación
B = conexión a la red de alimentación por medio de un
cable exterior.
Atención: antes de proceder al montaje,
desconectar el interruptor general de red
Antes del aparato debe instalarse un interruptor con una
apertura entre contactos de al menos 3 mm por cada polo. Cada
vez que se abra el aparato, debe accionarse el interruptor para
abrir el circuito.
Método A (conexión directa a la red de
alimentación) para los modelos 032.01
032.02 - 032.04 y 032.04/L
Los cables de alimentación para el soporte de pared 032.02
deben ser al menos 3 x 1,5 mm2.
Los cables de alimentación para el soporte de pared 032.01,
032.04 y032.04/L deben ser al menos 2 x 1,0 mm2
1. Retirar la tapa (1) del soporte de pared por la parte posterior,
soltando los tornillos (14).
2. Romper la membrana de plástico (2) que se encuentra en la
parte posterior del soporte de pared.
3. Introducir el cable principal de alimentación que sale de la
pared (3) en el orificio practicado en la membrana (2).
4. Fijar a la pared la parte posterior del soporte utilizando los
tacos y los tornillos en dotación.
5. Retirar el borne (4), conectar el cable de alimentación (3) al
borne (4), según se indica en el dibujo, y volver a posicionar
el borne (4).
6. Los modelos 032.01, 032.04 y 032.04/Lestán provistos de
doble aislamiento y no necesitan puesta a tierra. En el modelo
032.02 con enchufe estándar europeo, el conductor de tierra
de la instalación debe conectarse al borne (4). En este caso
hay que comprobar también que la instalación sea adecuada
para una carga de 16A.
7. Colocar la tapa del soporte de pared, teniendo cuidado de
posicionar correctamente el pasahilos (6) y sujetar con el
tornillo (14).
8. Conectar el interruptor de red:el secador está listo para su
utilización.
Método B (conexión a la red de
alimentación por medio de un cable
exterior) para los modelos 032.01
032.04 y 032.04/L
El cable de alimentación debe ser como mínimo del tipo H05VV-
F2x1 mm2.
1.Retirar la tapa (1) del soporte de pared por la parte posterior
soltando el tornillo (14).
2. Romper la membrana de plástico (8) que se encuentra en el
borde inferior a la izquierda del soporte de pared para
introducir el segundo pasahilos.
3. Fijar a la pared la parte posterior del soporte utilizando los
tacos y los tornillos en dotación.
4. Pelar unos 200 mm del cable de conexión a la red de
alimentación (13), introducir el pasahilos (11), retirar el borne
(9), conectar el cable (13) al borne (9) y volver a posicionar
el borne (9). Posicionar cuidadosamente la parte pelada del
cable según se indica en el dibujo. Fijar el pasahilos (10) con
los tornillos correspondientes. Atención: este aparato está
provisto de doble aislamiento y no está provisto de puesta a
tierra.
5. Posicionar los pasahilos (6) y (11) en su alojamiento.
6. Colocar la tapa del soporte de pared, teniendo cuidado de
posicionar correctamente los pasahilos (6) y (11).
7. Sujetar la tapa con el tornillo (14).
8. Conectar el interruptor de red:el secador está listo para su
utilización.
MODO DE EMPLEO
Conmutación
Interruptor del soporte de pared 0-1 = apagado/encendido
Secador mod. 530.02 - 530.15 - 530.22
533.03 - 533.05 - 540.05 - 540.06 - 542.05
y 542.06
Pulsador del secador ON = encendido/apagado
(mantenerlo pulsado para
hacer funcionar el aparato)
00060635 int ott2012:Layout 1 30/10/2012 13.11 Pagina 17

18
Conmutador Cool = (potencia mínima)
1 = (potencia media)
2 = (potencia máxima)
Secador
Type 554.02 - 554.05 - 554.08 - 554.11
554.13
Pulsador del secador
ON=encendido/apagado
(mantenerlo pulsado para hacer funcionar el aparato)
Conmutador
1=(potencia mínima)
2=(potencia máxima)
Secador
Type 554.03 - 554.06 - 554.09 - 554.12
Conmutador
0=(apagado)
1=(potencia mínima)
2=(potencia máxima)
Secador mod.530.03 - 530.14 - 530.16
530.23 - 533.04 - 533.06 - 554.01 - 554.04
554.07 - 554.10
Pulsador interruptor = encendido / apagado
(mantenerlo apretado
para hacer funcionar el
aparato)
Secador mod.561.02 - 561.17 - 561.20
561.22
Pulsador del secador ON = encendido/apagado (mantenerlo
apretado para hacer funcionar
el aparato)
Conmutador izquierdo 0 = Apagado
1 = Velocidad baja
2 = Velocidad alta
Conmutador derecho Cool = Temperatura baja
1 = Temperatura media
2 = Temperatura alta
MANTENIMIENTO
Cuando no se utilice el secador, el interruptor del soporte de
pared debe posicionarse en “apagado” (0). El aparato no
requiere ningún cuidado especial.
Puede limpiar el aparato con la ayuda de un paño húmedo con agua.
Está terminantemente prohibido limpiar los secadores de cabello
con detergentes, solventes, alcohol y productos químicos varios.
Si fuera necesario, limpiar la rejilla de entrada del aire con un
pincel o con el aspirador.
Importante
Este secador es conforme a las normas de seguridad
correspondientes a los aparatos eléctricos. Este secador está
provisto de termostato de seguridad. En caso de
sobrecalentamiento, se apaga automáticamente y vuelve a
funcionar al cabo de poco tiempo. Antes de utilizarlo, comprobar
que las rejillas de entrada y salida del aire del aparato estén
perfectamente limpias. Este aparato es conforme a las directivas
El simbolo en el producto o en su embalaje indica que este
producto no se puede tralar como desperdicios normales del
hogar. Este producto se debe entregar al punto de recolección
de equipos eléctricos y electrónicos para reciclaje. Al asegurarse
de que este producto se deseche correctamente, usted ayudará
a evitar posibles consecuencias negativas para el ambiente y la
salud pública, lo cual podria ocurris si este producto no se
manipula de forma adecuada. Para obtener información más
detallada sobre el reciclaje de este producto, póngase en
contacto con la administración de su ciudad, con su servicio de
desechos del hogar o con la tienta donde compró el producto.
VALERA es una marca registrada de
Ligo Electric S.A. - Suiza
europeas 2004/108/CE, 2006/95/CE, 2009/125/CE y al reglamento
(CE) N. 1275/2008.
GARANTÍA
VALERA garantiza el aparato que Ud. ha comprado bajo las
siguientes condiciones:
1. Son válidas las condiciones de garantía establecidas por
nuestro distribuidor oficial en el país de compra. En Suiza y
en los países en los que está en vigor la directiva europea
44/99/CE, el periodo de garatía es de 24 meses para uso
doméstico y de 12 meses para uso profesional o análogo. El
periodo de garantía inicia a partir de la fecha de compra del
equipo. Como fecha de compra se entiende la fecha del
certificado de garantía debidamente rellenado y sellado o la
fecha del documento de compra.
2. La garantía se aplica únicamente presentando este certificado
de garantía o el documento de compra.
3. La garantía cubre la eliminación de todos aquel los defectos
que han surgido durante el período de vigencia de la garantía,
ocasionados por defectos comprobados de materiales o de
fabricación. Los defectos del aparato se pueden eliminar
efectuando la reparación o sustituyendo el producto. La
garantía no cubre defectos o daños causados por la conexión
a la red eléctrica no conforme con las normas, por el uso
impropio del producto o por la inobservancia de las Normas
de Uso.
4. No se incluye ningún otro tipo de reivindicación, en particular
indemnizaciones de posibles daños que no formen parte del
aparato, con excepción de la eventual responsabilidad
establecida expresamente por las leyes vigentes.
5. El servicio de garantía se efectúa sin cargo y no constituye un
prolongamiento o un nuevo inicio del período de garantía.
6. La garantía decae si el aparato se ha alterado, ha sido
reparado por personas no autorizadas.
En caso de avería, se debe entregar el aparato bien embalado y
con el certificado de garantía regularmente fechado y sellado
por el vendedor, a uno de nuestros Centros de Asistencia
autorizados o al vendedor, quien se encargará de remitirlo al
importador oficial para efectuar la reparación de la garantía.
00060635 int ott2012:Layout 1 30/10/2012 13.11 Pagina 18

19
Nederlands
AANWIJZINGEN VOOR DE MONTAGE EN HET GEBRUIK
Lees deze aanwijzingen zorgvuldig door
WAARSCHUWINGEN VOOR UW VEILIGHEID
•Belangrijk: voor extra veiligheid raden wij u aan de
elektrische installatie waarmee het apparaat gevoed
wordt te voorzien van een aardlekschakelaar met
een stroomsterkte van niet meer dan 30 mA. Wendt
u voor meer informatie tot uw elektrotechnicus.
•Controleer voor gebruik van het apparaat of het
goed droog is.
•LET OP: gebruik dit apparaat niet in de buurt
van badkuipen, wastafels of andere houders
met water.
•Dit apparaat mag worden gebruikt door kinderen
vanaf 8 jaar en door personen met beperkte
lichamelijke, zintuiglijke of geestelijke vermogens of
met weinig ervaring en/of kennis, mits deze
personen onder passend toezicht staan of
geïnstrueerd zijn over het gebruik van het apparaat
en ze zich bewust zijn van de bijbehorende gevaren.
•Kinderen mogen niet met het apparaat spelen.
•De reiniging en het onderhoud mogen niet zonder
toezicht door kinderen worden uitgevoerd.
• Koppel het toestel uitsluitend aan wisselstroom aan, en kijk na of de netspanning overeenstemt met de op het toestel vermelde
spanning.
• Dompel het toestel nooit in water of in een andere vloeistof onder.
• Hang het toestel niet op een plaats vanwaar het in water of in een andere vloeistof zou kunnen vallen.
• Probeer een elektrisch toestel dat in het water is gevallen er niet uit te halen, maar trek de stekker onmiddellijk uit het stopcontact.
• Zet het toestel steeds uit wanneer u het terughangt.
00060635 int ott2012:Layout 1 30/10/2012 13.11 Pagina 19

20
• Gebruik de haardroger zodanig dat de invoer- en
afvoerroosters altijd vrij blijven.
• Gebruik het toestel niet als het een defect vertoont, als het
gevallen is of als de kabel beschadigd is.
• Probeer een elektrisch apparaat niet zelf te herstellen, maar
wend u tot een erkende hersteldienst.
• Mocht het elektrische snoer van dit toestel beschadigd
worden, dan moet die door de producent, door de erkende
Technische Dienst of door een geschoold technicus
vervangen worden, om problemen te vermijden.
• Indien u de haardroger in een badkamer gebruikt, dan is het
noodzakelijk om de stekker na hetgebruik uit het stopcontact
te halen aangezien de nabijheid van water een gevaar kan
vormen, ook als de haardroger uitgeschakeld is.
INSTRUCTIEAANWIJZINGEN
Muursteun voor haardroger model 032.01
032.02 - 032.04 - 032.04/L
Model 032.01
Basismodel met schakelaar.
Model 032.02
Model met Europese standaard-contactdoos 16A en een
schakelaar voor de haardroger.
Model 032.04 - 032.04/L
Model met universele scheermachine en schakelaar voor de
haardroger. Een veiligheidstran sformator isoleert de stekker van het
scheerapparaat van de netspanning, en de bescherming verhindert
dat het toestel met een vermogen van meer dan 20 VA kan worden
gebruikt.
Installatie van de muursteun
Dit mag uitsluitend door een geschoold elektricien gebeuren, zodat
de installatie aan de geldende veiligheidsregels beantwoordt. De
haardroger moet zodanig worden geplaatst dat iemand die in bad
zit of onder de douche staat, er in geen geval bijkan, zelfs niet
wanneer het snoer maximaal wordt gespannen.
Er zijn 2 verschillende installatiemethoden.
A = rechtstreeks aan het elektriciteitsnet verbinden
B = aan het elektriciteitsnet verbinden via een externe draad
Aandacht: zet de hoofdschakelaar van
het elektriciteitsnet af vóór u aan de
montage begint.
Vóór het toestel moet een schakelaar worden geïnstalleerd
waarvan de contactpunten minimum 3mm per pool openstaan.
Telkens wanneer het toestel wordt geopend, moet u de
schakelaar gebruiken om de stroomkring te openen.
Methode A (rechtstreeks aan het
elektriciteitsnet verbinden) voor de
modellen 032.01 - 032.02 - 032.04
032.04/L
Muursteun model 032.02 vereist een voedingskabel van
minimum 3x1,5 mm2.
De muursteunen model 032.01, 032.04 en 032.04/Lvereisen
een voedingskabel van minimum 2x1,0 mm2.
1. Neem het deksel (1) boven aan de muursteun weg, door het
los te schroeven (14).
2. Breek het plastic membraan (2) dat in het bovenste deel van
de muursteun zit.
3. Leid de hoofdvoedingskabel die uit de wand komt (3), in het
overeenkomstige gaatje in het gebroken membraan (2).
4. Bevestig het bovenste deel van de muursteun aan de wand,
met de bijgevoegde pluggen en schroeven.
5. Verwijder de klem (4), verbind de voedingskabel (3) met de
klem (4) zoals op de tekening is aangeduid, en plaats de klem
(4) weer op haar plaats.
6. De modellen 032.01, 032.04 en 032.04/L hebben een
dubbele isolatie en vereisen geen aarding. In model 032.02
met de Europese standaard-contactdoos, moet de
aardingsgeleider van het elektriciteitsnet aan de klem (4)
worden verbonden. In datgeval moet u ook nakijken of het net
voor een belasting van 16A voorzien is.
7. Hang het deksel van de muursteun erop (let erop de draadleider
(6) juist te plaatsen) en bevestig het met de schroeven (14).
8. Zet de netschakelaar aan. De haardroger is klaar voor gebruik.
Methode B (aansluiting aan het
elektriciteitsnet via een externe kabel)
voor de modellen 032.01 - 032.04
032.04/L
De voedingskabel moet minimum van het type H05VV-F 2x1
mm2zijn.
1. Neem het deksel (1) boven aan de muursteun weg, door het
los te schroeven (14).
2. Breek het plastic membraan (8) dat in de rand links onderaan
van de muursteun zit en leid de tweede draadleider er
doorheen.
3. Bevestig het bovenste deel van de muursteun aan de wand,
met de bijgevoegde pluggen en schroeven.
4. Maak de voedingskabel waarmee het toestel aan het
elektriciteitsnet gaat worden verbonden ongeveer 200 mm
bloot (13);breng de draadleider erin (11), verwijder de klem
(9), verbind de voedingskabel (13) met de klem (9), en plaats
de klem (9) weer op haar plaats. Plaats het ontblote deel van
de kabel heel precies op zijn plaats, zoals op de tekening is
aangeduid. Bevestig de kabelklem (10) met de voorziene
schroeven. Opgelet: Dit toestel heeft een dubbele isolatie en
is niet met een aarding uitgerust.
5. Plaats de draadleiders (6) en (11) op de voorziene plaats.
6. Hang het deksel van de muursteun erop (let erop dat de
draadleiders (6) en (11) op hun juiste plaats zitten).
7. Bevestig het deksel met de schroeven (14).
8. Zet de netschakelaar aan.De haardroger is klaar voor gebruik.
GEBRUIKSAANWIJZING
Schakelaars
Schakelaar van de muursteun 0-1 = uit/aan
Haardroger model 530.02 - 530.15 - 530.22
533.03 - 533.05 - 540.05 - 540.06 - 542.05 en
542.06
Drukknop van de haardroger ON = aan/uit
(het toestel staat aan
zolang u de schakelaar
ingedrukt houdt)
Schakelaar Cool = (minimum vermogen)
1 = (gemiddeld vermogen)
2 = (maximum vermogen)
00060635 int ott2012:Layout 1 30/10/2012 13.11 Pagina 20

21
Haardroger
Type 554.02 - 554.05 - 554.08 - 554.11
554.13
Drukknop van de haardroger
ON=aan/uit (het toestel staat aan zolang u de schakelaar
ingedrukt houdt)
Schakelaar
1=(minimum vermogen)
2=(maximum vermogen)
Haardroger
Type 554.03 - 554.06 - 554.09 - 554.12
Schakelaar
0=(uit)
1=(minimum vermogen)
2=(maximum vermogen)
Haardroger model 530.03 - 530.14
530.16 - 530.23 - 533.04 - 533.06 - 554.01
554.04 - 554.07 - 554.10
Drukknop = aan / uit
(het toestel staat aan
zolang u de schakelaar
ingedrukt houdt)
Haardroger model 561.02 - 561.17
561.20 - 561.22
Drukknop van de haardroger ON = aan/uit
(het toestel staat aan
zolang u de schakelaar
ingedrukt houdt)
Linkse schakelaar 0 = uit
1 = Traag
2 = Snel
Rechtse schakelaar Cool = Koude lucht
1 =Matig warme lucht
2 =Warme lucht
ONDERHOUD
Wanneer deze haardroger niet wordt gebruikt, moet de
schakelaar op de muursteun op UIT (0) gezet worden.
Het toestel vereist geen bijzondere zorgen.
Maak het apparaat schoon met een met water bevochtigde doek.
LET OP: het is streng verboden om de föhn schoon te maken
met schoonmaakmiddelen, oplosmiddelen, alcohol en diverse
chemische producten.
Maak zo nodig het luchtinvoerrooster schoon meteen penseel
of een stofzuiger.
Belangrijke opmerking
Deze haardroger beantwoordt aan de veiligheidsnormen voor
elektrische toestellen. Deze haardroger is voorzien van een
veiligheidsthermostaat. Bij oververhitting valt hij automatisch uit;wat
later is hij weer gebruiksklaar. Controleer telkens voor u het toestel
gebruikt of de luchtinvoer- en uitvoerroosters van het toestel perfect
netjes zijn. Dit apparaat voldoet aan de Europese richtlijnen
2004/108/EG, 2006/95/EG, 2009/125/EG en aan de verordening
(EG) nr. 1275/2008.
Het symbool op het product of op de verpakking wijst erop
dat dit product niet als huisafval mag worden behandeld. Het
moet echter naar een plaats worden gebracht waar elektrische
en elektronische apparatuur wordt gerecycled. Als u ervoor zorgt
dat dit product op de correcte manier wordt verwijderd,
voorkomt u mogelijk voor mens en milieu negatieve gevolgen
die zich zouden kunnen voordoen in geval van verkeerde
afvalbehandeling. Voor meer details in verband met het recyclen
van dit product, neemt u het best contact op met de
gemeentelijke instanties, het bedrijf of de dienst belast met het
verwijderen van huishoudafval of de winkel waar u het product
hebt gekocht.
VALERA is een geregistreerd handelsmerk van
Ligo Electric SA
GARANTIE
Valera biedt volgende garantievoorwaarden:
1. Van toepassing zijn de garantievoorwaarden die door onze
officiële distributeur in het land van aankoop zijn vastgesteld.
In Zwitserland en in de landen waar de Europese richtlijn
44/99/CE van kracht is, geldt een garantieperiode van 24
maanden bij huishoudelijk gebruik en van 12 maandenbij
professioneel of soortgelijk gebruik. De garantieperiode loopt
vanaf de aankoopdatum van het apparaat. De aankoopdatum
is de datum die staat op dit volledig ingevulde en door de
verkoper gestempelde garantiebewijs of op de aankoopbon.
2. De garantie is enkel van toepassing na voorlegging van het
certificaat of het bewijs van aankoop.
3. De garantie dekt het verwijderen van bewezen materiaal- of
fabricagefouten, tijdens de garantie- periode. Dit kan
gebeuren door reparatie of vervanging van het toestel. De
garantie is niet van toepassing in geval van schade door
aansluiting op een netwerk dat niet aan de officiële normen
voldoet, noch in geval van niet naleven van de
gebruiksaanwijzing.
4. Elke andere schadeclaim van welke aard dan ook is
uitgesloten, in het bijzonder terugbetaling van schade
veroorzaakt door externe factoren, buiten degenen die
uitdrukkelijk bepaald zijn door de van kracht zijnde wetgeving.
5. De garantie-service is gratis. Deze vertegenwoordigt geen
enkele verlenging noch vernieuwing van de garantie periode.
6. De garantie vervalt indien het toestel vervalst is of gerepareerd
werd door een niet erkende persoon.
In geval van defect, gelieve het toestel behoorlijk verpakt, samen
met het garantiebewijs (gedateerd en voorzien van de stempel
van de verkoper) terug te sturen naar één van de officiële Service
Centra, of te bezorgen aan de winkel waar het toestel werd
aangekocht. Zij zullen het nodige doen om uw toestel onder
garantie te laten herstellen.
00060635 int ott2012:Layout 1 30/10/2012 13.11 Pagina 21

22
Română
INSTRUCŢIUNI DE MONTARE ŞI DE UTILIZARE
Citiţi cu atenţie aceste instrucţiuni
PRECAUŢII DE SIGURANTĂ
• Important: pentru a garanta o protecţie
suplimentară, este recomandat ca un întrerupător
diferenţial cu un curent de intervenţie nu mai mare
de 30 mA să fie instalat în sistemul electric cu care
e alimentat aparatul. Pentru mai multe informaţii
consultaţi un electrician.
• Asiguraţi-vă că aparatul este perfect uscat înainte
de a-l folosi.
• ATENŢIE: nu utilizaţi acest aparat în apropierea
căzilor, a chiuvetelor sau a altor recipiente care
conţin apă.
• Acest aparat poate fi utilizat de copii începând cu
vârsta de 8 ani şi de persoane cu capacităţi fizice,
senzoriale sau mentale reduse, sau de persoane
lipsite de experienţă şi de cunoştinţe,
dacă acestea sunt supravegheate în mod
corespunzător sau dacă au fost instruite în legătură
cu utilizarea aparatului în mod sigur şi dacă înţeleg
care sunt pericolele legate de acesta.
• Copiii nu trebuie să se joace cu aparatul.
• Operaţiile de curăţare şi de întreţinere nu trebuie să
fie efectuate de copii nesupravegheaţi.
•
Conectaţi aparatul numai la o sursă de curent alternativ si verificaţi ca sursa de curent să corespundă cu numărul de V indicat pe
aparat.
•
Nu introduceţi aparatul în apă sau alte lichide.
00060635 int ott2012:Layout 1 30/10/2012 13.11 Pagina 22
Other manuals for 530
2
This manual suits for next models
9
Table of contents
Languages:
Other VALERA Hair Dryer manuals

VALERA
VALERA 530 User manual

VALERA
VALERA Hotello Operation manual

VALERA
VALERA IONIC COMFORT 613 User manual

VALERA
VALERA VA 8601 User manual

VALERA
VALERA Hotello Operation manual

VALERA
VALERA Excel 2000 User manual

VALERA
VALERA 545 Series User manual

VALERA
VALERA 533 Operation manual

VALERA
VALERA 533.03 Operation manual

VALERA
VALERA SWISS IONIC COMFORT User manual