manuals.online logo
Brands
  1. Home
  2. •
  3. Brands
  4. •
  5. Valken
  6. •
  7. Paintball Equipment
  8. •
  9. Valken GOTCHA User manual

Valken GOTCHA User manual

Below is a picture of a correctly reassembled Gotcha marker.
Please note when removing the top cover some of the parts may spring out.
It is advisable to put a cloth over the gun, this will prevent the loss of some
of the small parts.
reassembly.
1. Unscrew the barrel shown by the Blue arrow.
2. Unscrew the 10 screws shown by the Black arrows in white circles.
3. Carefully separate the 2 casings keeping an eye out for anything that springs out.
The Gotcha Gun is a 50cal low impact spring powered gun, designed to be maintained by
the operator. This pictorial guide is designed to help users disassemble and reassemble
the gun, install new parts, and maintain the gun.
The breach simply
slots into place as
shown in the picture
below, and marked
with the green arrow.
1. Push the cocking rod onto the piston housing marked with the
red arrow.
marked with the blue arrow.
3. Slide the assembled unit into the breech. It should lay flat in
the body as shown in the picture.
Once you are at this stage you can carefully put the top
cover back on and screw the 10 screws that hold the 2
sides together.
The next page shows how various springs fit onto the
parts.
1. Insert the spring and spring guide as shown in the picture below.
2. Install the trigger and sear as shown in picture marked by the blue arrow.
3. Install the an-double cock lever shown by the yellow arrow.
4. Install the trigger stop shown by the green arrow.
All the above items have springs these will be shown next page in detail.
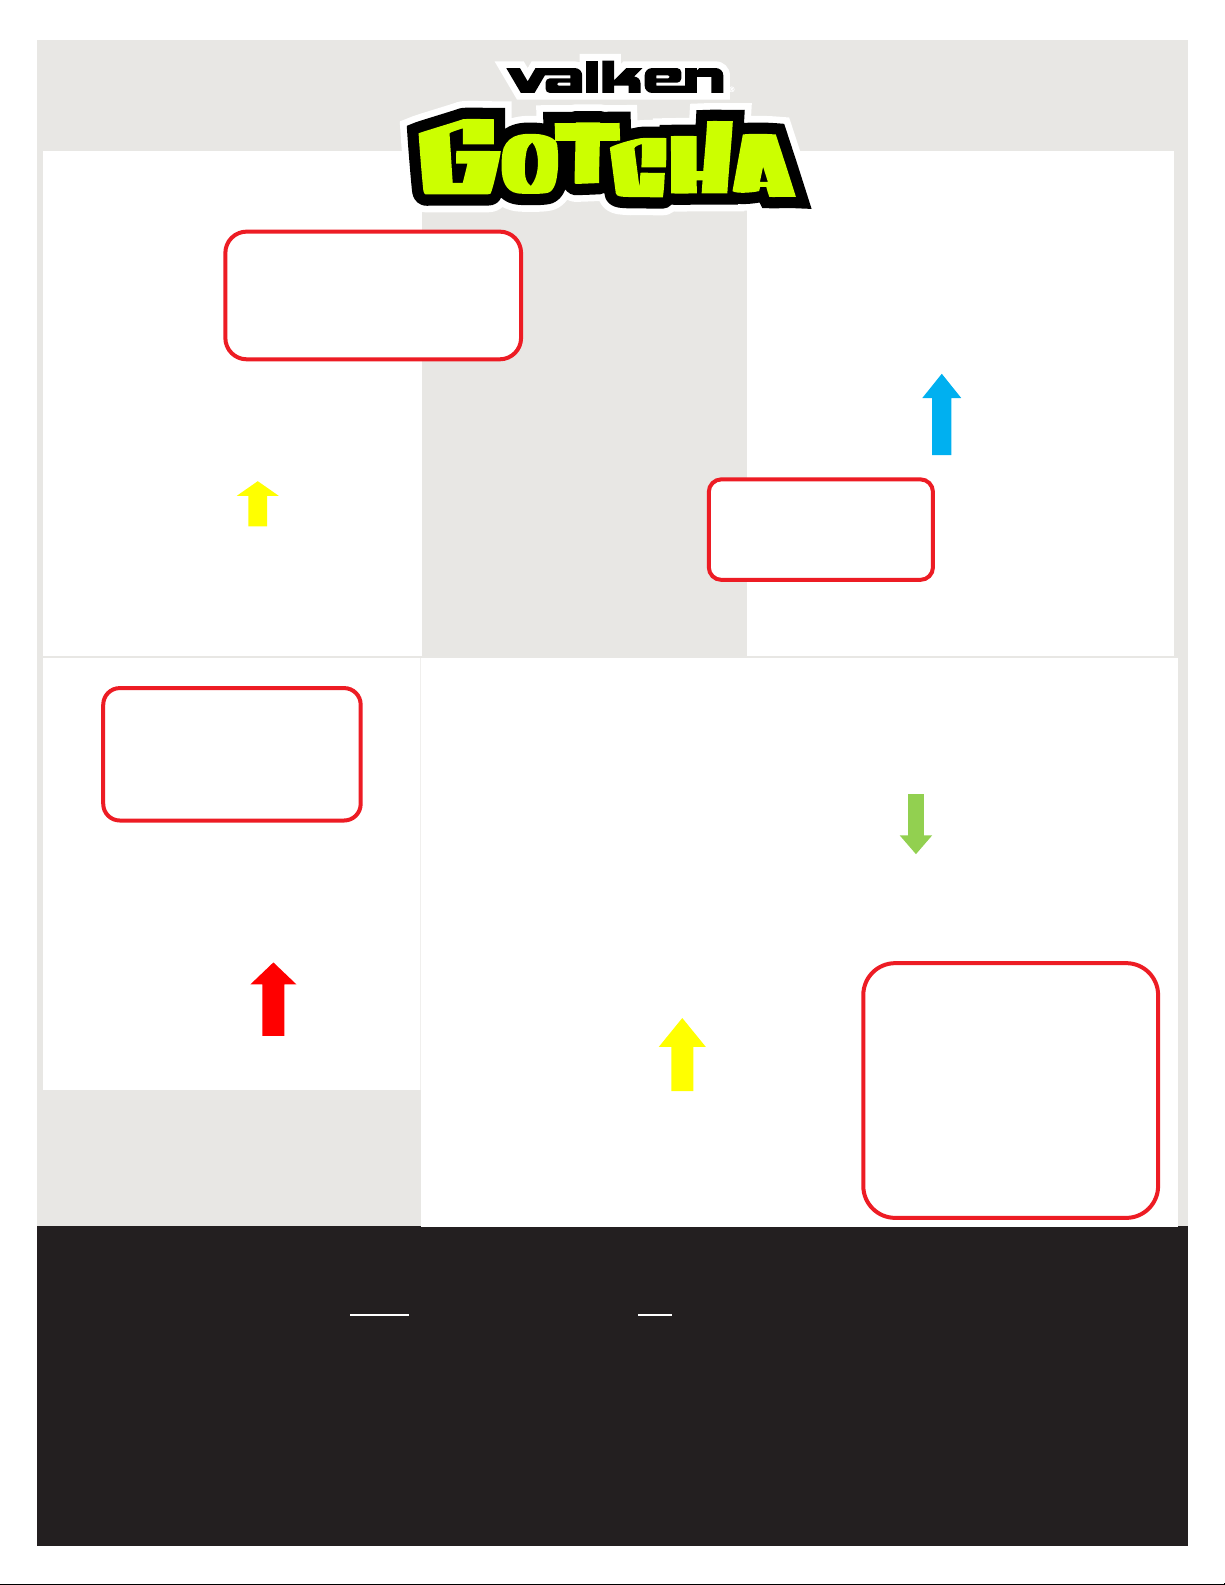
The Sear spring is installed as
shown in the picture below.
And marked by the red arrow.
The trigger stop spring fits
like this ( green arrow )
The trigger and sear fit
like this ( Yellow arrow )
Tech support and parts are available from the locations below
Europe USA
Valken Sports UK Valken Sports USA
3 Lancaster Way 1 Hawk Ct.
Earls Colne Business Park Swedesboro NJ 08085
United Kingdom USA
CO6 3NS 866-97VALKEN
+44 1206 918230 info@valken.com
The trigger stop fits with the spring as
shown the picture. If this is inserted
incorrectly the gun will not cock.
The spring goes into the
small hole marked by the
blue arrow.

Other Valken Paintball Equipment manuals

Valken The Unit User manual

Valken

Valken The Unit User manual

Valken Proton User manual

Valken

Valken Proton User manual

Valken Code User manual

Valken

Valken Code User manual

Valken Code User manual

Valken

Valken Code User manual

Popular Paintball Equipment manuals by other brands

GOG Envy Operation and Adjustment Instructions

GOG

GOG Envy Operation and Adjustment Instructions

32 Degrees Icon-E owner's manual

32 Degrees

32 Degrees Icon-E owner's manual

PMI Piranha VTL owner's manual

PMI

PMI Piranha VTL owner's manual

Invert Paintball HALO B manual

Invert Paintball

Invert Paintball HALO B manual

Eclipse EGO user manual

Eclipse

Eclipse EGO user manual

PLANET ECLIPSE ETHA3 user manual

PLANET ECLIPSE

PLANET ECLIPSE ETHA3 user manual

Indian Creek Design PROMASTER instruction manual

Indian Creek Design

Indian Creek Design PROMASTER instruction manual

32 Degrees Rebel Xtreme Operation guide

32 Degrees

32 Degrees Rebel Xtreme Operation guide

manuals.online logo
manuals.online logoBrands
  • About & Mission
  • Contact us
  • Privacy Policy
  • Terms and Conditions

Copyright 2025 Manuals.Online. All Rights Reserved.