Valken The Unit User manual
OWNER’S MANUAL
“The Unit” Air Fill Station
For more information call (856) 812-2800 or visit www.valkendealer.com
For more information call (856) 812-2800 or visit www.valkendealer.com
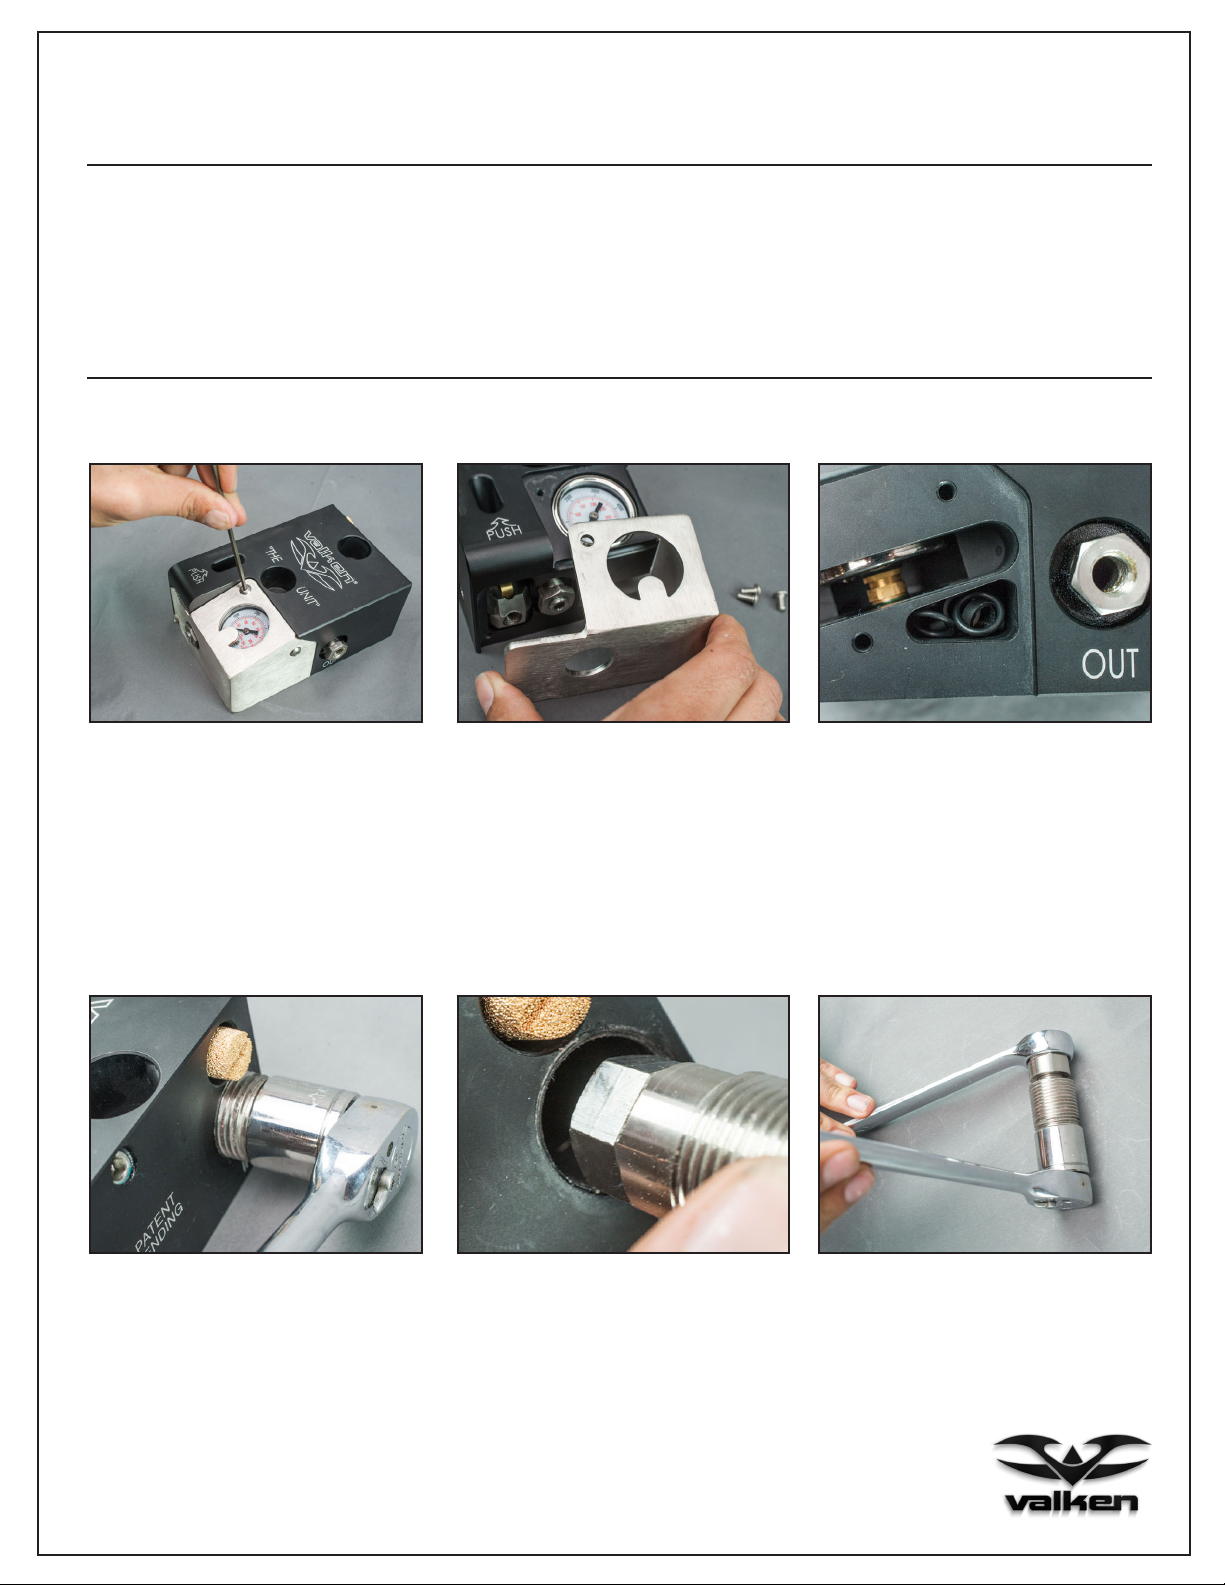
ACCESSING THE REBUILD KIT
CHANGING THE VALVE PLUNGER
REQUIRED TOOLS:
INSTRUCTIONS:
#248 “Blue” Loctite
1/2” Deep Socket and Ratchet
7/8” Socket and Rachet
1.Remove the gauge cover plate
by removing the (4) stainless
steel screws using a 1/8”
allen wrench.
1.Remove valve cartridge using
7/8” ratchet. *May have to heat
2.Remove the gauge cover and
set aside.
2.Completely remove valve
cartridge from filling station.
3.Location of the rebuild kit
3.Using the 7/8” wrench and
7/8” socket, unscrew the
valve cartridge cap. *May have to
heat
7/8” Adjustable Crescent Wrench
1/8” Allen Wrench
1/8” Allen Wrench
Dental Pick
Torque Wrench

For more information call (856) 812-2800 or visit www.valkendealer.com
CHANGING THE VALVE PLUNGER CONT’D
4.Remove the plunger and
spring assembly.
7.Remove black plunger from
spring and replace with new
plunger from rebuild kit.
(if needed)
5.Inspect O-ring for damage.
8.Make sure plunger is fully
seated in spring.
6.Replace o-ring if damaged
with large o-ring from rebuild kit.
9.Replace plunger and spring
assembly into the valve cartridge.
10.Make sure plunger is
installed as shown. 11.Apply a small amount of
#248 “Blue” Loctite to the
small threads.
12.Re-install valve cartridge
cap and ensure the plunger is in
proper position.

CHANGING THE VALVE PLUNGER CONT’D
13.Tighten valve cartridge cap
using the 7/8” wrench and
the 7/8” ratchet. Tighten snugly.
Torque to 45 ft/lbs.
16.Reinstall valve cartridge
14.Inspect o-ring at end of
the valve cartridge. If damaged,
replace with large o-ring from the
rebuild kit.
17.Tighten valve cartridge
cap using the 7/8” wrench.
Torque to 45 ft/lbs.
15.Apply a small amount of
#248 “Blue” Loctite to the
Large Threads.
For more information call (856) 812-2800 or visit www.valkendealer.com
CHANGING THE PIN BUSHINGS
1.Unscrew the handle and
Remove. 2.Remove the pivot bolt using
1/8” allen wrench. 3.Remove the pivot.

4.Note the 1/2” Hex fastener
at the bottom of the pocket.
7.Replace plastic seat and small
O-ring from the pocket using a small
dental pick.
5.Using the 1/2” deep well
socket, unscrew the 1/2” pin
carriage.
8.Remove the pin from the pin
carriage.
6.Remove pin and pin carriage
9.Inspect pin split bushings
(they should be split). If worn,
replace with new split bushings
in the rebuild kit.
For more information call (856) 812-2800 or visit www.valkendealer.com
CHANGING THE PIN BUSHINGS CONT’D
10.Separate split bushings
with your fingers and slide over
pin.
11.Splits in split bushings
should appear invisible once
installed.
12.Reinstall pin into the pin
carriage.

13.Apply a small amount of
#248 “Blue” Loctite to outer
threads.
17.Snug pin carriage using
1/2” deep well socket and ratchet.
*Do not overtighten.
15.Reinstall pin carriage
assembly into fill station.
14.Install new seat onto pin.
18.Reinsert pivot.
16.Tighten the pin carriage by
hand using the 1/2” deep well
socket.
For more information call (856) 812-2800 or visit www.valkendealer.com
CHANGING THE PIN BUSHINGS CONT’D
19.While sliding pivot into
pocket, insert handle and
screw into pivot.
20.Hold handle to align pivot
bolt. 21.Insert pivot bolt.
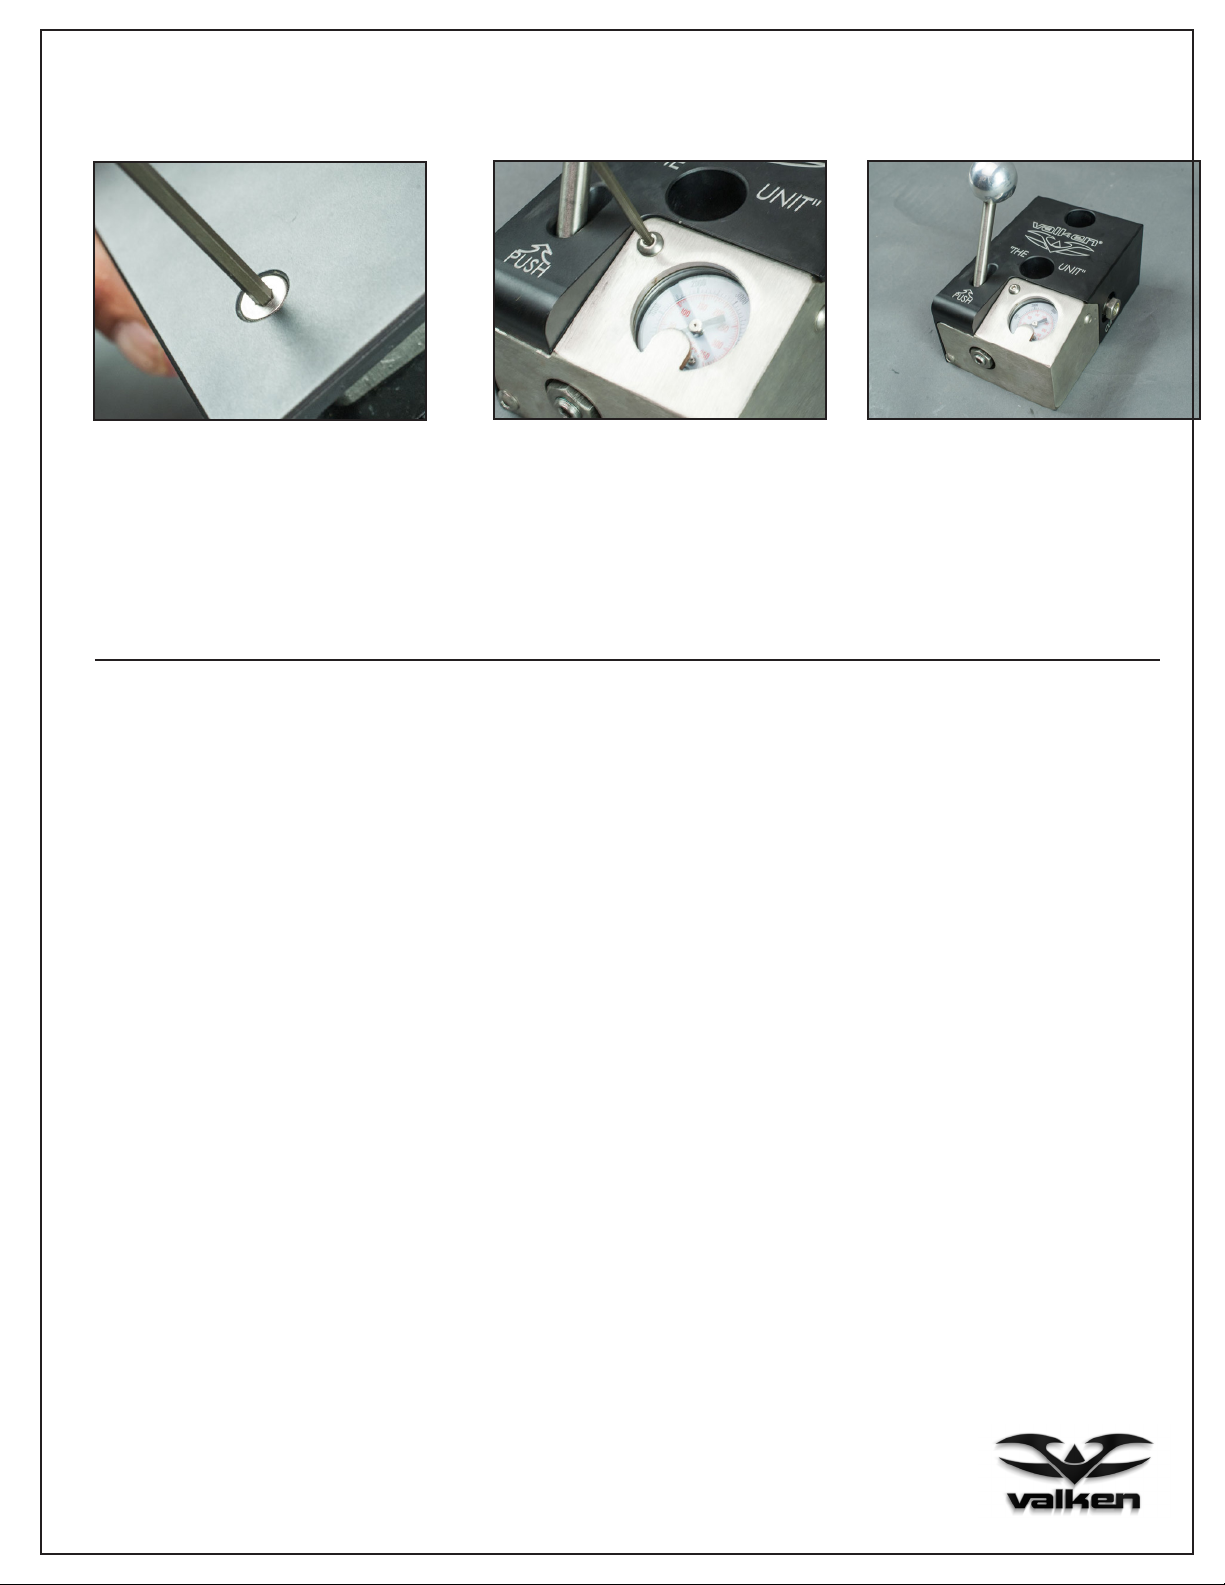
23.Reinstall gauge cover
plate 24.Finished product
22.Tighten pivot bolt using
1/8”allen wrench.
ISSUE: Station leaks while under pressure but not in use.
SOLUTION: Valve cartridge needs to be rebuilt
ISSUE: Leaking out of brass purge valve while filling
SOLUTION: Plastic seat and o-ring needs to be replaced
ISSUE: Handle will not return after station rebuild
SOLUTION: Pin carriage may be installed too tightly or
plastic seat may not be seated correctly
GUIDE FOR LEAKS:
***WE STRONGLY RECOMMEND USING
“The Unit” WITH AN INLINE REGULATOR.
For more information call (856) 812-2800 or visit www.valkendealer.com
Table of contents
Other Valken Paintball Equipment manuals


