Valley Electronics pearly User manual
the small, safe, intelligent cycle computer
..................

....................................................................
Content
The most important things first . . . . . . . . 5
Operating levels . . . . . . . . . . . . . . . . . . . . 6
Function keys. . . . . . . . . . . . . . . . . . . . . . 7
Fertility displays. . . . . . . . . . . . . . . . . . . . 8
Potential fertility display
Retroactive fertility display
How to start . . . . . . . . . . . . . . . . . . . . . . . 10
Self-testing and initial temperature reading
Switching on pearly
Automatic switching off
Return to the time display
Setting the time and date
Enter past menstruation data
Setting alarm time
Activating alarm
Temperature reading . . . . . . . . . . . . . . . . 14
Enter menstruation data. . . . . . . . . . . . . . 16
Activating “M”
Enter menstruation data at a later time
Further information . . . . . . . . . . . . . . . . . 17
Travelling / Time zones
Shift work
Pregnancy display
Mono-phases
Back in operation after interruption
Cleaning the thermometer
Technical details . . . . . . . . . . . . . . . . . . . 18
Battery
Print-out of cycle data
Deleting saved data
Alphabetical index . . . . . . . . . . . . . . . . . . 19

....................................................................
We would like to congratulate you on your decision to have a natural
contraception in future.
With pearly you have a very reasonable and healthy and environmentally
friendly alternative to conventional contraception methods along with the
optimal safety on “green days”.
Please read these instructions attentively and completely for your own
safety. Everything you should know about the device can be found in the
Table of Contents or in the Alphabetic Index.
We wish you a good start.
Congratulations
....................................................................
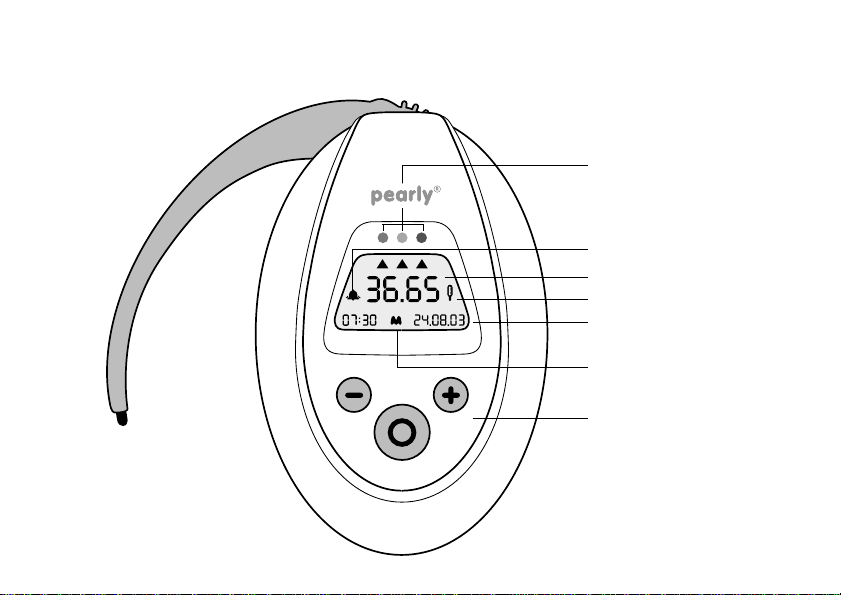
Function keys
Fertility display
Red-yellow-green
Temperature reading value
Alarm indicator
Time / alarm time + date
Menstruation display
Thermometer
Thermometer symbol
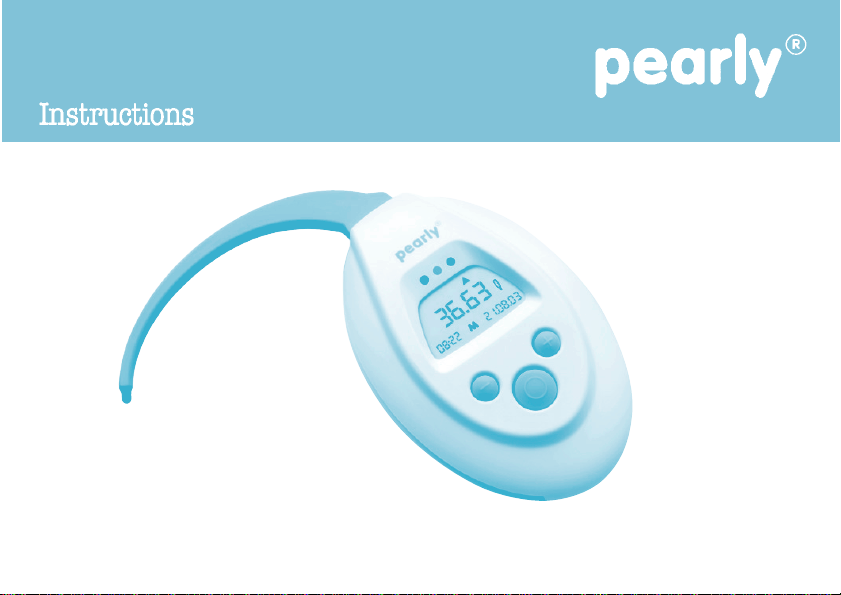
pearly

................................................................
• You can take your temperature early in the morning right after waking up.
•Always take your temperature immediately after waking up, before getting up,
i.e. before becoming active in any way.
(morning temperature = basal body temperature)
• If you have past menstruation data, please enter it before the first temperature
reading.
• The alarm clock must be set on the previous day before 12 p.m. and must be
activated for the first day of application.
• Please stop taking the pill before using pearly.
Because: The programme is based on the fact that the ovulation is accurately
identified. The pill, however, prevents the ovulation.
• The coil which is doped with hormones must be removed before beginning.
In case of a copper coil it is recommended to remove it.
Right from the beginning the programme works with entered historical data.
The more regularly you take your temperature, the faster the device learns
to know your individual cycle.
It shows more and more green days (infertile days) and the red days (fertile
days) are more and more limited.
5
The most important things first

....................................................................
Operating levels
press shortly = switch it on
set date
via time display
± 12.00 am/pm
ALARM TIME
TIME LEVEL
off / on set alarm time
5 seconds
5 seconds
hours
shortly
press shortly
press shortly / back to the time level
enter menstruation data
“M” yes advance display up to 6 days
up to 99 days retroactive
FERTILITY LEVEL
5 seconds
FERTILITY FERTILITY
pearly switches off after 30 seconds of inactivity
TEMPERATURE READING VALUE + FERTILITY / CYCLE DAY
“M” no
set time
5 seconds
hours
shortly
ALARM CLOCK DATETIME
minutes minutes 5 seconds

................................................................ 7
Function keys
Round button
• With the round button you can choose
between time level and fertility level.
• With the round button you can prepare
individual settings.
• Ready for setting: press and hold the
round button for 5 seconds
• The display flashes, it is ready for setting.
The respective data can be advanced or
reversed by pressing the plus or minus
button.
• Setting completed: press and hold the
round button for 5 seconds
• Confirmation of the desired input: the
flashing stops and there is an acoustic
signal for confirmation.
Back to the starting position
• By pressing two buttons simultaneously
you can always return to the starting
position.
Plus button
• With the plus button you can advance
and enter data (for example to confirm
menstruation).
• One press on the plus button advances
the display by one unit respectively.
Minus button
• With the minus button you can go back-
wards (for example displays of past
temperature reading values).
• One press on the minus button reverses
the display by one day respectively.
Fast mode
• By pressing and holding the plus or
minus button, you can fast advance or
go backwards.

...............................................................
8
Fertility displays
The fertility is indicated by three colours:
green infertile
yellow learning area and
transition area,
missing temperature
reading value
(e.g. at the beginning of
the application or inter-
ruption of use)
red
fertile
arrow
prognosis
flashes
ovulation day
on red
Proceeding from the time display, press
the round button once.
• The temperature reading value of the
day, alternating with the current cycle
day and the possibly entered “M” data
is shown.
• The triangular arrows show the
respective fertility of the day:
red, yellow or green.
TEMPERATURE
READING VALUE CYCLE DAY

................................................................
Potential fertility display
Proceeding from the temperature reading
value
• Press the plus button once to see
tomorrow’s fertility to be expected.
• Press the plus button several times to
see the fertility of the following 6 days.
Retroactive fertility display
All previous temperature reading values
can be retrieved up to 99 days.
Proceeding from the temperature reading
value
• Press the minus button once. By
pressing several times you return into
the past fertility displays step by step.
By holding the minus button you go to
the fast mode.
• By pressing the plus button you return
to the starting position on a day-to-day
basis or in the fast mode.
• The fertility and temperature reading
value of the respective date is shown
respectively.
• By pressing two buttons simultaneously,
you return to the starting position.
9
Fertility displays
Every prediction is a prognosis.
The fertility of a “prognosis day” may
deviate from the fertility ascertained
on the respective day. The current
fertility shown is applicable.

...............................................................
10
Self-testing and initial temperature reading
pearly shows you all displays in a self-
testing.
Proceeding from the time display:
• Press and hold the plus button for 5
seconds.
• pearly now runs through all its symbols
independently. The symbols are visible.
• Now press any button, the thermometer
symbol flashes and is ready for an initial
temperature reading. The initial tempera-
ture reading value is shown but not
saved.
• By pressing the minus and plus button
simultaneously the procedure is comple-
ted.
Switching on pearly
Press any button.
Automatic switching off and automatic
return into the time display
• If you do not press any button for 30
seconds, the device automatically
returns to the time display.
• When you press the plus and the minus
button simultaneously, the device auto-
matically returns to the time display.
• The device is automatically switched off
after 30 seconds when the time display
is reached.
Table of contents
Other Valley Electronics Medical Equipment manuals


