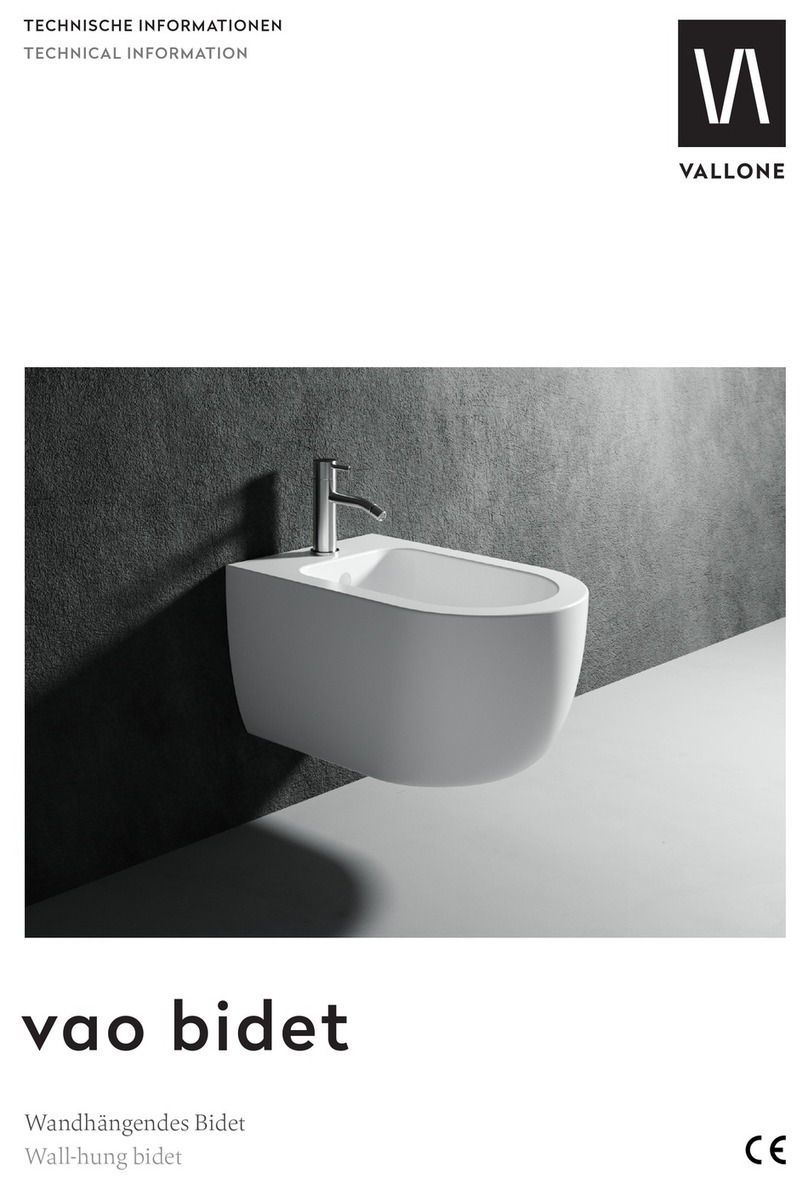
Vallone Vao User manual

vao urinal
TECHNISCHE INFORMATIONEN
TECHNICAL INFORMATION
Wandhängendes Urinal mit rückseitigem Zulauf
Wall-hung urinal with rear inlet

2V.2023.8.1
vao urinal
ARTIKELNUMMER
ITEM NUMBER
BESCHREIBUNG
DISCRIPTION
MASSE
DIMENSIONS
GEWICHT
WEIGHT
WEISS MATT 5100-80-0013-MW
WHITE MATT
SCHWARZ MATT 5100-80-0013-MB
BLACK MATT
WANDHÄNGENDES URINAL MIT RÜCKSEITIGEM
ZULAUF, KERAMIK, WEISS MATT, INKL.
MONTAGEMATERIAL
WALL-HUNG URINAL WITH REAR INLET, CERAMIC,
WHITE MATT, INCL. MOUNTING MATERIAL
290 X 330 X 660 MM
25,5 KG
PRODUKTINFORMATIONEN
PRODUCT INFORMATION
ZUSÄTZLICH ERFORDERLICHES PRODUKT
ADDITIONAL REQUIRED PRODUCT
VAO URINAL DECKEL
WEISS MATT 5100-80-0014-MW
WHITE MATT
SCHWARZ MATT 5100-80-0014-MB
BLACK MATT

3V.2023.8.1
vao urinal
LIEFERUMFANG
SCOPE OF DELIVERY
HALTEBLECH A MIT SENKKOPFSCHRAUBEN
INSTALLATION PLATE A WITH COUNTERSUNK SCREWS
HALTEBLECH B MIT SENKKOPFSCHRAUBEN
INSTALLATION PLATE B WITH COUNTERSUNK SCREWS
HALTEBLECH C MIT SCHRAUBEN
INSTALLATION PLATE C WITH SCREWS
HALTEBLECH D MIT SCHRAUBEN
INSTALLATION PLATE D WITH SCREWS
WASSERLEITUNG 3/8“
WATER PIPE 3/8"
SIPHON
SIPHON
HALTEKETTE
RETAINING CHAIN
WANDHALTER AUS KUNSTSTOFF
PLASTIC WALL BRACKET
ZULAUFANSCHLUSS
INLET CONNECTION
SCHRAUBEN FÜR WANDHALTER
SCREWS FOR WALL BRACKETS
URINAL
URINAL

4V.2023.8.1
vao urinal
Alle Maße in Millimetern. Produktionstoleranzen vorbehalten.
All dimensions in millimeters. Production tolerances reserved.
MASSZEICHNUNG
DIMENSIONAL DRAWING
330
210
170
290
1000
660
340
670
WASSERZULAUF
WATER INLET
ABLAUF
OUTLET
1000
530
810
530

5V.2023.8.1
vao urinal
• Die Installation darf nur von geschultem Fachpersonal unter Be-
rücksichtigung der Montageanleitung und den allgemein an-
erkannten Regeln der Technik (a.a.R.d.T.) durchgeführt werden.
Nach erfolgter Installation ist die Montageanleitung dem Endan-
wender auszuhändigen.
• Um eine korrekte Funktion des Produktes zu gewährleisten,
müssen die Anweisungen und Schritte der Montageanleitung be-
folgt werden. Das Urinal ist so zu installieren wie in der
Montageanleitungen angegeben.
• Offensichtliche Schäden am Produkt sind vor der Installation zu
reklamieren. Nach der Installation kann die Reklamation offensicht-
licher Schäden nicht mehr berücksichtigt werden.
• Installation may only be carried out by trained technical staff
and in compliance with the installation instructions and the
generally recognised rules of technology (a.a.R.d.T.). After suc-
cessful installation, the installation instructions must be handed
over to the end user.
• To ensure correct functioning of the product, the instructions
and steps in the installation instructions must be observed.
Urinals must be installed as specified in the installation instruc-
tions.
• Obvious damage to the product must be reported before instal-
lation. Complaints about obvious damage can no longer be
considered after installation.
VOR DER INSTALLATION IST FOLGENDES ZU BEACHTEN:
!
• Vor der Installation ist zu prüfen, ob alle Teile des Lieferumfangs
vorliegen und das Produkt vollständig ist.
• Scharfkantiges Werkzeug sowie schmutziges Arbeitsmaterial
sollten nicht auf dem Produkt abgelegt werden.
• Die einzelnen Komponenten des Produktes oder das Produkt
selbst dürfen nicht verändert oder modifiziert werden. Wir über-
nehmen keine Gewährleistung für Modifikationen und weisen
darauf hin, dass auch die gesetzliche Gewährleistung durch eine
Modifikation des Produktes eingeschränkt oder vollständig auf
gehoben werden kann.
• Die Montageanleitung ist vom Endanwender aufzubewahren.
• Sharp-edged tools as well as dirty working material should not
be placed on the product.
• Before installation, make sure that all parts of the scope of deliq
very are included and that the product is complete.
• The individual components of the product or the product itself
must not be changed or modified. Modifications of the product
are not covered by any warranty and the legal warranty may also
be limited or completely voided due to a modification.
• The installation instructions must be kept by the end user.
PLEASE TAKE NOTE OF THE FOLLOWING BEFORE INSTALLATION:
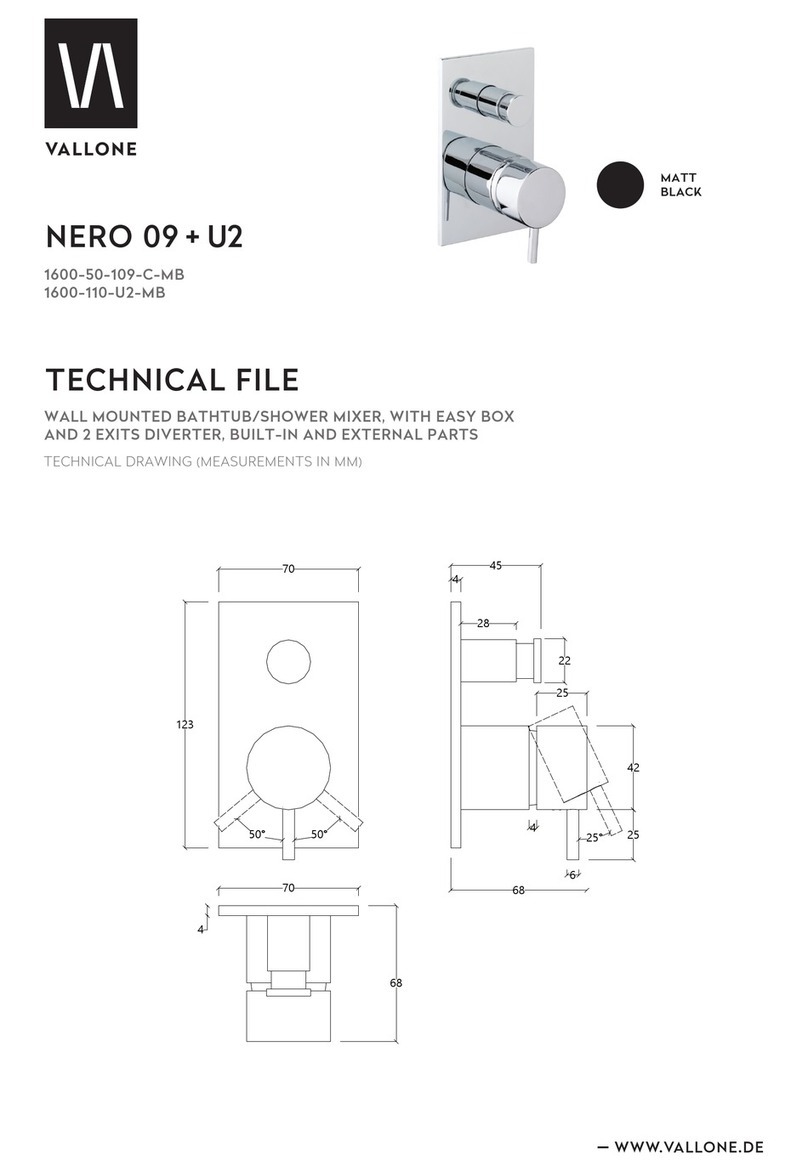
HINWEISE ZUR MONTAGE
NOTES ON ASSEMBLY
6V.2023.8.1
vao urinal
MONTAGEANLEITUNG
INSTALLATION INSTRUCTION
BITTE BEACHTEN SIE:
PLEASE NOTE:
!
Beachten Sie, dass zur Montage ein Unterputz-
spülsystem sowie ein Auslösemechanismus
(Drückerplatte oder Sensor) erforderlich sind.
Zum Anschließen der Wasserleitung wird ein
3/8“-Gewinde benötigt.
Please note that a concealed flushing system
and a trigger mechanism (flush plate or
sensor) are required for installation. A 3/8"
thread is required to connect the water line.
410
535
815
970
170
55
Ø50
G 3/8"

7V.2023.8.1
vao urinal
1Nutzen Sie einen geeigneten Bohrer um die Bohrlöcher
wie auf der Anschlussskizze (S. 6) zu setzen. Beachten Sie,
dass ein 3/8“ Wasser-Anschluss erforderlich ist.
Use a suitable drill to drill the holes as shown on the
connection sketch (p. 6). Note that a 3/8" water-connec-
tion is required.
Befestigen Sie die Wandhalterungen aus Kunststoff zu-
sammen mit dem Halteblech D in den oberen Löchern.
Fasten the plastic wall brackets together with the instal-
lation plate D in the upper holes.
Befestigen Sie die Haltekette im mittleren Loch wie auf
der Skizze gezeigt.
Attach the retaining chain in the center hole as shown in
the sketch.
MONTAGEANLEITUNG
INSTALLATION INSTRUCTION

8V.2023.8.1
vao urinal
MONTAGEANLEITUNG
INSTALLATION INSTRUCTION
Befestigen Sie das Halteblech C wie auf der Skizze ge-
zeigt in den unteren Löchern.
Fasten the installation plate C in the lower holes as
shown in the sketch.
Setzen Sie das Zulaufstück in die vorgesehene Öffnung
vorne innen im Urinal. Befestigen Sie das Zulaufstück auf
der Rückseite des Urinals mit der Kunststoffmutter.
Schließen Sie in diesem Schritt auch die Wasserleitung
am Zulaufstück an sowie den Siphon wie auf der Skizze
gezeigt.
Place the inlet piece in the opening provided on the in-
side front of the urinal. Fasten the inlet piece at the back
of the urinal with the plastic nut.
In this step, also connect the water pipe to the inlet piece
and the siphon as shown in the sketch.

9V.2023.8.1
vao urinal
MONTAGEANLEITUNG
INSTALLATION INSTRUCTION
Befestigen Sie Halteblech A und B auf der Rückseite des
Urinals wie auf der Skizze gezeigt.
Attach installation plate A and B to the back of the
urinal as shown in the sketch.
Hängen Sie das Urinal auf dem unteren Halteblech auf,
verbinden Sie die Haltekette mit dem Halteblech A.
Schließen Sie die Wasserleitung an das Gewinde an und
setzen Sie den Siphon in die Wand ein, indem Sie das
Urinal zur Wand kippen.
Hang the urinal on the lower installation plate and
connect the retaining chain to the installation plate A.
Connect the water pipe to the thread and insert the
siphon into the wall by tilting the urinal towards the wall.
Befestigen Sie nun das Urinal links und rechts mit den
Schrauben wie in der Skizze gezeigt. Setzen Sie die bei-
den Abdeckkappen auf die Köpfe der Schrauben.
Now fasten the urinal on the left and right with the
screws as shown in the sketch. Place the two cover caps
on the heads of the screws.

10V.2023.8.1
vao urinal
MONTAGEANLEITUNG
INSTALLATION INSTRUCTION
Setzen sie die beiden Bolzen zur Befestigung des Deckels
in die vorgesehenen Löcher. Kippen Sie dazu die Platte
auf dem Gewinde so steil, dass sie durch die Öffnung
passen. Schrauben Sie den Bolzen fest.
Place the two bolts for fastening the cover in the holes
provided. To do this, tilt the plate on the thread so
steeply that they fit through the opening. Screw the bolt
tight.
Fixieren Sie den Deckel mit den Madenschrauben auf
den Bolzen.
Fix the cover onto the bolts with the grub screws.
Die Montage ist nun abgeschlossen. Das Urinal kann zur
Wand mit einer Wartungsfuge versehen werden.
The assembly is now complete. The urinal can be provi-
ded with a maintenance joint to the wall.

11V.2023.8.1
vao urinal
Die Reinigung des Deckels sollte getrennt von der Reinigung der
Keramik erfolgen. Verwenden Sie zur Reinigung des Deckels nicht
die Medien, die auch für die Keramik verwendet werden - die
Werkstoffe beider Produkte weisen unterschiedliche Verträg-
lichkeiten gegenüber Reinigungsmitteln auf. Verwenden Sie zur
Reinigung des Deckels ausschließlich ein transparentes Geschirr-
spülmittel mit Tensiden sowie ein weiches Microfaser- oder Baum-
wolltuch. Verwenden Sie keine Scheuermilch oder abrasive Medien,
da diese die matte Oberfläche des Deckels beschädigen.
Cleaning the cover should be done separately from cleaning the
ceramics. Do not use the media for cleaning the cover that are
also used for the ceramic - the materials of the two products have
different compatibility with cleaning agents. To clean the cover,
use only a transparent dishwashing detergent with surfactants
and a soft microfiber or cotton cloth. Do not use scouring agents
or abrasive media, as these will damage the matt surface of the
cover.
REINIGUNG DES DECKELS
CLEANING THE COVER
PFLEGE UND WARTUNG - FÜR MATTE KERAMIK URINALE
CARE AND MAINTENANCE - FOR MATT CERAMIC URINALS
Reinigungsmittel zum Lösen von Kalk sind oft sehr sauer (pH-Wert
unter 5) oder enthalten starke Säuren. Diese lösen mineralische
Verbindungen, daher sind sie für die Reinigung von Urinalen aus
Keramik ungeeignet. Verwenden Sie stattdessen zum Lösen von
Kalkrückständen und Wasserflecken ein mit Essig getränktes
Papiertuch. Legen Sie das Tuch auf die entsprechende Stelle und
lassen Sie es einige Minuten einwirken. Spülen Sie anschließend
mit ausreichend Wasser nach. Zum Entfernen von Verschmutzun-
gen natürlichen Ursprungs können handelsübliche Reinigungsmit-
tel für WCs verwendet werden.
Achten Sie darauf, dass diese Mittel keine Tenside enthalten und
alkalisch sind (pH-Wert über 7). Auch nach der Verwendung von
alkalischen Reinigungsmitteln sollte die Keramik gründlich mit
Wasser nachgespült werden. Verwenden Sie keine Scheuermilch,
diese kann die seidenmatte Oberfläche beschädigen. Ebenso
sollten nur weiche Microfaser- oder Baumwolltücher verwendet
werden.
Cleaning agents used to dissolve lime are often very acidic
(pH below 5) or contain strong acids. These dissolve mineral
compounds, so they are unsuitable for cleaning ceramic.
Instead, use a paper towel soaked in vinegar to dissolve lime-
scale residues and water stains. Place the cloth on the cor-
responding spot and let it soak for a few minutes. Then rinse
with sufficient water. Commercially available cleaning agents
for WCs can be used to remove stains of natural origin.
Make sure that these agents do not contain surfactants and
are alkaline (pH above 7). Even after using alkaline cleaning
agents, the ceramics should be thoroughly rinsed with water.
Do not use scouring agents, they can damage the silky matt
surface. Likewise, only soft microfiber or cotton cloths should
be used.
Unsere matt gebrannten Keramik Urinale zeichnen sich durch eine
edle, seidenmatte und robuste Oberfläche aus, die bei korrekter
Pflege und Reinigung lange mit ihrer Schönheit begeistert.
Beachten Sie folgende Hinweise zur Reinigung, um die langfristige
Funktion und Oberflächenbeschaffenheit Ihres Urinals zu erhalten.
REINIGUNG DER KERAMIK
CLEANING THE CERAMICS
Our matt-fired ceramic urinals are characterized by a noble,
silk-matt and robust surface, which will inspire you with its
beauty for a long time if cared for and cleaned correctly.
Follow these cleaning instructions to maintain the long-term
function and surface finish of your urinal.

12V.2023.8.1
vao urinal
NOTIZEN
NOTES

KONTAKT
CONTACT
+49. 201. 806 943 0
PHONE
VALLONE®
TECHNICAL SUPPORT
www.vallone.de/support
WEB
Table of contents
Other Vallone Plumbing Product manuals

Vallone
Vallone noya u5 Manual

Vallone
Vallone noya 25 Manual

Vallone
Vallone vao bidet 5100-80-0012-MW Manual

Vallone
Vallone NERO 09+U2 User manual

Vallone
Vallone como 35 Manual

Vallone
Vallone NERO 11 User manual

Vallone
Vallone COMO 03 User manual

Vallone
Vallone 4700-00-01 Manual

Vallone
Vallone NERO 01 User manual

Vallone
Vallone COMO 07 User manual
Popular Plumbing Product manuals by other brands

Kohler
Kohler R22898-SD-BL installation guide

Viega
Viega 4989 Instructions for use

Moen
Moen Chrome 84299 Illustrate parts list

ProFlo
ProFlo PFXCM6847CP installation instructions

SIMILOR KUGLER
SIMILOR KUGLER Sanimatic arwa-curveprime WI9.32010.100.000 installation instructions

Omnires
Omnires Y Installation and Maintenance