SENSOR INSTALLATION GUIDE – EXTREME DUTY
2
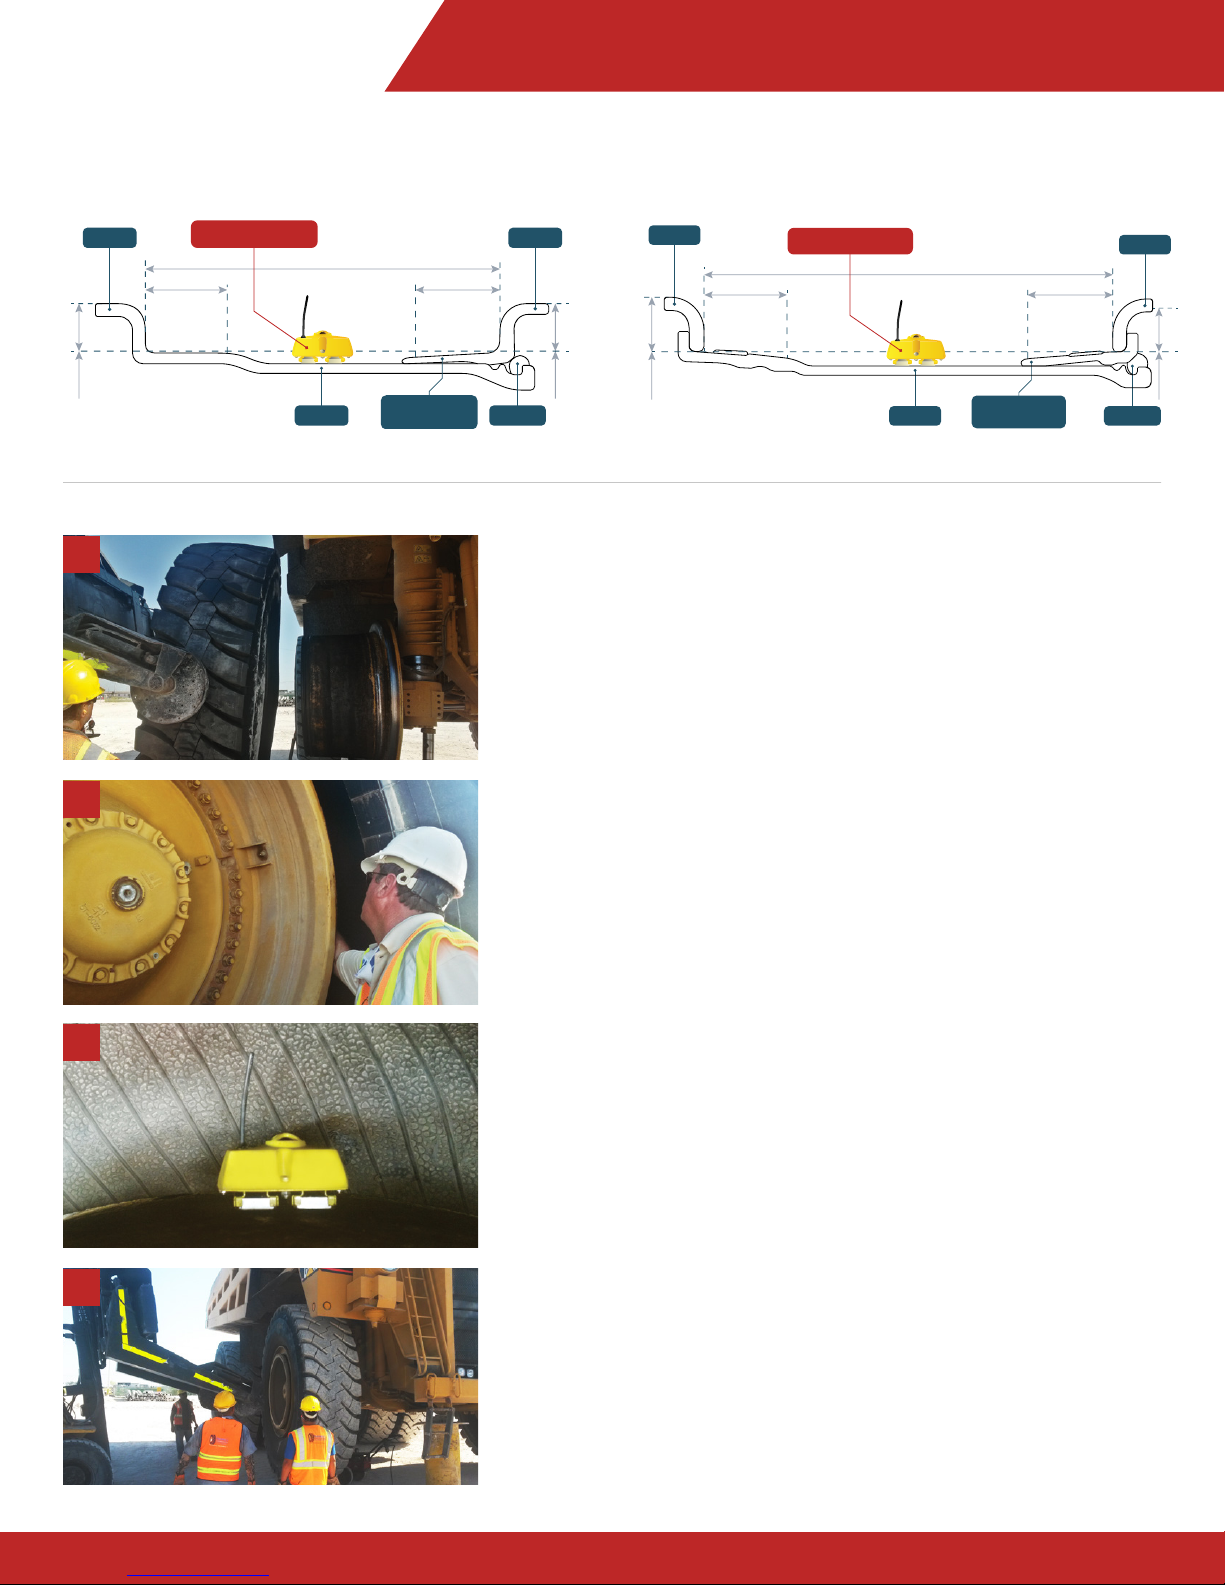
3 Piece Rim Components: 5 Piece Rim Components:
Mounting the Valor Gen II Magnetically
Mounted Sensor on a Vertical Tire Mount
1. Ensure the rim is surface where the sensor is to be mounted is
clean.
2. Position the tire approximately ¾ of the way onto the rim allowing
enough room to place the sensor on the recessed portion of the
rim. (Figure A)
3. Once the tire has been positioned and secured in such a matter as
to eliminate any unplanned movement, carefully place the sensor
on the rim base either to the left or right of the valve stem. (Figure
B)
4. When positioning the sensor watch for pinch points between the
magnets and the rim base surface. Valor uses extremely powerful
magnets to hold the sensor to the rim. (Figure C)
5. If you are unable to position the sensor in the center of the rim,
use a non-metal extension to push he sensor further toward the
center. Note: the sensor does not need to be in the center of the
rim, but simply clear of any rim components such as the side or
bead seat ring.
6. Complete reassembly of tire and rim. Inflate to manufacturers
recommended cold inflation pressure.
(Figure D)
Notes:
i. When using a 7 pieces rim or quick change system, the sensor can
be mounted directly on the bead seat ring after the tire bead has been
successfully seated.
ii. When performing a horizontal tire mount, follow steps 1 and 2, however
be sure to place blocking under the tire to support one side of it, allowing
the other side to slide down the rim and creating the secure opening that
use be used to place the sensor on the rim.
A
B
C
D
Height
Diameter
Flange
Rim
Bead Seat Widt
ead Seat Width
Rim Width
Side Ring
Side Ring
Lock RingRim Base Bead Seat Band
(Bead Seat Ring)
Valor OTR Sensor
Height
Diameter
Flange
Rim
Bead Seat Widt
ead Seat Width
Rim Width
Side RingValor OTR Sensor Side Ring
Lock RingRim Base Bead Seat Band
(Bead Seat Ring)


