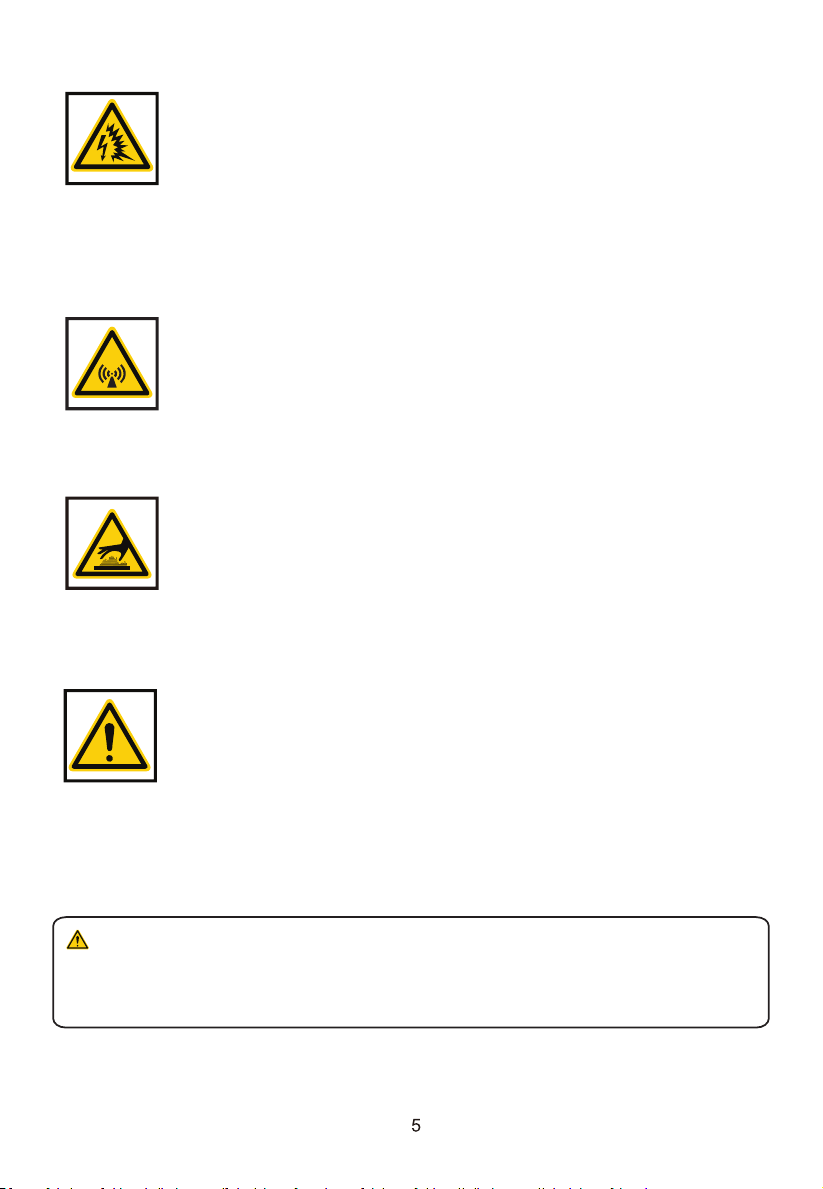
Vanair EPEQ WELDER140 User manual

140A 604.8 Wh Quick Charging 14°F - 140°F
Instruction Manual
Portable Li-ion Battery Welder
Li-Ion 1.5 h
WELDER140
Part Number: 282037
WELDER140

Thank you for choosing our product. For safe and efficient use of
this equipment, please keep this user manual and read it carefully
before use. After unpacking, please check the product carefully,
and check the items against the packing list. If there are any
inconsistencies, please contact Vanair®at 800-526-8817.
Design standards of the product: GB15579.1 EN60974-1
Certification standards: FCC CE UN38.3 ROHS EAC
The relevant design schemes and manufacturing technology used in
this product are protected by patents.
The copyright of this manual is owned by Vanair Manufacturing, Inc.
Its contents are subject to change without notice.
INTRODUCTION

CONTENTS
1. Safety Tips and Precautions.......................................................
2. Product Introduction..................................................................
3. Instructions for Use....................................................................
4. Troubleshooting..........................................................................
5. Maintenance, Storage, and Disposal.........................................
6. Service..........................................................................................
7. Packing List .................................................................................
8. Replacement Parts......................................................................
9. Warranty ....................................................................................
This manual will explain how to use the unit safely and effectively. Please read and
follow these instructions and precautions carefully.
4
6
9
12
12
13
13
13
14

SAFETY TIPS AND PRECAUTIONS
Please keep this User Manual and read it carefully before use.
This user manual describes how to use the equipment safely and efficiently.
Be sure to follow the instructions during its use.
Beware of Electric Shock
• Install the grounding device correctly according to the application standard.
• Wear dry and hole-free protective clothing and protective gloves to keep
your hands insulated. When in contact with live parts, do not expose any
part of your skin or wear wet gloves or clothes.
• Please use the product in a clean and dry environment to ensure the
work site is safe.
• Insulate yourself from the workpiece and the ground.
• Ensure the workpiece is properly connected to the ground lead.
Beware of Noise
• Wear a hearing protective device to protect ears from noise.
• Warn bystanders to avoid potential damage caused by noise.
Beware of Fire
• Remove all flammable or explosive materials from the worksite.
• This welder should be used in an upright position.
• The welding position should be isolated from surrounding objects.
• Avoid welding at hydraulic lines. Place the fire extinguisher in an
easy-to-access location.
• When not in use, disconnect the welding leads from the workpiece.
• When welding, splashing sparks and hot metal fragments may cause clothing
to catch fire. Be sure to wear protective equipment and appropriate clothing.
• Do not heat, cut or weld fuel tanks, drums, or other containers which may
contain flammable or toxic substances.
• The built-in battery of the welder should be used within the environmental
conditions specified in this manual.
Beware of Smoke Damage
• Harmful fumes and gases may be generated during the welding
process. Direct inhalation should be avoided.
• Keep the working environment well-ventilated.

Beware of Arc Flash
• Strong arc flash will be generated during welding. Therefore,
a welding helmet with a qualified filter and cover should be used to
prevent the eyes from being hurt by sparks or arcs when welding
or observing the arc.
• Wear durable protective clothing and protective gloves made from
flame retardant material to protect the skin from arc flash.
• Instruct personnel around the workplace not to look directly at the arc
and when necessary, install protective barriers to shield against arc flash.
Beware of Burns
• Several parts of the welding process may present the risk of high
temperature burns before, during, and after use of the welder.
• Do not touch the hot workpieces with bare hands.
• Wear protective clothing to avoid being burnt by welding sparks.
• The temperature of the electrode holder is high after use and it
takes a long time to dissipate its heat.
• Warn surrounding personnel to avoid burns.
Beware of Electromagnetic Radiation
• When the welder is working, there may be electromagnetic radiation
around the welding cable and the welder.
• Operators with a cardiac pacemaker should consult their doctor before
welding.
• When welding, maintain a safe distance from the welder.
• Wrapping the welding cable around your body is strictly prohibited.
Other Safety Tips
• Avoid violent vibration and collision since the welder contains a
Lithium-Ion battery. Do not store the welder with other items.
Do not place heavy objects on top of the welder.
• Do not disassemble the welder by yourself in case of failure.
• Keep away from high-temperature heat sources.
• Keep moisture off of the welder.
WARNING: This product can expose you to chemicals including antimony [oxide],
arsenic, beryllium, chromium [hexavalent], cobalt, cadmium, lead, and nickel, which are
known to the State of California to cause cancer and birth defects or other reproductive harm.
For more information, go to www.P65Warnings.ca.gov.

Note:
If the welder needs maintenance and repair, call the Vanair®Service
Department at 844-VAN-SERV. If the user delivers the welder to an
unauthorized service center for maintenance or repair, the user is no
longer entitled to the manufacturer’s warranty service.
PRODUCT INTRODUCTION
Appearance
Panel Cover1
2
3
4
5
6
7
8
DescriptionName
Main Control Panel
Welding Output “+”
Welding Output “-”
Air Outlet
Charging Interface
Circuit Breaker
Air Inlet
Operational Panel Protection
See Section 1.3 for Details on its Functions
Connect to Positive Welding Cable
Connect to Negative Welding Cable
Cooling Air Outlet, Do Not cover
Connect to Charging Cable
Welding Output Main Switch
Cooling Air Inlet, Do Not Cover
6
7
8
1
2
4
3
5

WELDER140
800.526.8817 | EPEQ.com
Control Panel
Description
Name
Note Window
K
J
I
H
G
F
E
D
D
C
B
A
A C
Power Indicator Window
Power Switch
Current Adjusting Knob
Charging Indicator
High Temperature Indicator (HT)
Low Temperature Indicator (LT)
Warning Indicator
Digital Display Displaying Working Status / Welding Current
Battery Indicator / Quick and Standard Charge Indicator
Battery Button
Reset Button
Check Battery Capacity / Switch Between Quick and
Standard Charge
Indicating An Abnormal State
Restart the Product When the Product Crashes
Indicating Low Temperature Status
Indicating High Temperature Status
Indicating Charge Status
Adjust the Welding Current
Turn On / Off the Welding Power Source
Important Note
B
I
H
G
F
J
K
E

Technical Details
Description
Dimension
Smart Double Air Cooling
IP23
34 lbs (15.5kg)
Built-In
Auto
Weight
10 ft
Lead Length
Protection Class
Cooling Mode
Hot Start
Arc Force
Discharging Temperature Range
Duty Cycle
No-Load Voltage
Rated Output Voltage
Output Current Range
Charging Temperature Range
Charging Time
Charging Mode
Input Voltage Frequency
Input Voltage Range
Model
Battery Type
Battery Capacity
18.3 x 7.6 x 14.9 in (466 x 193 x 379 mm)
604.8WH
EPEQ™WELDER140
Lithium-Ion
14°F - 140°F (-10°C - 60°C)
100% 80A
50% 110A
20% 140A
70V ± 10V
25.6V
DC40-140A
32°F - 113°F (0°C - 45°C )
1.5 Hours / Quick Charge
3 Hours / Standard Charge
CC - CV
50/60HZ
100V - 240V AC

INSTRUCTIONS FOR USE
Battery Level Checking
Under the power-off state, press the Battery
Button (J) to observe the remaining battery
capacity through the Battery Indicator LED (C).
The LED will turn off if the Battery Button (J) is
pressed again or no other operation is performed
within 10 seconds.
Charging Mode
The EPEQ™WELDER140 has been equipped with a
built-in charger. So the user only needs to connect
the welder to AC power with rated input voltage
through the charging cable, when the power level is
low. At this time, the Digital Display (B) shows “SC”
(Standard Charging), and the Battery Indicator (F)
shows that it is charging.
Introduction to Charging Mode
Two charging modes are available for the
EPEQ™WELDER140: Standard Charging (SC)
and Quick Charging (qC).
Standard Charging Mode
This mode is automatically activated when the welder is connected to AC power. The Battery
Indicator (F) flashes red. The Digital Display (B) will show “SC” (Standard Charging Mode), and
the standard charging time is about 3 hours.
Quick Charging Mode
Press the Battery Button (J) for 2 seconds, and it will switch to the quick charging mode. The cycling of
Battery Indicator (C) speeds up and the Digital Display (B) will show “qC” (Quick Charging Mode). The
quick charging time is about 1.5 hours. Press and hold the Battery Button (J) for 2 seconds to switch back
to the standard charging mode.
Note:
• Standard charging mode is recommended as this mode optimizes the battery
charging power and maximizes the battery life.
• When the battery capacity is charged to 90%, it will automatically jump to standard
charge mode. At this time, the charging indicator flashes yellow and then turns
green when it is fully charged.
• After it is fully charged, please unplug the charging cable.
• Charging is automatically disabled after 8 hours.
Standard Charging
Quick Charging
2s
Low Capacity
20% Capacity
40% Capacity
60% Capacity
100% Capacity
80% Capacity
2s

Welding Mode
Mixed Mode
The EPEQ™ WELDER140 supports welding while charging. The specific steps are as follows:
• Insert the charging cable, and the welder will automatically enter the charging state.
• Connect the welding cable and make sure that the electrode holder and the ground
clamp are not in contact with each other.
Make Sure the Welder Power is Off Before Working
• With the power off, ensure the electrode is secure in the stinger, and the ground clamp is
secured to the workpiece.
• Flip the Circuit Breaker (7) on the rear cover to the "ON" position.
• Press the Power Button (D) on the front panel; a green light will illuminate.
• Wait for the Digital Display (B) to display the current correctly, and then turn the Current
Adjusting Knob (E) to select the desired welding current parameter.
• Once you are finished welding, turn off the welder by pressing the Power Button (D); the green
light will turn off.
• Flip the Circuit Breaker (7) on the rear cover to the "OFF" position.
• Remove the positive and negative welding cables.
Note:
The Lithium-Ion battery must be fully charged before first use of the welder.
Make sure the equipment has a safety clearance of 1.5 ft (0.5 m) and there is
no obstruction at the air inlet and outlet to ensure the cooling air enters and
exits freely.
Reference Table for Welding Electrode Size and Corresponding Current
1/16” (1.6 mm)
5/64" (2.0 mm)
3/32” (2.5 mm)
1/8" (3.2 mm)
25 - 40
40 - 65
50 - 90
100 - 130
Note:
The welder will automatically shut down if no welding operation is performed
within 2 minutes.
Welding Electrode Size Recommended Current (A)

Protection Status Indicators
Note:
In mixed mode, if no welding operation is performed within 2 minutes, the
Power Button (D) will automatically go off and the welder will enter the
charging mode.
• Flip the Circuit Breaker (7) on the rear cover to the "ON" position. Press the Power Button (D) on
the front panel; a green light will illuminate. Mixed mode will be automatically enabled and the
welder is ready for operation. In the mixed mode, it will automatically switch to the quick charge
mode and the charge mode switch will be locked; it will be unlocked only when the welding
operation is stopped.
StatusDigital Display LED Indicator
Battery temperature is too high. Shut down and
allow the unit to cool.
The battery is low. Please recharge.
AT (I) Flashing
LT (H) Normally On
HT (G) Normally On
AT (I) Flashing
HT (G) Flashing
(C) Flashing
HT (G), LT (H) Flashing
HT (G) Flashing
LT ( H) Flashing
The temperature of welder is too high. Discontinue
use, and wait for system temperatures to recover.
Welding electrode adhesion (short circuit); please
separate the electrode holder and the ground clamp.
High temperature indication during charging; will
resume after temperatures normalize.
Low temperature indication during charging; will
resume after temperatures normalize.
System error code. Try to restart the welder and
please contact Service if the code reappears after
restarting.
Battery temperature is too low. Please use the
welder within the allowable ambient temperature
range.
The temperature difference inside the battery is
large. Shut down and wait for temperatures to
normalize.

Note:
For other non-common failures, if multiple restarts cannot be recovered, try to
restart the welder after pressing the reset button (K). If it is still unable to
recover from the failure after restarting, please contact the Vanair® Service
Department at 844-VAN-SERV.
TROUBLESHOOTING
MAINTENANCE, STORAGE, AND DISPOSAL
Maintenance
• After use, remove the charging cable and welding leads before performing maintenance.
• Use a piece of dry cloth to remove the dust and oil stains on the clamps, wires, and casing.
• Do not disassemble the equipment. There are no parts that may be repaired by users, and
all repair services shall be provided by qualified maintenance personnel.
• It is recommended to fully charge the product after each use.
Common Failures
The Welder Does Not Strike
an Arc
Poor Arc Starting or Arc
Breaking
Serious Splashing When Welding
Hot Electrode Holder
The Battery is Not Fully Charged
After More Than 8 Hours of
Charging
• Check whether a prompt is given.
• Check whether the welding leads are connected correctly.
• Check whether the selected current matches welding electrode.
• Check whether the charging cable is connected properly.
• Check whether rear panel breaker is switched "ON".
• Check whether the welding cables are suitable and whether the
connections are reliable. Ensure that the workpiece is properly connected
to the negative terminal of the welder.
• Check whether the size of the welding electrode matches the adjusted
current.
• Check whether any temperature prompt is given.
• Check whether the welding lead polarity is correct.
• Check whether the welding electrode and the stinger are connected
reliably.
• Check whether the size of the welding electrode matches the adjusted
current.
Solutions

Storage
Disposal
• Before long-term storage, the welder shall be fully charged.
• The recommended ambient environment for long-term storage is around 77°F (25°C),
dry and ventilated.
• When it is not frequently used, charge it at least once every 3 months to avoid excessive
discharge.
For the disposal of this product, please refer to your state and local regulations on Lithium-Ion battery
disposal and recycling.
SERVICE
REPLACEMENT PARTS
Please keep the warranty card. This product is warranted for one year from the date
of purchase. This warranty does not cover failures caused by normal wear or misuse.
For further details on warranty coverage and warranty information, please contact the
Vanair®Service Department at 844-VAN-SERV.
PACKING LIST
Name
Weld Sting Cable
Ground Cable
Charging Cable
Carry Strap
EPEQ™ WELDER140 1 pcs
1 pcs
1 pcs
1 pcs
1 pcs
Manual 1 pcs
Quantity
Name
282037-02
282037-03
282037-01Carry Strap
Ground Cable
Weld Sting Cable
Part Number

Vanair reserves the right to make changes in engineering, design, and specifications; add improvements; or discontinue
manufacturing at any time without notice or obligation. Vanair, EPEQ, and the corresponding logos and ELECTRIFIED
POWER EQUIPMENT, are registered logos or trademarks of Vanair Manufacturing, Inc., Michigan City, IN, USA. ©2021
All Rights Reserved.
The EPEQ™ WELDER140 is warranted from the date of purchase at retail against
failure due to defective material and/or workmanship for a period of one (1) year. This
warranty does not cover any product that has been used for a purpose other than for
which it is intended or used in a manner inconsistent with any instruction regarding its
use. This warranty is void if the unit is repaired, modified by anyone other than the
Manufacturer, or if this unit has been resold through an unauthorized retailer. In the
event of a warranty claim covered by this Limited Warranty, the exclusive remedies
shall be, at Vanair’s sole discretion, to repair or replace the unit.
TO BE ELIGIBLE FOR WARRANTY, THE CUSTOMER MUST REGISTER THE PRODUCT
ONLINE AT https://vanair.com/support/ registration.html AND RETAIN PROOF OF
PURCHASE RECEIPT.
All returns must receive a Return Material Authorization (RMA) number from the
factory and be returned directly postage or freight prepaid. See RMA for instructions
regarding the shipping of products containing Lithium Batteries. DO NOT SHIP
LITHIUM BATTERIES VIA AIR FREIGHT. Vanair does not provide any warranty for any
accessories used with this product that are not manufactured by Vanair Manufacturing
and approved for use with this product. Vanair will make final determination of
defects. No agent, employee, or representative of Vanair has any authority to bind to
any affirmation, representation or warranty concerning Vanair products, except as
stated herein.
TO THE GREAT EXTENT PERMITTED BY APPLICABLE LAW, THE REMEDIES
PROVIDED HEREIN ARE THE SOLE AND EXCLUSIVE REMEDIES APPLICABLE TO THE
VANAIR EQUIPMENT. IN NO EVENT SHALL VANAIR BECOME LIABLE FOR DIRECT,
INDIRECT, SPECIAL, PUNITIVE, INCIDENTAL OR CONSEQUENTIAL DAMAGES
(INCLUDING LOSS OF PROFIT OR LOST BUSINESS OPPORTUNITY), WHETHER BASED
ON CONTRACT, TORT OR ANY OTHER LEGAL THEORY. IN NO EVENT SHALL VANAIR
BECOME OBLIGATED TO PAY MORE ON ANY WARRANTY CLAIM THAN THE
PURCHASE PRICE ACTUALLY PAID BY THE ORIGINAL RETAIL PURCHASER. THIS
LIMITED WARRANTY IS MADE IN LIEU OF ALL OTHER WARRANTIES, EXPRESS OR
IMPLIED, INCLUDING THE WARRANTIES OF MERCHANTABILITY AND/OR FITNESS
FOR A PARTICULAR PURPOSE, OR ANY OTHER WARRANTY OR GUARANTEE
ARISING BY OPERATION OF LAW. ANY WARRANTY NOT EXPRESSLY PROVIDED
HEREIN, IMPLIED WARRANTY, GUARANTEE AND ANY REPRESENTATION
REGARDING THE PERFORMANCE OF THE EQUIPMENT, AND ANY REMEDY FOR
BREACH OF CONTRACT, IN TORT, OR ANY OTHER LEGAL THEORY WHICH, BUT FOR
THIS PROVISION, MIGHT ARISE BY IMPLICATION, OPERATION OF LAW, CUSTOM OF
TRADE, OR COURSE OF DEALING ARE EXCLUDED AND DISCLAIMED BY VANAIR. ALL
WARRANTY OR RETURNS MUST BE PRE-AUTHORIZED PRIOR TO PERFORMING ANY
WARRANTY WORK.
WARRANTY

FOR SERVICE: CALL 844-VAN-SERV
www.EPEQ.com
Vanair Manufacturing, Inc.
10896 West 300 North, Michigan City, IN 46360
NOTE: Before disposing of damaged goods, check with your state Environmental Protection Agency
to find out about special restrictions on the disposal of the lamp and batteries or return them to a
certified service center for recycling.

090188-OP_r2-062222_NML
800.526.8817 | EPEQ.com
10896 West 300 North | Michigan City, Indiana 46360 USA
This manual suits for next models
1
Table of contents
Other Vanair Welding System manuals
Popular Welding System manuals by other brands

FRONIUS
FRONIUS CWF 25i operating instructions

Lincoln Electric
Lincoln Electric RANGER IM604-B Operator's manual

Lincoln Electric
Lincoln Electric Vantage 580 11657 Operator's manual

AHP
AHP alphaTIG 225Xi Operator's manual

WeldCraft
WeldCraft WP-17V owner's manual

Climax
Climax AUTOBOREWELDER BW3000 operating manual