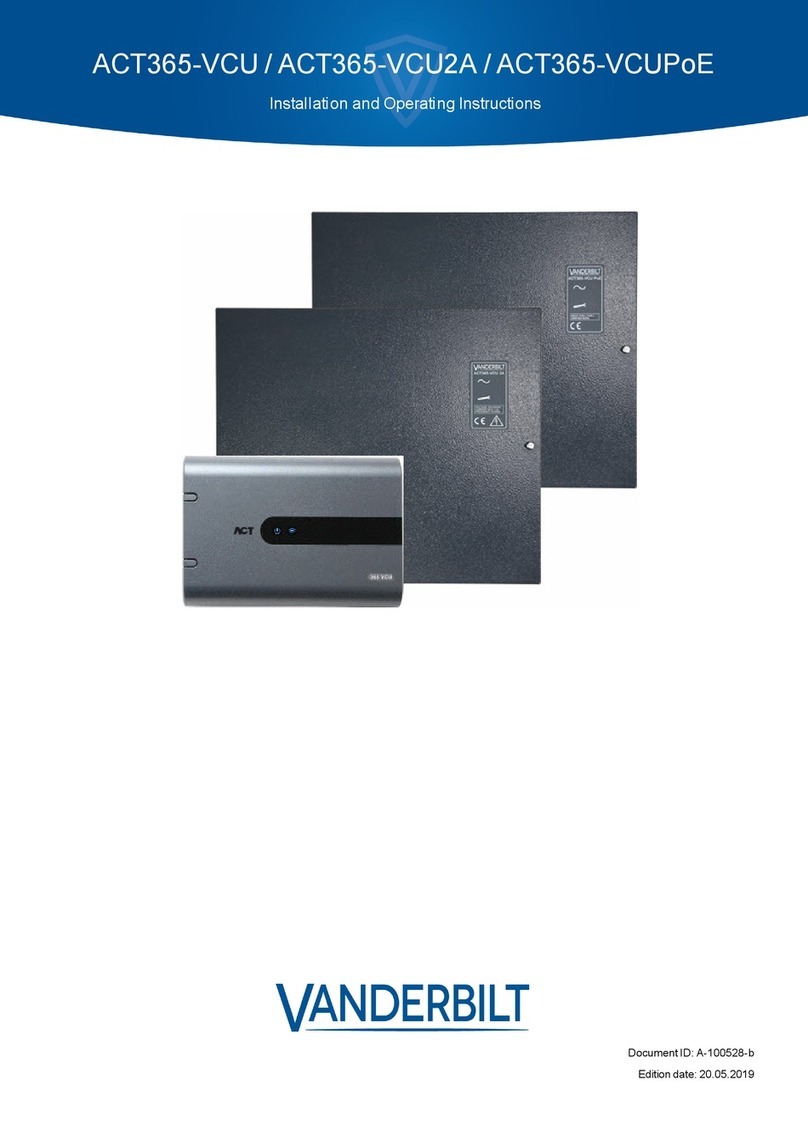
Vanderbilt ACT365-ACU User manual

ACT365-ACU / ACT365-ACU2A / ACT365-ACUPoE
Installation Instructions
Document ID: A-100521-c
Edition date: 15.03.2019

Data and design subject to change without notice. / Supply subject to availability.
© 2019 Copyright by Vanderbilt International Ltd.
We reserve all rights in this document and in the subject thereof. By acceptance of the document the recipient acknowledges these rights and
undertakes not to publish the document nor the subject thereof in full or in part, nor to make them available to any third party without our prior
express written authorization, nor to use it for any purpose other than for which it was delivered to him.
ACT365-ACU & ACT365-ACUPoE
Hereby, Vanderbilt International (IRL) Ltd declares that this equipment type is in compliance with the following EU Directives for CE marking:
• Directive 2014/30/EU (Electromagnetic Compatibility Directive)
• Directive 2011/65/EU (Restriction of the use of certain hazardous substances Directive)
The full text of the EU declaration of conformity is available at: http://van.fyi?Link=DoC
ACT365-ACU2A
Hereby, Vanderbilt International (IRL) Ltd declares that this equipment type is in compliance with the following EU Directives for CE marking:
• Directive 2014/30/EU (Electromagnetic Compatibility Directive)
• Directive 2014/35/EU (Low Voltage Directive)
• Directive 2011/65/EU (Restriction of the use of certain hazardous substances Directive)
The full text of the EU declaration of conformity is available at: http://van.fyi?Link=DoC
&
http://van.fyi?Link=ACT365ACU

Table of Contents
1 Overview 4
1.1 Technical specification 4
1.1.1 Electrical specification 4
1.1.2 Relay load 5
1.2 Ordering details 5
1.3 Monitoring 6
2 Installation 7
2.1 ACT365-ACU 7
2.1.1 Mounting 7
2.1.2 Power supply 7
2.2 ACT365-ACU2A 7
2.2.1 Mounting 8
2.2.2 Mains power up 8
2.2.3 Load Output 8
2.2.4 Standby Battery 8
2.2.5 Tamper 9
2.3 ACT365-ACUPoE 9
2.3.1 Mounting 9
2.3.2 Power Up 9
2.3.3 Troubleshooting 10
2.3.4 Tamper 10
3 Wiring 11
3.1 Typical wiring of ACT365-ACU 11
3.1.1 Wiring exit readers 12
3.2 Fire override configuration 12
3.3 Interlock/airlock configuration 12
3.4 Intruder panel wiring 13
4 Defaulting the Controller and IP Address Configuration 15
4.1 Factory default the Controller (DIP switch 2) 15
4.2 DHCP/static IP addressing (DIP switch 1) 15
4.3 Defaulting the static IP address 16
4.4 Changing static IP address on the ACT365-ACU 16
5 Door Controller Status Indicators 17
5.1 ACT365-ACU 17
5.2 ACT365-ACU2A and ACT365-ACUPoE 17
© Vanderbilt 2019 3 A-100521-c
15.03.2019

1 Overview
This guide describes the installation of the ACT365-ACU controller.
The ACT365-ACU Controller is a single door IP controller that requires an external 12V or 24V power
supply.
The ACT365-ACU2A Controller is a single door IP controller with a 12V DC 2A PSU.
The ACT365-ACUPoE Controller is a single door IP controller that is powered over Ethernet.
Sign up to ACT365 via www.act365.eu.
1.1 Technical specification
ACT365-ACU ACT365-ACU2A ACT365-ACUPoE
Voltage Range (Controller) 11–24V DC 11–24V DC 11–24V DC
Current Consumption
(Controller)
350mA (Max) 350mA (Max) 350mA (Max)
Controller Dimensions
(H x W x D mm)
165 x 235 x 55 275 x 330 x 80 275 x 330 x 80
Controller Weight (kg) 0.4 2.2 2.2
Operating Temperature -10 to +50° C -10 to +40° C
75% RH non-condensing
-10 to +40° C
75% RH non-condensing
Operating Environment Surface
mounting
Internal use
only
Surface mounting
Internal use only
Surface mounting
Internal use only
Enclosure Material ABS 1.2mm steel grey powder
coated
1.2mm steel grey powder
coated
LED Status Indicators Yes Yes Yes
PSU Fault Output n/a Yes Yes
Lid Opening Tamper Detection
(Front)
Yes Yes Yes
Rear Tamper Detection No Yes Yes
1.1.1 Electrical specification
ACT365-ACU ACT365-ACU2A ACT365-ACUPoE
PoE 802.3bt input (PoE++) N/A N/A 13.8V at 3A output + 0.5A battery
charge
PoE 802.3at input (PoE+) N/A N/A 13.8V at 1A output + 0.5A battery
charge
© Vanderbilt 2019 4 A-100521-c
15.03.2019

ACT365-ACU ACT365-ACU2A ACT365-ACUPoE
PoE 802.3af input (PoE) N/A N/A 13.8V at 0.3A output + 0.5A battery
charge
Battery charging N/A Yes Yes
Standby Battery N/A 12V 7Ah Battery 12V 7Ah Battery
Battery Deep Discharge
Protection
N/A No Yes
Input: Voltage Rated N/A 100–240V AC N/A
Input: Voltage Operating N/A 90–264V AC N/A
Input: Frequency N/A 50–60Hz N/A
Input: Max Current N/A 1.0A (@ 90V AC) N/A
Input: Mains input fuse N/A T2.0A N/A
Input: Max standby power N/A 0.5W (no load and no
battery connected)
N/A
Output: Voltage N/A 13.4–14.2V DC
(13.8V DC Nominal)
on mains power
10.0–12.3V DC on
battery standby
N/A
Output: Max load current N/A 2.0A N/A
Output: Ripple N/A 150mA pk–pk max N/A
Output: Load output fuse N/A F2.0A N/A
Output: Overload N/A Electronic shutdown
until overload or short
circuit removed
(Under mains power
only)
N/A
1.1.2 Relay load
When used with inductive loads (Maglock/Strike locks) the following ratings apply.
ACT365-ACU ACT365-ACU2A ACT365-ACUPoE
Main relay 1.5A @ 30VDC /
1.5A @ 50VAC
1.5A @ 30VDC /
1.5A @ 50VAC
1.5A @ 30VDC /
1.5A @ 50VAC
Aux relay 400mA @ 30VDC 400mA @ 30VDC 400mA @ 30VDC
1.2 Ordering details
ACT365-ACU V54502-C130-A100 Single door cloud IP controller
ACT365-ACU / ACT365-ACU2A / ACT365-ACUPoE – Installation Instructions Overview
© Vanderbilt 2019 5 A-100521-c
15.03.2019

ACT365-ACU2A V54502-C131-A100 Single door cloud IP controller with 2A 12V DC PSU
ACT365-ACUPoE V54502-C132-A100 Single door cloud IP controller with PoE PSU
1.3 Monitoring
All faults including Mains Present and Tamper are reported on the ACT365 portal.
Mains present For the ACT365-ACU, the PSU MAINS PRESENT output is pre-wired to the AC MON
input.
Output Voltage For the ACT365-ACU, the PSU output voltage level is reported to the ACT365 portal.
Tamper / Break
Glass
All faults, including tamper and break glass, are reported to the ACT365 portal.
ACT365-ACU / ACT365-ACU2A / ACT365-ACUPoE – Installation Instructions Overview
© Vanderbilt 2019 6 A-100521-c
15.03.2019

2 Installation
The ACT365-ACU Controllers are for indoor installation only and must be installed as permanently
connected equipment.
An external mains disconnect device must be fitted. Before installation, ensure that the mains supply to
the controller is disconnected.
Mains power should be connected to ACT365 Controllers by a licensed electrician in accordance with
local/national codes.
After installing an ACT365 controller, Vanderbilt recommend that you place the provided ferrite bead (a
noise suppression device, supplied in a ziplock bag) around the Ethernet cable near the RJ45 connector to
attain a desired level of electromagnetic compatibility (EMC).
2.1 ACT365-ACU
2.1.1 Mounting
Mount the ACT365 Controller directly on to the wall with the supplied screws.
The keyed mounting hole should be screwed first to the wall to aid the mounting.
The unit should be installed in a ventilated area that allows for accessibility after installation.
2.1.2 Power supply
The ACT365-ACU requires an external 12V DC or 24V DC power supply. The supply should be connected
to the +12/24V DC and 0V/GND connections.
2.2 ACT365-ACU2A
This unit is only suitable for installation as permanently connected equipment.
lThe PSU is not suitable for external installation.
lEquipment must be earthed.
Before installation, ensure that external disconnect device is OFF. The PSU should be installed via a 3A
fused spur according to all relevant safety regulations applicable to the application.
© Vanderbilt 2019 7 A-100521-c
15.03.2019

2.2.1 Mounting
1. Mount securely in correct orientation allowing minimum clearance – see diagram.
2. Route mains and low voltage output cables via different knockouts and/or cable entry holes.
3. Use bushes and cable glands rated to UL94 HB minimum.
2.2.2 Mains power up
1. Attach correctly rated mains cable (minimum 0.5mm2 [3A], 300/500V AC) and fasten using cable
ties.
2. Apply mains power and:
lCheck for 13.8V DC on load outputs.
lCheck green Mains LED is on.
3. Disconnect mains power.
2.2.3 Load Output
1. Attach correctly rated load cable and fasten using cable ties. Note polarity.
2. Apply mains power and check green Mains LED is on.
Note: Red LED may be illuminated (dependent upon model) to indicate that no battery has been
connected. This is normal.
3. Verify load is operating correctly.
4. Disconnect mains power.
2.2.4 Standby Battery
Note: Ensure batteries being fitted to this unit are in good condition
1. Connect battery leads to battery, ensuring correct polarity of battery connections. Vanderbilt
recommend using a 7Ah battery.
2. Apply mains power and check that the green Mains LED is on.
3. Check there is no fault indication on Red LED (dependent on model).
4. Disconnect mains power.
5. Check that the batteries continue to supply voltage and current to the load.
The Green LED should be off.
ACT365-ACU / ACT365-ACU2A / ACT365-ACUPoE – Installation Instructions Installation
© Vanderbilt 2019 8 A-100521-c
15.03.2019

Note: Batteries must have sufficient charge to supply the load.
6. Reconnect mains power.
Green LED should be on.
7. Remove Load fuse and check that the red Fault LED is on (dependent on model).
2.2.5 Tamper
A tamper condition is reported in software.
1. Check that the tamper switch is:
lClosed when the enclosure is mounted on the wall, lid is closed, and the lid screw is fitted.
lOpen when the lid is open.
2. Close cover and secure using fastening screw(s) provided.
2.3 ACT365-ACUPoE
This unit must be fed from a compliant PoE (power over Ethernet) power source (PoE 802.3bt for 3A
power output).
2.3.1 Mounting
1. Mount the boxed module securely using the enclosure mounting points in the correct orientation,
allowing 100mm clearance around the enclosure – see diagram.
2. Route cables via knockouts and/or rear cable enclosure entry holes.
2.3.2 Power Up
1. Attach correctly rated load cable to load equipment and fasten using cable ties.
Note polarity.
2. Attach suitable Ethernet cable from PoE++ source to POE IN RJ45 connector (100m max from
PSE).
3. Attach suitable Ethernet cable between IP device and DATA RJ45 connector (if required).
4. Connect charged 12V battery 7Ah to the other end of battery cable.
Note: Ensure correct polarity of battery connections: + use Red lead, - use Black lead.
ACT365-ACU / ACT365-ACU2A / ACT365-ACUPoE – Installation Instructions Installation
© Vanderbilt 2019 9 A-100521-c
15.03.2019

5. Observe Green LED is ON when PoE is present.
6. Observe Load equipment indicates power is present.
7. Remove POE IN cable and observe load equipment continues to indicate power is present.
8. Reconnect PoE INPUT cable.
2.3.3 Troubleshooting
In the event of loss of PoE++ to the ACT365-ACUPoE, the PoE Fault signal contact will open and the
Green LED will turn off, the ACT365-ACUPoE will continue to deliver up to 13.8V 3A of power to the load
until the battery reaches its Deep Discharge protection limit.
If the output of the ACT365-ACUPoE fails, the cause of the failure should be investigated, for example, a
short circuit load, or connection of a deeply discharged battery. The fault should be rectified before
restoring power to the ACT365-ACUPoE. If any of the fuses require replacing, ensure the correct fuse
rating and type is used. A spare fuse is supplied with the controller.
Battery charging will only start after a compliant PoE power source is connected to ACT365-ACUPoE, it
will not start up on battery. Ensure only a healthy 12V battery is fitted to the system.
2.3.4 Tamper
A tamper condition is reported in software.
1. Check that the tamper switch is:
lClosed when the enclosure is mounted on the wall, lid is closed, and the lid screw is fitted.
lOpen when the lid is open.
2. Close cover and secure using fastening screw(s) provided.
ACT365-ACU / ACT365-ACU2A / ACT365-ACUPoE – Installation Instructions Installation
© Vanderbilt 2019 10 A-100521-c
15.03.2019

3 Wiring
This sections describes the following.
3.1 Typical wiring of ACT365-ACU 11
3.1.1 Wiring exit readers 12
3.2 Fire override configuration 12
3.3 Interlock/airlock configuration 12
3.4 Intruder panel wiring 13
3.1 Typical wiring of ACT365-ACU
Label Description Label Description
A Door contact, normally closed E Ethernet: RJ45
Note: All IP device must have a valid IP Address.
B Push to exit, normally open F Important: Place varistor across all lock terminals.
Note: Diagram shows normally energised Magnetic
Lock.
C Break glass monitoring, normally
closed
G Break glass unit (double pole)
© Vanderbilt 2019 11 A-100521-c
15.03.2019

Label Description Label Description
D Vanderbilt reader wire colour coding
3.1.1 Wiring exit readers
For clock and data readers, wire exit readers in parallel but leave the sense line unconnected.
For Wiegand readers, wire the DATA 0 of the exit reader to the SENSE pin on the ACT365-ACU and
DATA 1 to the CLOCK/D1 pin on the ACT365-ACU.
Max length: 100m with 12V DC
Cable: 8 core screened Belden 9504 or equivalent
3.2 Fire override configuration
To release doors on fire alarm activation:
1. On the ACT365 customer portal, select the site from the site picker.
2. Under Manage Sites > Site Settings, select the door group containing fire doors from the Fire
Door Group drop-down list, then click Save.
3. Wire the fire alarm panel (A) to the controller as shown:
While the 0V signal is maintained at the AUX input on Door 1, the doors in the Fire Doors group maintain
normal operation.
When the 0V signal is removed, the doors in the Fire Doors group are unlocked. The fire doors remain
unlocked until the 0V signal is restored.
3.3 Interlock/airlock configuration
To allow only one door to open at a time:
1. Wire the airlock doors.
Link OP3 and AUX I for each new door. For example, the following diagram shows how to interlock
two doors: when the first door is open, the second door is locked, and vice versa.
ACT365-ACU / ACT365-ACU2A / ACT365-ACUPoE – Installation Instructions Wiring
© Vanderbilt 2019 12 A-100521-c
15.03.2019

To interlock additional doors, continue linking OP3 and AUX I for each new door.
2. On the ACT365 customer portal, select the site from the site picker.
3. Under Access Control > Doors, for each interlock door:
a. Click the door name on the Doors screen.
b. Select the Interlock check box on the Update Door screen.
c. Click Save.
When Interlock is enabled on a door, the door is locked when the AUX input is active.
When the door is open, OP3 is active and pulls Aux I low (0V) on all interlock doors.
3.4 Intruder panel wiring
To arm/disarm an intruder panel:
1. Wire the intruder alarm panel to the controller as shown:
AIntruder alarm panel
BConnect the AUX Relay output from the controller to arm input on alarm panel. The AUX
Relay can be set to pulse or toggle. Toggle by programming the AUX Relay time to
zero.
CConnect a signal from the alarm panel to indicate armed or disarmed status. If 0V is
connected to AUX Input, the panel is armed.
2. Wire the door from which the system will be armed/disarmed.
3. On the ACT365 customer portal, select the site from the site picker.
4. On the ACT365 customer portal, program the ACT365-ACU:
a. Click Access Control > Doors > <Door Name>.
b. Under Aux Relay, select the Arm Intruder Panel check box.
c. Under Operation, select the Intruder Panel check box.
d. Click Save.
5. On the ACT365 customer portal, grant arm/disarm rights to users:
a. Click Access Control > Cardholders > <Card Holder Name>.
b. Under Options, select the Arm/Disarm check box
c. Click Save.
6. To arm the system, a user with arm/disarm rights should press the tick key on the keypad then
present their card. Once the intruder panel is armed (as monitored by the AUX I PIN), the Door
ACT365-ACU / ACT365-ACU2A / ACT365-ACUPoE – Installation Instructions Wiring
© Vanderbilt 2019 13 A-100521-c
15.03.2019

will lock.
7. To disarm the system, a user with arm/disarm rights should press the tick key on the keypad then
present their card.
If multiple doors should lock when the intruder panel is armed then each door must monitor the
alarm status.
If the intruder panel is not being monitored then only the door that is wired to control the intruder
panel will lock.
ACT365-ACU / ACT365-ACU2A / ACT365-ACUPoE – Installation Instructions Wiring
© Vanderbilt 2019 14 A-100521-c
15.03.2019

4 Defaulting the Controller and IP Address Configuration
The ACT365-ACU has two DIP switches.
lDIP switch 1: DHCP
Enables DHCP or Static IP address mode.
lDIP switch 2: DEFAULT
Defaults the controller or the Static IP address.
4.1 Factory default the Controller (DIP switch 2)
The ACT365-ACU Controller may be defaulted to factory settings. This will completely erase the controller
memory. All information including card details will be erased and the static IP address will be reset to
192.168.1.60.
To default the ACT365-ACU Controller:
1. Power down the ACT365-ACU Controller.
2. Set the DEFAULT DIP switch 2 to ON.
3. Hold down the Tamper spring.
4. Apply power to the ACT365-ACU Controllers.
5. Wait approximately 5 seconds, until the controller confirms default completed by sounding the
buzzer.
6. Release the Tamper.
7. Power down the ACT365-ACU Controller.
8. Set the DEFAULT DIP switch to OFF.
9. Re-apply power.
4.2 DHCP/static IP addressing (DIP switch 1)
The ACT365-ACU Controller is shipped with the DHCP enabled and can be configured to obtain an IP
address from a DHCP server or use a static IP address.
1. Power down the ACT365-ACU Controller.
2. Set DIP switch 1 to its new position.
a. DHCP IP addressing: Move DIP switch 1 to ON
b. Static IP addressing: Move DIP switch 1 to OFF
Note: Default static IP address is 192.168.1.60.
3. Re-apply power to the board.
© Vanderbilt 2019 15 A-100521-c
15.03.2019

4.3 Defaulting the static IP address
The static IP address can be reset to the default value of 192.168.1.60.
1. Power down the ACT365-ACU Controller.
Ensure nothing is connected to the tamper input terminal and the tamper spring is
not pressed, otherwise the following steps will factory default the controller losing
all information.
2. Set the DHCP DIP switch 1 to OFF.
3. Set the DEFAULT DIP switch 2 to ON.
4. Re-apply power.
5. Wait approximately 5 seconds, until the controller confirms default completed by sounding the
buzzer.
6. Remove power.
7. Set the DEFAULT DIP switch 2 to OFF.
8. Re-apply power.
Note: The static IP address can be changed via the web interface.
4.4 Changing static IP address on the ACT365-ACU
1. Connect the ACT365-ACU Controller to the IP network.
2. Open a web browser on a PC (for example, Microsoft Internet Explorer, Google Chrome, etc.).
3. Enter http://<NetBIOS address>, e.g. http://ACT365ACU010049
4. Logon details:
Username: installer
Password: 999999
5. Choose the Communication menu and set the
following:
lStatic IP Address
lNetwork Mask
lDefault Gateway
6. Click Save IP Settings.
Note: Use the new IP address when connecting to the
controller.
ACT365-ACU / ACT365-ACU2A / ACT365-ACUPoE – Installation Instructions Defaulting the Controller and IP Address
Configuration
© Vanderbilt 2019 16 A-100521-c
15.03.2019

5 Door Controller Status Indicators
5.1 ACT365-ACU
Status indicators appear on the front of the ACT365-ACU Door Controller.
The meaning of each indicator is described below.
(A) Power / System Running
This indicates that the ACT365-ACU has power.
(B) Communications
Constant illumination indicates that the ACT365-ACU is connected to the ACT365 service.
Flashing indicates that there is an issue connecting to the ACT365 service.
(C) Fault
Illuminates to indicate a fault on the system.
Possible causes are:
lTamper open: ACT365-ACU housing is not closed.
lBreak Glass: ACT365-ACU Controllers provide a method to monitor an Emergency break glass switch
via the BG/EDR input. The fault LED will illuminate if the Emergency break glass switch is activated.
lMains Fault: ACT365-ACU will accept a mains present signal from a PSU. This is wired into AC MON
input on the PCB. When the PSU has no mains supply the fault is active.
lLow Supply Voltage: When voltage to the +12/24V terminal is less than +9V.
lFuse Blown: The +12/24V output on the READER terminals is current limited to provide short circuit
protection. The Fault LED will illuminate if too much current is drawn from this connection.
lThe ACT365-ACU cannot connect to the ACT365 service.
5.2 ACT365-ACU2A and ACT365-ACUPoE
Fault indication Mains present
© Vanderbilt 2019 17 A-100521-c
15.03.2019

vanderbiltindustries.com
@VanderbiltInd Vanderbilt Industries
Issued by Vanderbilt International Ltd.
Clonshaugh Business and Technology Park
Clonshaugh, Dublin D17 KV 84, Ireland
vanderbiltindustries.com/contact
© Vanderbilt 2019
Data and design subject to change without notice.
Supply subject to availability.
Document ID: A-100521-c
Edition date: 15.03.2019
This manual suits for next models
2
Table of contents
Other Vanderbilt Controllers manuals

Vanderbilt
Vanderbilt lite blue User manual

Vanderbilt
Vanderbilt ACTpro-100 User manual

Vanderbilt
Vanderbilt ACT365 VCU User manual

Vanderbilt
Vanderbilt ACTpro-1500 User manual

Vanderbilt
Vanderbilt ACTpro-1002A User manual

Vanderbilt
Vanderbilt ACTpro 1500e User manual
Vanderbilt
Vanderbilt ACT365 VCU User manual
Popular Controllers manuals by other brands

Johnson Controls
Johnson Controls M9116-GG-1N4 Series installation instructions

Yamaha
Yamaha RCX340 Service information

Savant
Savant SmartControl RS232 Quick reference guide

Sitec
Sitec TRG 72x72 user manual

cashco
cashco P3 Installation, operation & maintenance manual

Kantech
Kantech KT-NCC installation manual