Vantec NexStar NST-D100S2-BK User manual

www.vantecusa.com
Model:NST-D100S2-BK
SATA to USB2.0
All Registered Trademarks Belong To Their Respective Companies.
Copyright © 2011 Vantec Technology Inc. All Rights Reserved.
User’s Manual / 使用手 冊
2.5/3. 5 吋雙用高速傳輸硬外接 座
傳輸方塊

1
■
Content
Content
............................................................................................................................ 1
1.Introduction
..............................................................................................................
3
2.System Requirements
.........................................................................................
3
3.Specifications/Features..............................................................................4
4.Installation
..................................................................................................................
5
5.Removal
....................................................................................................................... 8
6.Driver Installation
................................................................................................10
Windows ME/2000/XP/VISTA
...........................................................................10
Windows 98SE
.......................................................................................................10
Mac OS 9.0 or later
...............................................................................................11
Mac OS 8.6
..............................................................................................................11
7. Warranty
...................................................................................................................12

傳輸方塊2.5/3.5吋雙用高速傳輸硬碟外接座
2
■
目錄 ................................................................................................................................... 2
1.產品敘述 .................................................................................................................. 13
2.系統需求 ...................................................................................................................13
3.產品特色/規格 .......................................................................................................14
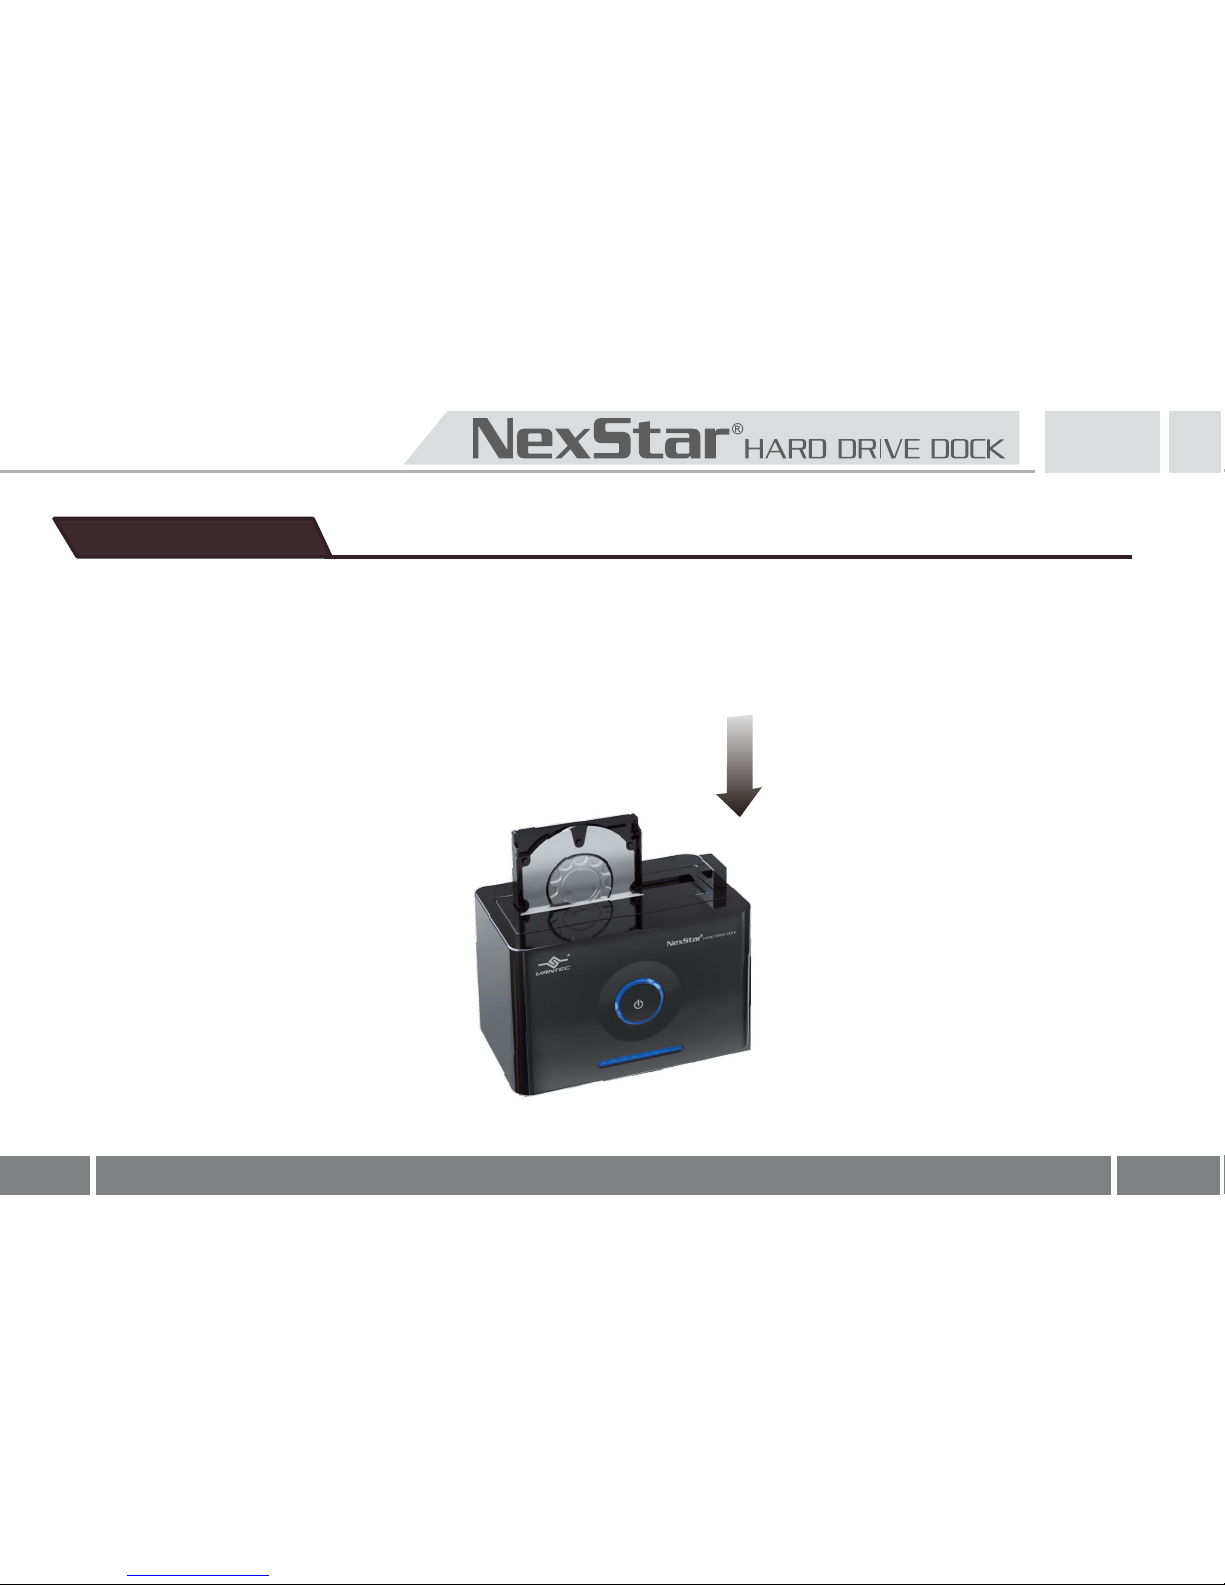
4.產品裝置說明 ......................................................................................................... 15
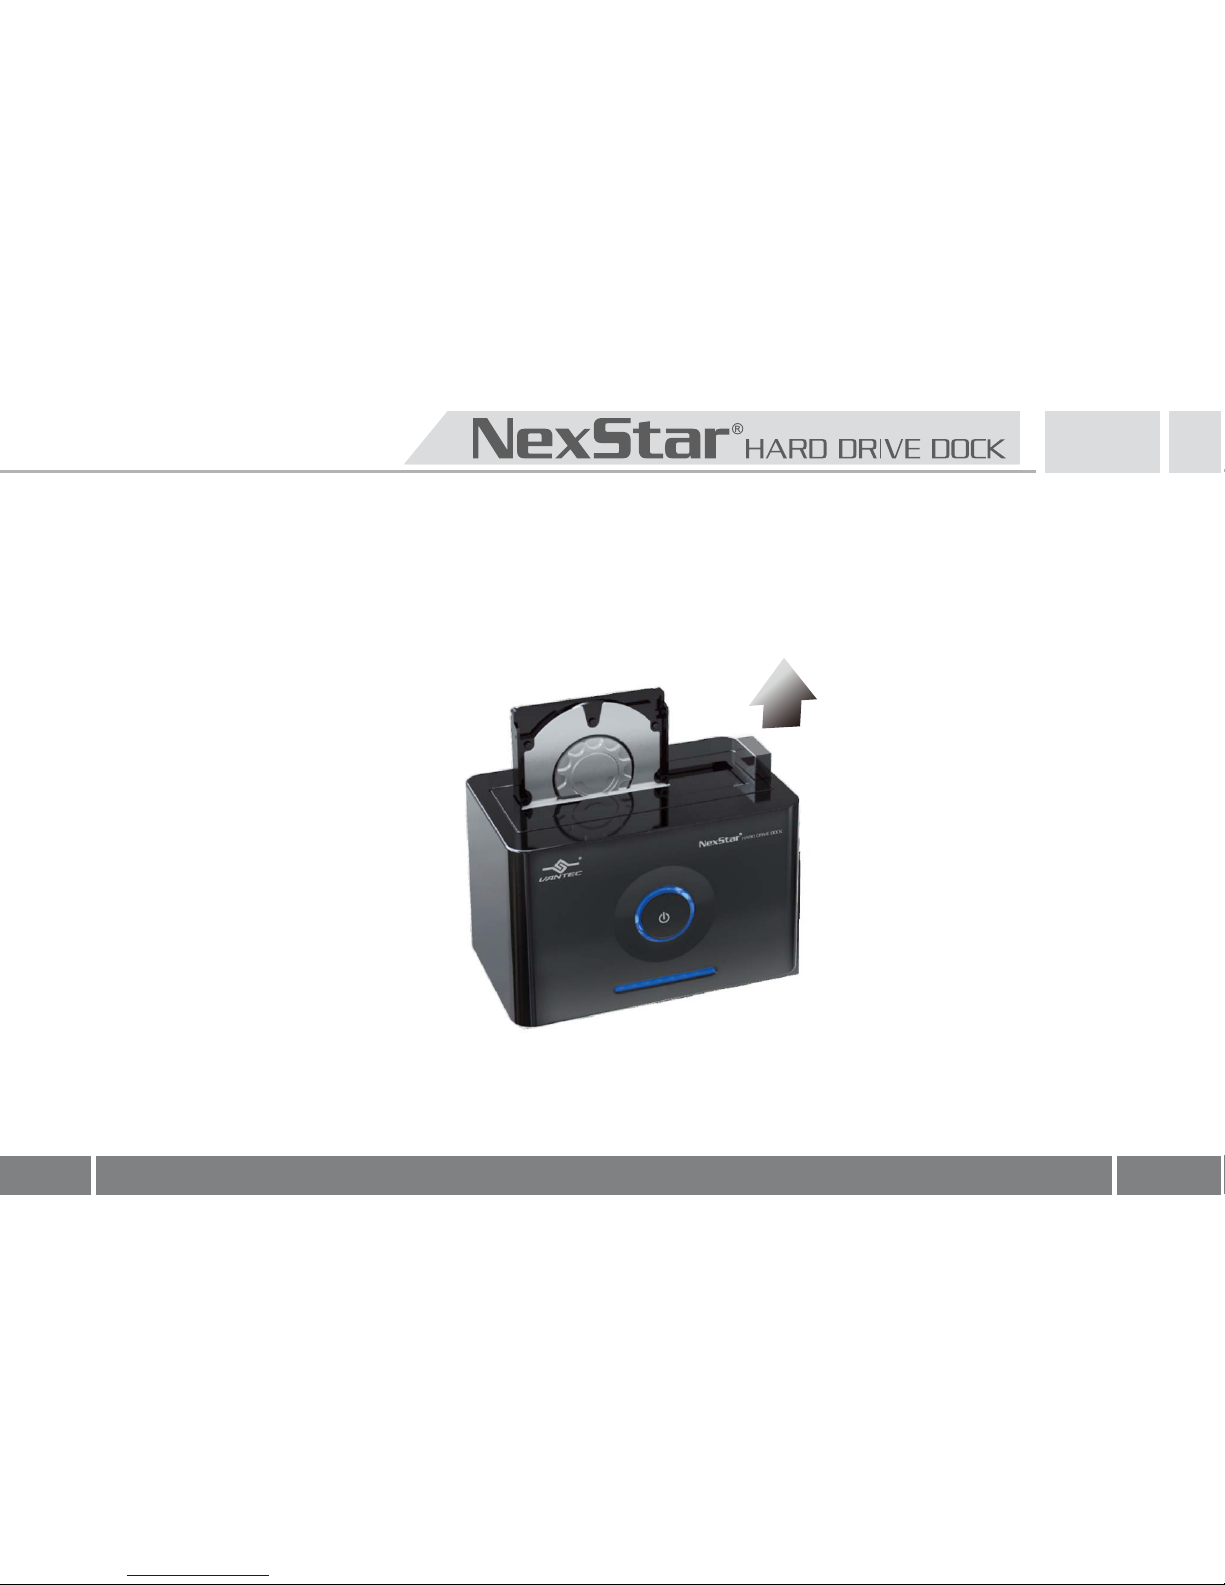
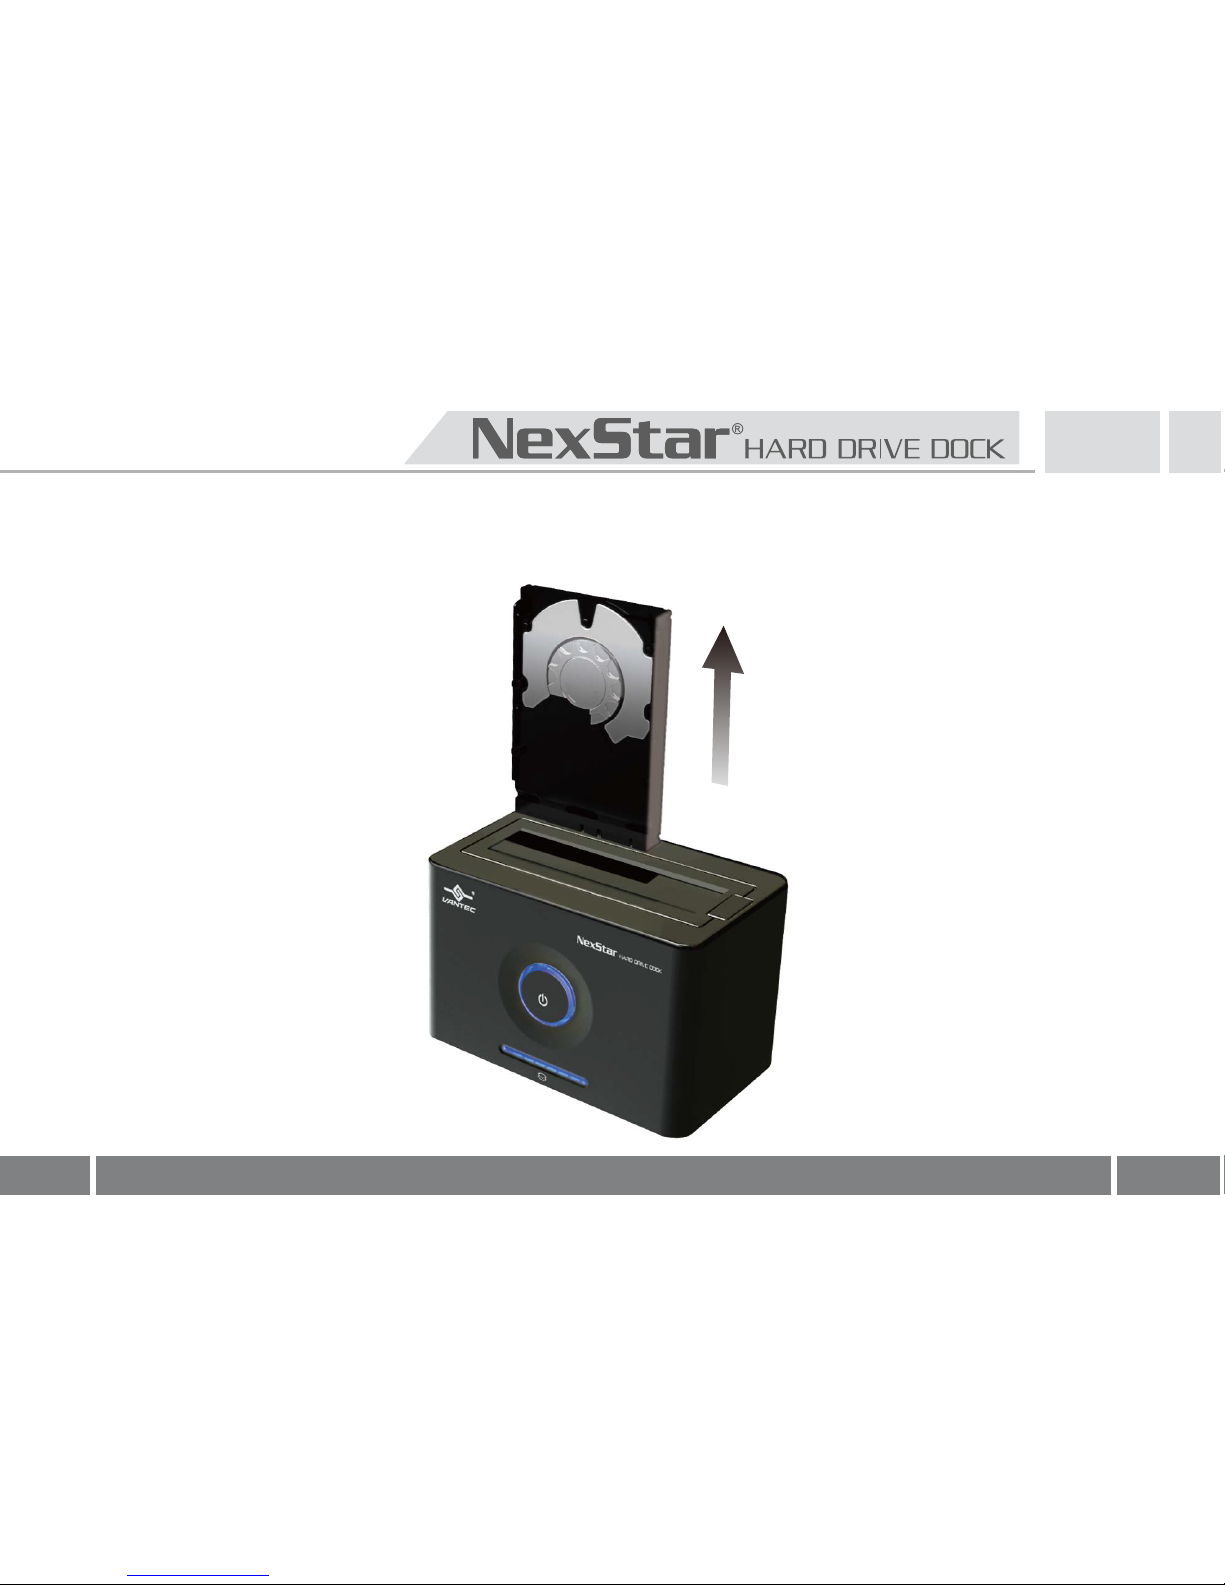
5.移除硬碟 ...................................................................................................................18
6.驅動程式安裝 ......................................................................................................... 20
Windows ME/2000/XP/VISTA
...................................................................................... 20
Windows 98SE
..............................................................................................................20
Mac OS 9.0
含以上 ....................................................................................................... 21
Mac OS 8.6
....................................................................................................................21
7.聯絡我們 ...................................................................................................................22
目錄

3
1.Introduct
2.System Requlrements
■
Microsoft Windows XP/Vista/7
■
Mac OS X v10.4 and Up
1.Introduction
The Vantec NexStar Hard Drive Dock is a complete and easy way to add or swap hard drives to your
computer. It gives you the flexibility of connecting any SATA I/II hard drive to your computer via USB
2.0 connection without opening up your computer case or installing into an enclosure. Simply just
insert any 2.5” or 3.5” SATA I/II hard drive into the NexStar Hard Drive Dock and you are ready to
transfer, copy, or backup files. Quick and easy, the Vantec NexStar Hard Drive Dock is the perfect
solution to access your hard drive in seconds.

4
3.Specifications/Features
Package Includes
:
■
NexStar Hard Drive Dock
■
USB Cable
■
■
Power Adapter
■
User’s Manual
CD Driver
Specifications
:
■
Device Support
:
SATA I/II Hard Drive
■
Device Size
:
2.5
”
or 3.5
”
■
Internal Interface
:
SATA
■
External Interface
:
USB 2.0
■
Material
:
Plastic
■
Dimension
:
136 x 83 x 87mm
■
HDD Capacity
:
Up to 2TB*
■
Power Supply
:
Features
:
■
Install And Access Hard Drive in Seconds.
■
Simple to Use Design; No Need to Add Enclosure or
Open Case.
■
Eject Button for Easy Removal of Hard Drive.
■
Supports 2.5"/3.5" SATA I/II Hard Drive Up to 2 TB*.
■
Add Storage to Any System with USB.
■
Plug & Play.
■
Attractive Blue LED Power & HDD Activity Light.
■
Transfer Rates Up to 480Mbps w/USB 2.0.
*For the most updated storage capacity, please check our website: www.vantec.com.tw
AC Adapter

5
4.Installation
1. Connect the power adapter to the NexStar Hard Drive Dock.
2. Connect the USB Cable to the NexStar Hard Drive Dock
and attach the other end to your computer.
USB 2.0
Cable
Power
Cable

6
3. Insert 2.5” or 3.5” SATA HDD into the slot.

7
3-1. When the eject button is upright, the NexStar Hard Drive Dock is ready for use.

8
5.Removal
1. Remove the HDD safely from your computer system.
2. Push down the button to eject the HDD.
(Stabilize the HDD with your hand).
Warning, please push power button & turn off unit before removing the hard drive!

9
3. Remove the HDD from the Hard Drive Dock.

10
6.Driver Installation
Windows ME/2000/XP/VISTA
No drivers are necessary when using Windows ME/2000/XP/VISTA. If the hard drive does
not appear under My Computer, be sure to partition your hard drive.
Windows 98SE
1. The first time you plug in the NexStar Hard Drive Dock into a USB port of your
computer, the [Add New Hardware Wizard] dialog box will appear.
2. Click on [Next]. Check the [Search for the best driver for your device] and click on [Next]
again.
3. Insert the device driver CD into your CD-ROM drive if you have not already done so
and click on [Next], a screen should appear to show which Storage Device you installed.
Click on [Next].
4. After the needed files are copied into your system, click on [Finish].
5. You should now be able to see the new hard drive under My Computer. A green
Unplug or Eject hardware icon will appear in the system tray as well. If the drive does
not appear, you may need to partition your hard drive first.

11
Mac OS 9.0 or later
No drivers are necessary when using Mac OS 9.0 above. If the hard drive does not
appear on the desktop, be sure to partition your hard drive.
Mac OS 8.6
1. Unplug the NexStar Hard Drive Dock if you currently have it connected.
2. USB Mass Storage Support 1.3.5 must be installed on your system. If it is not, you can
download the USB Mass Storage Support 1.3.5 from the Apple Software Updates
website: http://www.apple.com/support.
3. Follow the direction associated with the USB Mass Storage Support driver to install.
4. Repeat the steps listed under “Connecting the NexStar Hard Drive Dock to your
computer”.

12
7. Warranty
The NexStar Hard Drive Dock comes with a 1 year limited warranty (90 day parts). If your unit become
defective within that time frame, please go to
http ://www.vante c.com.tw
for information on how to
receive warranty exchange or repair. Cosmetic defects and missing parts are not covered under this
warranty. Please check the contents of the unit to make sure you receive all parts. Also, c heck for any
cosmetic flaws. If any parts are missing or if there are cosmetic defects, Please contact the retailer
from which you purchased the unit immediately and ask for a replacement.
Vantec Thermal Technologies.
4F.-2, No. 23, Sec. 6, Minquan E. Rd.,
Neihu District, Taipei City 114 (11494)
Taiwan, R.O.C
Tel: +886 (02)2791-6657
Fax: +886 (02)2791-7858
www.vantecusa.com
www.vantec.com.tw

傳輸方塊2.5/3.5吋雙用高速傳輸硬碟外接座
13
■
Microsoft Windows XP/Vista/7
■
Mac OS X v10.4 and Up以上
.
1.產品敘述
2.系統需求
凡達克科技為滿足外接式儲存週邊裝置使用的市場需求,正式推出「傳輸方塊-2.5/3.5吋雙用硬碟外接座」。人性化的
科技考量,減除繁瑣的硬碟安裝程序動作,資料傳輸及檔案交互備份快速又便利。
「 傳輸方塊-2.5/3.5吋雙用硬碟外接座 」透過USB介面傳輸,提供更靈活地連結外接裝置到您的電腦,無論是2.5吋或
3.5吋SATA裝置均可適用,不需繁瑣的安裝,直接將硬碟插入槽中即可使用,且支援隨插即用熱插拔。產品內附電源供
應器,便利供應裝置所需的獨立電源,讓您免除對於電源供應的疑慮,同時滿足您求新求變與精進講究的功能使用需求
。凡達克科技傳輸方塊絕對是您資料儲存的最佳工具。

傳輸方塊2 . 5 / 3 . 5 吋雙用高速傳輸硬 外接座
14
3.產 品 特 色 /規 格
簡易插拔安裝設計,不需使用工具拆裝硬碟,迅速好用。
力。
料。
藍光LED硬碟讀取/電源指示燈,可有效監控硬碟讀取動作。
適用於市面上所有2.5/3.5吋SATA硬碟(支援SATA2向下相容SATA1硬碟)。
USB傳輸介面符合USB2.0標準規格,最高支援480Mbps傳輸速度。
經典時尚霧面黑色烤漆,極簡風格更勝別家。
隨插即用,支援熱插拔。
產品特色:
型號 :NST-D100S2-BK
支援硬碟裝置:SATA I/II 硬碟
硬碟裝置規格:2.5吋/3.5 吋
內部連接介面:SATA
外部傳輸介面:USB 2. 0
硬碟支援:最高支援2TB*
電源供應:變壓器
外觀材質:塑 膠
本體尺寸:136x83x87mm
產品規格:
傳輸方塊-2.5/3.5吋雙用高速傳輸硬碟外接座
驅動程式光碟片
使用說明書
USB傳輸線
專用變壓器
包裝內附:
* ,請上凡達克科技網站www.vantec.com.tw

傳輸方塊2.5/3.5吋雙用高速傳輸硬碟外接座
15
4.產品裝置說明
步驟 1. 使用USB介面,請先確定USB1.1/USB2.0裝置是否已經安裝驅動程式,確保USB1.1/USB2.0裝置能正常運作。
步驟 2. 將USB的傳輸線,連接到傳輸方塊的USB連接埠。
步驟 3. 將USB的傳輸線,連接到您電腦的USB連接埠。
步驟 4. 將電源線連接到傳輸方塊的電源連接埠,並將電源開關打開,傳輸方塊即可以開始使用
傳輸線
USB 2.0
電源線
15

傳輸方塊2.5/3.5吋雙用高速傳輸硬碟外接座
16
步驟 5. 將2.5吋或3.5吋SATA硬碟插入傳輸方塊插槽內。

傳輸方塊2.5/3.5吋雙用高速傳輸硬碟外接座
17
步驟 6. 當退出鈕向上彈起,代表硬碟已正確安裝,即可開始傳輸及使用您的資料。

傳輸方塊2.5/3.5吋雙用高速傳輸硬碟外接座
18
5 . 移除硬碟
[注意]當系統正在對USB2.0硬碟執行資料拷貝或應用程序調用硬碟資料時,
程序未執行完畢或結束時,請勿將硬碟拔除,中途拔除硬碟將會導致檔案遺失或損壞。
步驟 1. 滑鼠雙擊在工具列的綠色小箭頭,然後選擇您想要移除的設備。
步驟 2. 關閉傳輸方塊電源並按下退出鍵移除硬碟。
(按下退出鍵時請輕扶硬碟)

傳輸方塊2.5/3.5吋雙用高速傳輸硬碟外接座
19
步驟 3. 安全的從傳輸方塊中移除硬碟。
Table of contents
Other Vantec Docking Station manuals

Vantec
Vantec vantec NST-D300S3 User manual

Vantec
Vantec DSH-300U3 User manual

Vantec
Vantec NexStar User manual

Vantec
Vantec Vantec NST-D300S3-BK User manual

Vantec
Vantec NextStar NST-D100S2 User manual

Vantec
Vantec DSH-200U2 User manual

Vantec
Vantec DSH-M100U3 User manual

Vantec
Vantec Vantec NST-D100SU User manual

Vantec
Vantec Vantec NST-D100SU User manual

Vantec
Vantec DSH-300U3 User manual