Vantly BT-1228SDU-S User manual

1
Dual Function Trailer Manual
ATTENTION:
Please read this instruction before mounting and using.
Disregarding the directions in this manual can cause damage or injury.

2
Model no. BT-1228SDU-S Before you start assembly, please check the
contents of the carton:
♦1 x trailer folded
♦1 x 8” front swivel wheel set
♦2 x 20” rear wheel
♦1 x handlebar
♦1 x tow bar
♦1 x quick release
♦2 x locking clip for rear wheel
♦2 x lock pin for handlebar
♦1 x flag
zAssemble the trailer(function 1)
Step 1:
When starting to assemble the trailer, push up the trailer
from the back side.
Step 2:
The folded mechanism is inside the rear pocket. Open
the zipper first.

3
Step 3:
Pull the rear tubing backward. (The buckles might hit the
seat back, push the seat back forwarder to let the
buckles pass through it.)
Step 4:
Close the both side clips. The red lever will fall and set
automatically.
Step 5:
Closed the zippers at both sides of fabric cover after both
buckles are assembled to protect kids fingers.
Step 6:
The fabric cover should be kept closed during driving.
Step 7:
Insert the wheel axle into the wheel tube then insert the
locking clip and make sure the wheels are locked into
position.
Step 8 :
Insert the tow bar to the bracket at middle of front
frame.

4
Step 9 :
Fasten the lever of the qulick release and the tow bar
is now secured.
Step 10:
Pull down the side protect bar at both sides of trailer.
Step11:
The ball pin at front side would be fell into bracket
automatically.
Step 12:
To assemble the trailer with your bike.
You have to examine that the hitch assembly is fixed
at the end of tow bar.
A – black connector
B – silver alloy tubing C – Locking clip
Step 13:
Use the wrench to release the nut of bike rear wheel
axle. Remove the black connector (PartA) from the hitch
assembly and slide the bike rear wheel axle through the
hole of black connector. Then tighten the
nut of bike rear wheel axle.
Step 14:
Take the silver alloy tubing (Part B) that fixed at the
end of tow bar, insert the black connector into the
silver alloy tubing. Rotate the black connector to
align its hole with the hole of silver alloy tubing.
Insert the locking clip into both holes to lock.

5
Step 15:
Circle the safety strap around the rear stay of bicycle and
hook it back to the tow bar.
Step 16:
The entrance for child to come in and get out is the
zipper door.
Step 17 :
When the child is in the trailer. The safe straps should
harnessed and adjusted carefully.
Step 18 :
The transparent cover is made to protect the kids from
rain and dust. Usually, the rain cover is rolled up. In
case you need it, pull the transparent cover down and
fasten the Velcro in the front of the canopy.
Step 19 :
Before using the trailer, put the flag into the mount at the
left side. This is very important, because the trailer can
be easy overlook in the traffic.
Step20:
When close (fold) the trailer, firstly open the zipper of
the fabric cover, push up the red lever firstly. (It is the
2nd safety lock.) Then open the clip.

6
Step 21:
Push the rear tubing forward. Then the trailer could be
folded.
zChange the trailer to the baby stroller (function 2)
Step 1 :
Insert the 8” front swivel wheel into bracket located at
the front of the trailer. Use the quick release to
tighten the stroller wheel.
Step 2:
When using the trailer as the stroller function, must assemble
the handlebar. Insert the pins to the brackets of handlebar to
finish assembly of the handle bar.

7
zParking device-packing device should be engaged when placing and removing the children
Step 1 :
The brake system is at rear side. To set the parking brake,
press the brake bar down into the locked
position with your foot.
Step 2:
Make sure the brake shaft insert into the both side
brake gears exactly.
zRear luggage - The rear space could be used to stock the toys and small miscellaneous articles,
maximum loading is 6kgs.

8
zInstruction of safety belt.
WARNING!
Always adjust the shoulder harness and crotch strap so that they meet at the child’s lower chest. Adjusting
harness and buckles near your child’s neck could cause serious injury.
ONE CHILD
1. Unclip the right-hand shoulder harness from the 2nd safety lock buckle.
2. Seat child in the center of the seat.
3. Place center crotch strap between child’s legs and adjust so that the strap loop is centered at the child’s
lower chest.
4. Thread the right-hand shoulder harness through the crotch strap loop, clip it into buckle over the child’s right
shoulder.
5. Fasten lap belt buckle and tighten snugly.
TWO CHILDREN
1. Unclip the shoulder harnesses from the 2nd safety lock buckles and unthread them.
2. Seat children in the trailer.
3. Place outer crotch straps between the children’s legs and adjust so that the strap loops are centered at the
children’s lower chest.
4. Thread shoulder harnesses through the crotch strap loops, clip them into the buckles over the children’s
rights shoulder and tighten by pulling the loose end from over the children’s left shoulder.
5. Fasten lap belt buckle and tighten snugly.

9
SATETY NOTES/WARNING!:
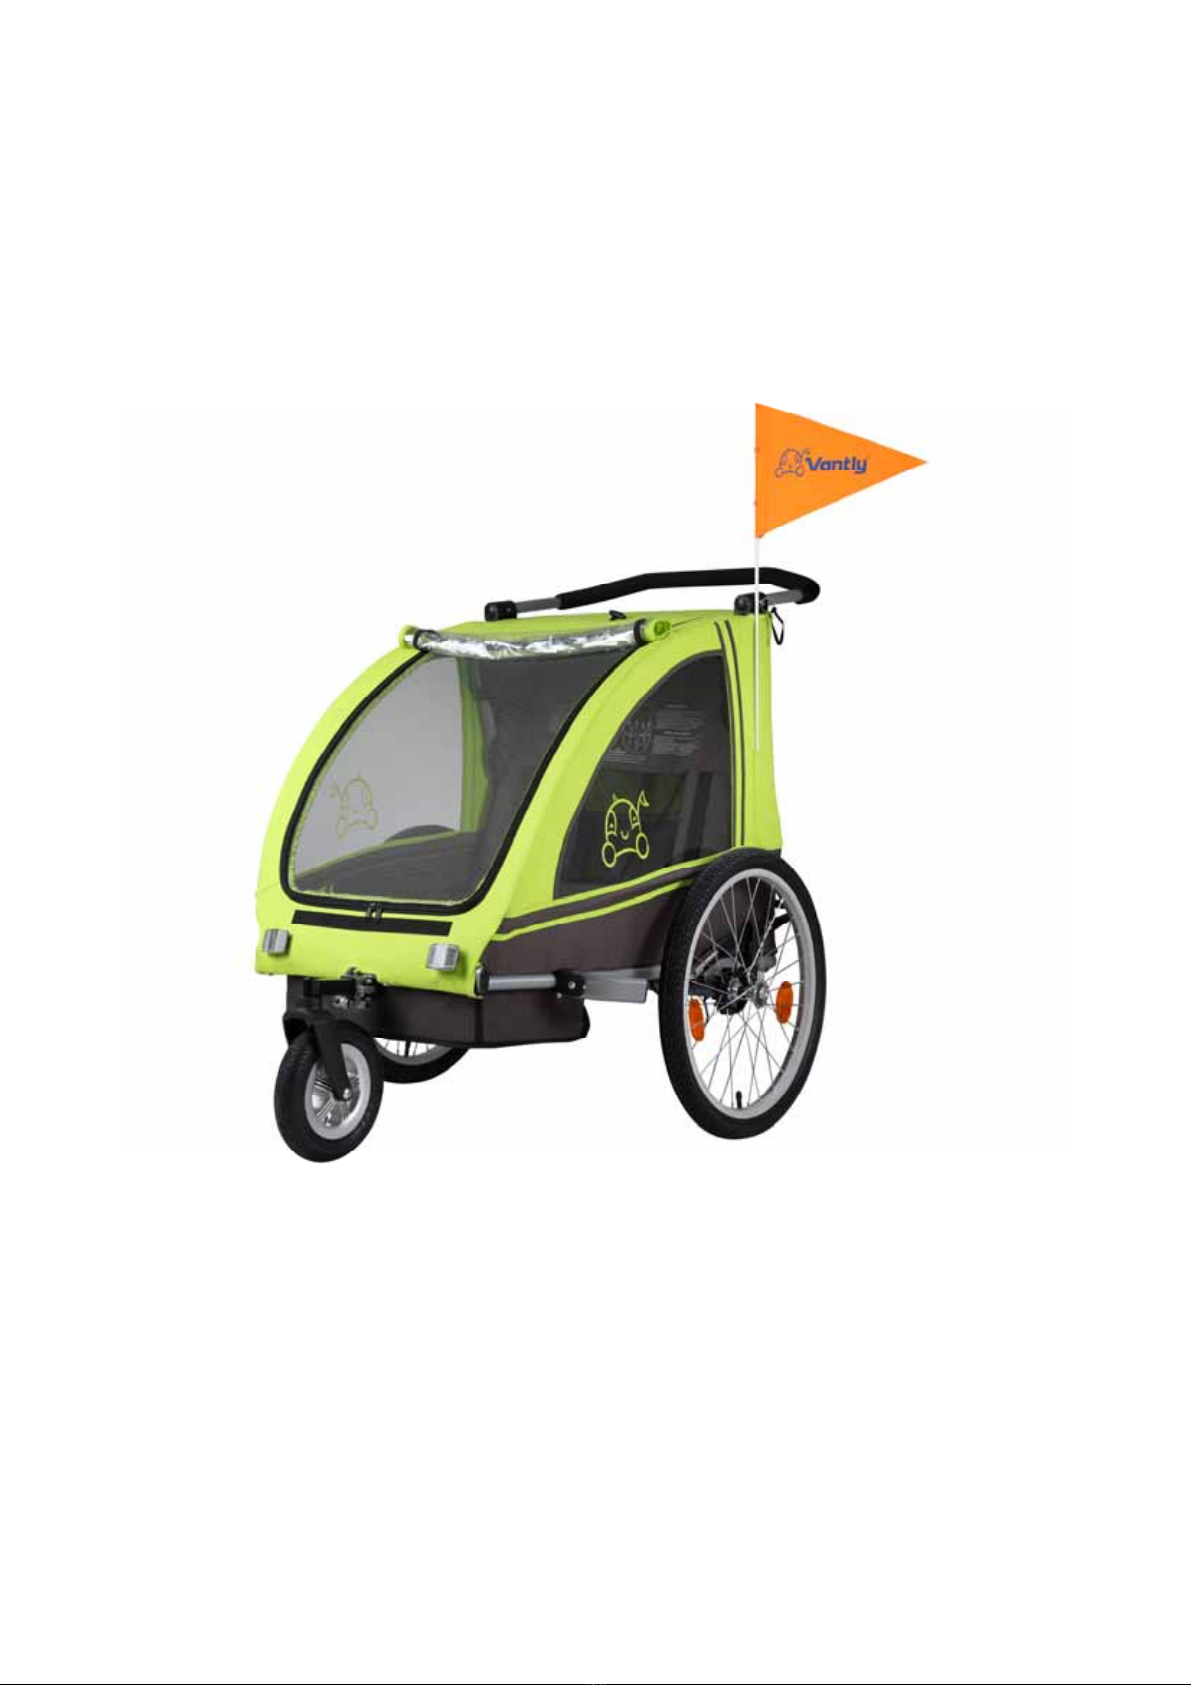
1. This product is two functions, one is trailer function, the other is stroller function, when using as trailer, the
front wheel must not be mounted at the trailer nor left into the trailer.
2. Maximum load = 42kgs(baby:18kgs+baby:18kgs+luggage:6kgs).
3. Maximum total weight: 58.6kgs
4. Minimum age of passengers: 9 months or could be seated without assistance.
5. Maximum height of passenger: 105cm or could be seated without assistance.
6. Maximum number of passengers: 2 children.
7. Maximum speed = 16km/h
8. Maximum pressure is 30-35 psi.
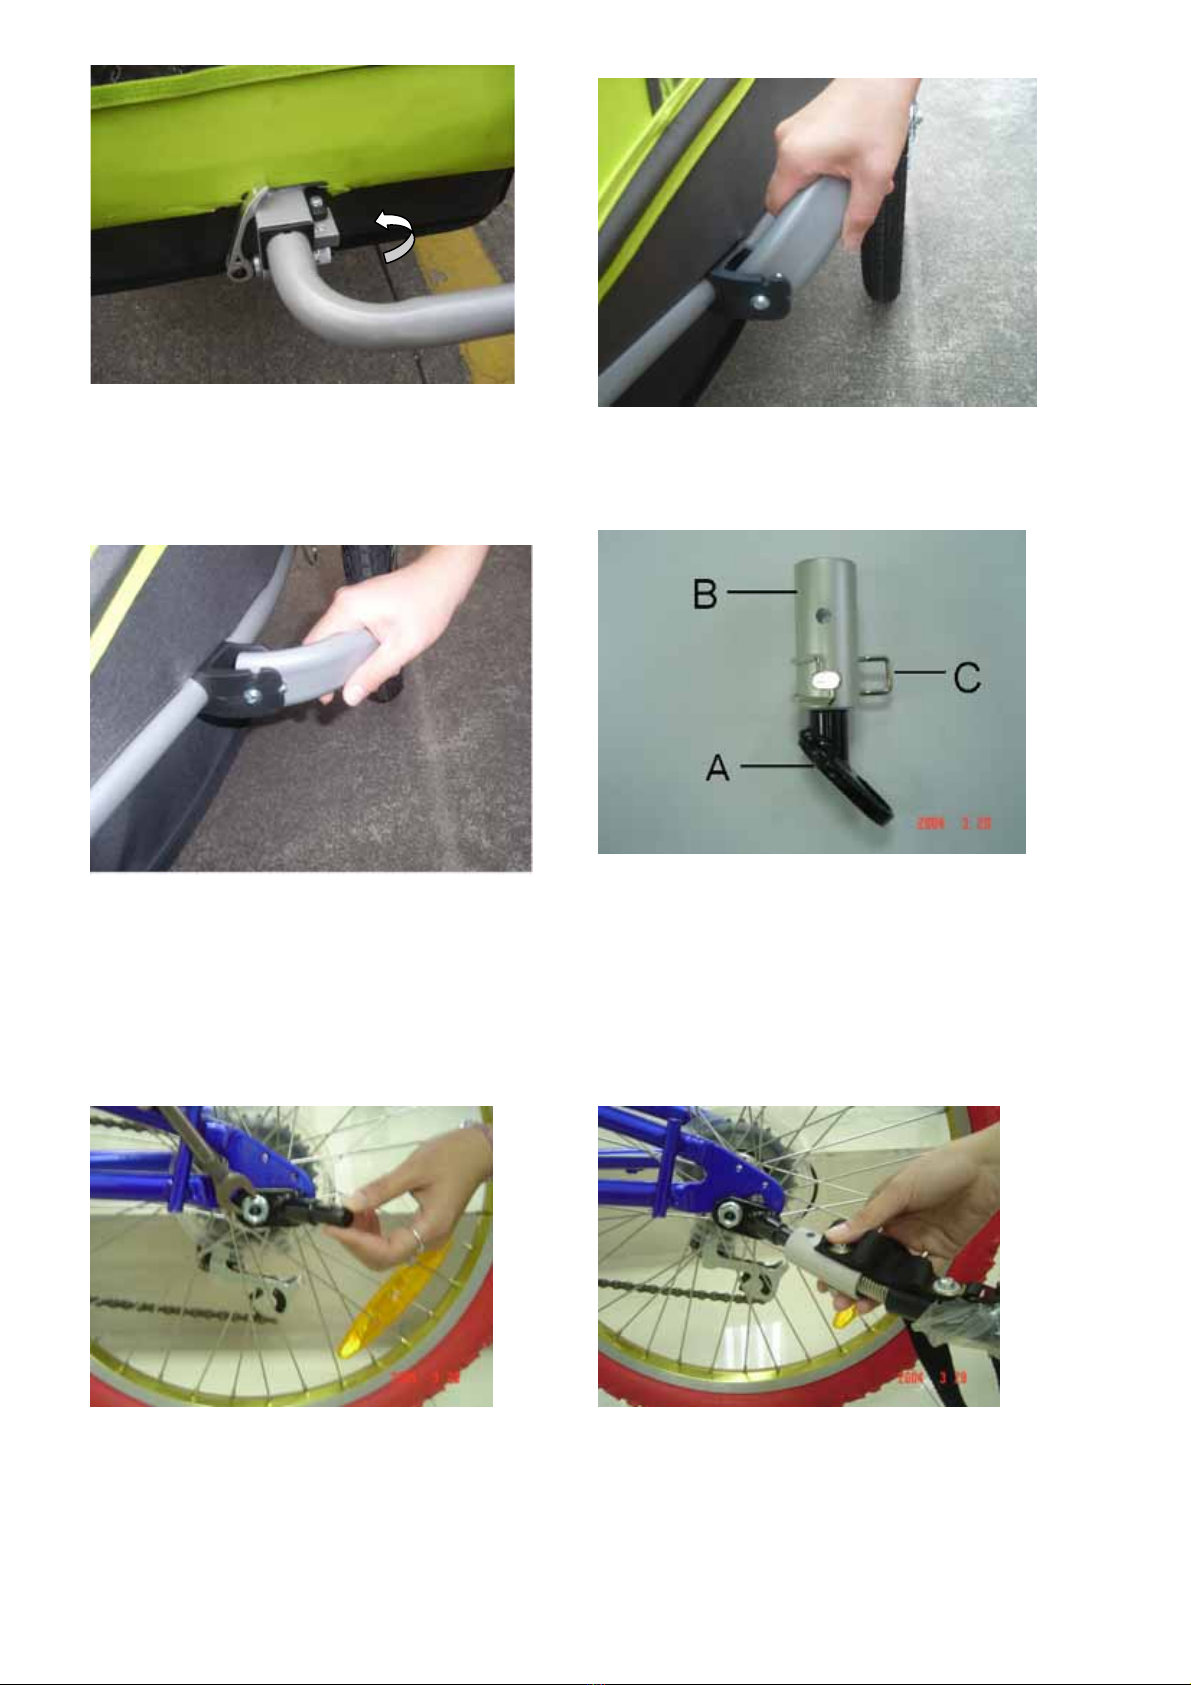
9. Maximum tow bar loading capacity:4kgs.
10. Minimum tow bar loading capacity: 0kgs
11. Never attach the trailer to the racing bike, off-road bike, e-bike or motor bike power assisted bike.
12. Never leave the kid unattended in the trailer.
13. The rider should be an adult in good physical condition, take more attention when driving downhill or around
corners.
14. The person on the bike and the kid in the trailer should wear a helmet.
15. The safety belts should be adjusted carefully.
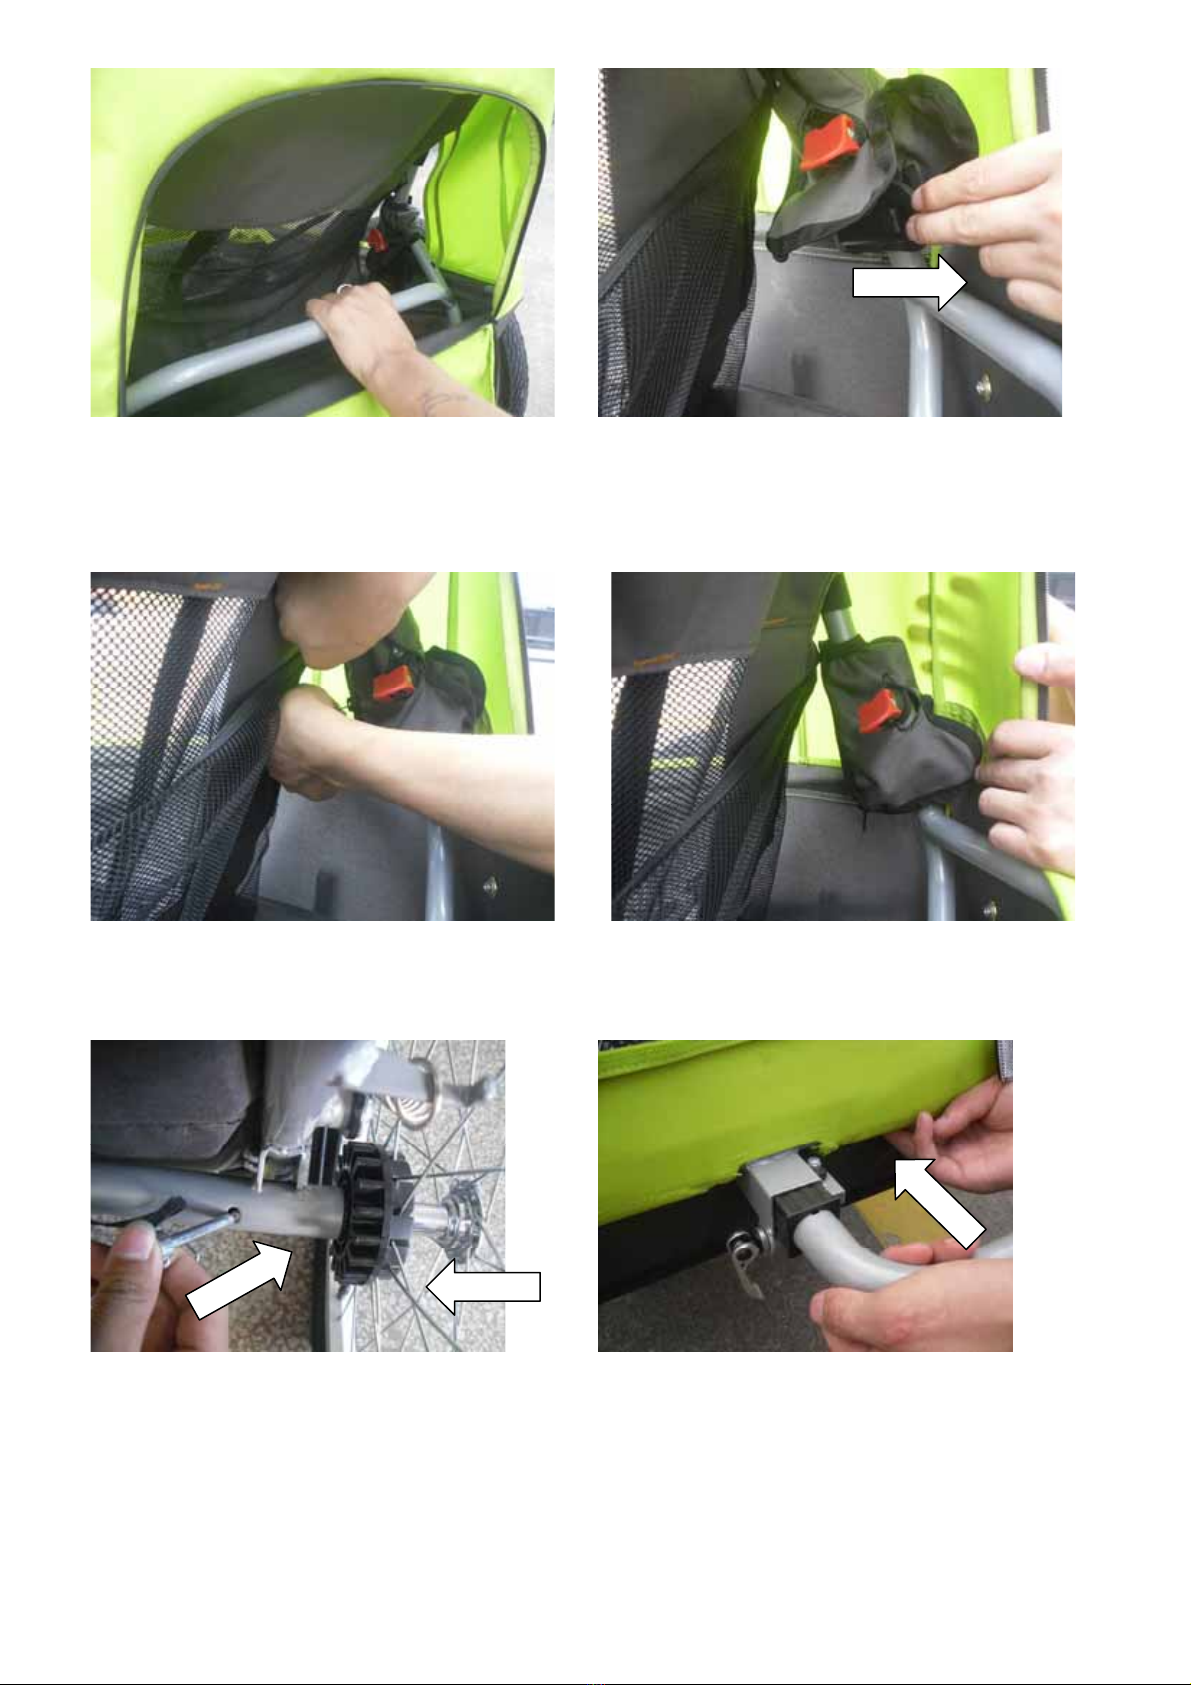
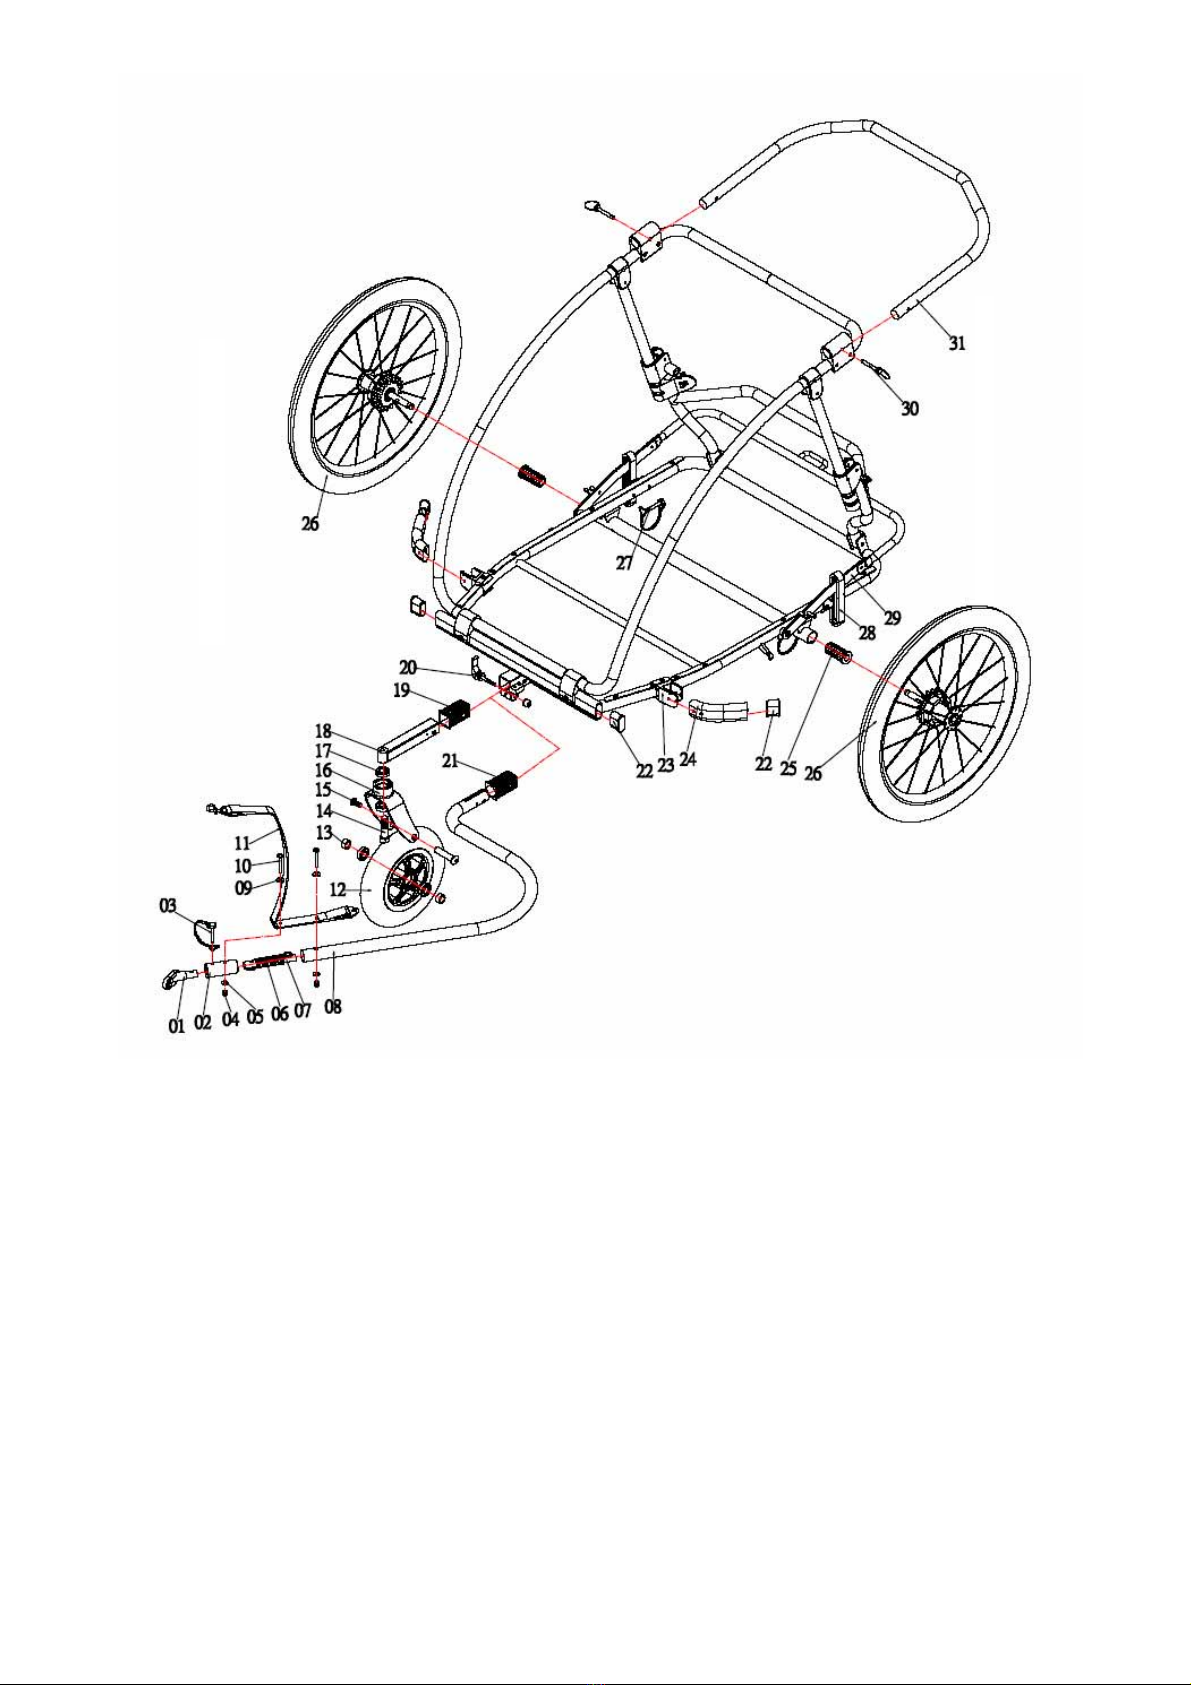
16. Please assemble the trailer exactly according this instruction.
17. Do not make any modifications to the trailer.
18. Do not park trailer near a ditch or dangerous road.
19. Don’t put anything next to the child when it’s sitting in the trailer as danger of injury.
20. Ensure that all the locking/packing devices are engaged and function well before use.
21. To avoid injury, ensure that your child is kept away when unfolding and folding this product.
22. Do not let your child play with this product.
23. Always use the restraint system.
24. Check the seat unit is correctly engaged before use.
25. This seat unit is not suitable for children under 6 months
26. The cover of a cycle trailer for children shall always be closed during the drive
27. When using as stroller function, it is not suitable for running or skating.
28. Parking device shall be engaged when placing and removing the children
29. Please note the braking distance of the cycle when the trailer is attached.
30. Any load attached to the handle and/or on the sides of the vehicle will affect the stability of the vehicle.
31. Accessories which are not approved by the manufacturer shall not be used
32. Only replacement parts supplied or recommended by the manufacturer/distributor shall be used.
33. Check tire pressure during assembly and before each ride, inspect routinely, maintain cleanly.

10
1. Black connector 13. Sleeve(2pcs)&bearing(2pcs) 25. Rear wheel bushing(2pcs)
2. Silver alloy tubing 14. Screw bolt 26. 20” Rear wheel(2pcs)
3. Locking clip 15. Front wheel axle 27. Safety pin(2pcs)
4. Nut (2pcs) 16. Front fork 28. Brake bracket(2pcs)
5. Washer (2pcs) 17. Ball bearing 29. Park brake bar
6. Yellow pipe
7. Spring
8. Tow bar
9. Washer(2pcs)
10. Screw bolt (2pcs)
11. Secondary safety strap
12. Front swivel wheel 8”
18. Front wheel connection
19. Front wheel housing
20. Quick release
21. Tow bar housing
22. End cap(4pcs)
23. Black plastic bracket
24. Protection bar
30. Ball pin (2pcs)
31. Handle bar
Table of contents