manuals.online logo
Brands
  1. Home
  2. •
  3. Brands
  4. •
  5. Veris
  6. •
  7. Transducer
  8. •
  9. Veris E683 Series User manual

Veris E683 Series User manual

ZL0170-0A Page 1 of 2 ©2018 Veris Industries USA 800.354.8556 or +1.503.598.4564 / suppor[email protected] 0518
Alta Labs, Enercept, Enspector, Hawkeye, Trustat, Aerospond, Veris, and the Veris ‘V’ logo are trademarks or registered trademarks of Veris Industries, L.L.C. in the USA and/or other countries.
Other companies’ trademarks are hereby acknowledged to belong to their respective owners.
Installation Guide
Power Metering CTs TM
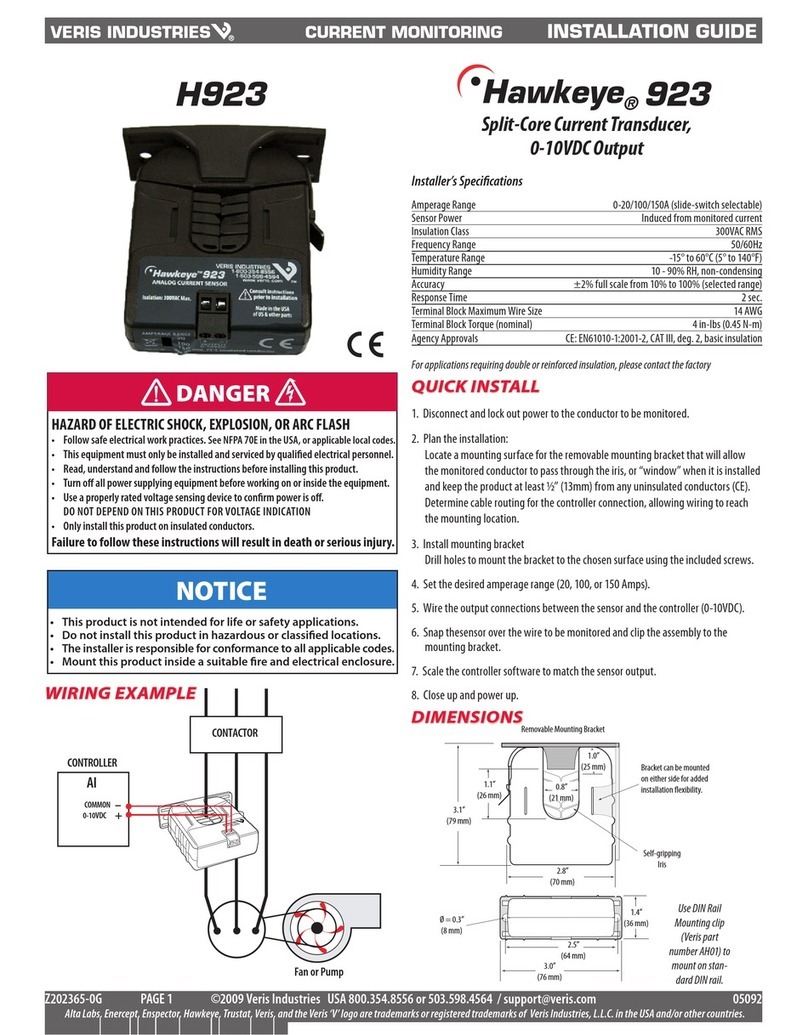
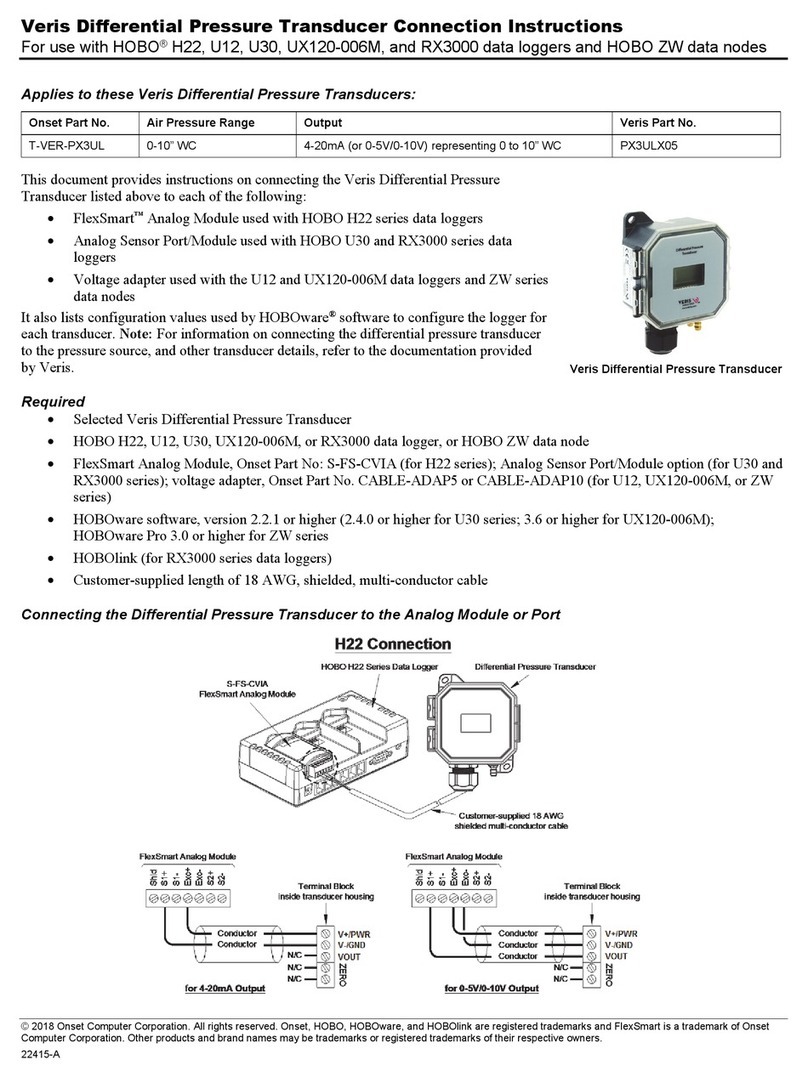
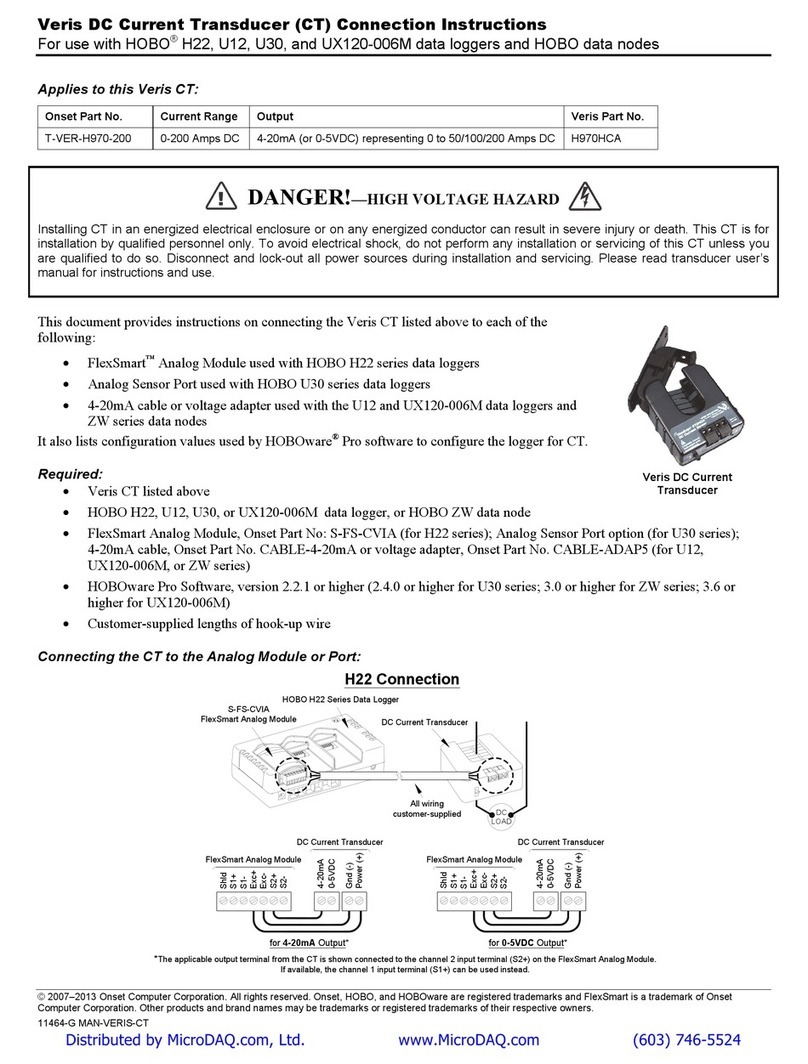
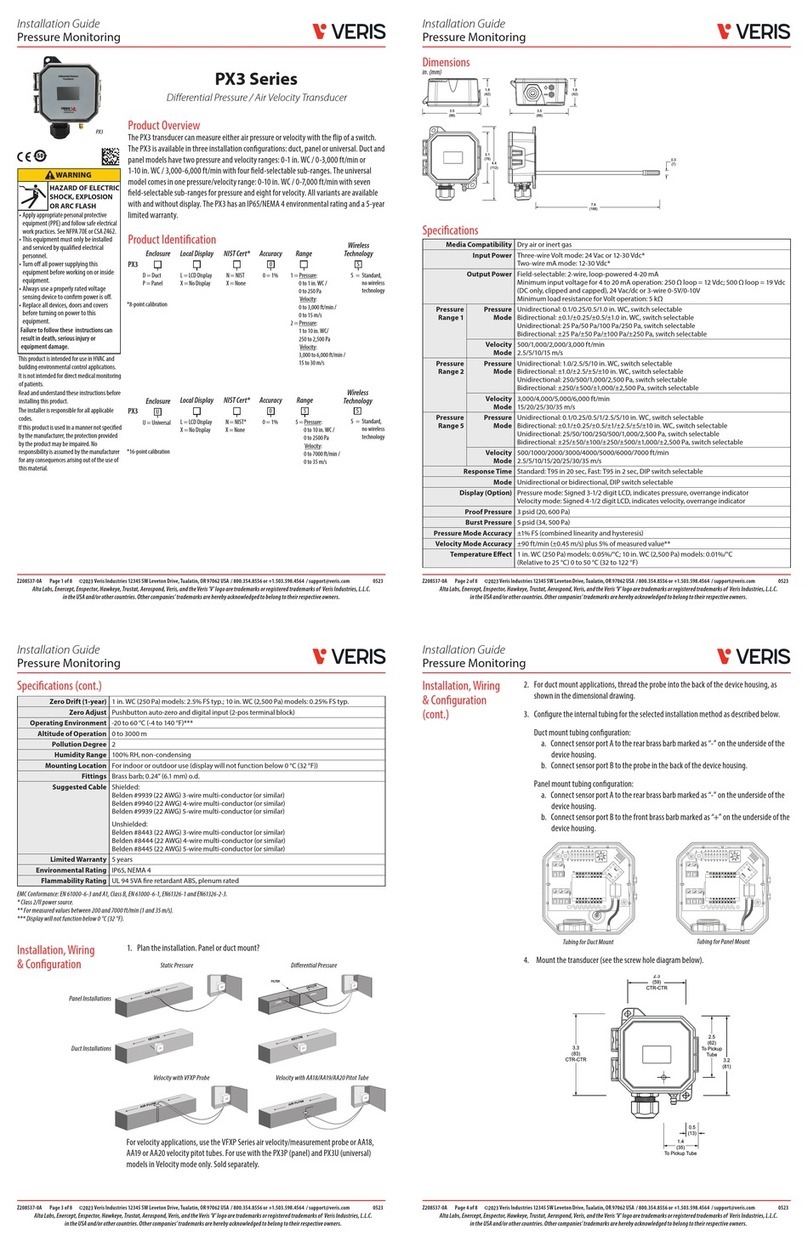
DRAFT
Product Identication
Product Description
E683D502 Rogowski CT, 300 mm (12”), 600 Vac, 5 kA
E683G502 Rogowski CT, 460 mm (18”), 600Vac, 5 kA
E683J502 Rogowski CT, 600 mm (24”), 600 Vac, 5 kA
E683L502 Rogowski CT, 900 mm (36”), 600 Vac, 5 kA
Product Overview
The E683x Series of Rogowski exible rope style current transducers (CTs) provide secondary AC voltage
proportional to the primary (sensed) current. For use with E5xxxA and E2x Series power meters, the E683x
Series CTs provide a cost-eective means to transform electrical service amperages to a voltage compatible
with monitoring equipment. The exible core makes it easy to t in tight enclosures.
These products provide reinforced insulation between the sensed conductor and the output leads.
E683x Series
Rogowski Current Transducers
for use with E5xxxA & E2x Series Power Meters
Specications
Output at Rated Current Custom for E5xxxA and E2x Series power meters
Accuracy ±1% from 50 to 5000 A
Frequency Range 50/60 Hz
Cable 1000 Vac UL Style 21223 cable with 22 AWG leads
Operating Temperature Range -15 to +60 °C (+5 to +140 °F)
Storage Temperature Range -40 to +70 °C (-40 to +158 °F)
Humidity Range 0 to 95% non-condensing
Max. Voltage L-N Sensed Conductor 600 Vac (reinforced insulation rating)
Altitude of Operation 2000 m max.
COMPLIANCE INFORMATION
Approvals EN61010-1; UL61010-1; EN61010-2-032; UL61010-2-032;
CAN/CSA-C22.2 No. 61010-1
Installation Category 600 Vac Cat IV, Pollution Degree 2
WARRANTY
Limited Warranty 3 years
HAZARD OF ELECTRIC SHOCK, EXPLOSION, OR ARC FLASH
• Do not use this product for life or safety applications.
• Do not install this product in hazardous or classified locations.
• Mount this product inside a suitable fire and electrical enclosure.
• Apply appropriate personal protective equipment (PPE) and follow safe electrical
work practices. See NFPA 70E in the USA, CSA Z462 or applicable local standards.
• This equipment must only be installed and serviced by qualified electrical personnel.
• Read, understand and follow the instructions before installing this product.
• Turn off all power supplying equipment before working on or inside the equipment.
• Product may use multiple voltage/power sources. Disconnect all sources before
servicing.
• Use a properly rated voltage sensing device to confirm that power is off. Do not
depend on this product for voltage indication.
• Current transformer secondaries must be shorted or connected to a burden at all times.
• Replace all doors, covers and protective devices before powering the equipment.
Failure to follow these instructions will result in death or serious injury.
Electrical equipment should be installed, operated, serviced and maintained only by
qualied personnel. No responsibility is assumed byVeris Industries for any
consequences arising out of the use of this material. A qualied person is one who has
skills and knowledge related to the construction, installation and operation of
electrical equipment and has received safety training to recognize and avoid the
hazards involved.
Installation, wiring, testing and service must be performed in accordance with all local
and national electrical codes.
If this product is be used in a manner not specied by the manufacturer, the
protection provided by the product may be impaired.
DANGER
Do not apply current transducers to circuits that have a phase-to-phase voltage greater
than their voltage rating unless adequate additional insulation is applied between the
primary conductor and the current transducers. Veris assumes no responsibility for
damage of equipment or personal injury caused by products operated on circuits
above their published ratings.
WARNING
E683x Series Installation Guide
TM
ZL0170-0A Page 2 of 2 ©2018 Veris Industries USA 800.354.8556 or +1.503.598.4564 / suppor[email protected] 0518
Alta Labs, Enercept, Enspector, Hawkeye, Trustat, Aerospond, Veris, and the Veris ‘V’ logo are trademarks or registered trademarks of Veris Industries, L.L.C. in the USA and/or other countries.
Other companies’ trademarks are hereby acknowledged to belong to their respective owners.
1. Turn o all power supplying this device and the equipment in which it is
installed before working on the device or equipment.
2. Always use a properly rated voltage sensing device to conrm that all
power is o.
3. Connect the CT output leads to the meter inputs. The white wire is the x1
lead. An arrow points to the load side.
4. Release the clasp on one side of the CT and open it on the hinge.
5. Fit the Rogowski coil around the conductor, bringing the coil ends
together.
6. Lock the coil by turning the ring clockwise as shown in the diagram
at right.
7. Reconnect power to the panel.
Installation
Dimensions
3.76 in. (96 mm)
5.76 in. (146 mm)
7.52 in. (191 mm)
11.28 in. (287 mm)
(FOR REFERENCE ONLY)
1.05 in. (26.50 mm)
0.33 in. (8.3 mm)
2.84 in.
(72 mm)
8 ft. (2.45 m)
7.7 ft. (2.35 m)
12 in. (300 mm)
18 in. (460 mm)
24 in. (600 mm)
36 in. (900 mm)
HAZARD OF ELECTRIC SHOCK, EXPLOSION, OR ARC FLASH
• Do not use this product for life or safety applications.
• Do not install this product in hazardous or classified locations.
• Mount this product inside a suitable fire and electrical enclosure.
• Apply appropriate personal protective equipment (PPE) and follow safe electrical
work practices. See NFPA 70E in the USA, CSA Z462 or applicable local standards.
• This equipment must only be installed and serviced by qualified electrical personnel.
• Read, understand and follow the instructions before installing this product.
• Turn off all power supplying equipment before working on or inside the equipment.
• Product may use multiple voltage/power sources. Disconnect all sources before
servicing.
• Use a properly rated voltage sensing device to confirm that power is off. Do not
depend on this product for voltage indication.
• Current transformer secondaries must be shorted or connected to a burden at all times.
• Replace all doors, covers and protective devices before powering the equipment.
Failure to follow these instructions will result in death or serious injury.
Electrical equipment should be installed, operated, serviced and maintained only by
qualied personnel. No responsibility is assumed byVeris Industries for any
consequences arising out of the use of this material. A qualied person is one who has
skills and knowledge related to the construction, installation and operation of
electrical equipment and has received safety training to recognize and avoid the
hazards involved.
Installation, wiring, testing and service must be performed in accordance with all local
and national electrical codes.
If this product is be used in a manner not specied by the manufacturer, the
protection provided by the product may be impaired.
DANGER

This manual suits for next models

4

Other Veris Transducer manuals

Veris T-VER-H970-200 Instruction manual

Veris

Veris T-VER-H970-200 Instruction manual

Veris H-6001 User manual

Veris

Veris H-6001 User manual

Veris Hawkeye H421SP User manual

Veris

Veris Hawkeye H421SP User manual

Veris PX3 Series User manual

Veris

Veris PX3 Series User manual

Veris PX3ULX05 Instruction manual

Veris

Veris PX3ULX05 Instruction manual

Veris PX3 Series User manual

Veris

Veris PX3 Series User manual

Veris EP3 Series User manual

Veris

Veris EP3 Series User manual

Veris PX3 Series User manual

Veris

Veris PX3 Series User manual

Veris EP2 Series User manual

Veris

Veris EP2 Series User manual

Veris Hawkeye 923 User manual

Veris

Veris Hawkeye 923 User manual

Popular Transducer manuals by other brands

Raymarine RV-100 RealVision 3D installation instructions

Raymarine

Raymarine RV-100 RealVision 3D installation instructions

novotechnik TM1 Series user manual

novotechnik

novotechnik TM1 Series user manual

LEM ITZ 2000-SBPR FLEX ULTRASTAB manual

LEM

LEM ITZ 2000-SBPR FLEX ULTRASTAB manual

WHD Exciter X.32-4 quick start guide

WHD

WHD Exciter X.32-4 quick start guide

Axiometrix Solutions imc WFT-Cx manual

Axiometrix Solutions

Axiometrix Solutions imc WFT-Cx manual

S+S Regeltechnik THERMASGARD RTM1-U Operating Instructions, Mounting & Installation

S+S Regeltechnik

S+S Regeltechnik THERMASGARD RTM1-U Operating Instructions, Mounting & Installation

Raymarine Wind Vane Service manual

Raymarine

Raymarine Wind Vane Service manual

HBM C6A Mounting instructions

HBM

HBM C6A Mounting instructions

Seneca T201DC manual

Seneca

Seneca T201DC manual

Lumel P30U series user manual

Lumel

Lumel P30U series user manual

gefran ONP1-A Series installation manual

gefran

gefran ONP1-A Series installation manual

KEPO DAP9050-F3 specification

KEPO

KEPO DAP9050-F3 specification

Trimec DUALPULSE 490 instruction manual

Trimec

Trimec DUALPULSE 490 instruction manual

turck HART IM33-11-Hi/24VDC Series quick start guide

turck

turck HART IM33-11-Hi/24VDC Series quick start guide

Signaltec MCTS II CT installation manual

Signaltec

Signaltec MCTS II CT installation manual

Siemens EchoMax ST-H Quick start manual

Siemens

Siemens EchoMax ST-H Quick start manual

Meggitt Whittaker C173255-1 Maintenance manual

Meggitt

Meggitt Whittaker C173255-1 Maintenance manual

Thyracont VSH87E operating instructions

Thyracont

Thyracont VSH87E operating instructions

manuals.online logo
manuals.online logoBrands
  • About & Mission
  • Contact us
  • Privacy Policy
  • Terms and Conditions

Copyright 2025 Manuals.Online. All Rights Reserved.