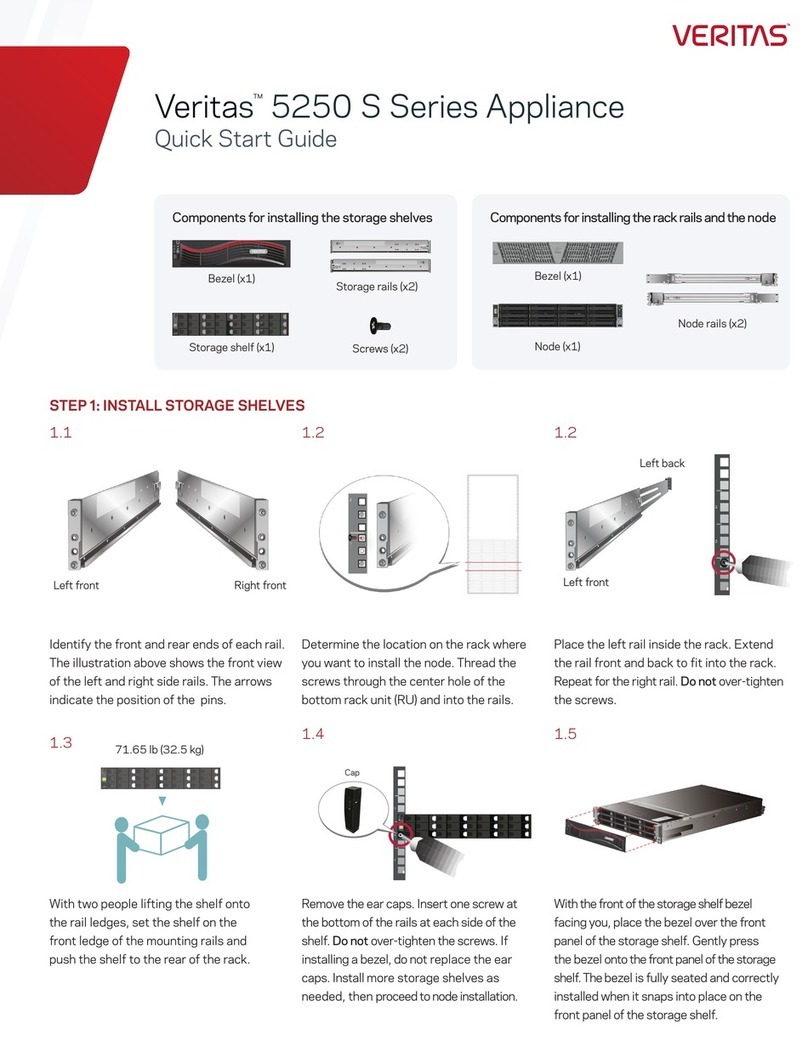
VERITAS 5250 Manual

Veritas™ 5250 Appliance
Hardware Installation Guide

Veritas 5250 Appliance Hardware Installation Guide
Last updated: 2020-05-20
Legal Notice
Copyright © 2020 Veritas Technologies LLC. All rights reserved.
Veritas, the Veritas Logo, and NetBackup are trademarks or registered trademarks of Veritas
Technologies LLC or its affiliates in the U.S. and other countries. Other names may be
trademarks of their respective owners.
This product may contain third-party software for which Veritas is required to provide attribution
to the third party (“Third-party Programs”). Some of the Third-party Programs are available
under open source or free software licenses. The License Agreement accompanying the
Software does not alter any rights or obligations you may have under those open source or
free software licenses. Refer to the Third-party Legal Notices document accompanying this
Veritas product or available at:
https://www.veritas.com/about/legal/license-agreements
The product described in this document is distributed under licenses restricting its use, copying,
distribution, and decompilation/reverse engineering. No part of this document may be
reproduced in any form by any means without prior written authorization of Veritas Technologies
LLC and its licensors, if any.
THE DOCUMENTATION IS PROVIDED "AS IS" AND ALL EXPRESS OR IMPLIED
CONDITIONS, REPRESENTATIONS AND WARRANTIES, INCLUDING ANY IMPLIED
WARRANTY OF MERCHANTABILITY, FITNESS FOR A PARTICULAR PURPOSE OR
NON-INFRINGEMENT, ARE DISCLAIMED, EXCEPT TO THE EXTENT THAT SUCH
DISCLAIMERS ARE HELD TO BE LEGALLY INVALID. VERITAS TECHNOLOGIES LLC
SHALL NOT BE LIABLE FOR INCIDENTAL OR CONSEQUENTIAL DAMAGES IN
CONNECTION WITH THE FURNISHING, PERFORMANCE, OR USE OF THIS
DOCUMENTATION. THE INFORMATION CONTAINED IN THIS DOCUMENTATION IS
SUBJECT TO CHANGE WITHOUT NOTICE.
The Licensed Software and Documentation are deemed to be commercial computer software
as defined in FAR 12.212 and subject to restricted rights as defined in FAR Section 52.227-19
"Commercial Computer Software - Restricted Rights" and DFARS 227.7202, et seq.
"Commercial Computer Software and Commercial Computer Software Documentation," as
applicable, and any successor regulations, whether delivered by Veritas as on premises or
hosted services. Any use, modification, reproduction release, performance, display or disclosure
of the Licensed Software and Documentation by the U.S. Government shall be solely in
accordance with the terms of this Agreement.
Veritas Technologies LLC
2625 Augustine Drive
Santa Clara, CA 95054
http://www.veritas.com

Technical Support
Technical Support maintains support centers globally. All support services will be delivered
in accordance with your support agreement and the then-current enterprise technical support
policies. For information about our support offerings and how to contact Technical Support,
visit our website:
https://www.veritas.com/support
You can manage your Veritas account information at the following URL:
https://my.veritas.com
If you have questions regarding an existing support agreement, please email the support
agreement administration team for your region as follows:
[email protected]Worldwide (except Japan)
[email protected]Japan
Documentation
Make sure that you have the current version of the documentation. Each document displays
the date of the last update on page 2. The latest documentation is available on the Veritas
website:
https://www.veritas.com/content/support/en_US/dpp.Appliances.html
Documentation feedback
Your feedback is important to us. Suggest improvements or report errors or omissions to the
documentation. Include the document title, document version, chapter title, and section title
of the text on which you are reporting. Send feedback to:
You can also see documentation information or ask a question on the Veritas community site:
http://www.veritas.com/community/
Veritas Services and Operations Readiness Tools (SORT)
Veritas Services and Operations Readiness Tools (SORT) is a website that provides information
and tools to automate and simplify certain time-consuming administrative tasks. Depending
on the product, SORT helps you prepare for installations and upgrades, identify risks in your
datacenters, and improve operational efficiency. To see what services and tools SORT provides
for your product, see the data sheet:
https://sort.veritas.com/data/support/SORT_Data_Sheet.pdf

Chapter 1 Hardware overview ............................................................. 7
About the appliance and the storage shelves ....................................... 7
Appliance disk drives ...................................................................... 8
About the 5250 Appliance control panel .............................................. 9
About the System Status LED states .......................................... 10
About the Power button LED states ............................................ 14
Appliance rear panel ..................................................................... 15
Storage shelf disk drives ................................................................ 16
Storage shelf control panel ............................................................. 16
Storage shelf rear panel ................................................................. 17
Cables ....................................................................................... 18
About IPMI configuration ................................................................ 19
Product documentation .................................................................. 20
Chapter 2 Preinstallation requirements .......................................... 21
Customer-provided environment and supplies .................................... 21
Appliance shipping container contents .............................................. 22
Storage shelf shipping container contents .......................................... 23
Best practices for rack installation .................................................... 23
Determining rack locations ............................................................. 24
Storage shelf rack requirements ...................................................... 25
Heat dissipation ........................................................................... 26
Verifying SAS-3 cable length ........................................................... 27
Prerequisites for IPMI configuration .................................................. 27
Chapter 3 Installation procedures ..................................................... 29
Installing the storage shelf rack rails ................................................. 29
Installing the storage shelf into a rack ............................................... 31
Attaching the storage shelf bezel ..................................................... 32
Installing the appliance rack rails ..................................................... 33
Installing the appliance into a rack ................................................... 37
Understanding appliance and storage shelf connections ....................... 38
Connecting an appliance to one storage shelf .................................... 41
Connecting an appliance to more than one storage shelf ...................... 42
Contents

Connecting the network cables ........................................................ 54
Connecting the power cords ........................................................... 55
Turning on the hardware and verifying operation ................................. 56
Configuring the IPMI port from the NetBackup Appliance Shell Menu
........................................................................................... 65
Accessing and using the Veritas Remote Management interface ............ 70
Appendix A Adding one or more storage shelves to an
operating appliance that does not have any
storage shelves ............................................................ 73
Overview ................................................................................... 73
Preparing the appliance ................................................................. 75
Removing the appliance cover ........................................................ 76
Installing the Expansion Storage Kit components ................................ 77
Replacing the appliance cover ........................................................ 83
Connecting the storage shelves to the appliance ................................. 84
Connecting one storage shelf to an appliance .............................. 84
Connecting two storage shelves to an appliance ........................... 87
Connecting three storage shelves to an appliance ......................... 92
Connecting four storage shelves to an appliance .......................... 99
Connecting the fifth storage shelf to an appliance ........................ 107
Connecting the sixth storage shelf to an appliance ....................... 115
Appendix B Adding storage shelves to an operating appliance
that has at least one storage shelf attached
.......................................................................................... 124
Overview .................................................................................. 124
Moving the MSDP partition from a base disk to an expansion disk for
optimum performance ............................................................ 125
Additional storage shelf scenarios .................................................. 134
Installing storage shelves to an appliance that has at least one storage
shelf ................................................................................... 135
Recabling to connect additional shelves .......................................... 135
Connecting additional shelves to an appliance that already has
one operating shelf ......................................................... 137
Connecting additional shelves to an appliance that already has
two operating shelves ...................................................... 140
Connecting a storage shelf to an appliance that already has three
operating shelves ........................................................... 143
5Contents

Appendix C Adding the disk space of additional storage
shelves .......................................................................... 146
Adding the disk space of additional storage shelves from the NetBackup
Appliance Shell Menu ............................................................ 146
Adding the disk space of additional storage shelves from the NetBackup
Appliance Web Console ......................................................... 147
Index .................................................................................................................. 149
6Contents

Hardware overview
This chapter includes the following topics:
■About the appliance and the storage shelves
■Appliance disk drives
■About the 5250 Appliance control panel
■Appliance rear panel
■Storage shelf disk drives
■Storage shelf control panel
■Storage shelf rear panel
■Cables
■About IPMI configuration
■Product documentation
About the appliance and the storage shelves
The Veritas 5250 Appliance is a hardware and software storage system that can
scale to 429.4TiB of available backup capacity. It consists of a Veritas 5250
Appliance and up to six optional Veritas 2U12 65.5TiB/72TB storage shelves.
1
Chapter

The 5250 appliance and storage shelves provide storage capacity in several
configurations. You can use the appliance by itself to achieve 9.1TiB to 36.4TiB of
usable capacity. You can add storage shelves to any appliance to further increase
the storage capacity.
You can add up to six Veritas 2U12 65.5TiB/72TB Storage Shelves to an existing
5250 Appliance. Before you place the system into a production environment, you
must migrate all MSDP data from the appliance to the first external storage shelf.
After you migrate the MSDP data, the amount of usable storage space may fluctuate,
depending on how much storage space the MSDP data pool presently uses.
Refer to the 5250 Appliance Product Description Guide at the following site for
details about usable storage options.
NetBackup Appliance Documentation
Appliance disk drives
The front panel of the appliance contains 12 disk drives.
Slot designations are as follows. Do not rearrange the disk drives from the factory
configuration.
Table 1-1 5250 Appliance disk drive slots
Disk drive roleAppliance storage
capacity
Disk drive
size
RAID
configuration
Slot
Boot/swapN/A1TBRAID 10, 1
Log filesN/A1TBRAID 12, 3
User storage data9.1TiB, 36.4 TiB2TB, 8TBRAID 64 - 10
Hot spare for user
storage data
N/A2TB, 8TBRAID 611
8Hardware overview
Appliance disk drives

About the 5250 Appliance control panel
The 5250 Appliance includes a control panel on the right side of the front panel.
System information is shown on this control panel.
Figure 1-1 Control panel
A
B
C
G
F
D
E
Table 1-2 Control panel system LED descriptions
System informationLEDLabel
The Power button toggles the system on and off.
See “About the Power button LED states”
on page 14.
Power button with integrated
LED
A
The drive activity LED on the front panel indicates
drive activity from the on-board hard disk controllers.
Hard Drive Activity LEDB
The System ID button toggles the integrated ID LED
and the blue server board LED on and off.
The system ID LED identifies the system for
maintenance when it is racked with similar server
systems.
System ID button with
integrated LED
C
9Hardware overview
About the 5250 Appliance control panel

Table 1-2 Control panel system LED descriptions (continued)
System informationLEDLabel
The front control panel includes four activity LED
indicators for each on-board network interface
controller (NIC).
■NIC-1 represents network interface controller 1
■NIC-2 represents network interface controller 2
■NIC-3 represents network interface controller 3
■NIC-4 represents network interface controller 4
When network links are detected on the controllers,
the LEDs are activated and remain on. The LEDs
blink when network activity occurs, and the rate at
which they blink is determined by the amount of
network activity that occurs.
Network Activity LEDsD
When it is depressed, the NMI button puts the
appliance in a halt state, issues a non-maskable
interrupt (NMI), and then triggers the non-maskable
interrupt. All server data can be lost.
Veritas recommends that you do not enable NMI by
pressing the NMI button.
NMI button (recessed, tool
required for use)
E
When depressed, the System Cold Reset button
re-boots and re-initializes the appliance.
System Cold Reset Button
(recessed, tool required for
use on non-storage models)
F
The System Status LED is bi-color indicator that uses
the colors green and amber to display the current
health of the appliance.
Two locations are provided for you to monitor the
health of the system. You can find the first location
on the front control panel, while the second location
is located on the back edge of the server board. It is
viewable from the rear of the appliance. Both LEDs
show the same state of health.
See “About the System Status LED states”
on page 10.
System Status LEDG
About the System Status LED states
The System Status LED is a bi-color (Green/Amber) indicator that shows the current
health of the system. The appliance provides two locations for this feature. The first
10Hardware overview
About the 5250 Appliance control panel

location is on the Front Control Panel, while the second location is on the back edge
of the server board.
Figure 1-2 System Status LED control panel location
System
Status
LED
The following table provides a description of each LED state.
Table 1-3 System Status LED states
DescriptionCriticalityStateColor
■System power is off (AC and/or DC)
■System is in EuP Lot6 Off Mode
■System is in S5 Soft-Off State
Not readyOff - The
system is not
operating.
No
color
Indicates that the system is running (in S0 State)
and its status is “Healthy”. The system is not
exhibiting any errors. AC power is present and
BMC has booted and manageability functionality
is up and running.
HealthySolid on (SO)Green
11Hardware overview
About the 5250 Appliance control panel

Table 1-3 System Status LED states (continued)
DescriptionCriticalityStateColor
System degraded:
■Redundant loss, such as power supply or
fan. Applies only if the associated platform
sub-system has redundancy capabilities.
■Fan warning or failure when the number of
fully operational fans is more than minimum
number needed to cool the system.
■Non-critical threshold crossed: Temperature
(including HSBP temp), voltage, input power
to power supply, output current for main
power rail from power supply and Processor
Thermal Control (Therm Ctrl) sensors.
■Power supply predictive failure occurred while
redundant power supply configuration was
present.
■Unable to use all of the installed memory (one
or more DIMMs failed/disabled but functional
memory remains available).
■Battery failure
■BMC executing in uBoot. (Indicated by
Chassis ID blinking at 3Hz). System in
degraded state (no manageability). BMC
uBoot is running but has not transferred
control to the BMC Linux. Server will be in
this state 6-8 seconds after BMC reset while
it pulls the Linux image into flash.
Degraded
The system is
operating in a
degraded state
although still
functional.
or
The system is
operating in a
redundant state
but with an
impending failure
warning.
~1 Hz blinkGreen
System degraded (continued):
■BMC booting Linux. (Indicated by Chassis ID
solid ON). System in degraded state (no
manageability). Control has been passed
from BMC uBoot to BMC Linux itself. It will
be in this state for 10-20 seconds.
■BMC Watchdog has reset the BMC.
■Power unit sensor offset for configuration
error is asserted.
■Hard disk drive HSC is off-line or degraded.
Degraded
(continued)
~1 Hz blinkGreen
12Hardware overview
About the 5250 Appliance control panel

Table 1-3 System Status LED states (continued)
DescriptionCriticalityStateColor
Non-fatal, although the system is likely to fail due
to the following issues:
■Critical threshold crossed – Voltage,
temperature (including HSBP temp), input
power to power supply, output current for
main power rail from power supply and
PROCHOT (Therm Ctrl) sensors.
■VRD Hot asserted
■Minimum number of fans to cool the system
not present or failed
■Hard drive fault
■Power Unit Redundancy sensor – Insufficient
resources offset (indicates not enough power
supplies present)
■Correctable memory error threshold has been
reached for a failing DIMM when the system
is operating in a non-redundant mode.
Non-critical
The system is
operating in a
degraded state
with an
impending failure
warning.
However, the
system is still
functioning.
~1 Hz blinkAmber
Fatal alarm – system has failed or shutdown:
■CPU CATERR signal asserted
■MSID mismatch detected (CATERR also
asserts for this case)
■CPU1 is missing
■CPU Thermal Trip
■No power – power fault
■DIMM failure when there is only one DIMM
present; no other good DIMM memory
present
■Runtime memory uncorrectable error in
non-redundant mode.
Critical,
non-recoverable
– System is
halted
Solid onAmber
13Hardware overview
About the 5250 Appliance control panel

Table 1-3 System Status LED states (continued)
DescriptionCriticalityStateColor
■Uncorrectable Runtime memory error in
non-redundant mode
■DIMM Thermal Trip or equivalent
■CPU ERR2 signal is asserted
■BMC/Video memory test failed (Chassis ID
shows blue/solid-on for this condition)
■SBB Thermal Trip or equivalent
■240VA fault
■Both uBoot BMC FW images are bad
(Chassis ID shows blue/solid-on for this
condition)
■Fatal Error in processor initialization:
■Processor family not identical
■Processor model not identical
■Processor core/thread counts not identical
■Processor cache size not identical
■Unable to synchronize processor
frequency
■Unable to synchronize QPI link frequency
Critical,
non-recoverable
– System is
halted
Solid onAmber
About the Power button LED states
The Power button is located on the Veritas 5250 Appliance control panel. It is used
to turn the appliance on and off.
Figure 1-3 Power button control panel location
Power/Sleep
button
The following table provides a description of each power state.
14Hardware overview
About the 5250 Appliance control panel

Table 1-4 Power button LED states
DescriptionLEDPower ModeState
The system power is off, and the
BIOS has not initialized the chipset.
OffNon-ACPIPower - off
The system power is on and the
green Power button LED is active.
OnNon-ACPIPower - on
The system and the operating
system are up and running.
Steady onACPI
(Advanced
Configuration and
Power Interface)
S0
Mechanical is off and the operating
system has not saved any context
to the hard disk drive.
OffACPI
(Advanced
Configuration and
Power Interface)
S5
Appliance rear panel
The rear panel of the appliance contains several default ports that are embedded.
Three PCIe riser assemblies support various configurations.
The three PCIe riser assemblies outlined red are numbered, 1, 2, and 3 from right
to left. Slots 1 through 8 are shown in the risers.
The following list describes the numbered ports.
1. VGA port
2. 3 USB ports
3. IPMI, remote management, port
4. Four copper, RJ45, 1Gb Ethernet* ports, NIC1/eth0, NIC2/eth1, NIC3/eth2,
and NIC4/eth3, left to right
15Hardware overview
Appliance rear panel

Note: * The embedded Ethernet ports are copper. PCIe Ethernet ports are
optical. You cannot bond the copper ports and the optical ports to each other.
5. Riser Assembly 2, Slot 1, reserved for the RAID PCIe card
Refer to the 5250 Appliance Product Description at the NetBackup Appliance
Documentation page for optional port configurations.
Storage shelf disk drives
The 5250 Storage Shelf is a 2U enclosure that contains 12 disk drives.
Disk drive carriers in the storage shelf are locked by default. If you need to replace
a locked disk drive use a screwdriver with a T10 bit to unlock each carrier.
The lock is located on the left side of each carrier.
Storage shelf control panel
The left, front, of the storage shelf contains the system control panel.
16Hardware overview
Storage shelf disk drives

Components of the control panel include the following.
1. The Input switch enables you to set the Unit Identification display.
2. The Power On/Standby LED is amber when only standby power is available.
The LED is green when system power is available.
3. The Module Fault LED is on when there is a system hardware fault. A Power
Cooling Module (PCM) or an I/O module may be at fault.
4. The Logical Status LED shows a change of status or a fault, typically associated
with the shelf's disk drives. This LED also indicates an issue with an internal
RAID controller or external RAID controller, or with a host bus adapter.
5. The Unit Identification Display provides information to assist in the configuration
of multiple storage shelves.
Storage shelf rear panel
The rear panel of the storage shelf contains two main components; two Power
Cooling Modules (PCMs) and two I/O Module canisters.
17Hardware overview
Storage shelf rear panel

The PCMs, located on the left and the right sides of the storage shelf, contain fans.
The I/O module canisters are located in the center of the rear panel, one on top of
the other. Each I/O module contains three mini-SAS HD ports; A, B, and C. The
mini-SAS HD ports connect the I/O modules to the appliance and to other storage
shelves. Note that the port labels are reversed on the bottom canister. Port C is not
used at this time.
The PCMs and the I/O modules include LEDs.
Cables
Two power cables are shipped with each appliance and each storage shelf.
One-meter SAS-3 cables ship with each storage shelf. The one-meter cables are
sufficient when the recommended cabling scheme is followed. Three-meter SAS-3
cables are available separately in case of need.
Use the top down, bottom up method to connect storage shelves to the appliance.
The general scheme follows.
■The appliance is connected to the first storage shelf with one SAS-3 cable.
■One cable connects the first storage shelf to the next shelf.
■Subsequent storage shelves are connected until the last storage shelf is
connected.
■The last storage shelf is connected to the appliance with one cable.
18Hardware overview
Cables

■The last storage shelf is also connected to the next, highest, storage shelf.
■The storage shelves are connected until the shelf closest to the appliance is
connected.
See “Connecting the network cables” on page 54.
About IPMI configuration
The Intelligent Platform Management Interface (or IPMI) provides management and
monitoring capabilities independently of the host system's CPU, firmware, and
operating system. You can configure the IPMI sub-system for your appliances. You
can use the remote management port, located on the rear panel of the appliance,
to connect to the IPMI sub-system.
The following figure shows the remote management port (or the IPMI port) on the
rear panel of a 5250appliance:
The IPMI is beneficial after an unexpected power outage shuts down the connected
system. In case the appliance is not accessible after the power is restored, you can
use a laptop or desktop computer to access the appliance remotely by using a
network connection to the hardware rather than to an operating system or login
shell. This enables you to control and monitor the appliance even if it is powered
down, unresponsive, or without any operating system.
The following diagram illustrates how IPMI works:
19Hardware overview
About IPMI configuration

How does IPMI work?
When an appliance is powered off or cannot be accessed using the network interface
Remote Management Port
Out of band management using IPMI
Remote Management Console
The following are some of the main uses of IPMI:
■Manage an appliance that is powered off or unresponsive. Using the IPMI, you
can power on, power off, or restart the appliance from a remote location.
■Provide out-of-band management and help manage situations where local
physical access to the appliance is not possible or preferred like branch offices
and remote data centers.
■Access the NetBackup Appliance Shell Menu remotely using IPMI if regular
network interface is not possible.
Note: Only the NetBackup Appliance Shell Menu can be accessed by using the
IPMI interface. The NetBackup Appliance Web Console cannot be accessed
by using the IPMI interface.
■Reimage the appliance from the IPMI interface by using ISO redirection.
■Monitor hardware health of the appliance from a remote location.
■Avoid messy cabling and hardware like keyboard, monitor, and mouse (KVM)
solutions to access the appliance.
Product documentation
Additional documentation is available at the following site.
NetBackup Appliance Documentation
20Hardware overview
Product documentation
Other manuals for 5250
5
Table of contents
Other VERITAS Network Hardware manuals
Popular Network Hardware manuals by other brands

Digital Watchdog
Digital Watchdog Blackjack Ai DW-BJAiASL quick start guide

IOTAVX
IOTAVX NP3 user manual

HPE
HPE Edgeline EL8000 Setup and configuration guide

TRENDnet
TRENDnet TPE-113GI Quick installation guide

DivioTec
DivioTec SRA311-008P8 Series user manual

Interlogix
Interlogix TruVision NVR 21 user manual