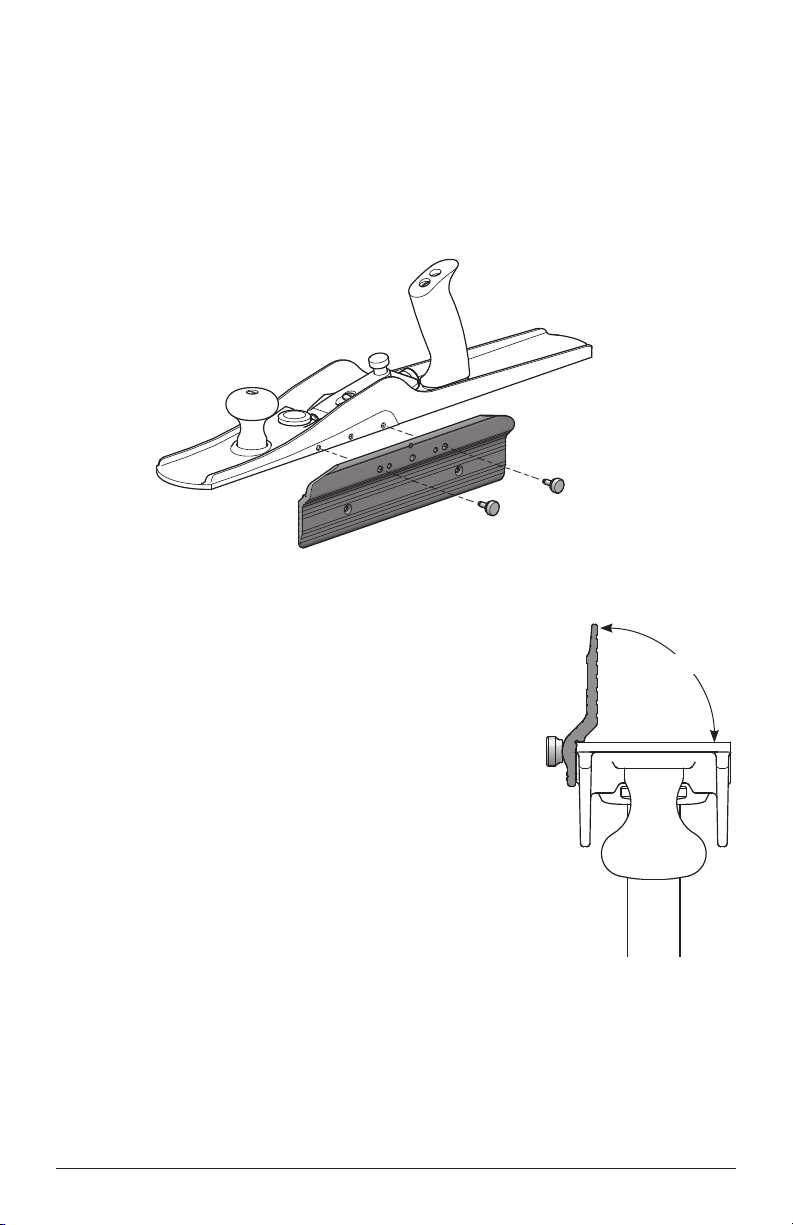
Installation
Bring the fence up to the side of the plane until the step in the fence makes contact
with the sole of the plane. Position the fence such that the mounting holes are
aligned and insert the two clamping knobs. Push the fence so that the step in the
fence is tight against the sole of the plane, then tighten the two clamping knobs.
The plane and jointer fence have been configured such that the fence can be
installed for either right- or left-handed use.
Initial Set-Up
When the fence is first installed on the plane, it
will have to be set or calibrated. Use the set screw
between the two clamping knobs to fine tune the
angle or squareness of the fence to the sole. Install
the fence with the clamping knobs with light
pressure. Flip the plane upside down and check
for squareness with an engineer’s square. Adjust
as required by turning the set screw in or out and
retightening or loosening the clamping knobs as
required. When square, fully tighten the clamping
knobs. When the fence is removed and reinstalled,
check the squareness and adjust as required.
2
Figure 2: Fence installation.
Figure 3: Fence set-up.
90°


