Hart InterCivic Quality and Information Security Policy
Hart InterCivic is committed to consistently providing high quality products and services for its customers through
adherence to its established hardware and software Quality Management Systems, complying with customer, statutory
and regulatory requirements, and a commitment to continual improvement. Hart InterCivic is also committed to the
integrity and the security of the information used in the product development process, in the products themselves,
and in our management of customer data during the implementation process.
This DOCUMENT and the SOFTWARE, HARDWARE, and FIRMWARE to which it pertains contain confidential and
proprietary information belonging exclusively to Hart InterCivic, Inc. No part of this publication may be modified,
reproduced, stored in a retrieval system, or transmitted in any form, distributed by any electronic or mechanical
means, photocopied, recorded, or otherwise reproduced or distributed without prior written permission from
authorized personnel at Hart InterCivic, Inc. Any person receiving this document has a duty to take reasonable
precautions preventing unauthorized use or disclosure of the contents.
Trademarks
Hart InterCivic and Verity are registered trademarks of Hart InterCivic, Inc.
Hart InterCivic disclaims any proprietary interest in the marks and names of others.
Hart InterCivic, Inc.
15500 Wells Port Drive
Austin, TX 78728
Document Number 6651-008 A
© 2019 Hart InterCivic, Inc.
All Rights Reserved
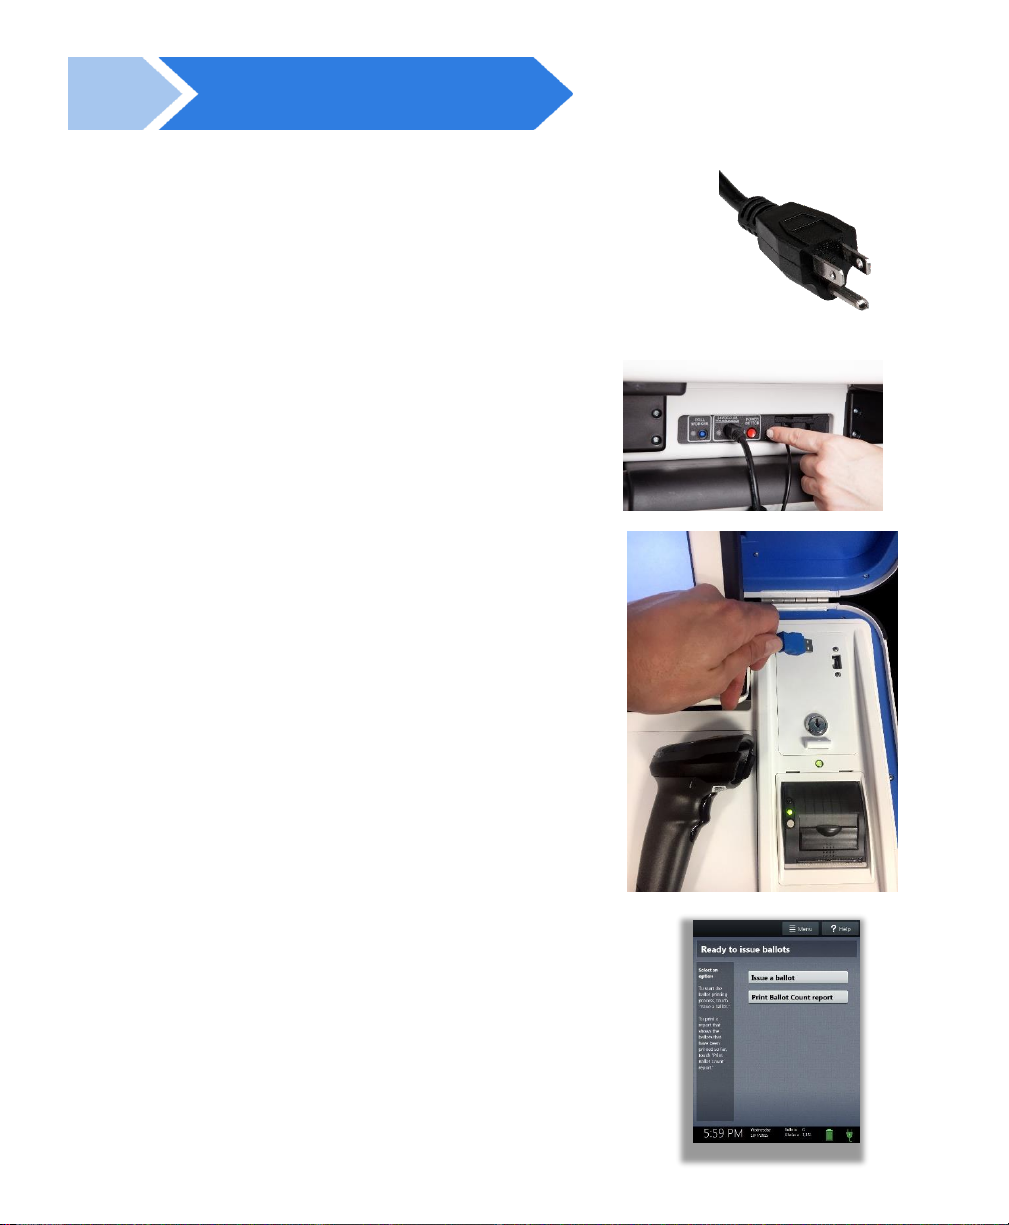
about this guide
This Verity Field Guide is a portable guide to using Verity Print.