Verkada CP52-E User manual


Document
Document Details
Verkada Inc. 406 E. 3rd Ave, San Mateo, CA 94401
V1.3 (20230711)
(V1.0 first published 20230208)
Firmware
Firmware version can be verified on
Verkada Command command.verkada.com.
2All specifications are subject to change without notice
Copyright © 2023 Verkada Inc. All rights reserved.
Introduction
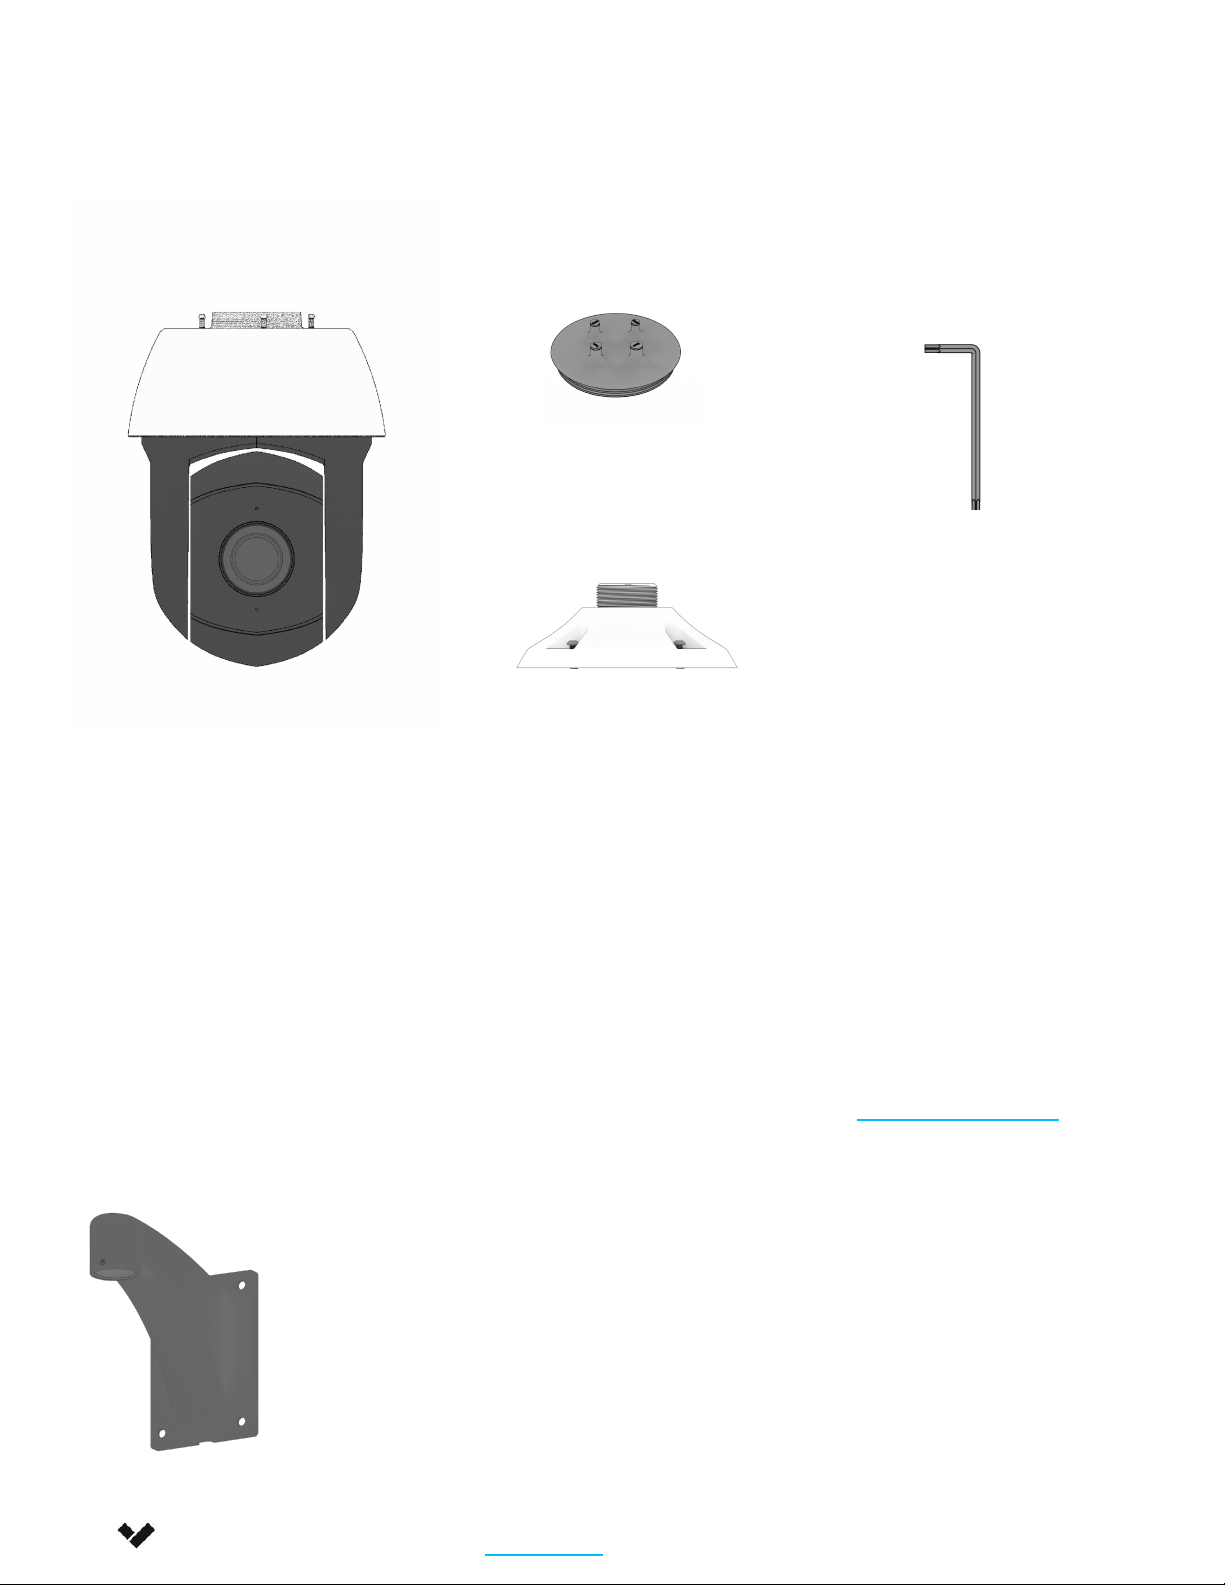
What’s in the box
Verkada Inc. 406 E. 3rd Ave, San Mateo, CA 94401
3All specifications are subject to change without notice
Copyright © 2023 Verkada Inc. All rights reserved.
Pan-Tilt-Zoom Camera Pendant Cap
T30 Security Wrench
Rubber Cap
What you’ll need
●A working Internet connection
●A smartphone or laptop
●Arm Mount Accessory (sold separately)
●PoE++ (802.3bt-2018) power injector
(sold separately)
●Utility knife
Connect
For easy registration and setup, scan the QR
code on the product.
If you prefer to manually register your product,
please proceed to: verkada.com/start
Placement
Mount the camera on a wall, using arm mount
accessory (not included), 8 to 10 feet above the
ground.
Arm Mount Accessory is
required for installation.
Introduction
Verkada Inc. 405 E 4th Ave, San Mateo, CA 94401
All specifications are subject to change without notice
Copyright © Verkada Inc. All rights reserved.
4
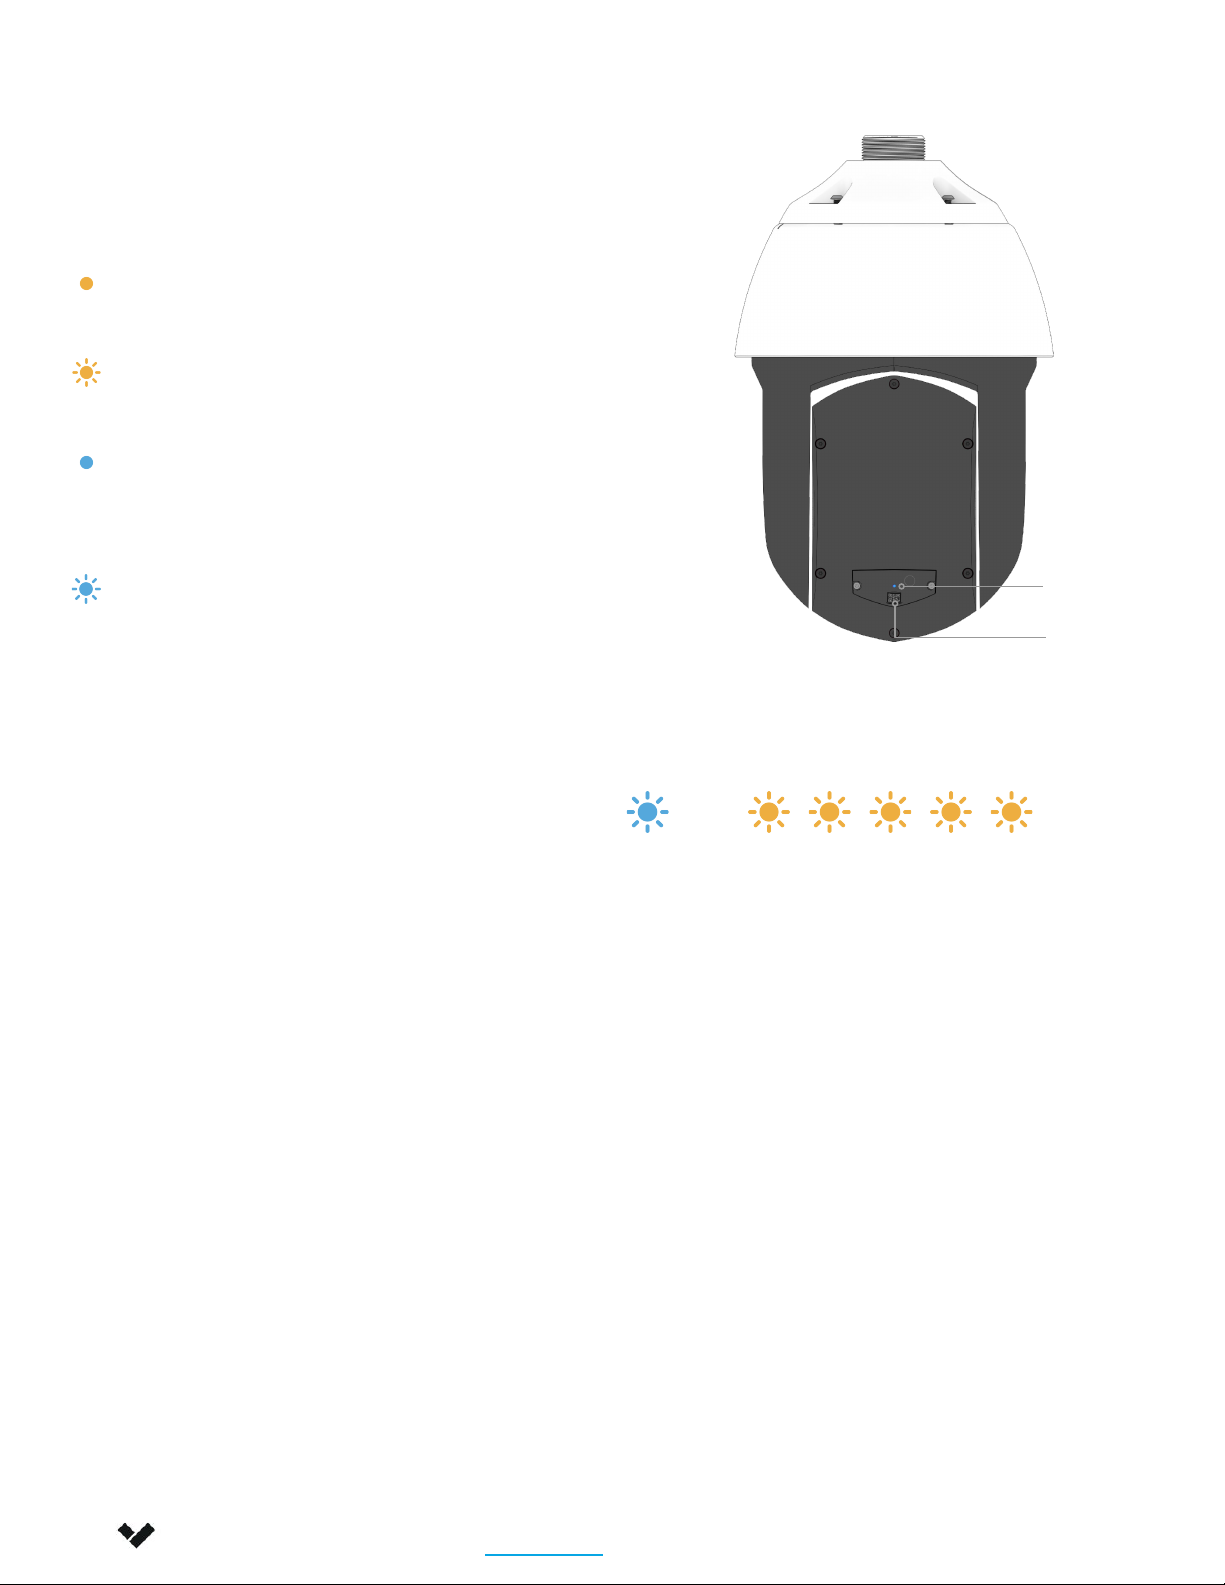
LED Behaviors
Regular operation
Solid Orange
Camera is on and booting up.
Flashing Orange
Camera is updating firmware.
Solid Blue
Camera is running, connected,
and recording data.
Flashing Blue
Generic network error. Contact support.
Network errors
1 Blue, 1 Orange
Camera is connected with PoE, but
unable to connect to the Switch.
1 Blue, 2 Orange
Camera has not received an IP address.
1 Blue, 3 Orange
Camera is not able reach the
configured Gateway.
1 Blue, 4 Orange
Camera has detected duplicate IP
addresses on the LAN.
The LED will flash in a specific order,
depending on the error state. You will
see 1 blue flash, followed by a number of
orange flashes.
Example of 1 Blue, 5 Orange flash sequence
1 Blue, 5 Orange
Camera is not able to resolve Verkada
hostnames.
1 Blue, 6 Orange
Camera is not able to receive a
response from the NTP Server.
1 Blue, 7 Orange
Camera is not able to certify the SSL
connection, likely due to SSL inspection.
1 Blue, 8 Orange
Verkada endpoints are not reachable
after boot up.
–
QR Code
LED

Note
Verkada Inc. 406 E. 3rd Ave, San Mateo, CA 94401
5
Installation
Mounting 1/4
All specifications are subject to change without notice
Copyright © 2023 Verkada Inc. All rights reserved.
Mount the Arm Mount accessory into
the wall (sold separately), refer to Arm
Mount instructions
Assemble the pendant cap with the
Arm Mount accessory by rotating the
threads of the pendant cap into the
Arm Mount.
Make sure to lock the pendant cap in
place by tightening the Arm Mount
headless screw using the L-Key
wrench (Included with the Arm Mount
accessory).
Connect the Ethernet cable through
the center hole of the pendant cap.
The cable will be bent, so leave some
extra slack.

Note
Verkada Inc. 406 E. 3rd Ave, San Mateo, CA 94401
6
Installation
Mounting 2/4
All specifications are subject to change without notice
Copyright © 2023 Verkada Inc. All rights reserved.
Determine the diameter of the Ethernet
cable that will be used.
Using a utility knife, cut the rubber plug
that matches the Ethernet cable size.
Route the Ethernet cable through the
rubber cap.
Make sure to have 1-4 inches or 80-100
mm of slack.
Use the carabiner on the base of the main
camera to hook it to the pendant cap.
Note
Verkada Inc. 406 E. 3rd Ave, San Mateo, CA 94401
7
Installation
Mounting 3/4
All specifications are subject to change without notice
Copyright © 2023 Verkada Inc. All rights reserved.
Connect the Ethernet cable to the
camera and assemble the rubber cap
to the main camera.
Assemble the main camera to the
installed pendant cap.
Align the indent on the cap to the
‘unlock’-symbol on the main camera
base and rotate counter-clockwise to
lock into position.
Once it is locked, the indent on the
pendant cap and indent on the main
camera should align.

Note
Verkada Inc. 406 E. 3rd Ave, San Mateo, CA 94401
8
Installation
Mounting 4/4
All specifications are subject to change without notice
Copyright © 2023 Verkada Inc. All rights reserved.
Tighten the four screws on the
pendant cap with the provided T30
Security Wrench.
The status LED will turn orange to
indicate the camera has power. The
LED will turn blue to indicate the
camera is active. See additional LED
states and definitions in the ‘LED
Behaviors’ section.
For easy registration and setup, scan
the QR code on the product. If you
prefer to manually register your
product, please proceed to:
verkada.com/start

Appendix
CP52-E Compliance
Caution 1. Maintenance and repair work must always be carried out by qualified technical personnel.
Disconnect power from the unit when performing a maintenance task.
2. Wiring methods used for the connection of the equipment to earth shall be in accordance with the
National Electrical Code, ANSI/NFPA 70, and the Canadian Electrical Code, Part 1, CSA C22.1.
3. The product must be installed and protected in a location that is not easily accessible and is away
from impacts or heavy vibration.
4. The device is only to be connected to PoE networks without routing to outside plants.
5. If powered by a power adapter, the adapter should be properly grounded.
6. Please contact certified dealers for power adapters.
FCC
Statement
NOTE: This equipment has been tested and found to comply with the limits for a Class A digital device, pursuant
to part 15 of the FCC Rules. These limits are designed to provide reasonable protection against harmful
interference when the equipment is operated in a commercial environment. This equipment generates, uses,
and can radiate radio frequency energy and, if not installed and used in accordance with the instruction
manual, may cause harmful interference to radio communications. Operation of this equipment in a residential
area is likely to cause harmful interference in which case the user will be required to correct the interference at
his own expense.
IC
Statement
This device complies with ISED’s licence-exempt RSSs. Operation is subject to the following two conditions: (1)
This device may not cause harmful interference, and (2) this device must accept any interference received,
including interference that may cause undesired operation.
Le présent appareil est conforme aux CNR d’ ISED applicables aux appareils radio exempts de licence.
L’exploitation est autorisée aux deux conditions suivantes : (1) le dispositif ne doit pas produire de brouillage
préjudiciable, et (2) ce dispositif doit accepter tout brouillage reçu, y compris un brouillage susceptible de
provoquer un fonctionnement indésirable.
Verkada Inc. 406 E. 3rd Ave, San Mateo, CA 94401
9All specifications are subject to change without notice
Copyright © 2023 Verkada Inc. All rights reserved.

Appendix
Support
Verkada Inc. 406 E. 3rd Ave, San Mateo, CA 94401
10
Thank you for purchasing this Verkada product. If for any reason
you're experiencing issues or need assistance, please contact our
24/7 Technical Support Team immediately.
Sincerely,
The Verkada Team
verkada.com/support
All specifications are subject to change without notice
Copyright © 2023 Verkada Inc. All rights reserved.
Table of contents
Other Verkada Digital Camera manuals


