VEVOR ZA-NTK16 User manual

Technical Support and E-Warranty Certificate www.vevor.com/support
PASTA MAKER
MODEL:ZA-NTK16
We continue to be committed to provide you tools with competitive price.
"Save Half", "Half Price" or any other similar expressions used by us only represents an
estimate of savings you might benefit from buying certain tools with us compared to the major
top brands and does not necessarily mean to cover all categories of tools offered by us. You
are kindly reminded to verify carefully when you are placing an order with us if you are
actually saving half in comparison with the top major brands.

- 1 -
MODEL:ZA-NTK16
Have product questions? Need technical support? Please feel free to
contact us:
Technical Support and E-Warranty Certificate
www.vevor.com/support
NEED HELP? CONTACT US!
This is the original instruction, please read all manual instructions
carefully before operating. VEVOR reserves a clear interpretation of our
user manual. The appearance of the product shall be subject to the
product you received. Please forgive us that we won't inform you again if
there are any technology or software updates on our product.
PASTA MAKER

- 2 -
Pasta Roller & Cutter Safety Precaution:
Precaution:
Your safety and your family members’safety are very important! Many
safety precaution messages had been laser-jet or printed on our products or
here. Please read carefully and obey all safety messages listed.
WARNING:
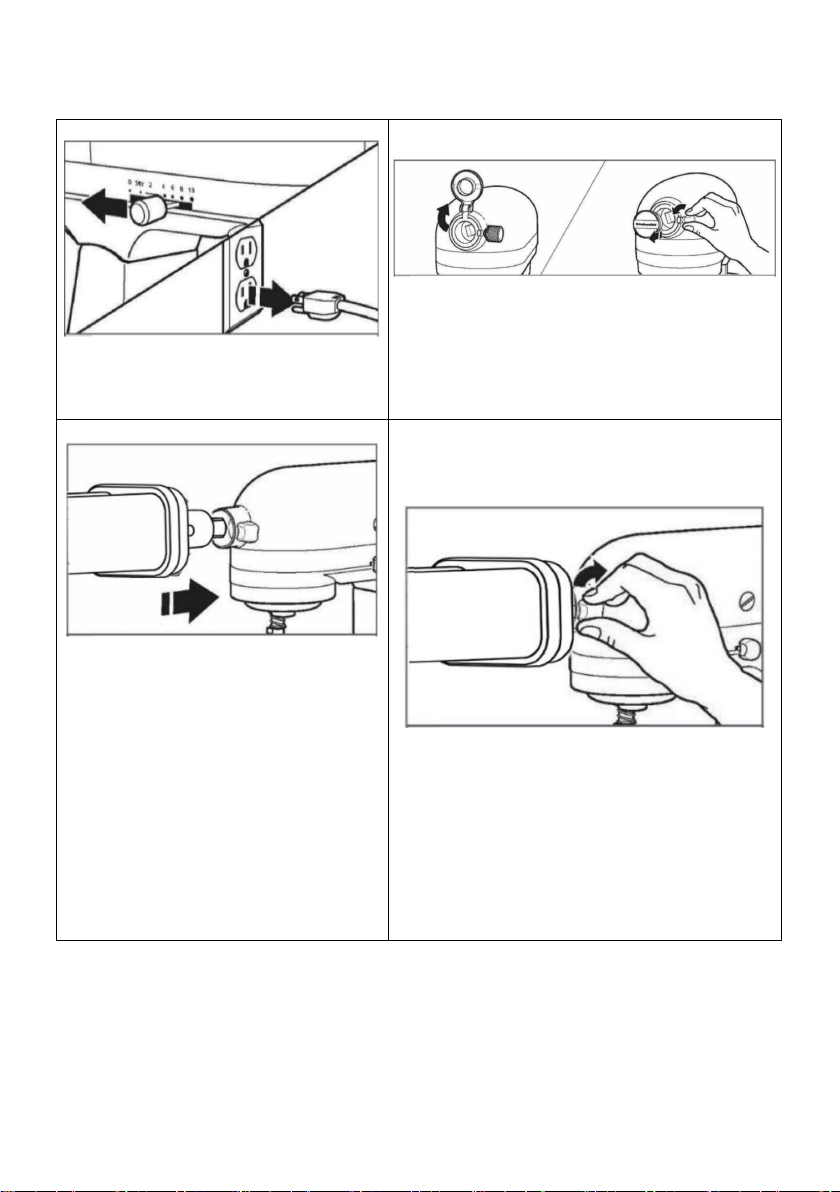
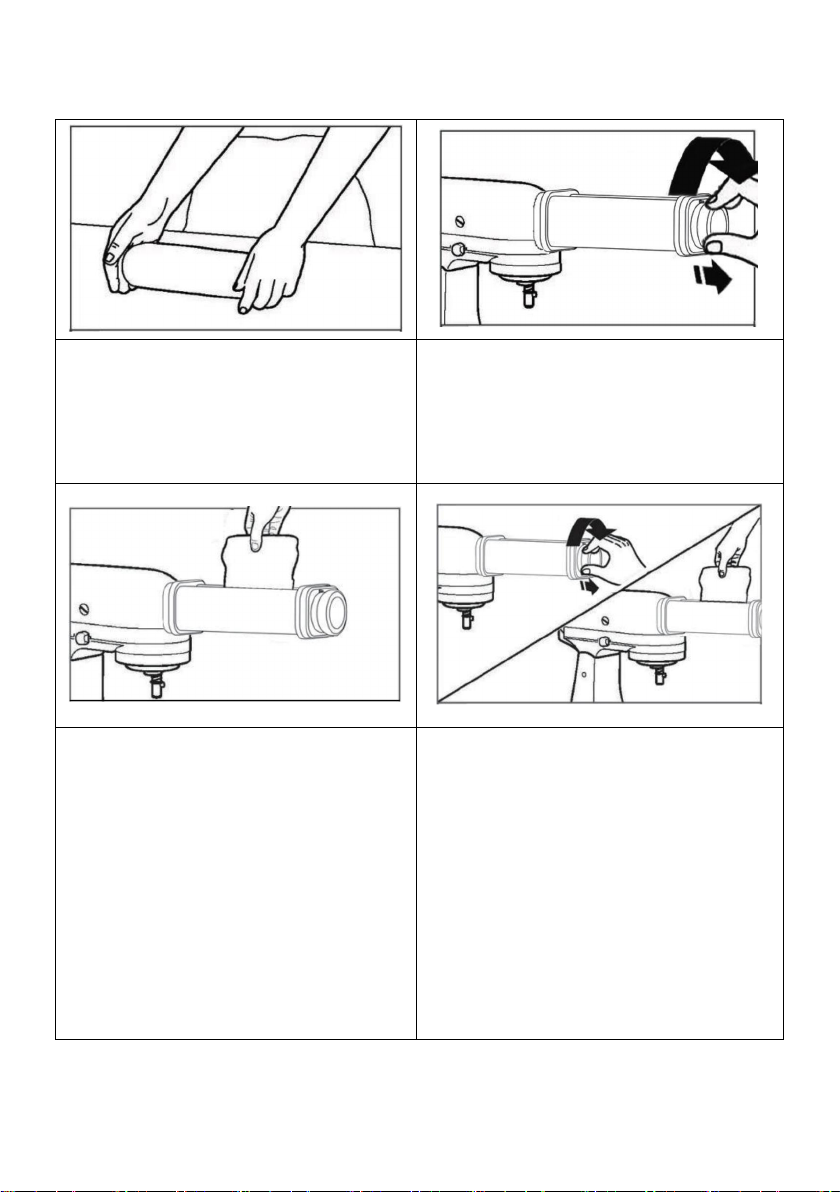
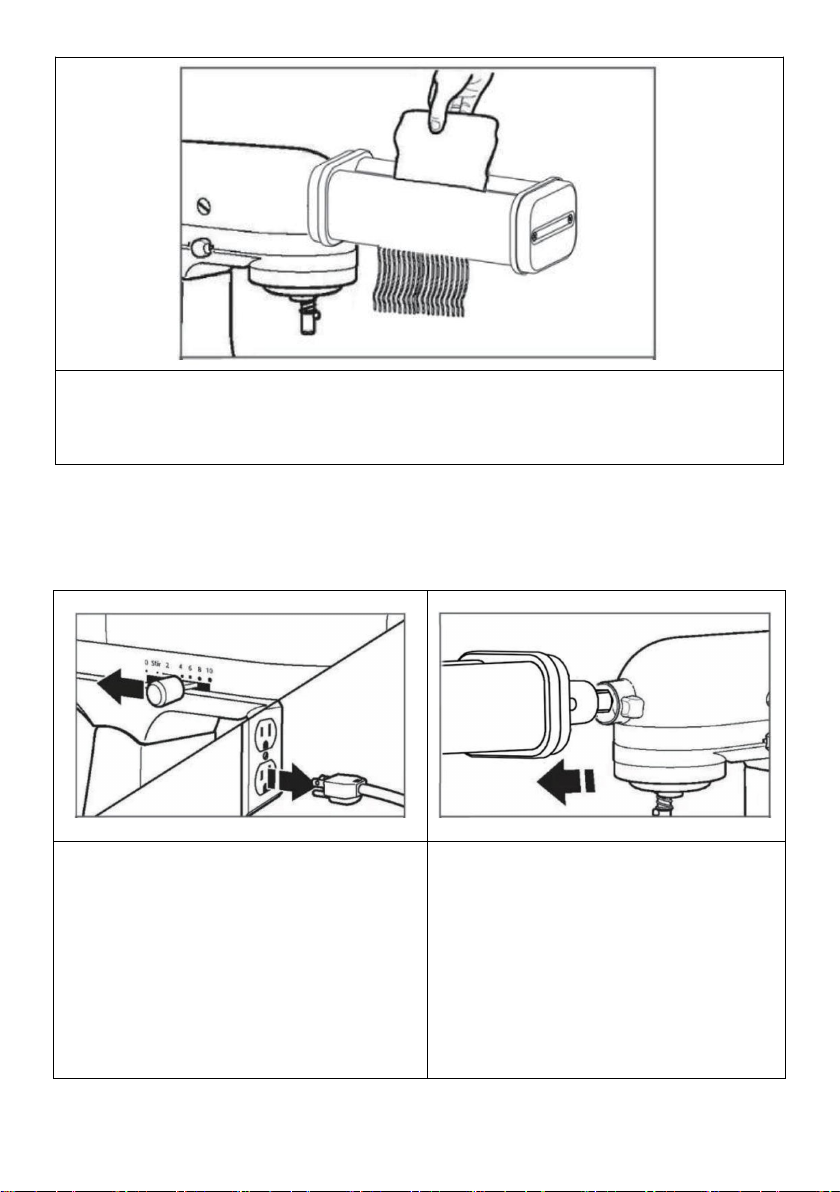
1. DO NOT put your hands into any attachments when it is running.
2. DO NOT put any metal items into any attachments when it is running.
3. DO NOT take it off the mixer before it stops completely.
4. DO NOT put pasta into dish washer for cleaning.
5. DO NOT put pasta into disinfection cabinet for sanitization.
6 . Close supervision is necessary when this or any appliance is used near
children.
7. If there is any damaged parts, please stop using immediately.
8. Keep safe distance if your are wearing tie、scarf、long necklace or loose
clothes. Tie up your long hair for safe.
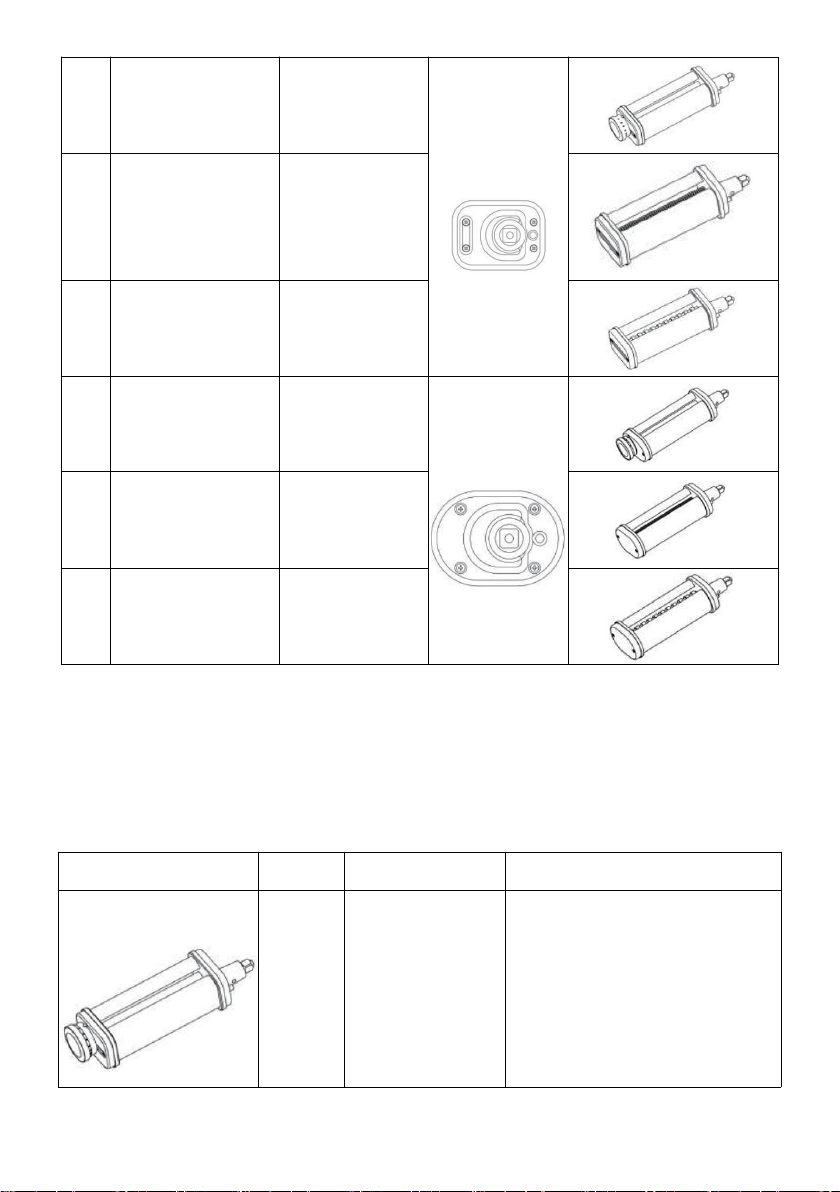
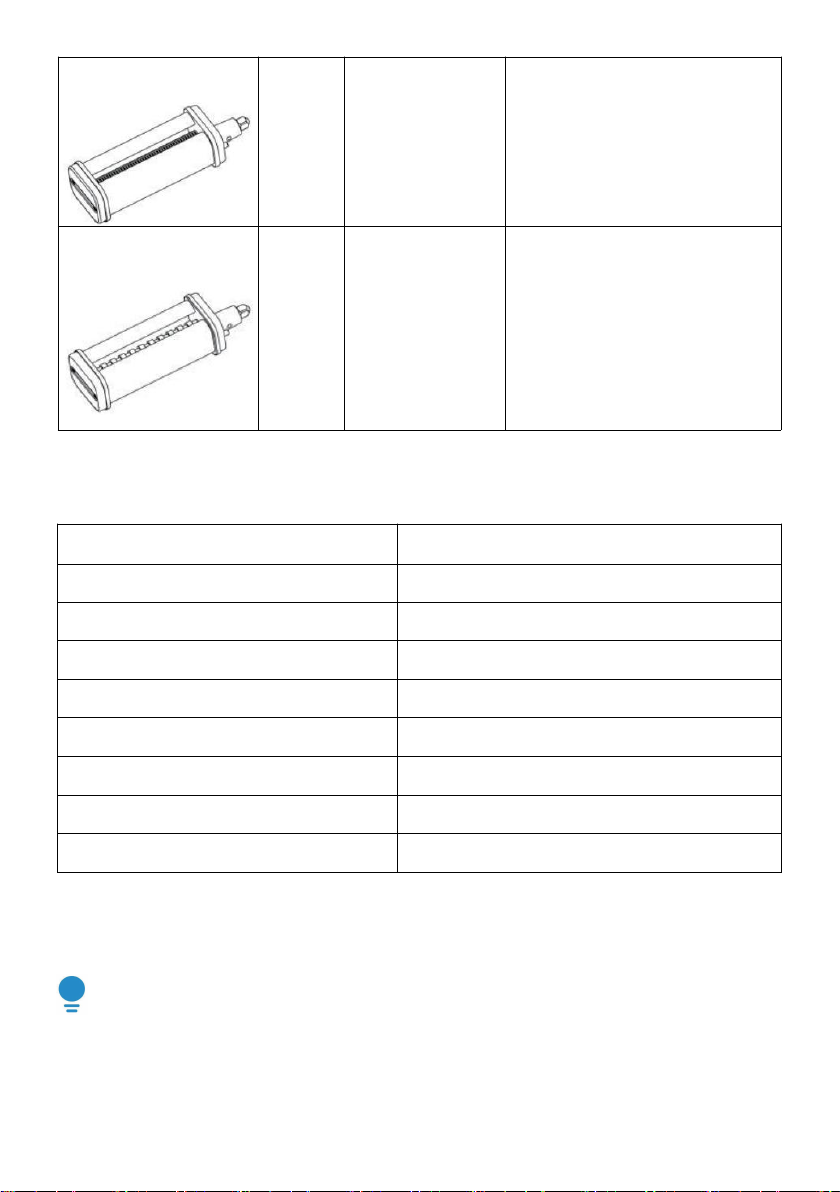
9 . Pasta roller &cutter attachments are designed to be used with pastadough only.
To avoid damaging your pasta roller, do not cut or rollanything other than pasta.
10. No more than 3 minutes without load.
11 Let it cool naturally for 30 minutes, after it is used for 30 minutes continously.
WARNING:
1 . This product is not designed for little baby or disabled people. Pleasetake good
care of them.2 . Clean table is needed for pasta processing
3 . Power off the machine immediately if there is any emergency happened.
4 . Be sure the food processing part has been completely cleaned after use.

- 3 -
PRODUCT DESCRIPTION:
NOTE: Due to the differences in product appearance, the following pietures
are for reference only. Please refer tothe actal product in the box for more
infomation.
Pasta Roller
Lasagnette
cutter
Fettuccine Cutter
Cleaning Brush
MODEL/ROLLER CHART:
Model
Specification
Type
Simplified Diagram

- 4 -
1
NP-0861
Pasta Roller
Square
2
NP-0862
Lasagnette
cutter
3
NP-0863
Fettuccine
Cutter
4
NP-0884
Pasta Roller
Round
5
NP-0885
Lasagnette
cutter
6
NP-0886
Fettuccine
Cutter
USER INSTRUCTION:
1.SPEED SETTINGS CHART:
Attchment
Speed
Noodle Width
Suggested Uses
Pasta Roller
2
up to 140mm
See pasta roller settings chart

- 5 -
Lasagnette cutter
7
1.6mm
Thick Noodles
Fettuccine Cutter
5
6.3mm
Egg Noodles Fettuccine
2.PASTA ROLLER SETTINGS CHART:
Roller setting
Noodle thickness (approximate)
1
~0.3mm
2
~0.4mm
3
~0.6mm
4
~1.0mm
5
~1.3mm
6
~ 1.5mm
7
~ 1.8mm
8
~2.0mm
3.PRECAUTIONS BEFORE USING:
please remove the package and label before using. And clean the surface of
the pasta roller or cutterattachments, especially for the parts which are dealing
with dough.(Refer to "Cleaning and Maintenance")

- 6 -
4.INSTALLATION INSTRUCTIONS:
1.Turn off and unplug the stand
mixer
2.Flip up to open or turn the attachment
knob counterclockwise to remove
attachment hub cover
3.Insert attachment shaft housing
into the attachment hub, making
certain the power shaft fits into the
square hub socket. If necessary,
rotate the Pasta Roller or Cutter
back and forth. The pin on the
attachment housing fits into the
notch of the hub rim when in the
proper position.
4.Tighten the Stand Mixer
attachment hub knob until the
attachment is completely secured to
the Stand Mixer.

- 7 -
5.HOW TO MAKE PASTA:
1.Prepare pasta dough (see
“Recipe” section). Cut dough into
sections that fit in the Pasta Roller
2.Pull out the dough knob adjustment
knob and set it to setting 8. Then
loosen the knob so that it is flush with
the surface shell.
3.Squeeze the dough by hand to a
thickness of about 1 cm and sprinkle a
small amount of flour between the
rollers. Fold dough in half and roll
again. Repeat until dough is smooth
and pliable and covers the width of the
roller. Dust pasta with flour lightly
while rolling and cutting to aid in drying
and separation.
4.Gradually adjust the thickness
adjustment knob setting, and repeat
the surface pressing operation until the
desired thickness is reached. It is
recommended to use setting 5 or 4 to
make noodle thickness.

- 8 -
5.To make noodles, exchange the Pasta Roller for the Cutter of your choice.
Feed the flattened sheets of dough through the cutter. See the “Roller settings
chart” to determine the correct thickness for each type of pasta.
6.DISASSEMBLE THE PASTA ROLLER AND CUTTERS
1.Turn off and unplug the stand mixer
2.Remove the pasta roller or cutter
from the stand mixer. After removing
the pasta roller or cutter from the
stand mixer, please be sure to clean
the remaining
dried dough. See “Care and Cleaning”
for details

- 9 -
3.After removing the pasta roller and cutters, replace the hub cover and tighten
the attachment knob on the stand mixer
MAINTENANCE:
Please do not clean pasta roller &cutter attachments with metal tools (knife or
sharp items).
Please do not clean pasta roller & cutter in dish washer machine.
Please do not clean the pasta roller & cutter by dish towels or any cloth
through them.
1.After use, keep the pasta roller or
cutter drying naturally for one hour.
Then clean the attachments by
brush or other pastic/wood/bamboo
tools for hard dough.
2.Clean the surface with soft towels
and let it dry naturally. Do not clean
it in the dishwasher or do not
sanitize it in disinfection cabinet.

- 10 -
DOUGH:
Basic Pasta dough
Pasta dough (100%
wheat)
Pasta dough with tomato
flour
500g
Whole wheat flour
500g
flour
500g
egg
4
egg
4
egg
3
salt
2.5 g
salt
2.5 g
ketchup
75 g
oil
2.5 ml
oil
2.5 ml
salt
2.5 g
water
180ml-192ml
water
180ml-192ml
water
181ml-195ml
Address: Baoshanqu Shuangchenglu 803long 11hao 1602A-1609shi Shanghai
Imported to AUS: SIHAO PTY LTD. 1 ROKEVA STREETEASTWOOD NSW 2122
Australia
Imported to USA: Sanven Technology Ltd. Suite 250, 9166 Anaheim Place,
Rancho Cucamonga, CA 91730
REP
UK
Pooledas Group Ltd
Unit 5 Albert Edward House, The Pavilions
Preston, United Kingdom
REP
EC
SHUNSHUN GmbH
Römeräcker 9 Z2021, 76351
Linkenheim-Hochstetten, Germany
Made In China
Table of contents
Other VEVOR Pasta Maker manuals