1. Door Types: Wooden door, Glass door, Metal door, Fireproof door.
2. Control Mode: Building intercom system, Access control system.
1. Using powerful power supply, output voltage should be DC12V±10%,cable >0.75mm.
2. Don' hurt the galvanization layer during the installation.
3. Ensure the mounting plate well attach to the lock body.
4. The rubber ring must be added between armature plate and door leaf, don't fasten the screw tightly, keep the rubber ring elastic.
5. Don't welded the mounting plate to the door, or will effect the lock.
6. Clean the slushing oil with cloth, don't use alkaline or pungent cleaner.
1. Specification
2. Application Range
3. Note
4. Wiring of Lock
Read the manual before usage and keep for future reference.
Electromagnetic Lock
User Manual
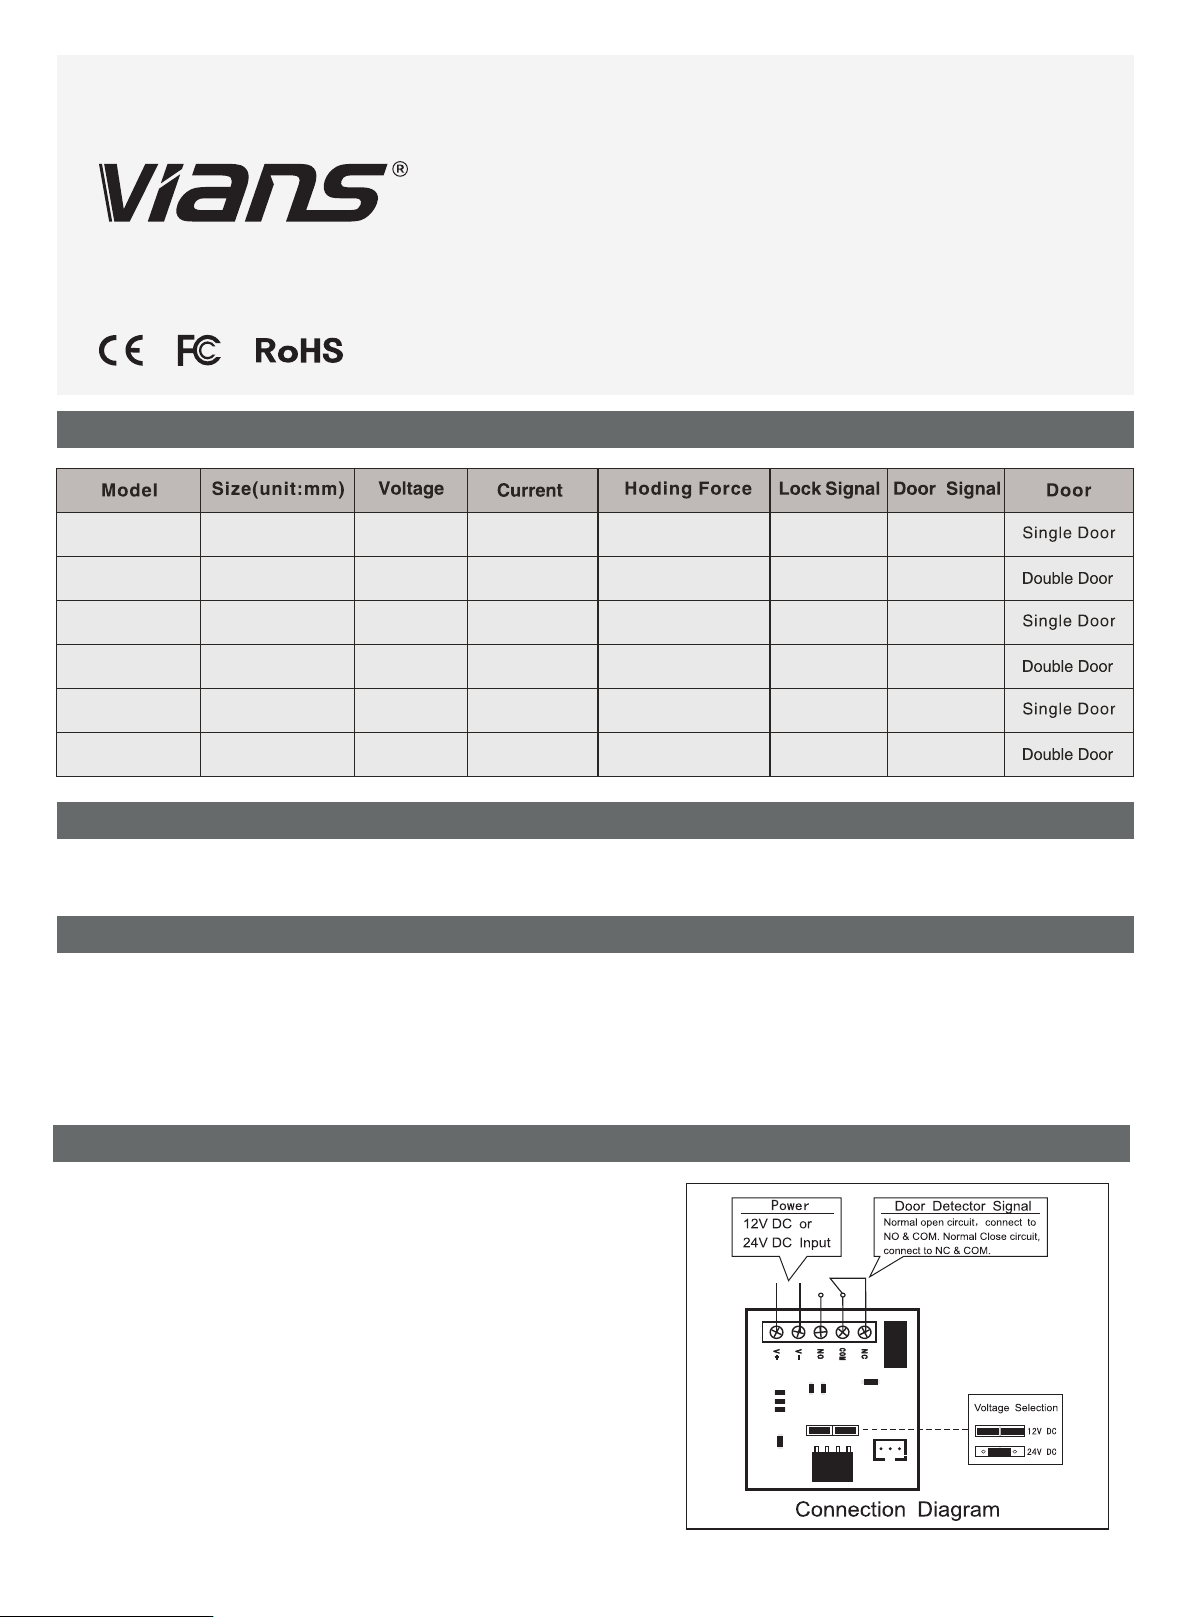
1.12V-DC input:
Positive pole of 12V-DC connect to the terminal marked with “+”
Negative pole of 12V-DC connect to the terminal marked with “-”
Ensure the Voltage Selector is switched to 12V-DC.
2.24V-DC input:
Positive pole of 24V-DC connect to the terminal marked with “+”
Negative pole of 24V-DC connect to the terminal marked with “-”
Ensure the Voltage Selector is switched to 24V-DC.
3.Wiring of Door-State Detector
The overload current of relay contact is 1amp. when the input is 24V-
DC, overload is strictly prohibited. Connect the normal-open circuit to
the COM and NC for getting switch-over signal. But connect the normal-
close circuit to the COM and NO for getting switch-over signal.
Note: Please use the 12V-DC input if the lock has not special annotate.
The overload voltage will damage the lock.
500L*47W*26H
285L*55W*29H
265L*71W*40H
12/24VDC
12/24VDC
12/24VDC
12/24VDC
380kg(800Lbs)
380kg*2(800Lbs*2)
500kg(1200Lbs)
12V/480mA
24V/240mA*2
*2
12V/500mA
24V/250mA*2
*2
12V/500mA
24V/250mA
12V/480mA
24V/240mA*2
*2
250L*47W*26H 12/24VDC 12V/480mA
24V/240mA 280kg(600Lbs)
12/24VDC 12V/600mA
24V/300mA
500kg*2(1200Lbs*2)
VI-280A/AS/DS
VI-280B/BS/DS
VI-380A/AS
VI-380B/BS
VI-500A/AS/DS
VI-500B/BS/DS
280kg*2(600Lbs*2)
No/Yes/Yes No/No/Yes
No/Yes/Yes No/No/Yes
No/Yes
No/Yes
No/No
No/No
No/Yes/Yes No/No/Yes
No/Yes/Yes No/No/Yes
570L*55W*29H
530L*71W*40H


