Victron energy VE.Bus BMS V2 User manual

VE.Bus BMS V2
Product manual
Rev 00 06/2022
ENGLISH

Table of Contents
1. General description .................................................................................................................. 1
2. Safety precautions ................................................................................................................... 2
3. Installation ............................................................................................................................. 3
3.1. What's in the box ............................................................................................................ 3
3.2. Basic installation ............................................................................................................. 3
3.2.1. Minimal VE.Bus firmware ......................................................................................... 4
3.2.2. Battery BMS cable connections ................................................................................. 4
3.2.3. Mains detector ..................................................................................................... 5
3.3. Controlling DC loads and chargers ........................................................................................ 6
3.3.1. DC load control .................................................................................................... 6
3.3.2. Charger control .................................................................................................... 6
3.4. Remote connector ........................................................................................................... 6
3.5. GX device .................................................................................................................... 7
3.6. Digital Multi Control panel and VE.Bus Smart dongle ................................................................... 8
4. System examples .................................................................................................................... 9
4.1. System with a GX device, on/off switch and pre-alarm circuit .......................................................... 9
4.2. System with a BatteryProtect and solar charger ....................................................................... 10
4.3. System with a battery monitor ........................................................................................... 11
4.4. System with an alternator ................................................................................................ 12
4.5. Three-phase system with a Multi Control panel ........................................................................ 13
5. Operation ............................................................................................................................ 14
5.1. Important warning ......................................................................................................... 14
5.2. LED indications ............................................................................................................ 14
6. Frequently asked questions ...................................................................................................... 15
7. Technical specifications VE.Bus BMS V2 ..................................................................................... 16
8. Appendix ............................................................................................................................. 17
8.1. Dimensions VE.Bus BMS V2 ............................................................................................ 17
8.2. VE.Bus BMS V2 compared to VE.Bus BMS ........................................................................... 17
VE.Bus BMS V2

1. General description
Protects each individual cell of a Victron Lithium Battery Smart (LiFePO₄) battery
Each individual cell of a LiFePO₄ battery must be protected against over voltage, under voltage and over temperature. The
Victron Lithium Battery 12.8V & 25.6V Smart have integrated Balancing, Temperature and Voltage control (acronym: BTV) and
connect to the VE.Bus BMS V2 with two M8 circular connector cord sets. The BTVs of several batteries can be daisy chained.
Please see our Lithium Battery Smart product page for details.
The BMS will:
• Generate a pre-alarm signal to warn of an imminent cell undervoltage.
• Shut down or disconnect loads in case of cell undervoltage.
• Turn off the inverter of VE.Bus inverter/chargers in case of cell undervoltage.
• Reduce the charge current in case of cell overvoltage or overtemperature of VE.Bus inverter/chargers or VE.Bus inverters.
• Shut down or disconnect battery chargers in case of cell overvoltage or overtemperature.
Pre-alarm
The pre-alarm output is normally free floating and becomes high in case of imminent cell undervoltage. It is set by default at 3.1V
per cell and is adjustable on the battery between 2.85V and 3.15V per cell. The minimum delay between pre-alarm and load
disconnect is 30 seconds.
Load Disconnect
The Load Disconnect output is normally high and becomes free floating in case of cell undervoltage. The Load Disconnect output
can be used to control:
• The remote on/off terminal of a load.
• The remote on/off terminal of an electronic load switch like a BatteryProtect (preferred low power consumption solution).
Charge Disconnect
The Charge Disconnect output is normally high and becomes free floating in case of cell over voltage or over temperature. The
Charge Disconnect output can be used to control:
• The remote on/off terminal of a charger, like an AC charger, DC-DC charger or solar charger.
• A Cyrix-Li-Charge relay.
• A Cyrix-Li-ct Battery Combiner.
LED indicators
The BMS has the following LED indications:
•Status LED (blue):
Lights shortly approximately once every 10 seconds to indicate normal operation.
• Cell voltage above 4V LED (red):
Lights when the charge disconnect output is low because of cell overvoltage or overtemperature.
•Cell voltage above 2.8V LED (blue):
Lights when the load disconnect output is high and the battery cell voltages are above 2.8V.
Connectivity and communication with GX device
• On/off/charger-only control of VE.Bus products via a GX device.
• Control of products connected to the GX device via DVVC.
• The battery pre-alarm is available on the GX device.
Has separate power input and output connections for GX devices
• The GX-Pow output supplies GX power from either the battery or from the Aux-In input. Whichever voltage is higher.
• An AC-DC adaptor or power supply connected to the Aux-In input ensures that the GX device is powered during a low cell state
as long as AC is available.
VE.Bus BMS V2
Page 1 General description

2. Safety precautions
• Installation must strictly follow the national safety regulations in compliance with the enclosure, installation,
creepage, clearance, casualty, markings and segregation requirements of the end-use application.
• Installation must be performed by qualified and trained installers only.
• Switch off the system and check for hazardous voltages before altering any connection.
• Do not open the lithium battery.
• Do not discharge a new lithium battery before it has been fully charged first.
• Charge a lithium battery only within the specified limits.
• Do not mount the lithium battery upside down or on its sides.
• Check if the Li-Ion battery has been damaged during transport.
VE.Bus BMS V2
Page 2 Safety precautions

3. Installation
3.1. What's in the box
The following items are in the box:
• 1x VE.Bus BMS V2.
• 1x Mains detector.
• 1x 0.3m RJ45 UTP cable.
• Piece of Velcro adhesive hook and loop tape
What's in the box
3.2. Basic installation
1. Connect the battery BMS cables to the BMS. In the case of multiple batteries, see the Battery BMS cable connections [4]
chapter.
2. Connect the inverter/charger or inverter positive and negative cables to the battery. Make sure it has been updated to the
most recent firmware version. For more information, see the Minimal VE.Bus firmware [4] chapter.
3. Connect the battery positive via the red power cable with the fuse to the BMS "Battery +" terminal.
4. Connect the VE.Bus port of the Inverter/charger or inverter to the "MultiPlus/Quattro" port of the BMS via an RJ45 cable (not
included).
5. In case of a non-MultiPlus-II or non-Quattro-II, install the mains detector. For more information, see the Mains detector [5]
chapter.
VE.Bus BMS V2
Page 3 Installation

Basic BMS connections
Note that the BMS does not have a battery negative connection. This is because the BMS obtains battery
negative from the VE.Bus. As such, the BMS cannot be used without a VE.Bus Inverter/charger or a VE.Bus
inverter.
3.2.1. Minimal VE.Bus firmware
Before connecting the BMS to the system, the VE.Bus firmware of all inverter/chargers or inverters used in the system needs to
be updated to the latest firmware version (version xxxx489 or above).
If the inverter/charger firmware is between version xxxx415 and xxxx489, the "VE.Bus BMS" or "ESS" assistant must be installed
in the inverter/charger.
If the inverter/chargers or inverters have a VE.Bus firmware version below xxxx415, the BMS will generate a VE.Bus error 15
(VE.Bus combination error). This error indicates that the VE.Bus products or firmware versions cannot be combined. If it is not
possible to update the inverter/chargers or inverters to a VE.Bus firmware version xxxx415 or higher the VE.Bus BMS V2 cannot
be used.
3.2.2. Battery BMS cable connections
In the case of several batteries in parallel and/or series configuration, the BMS cables should be connected in series (daisy-
chained), and the first and last BMS cable should be connected to the BMS.
Should the BMS cables be too short, they can be extended using extension cables, the M8 circular connector Male/Female 3 pole
cables.
VE.Bus BMS V2
Page 4 Installation

Left: Connecting a single battery. Right: connecting multiple batteries.
3.2.3. Mains detector
The mains detector is not needed for MultiPlus-II models, Quattro-II models, or inverters. In which case, this
chapter can be skipped, and the mains detector should be disposed of.
The purpose of the mains detector is to restart the inverter/charger when the AC supply becomes available, in case the BMS had
switched the inverter/charger off due to low cell voltage (so that it can recharge the battery).
In systems consisting of several units configured for parallel, three-phase, or split-phase operation, the mains detector should be
wired in the master or leader unit only.
In the case of a MultiPlus, only use one AC wire pair, and in the case of a Quattro, use both wire pairs.
AC detector wiring example.
# Description
1 AC grid or generator
2 AC circuit breaker and RCD
VE.Bus BMS V2
Page 5 Installation

# Description
3 Mains detector
4 Inverter/charger
5 VE.Bus BMS V2
6 Lithium Battery Smart
3.3. Controlling DC loads and chargers
3.3.1. DC load control
DC loads with remote on/off terminals:
DC loads must be switched off or disconnected to prevent cell undervoltage. The "Load Disconnect" output of the BMS can be
used for this purpose. The "Load Disconnect" output is normally high (= battery voltage). It becomes free-floating (= open circuit)
in case of an impending cell undervoltage (no internal pull down to limit residual current consumption in case of low cell voltage).
DC loads with a remote on/off terminal that switches the load on when the terminal is pulled high (to battery plus) and switches it
off when the terminal is left free-floating can be controlled directly with the BMS Load Disconnect output.
DC loads with a remote on/off terminal that switches the load on when the terminal is pulled low (to battery minus) and switches
it off when the terminal is left free-floating, can be controlled with the BMS Load Disconnect output via an Inverting remote on/off
cable.
Note: please check the residual current of the load when in the off state. After low cell voltage shutdown, a
capacity reserve of approximately 1Ah per 100Ah battery capacity is left in the battery. For example, a residual
current of 10mA can damage a 200Ah battery if the system is left in a discharged state for more than eight
days.
Disconnecting a DC load via a BatteryProtect:
Use a BatteryProtect for DC loads that do not have a remote on/off terminal or for switching groups of DC loads off.
A BatteryProtect will disconnect the DC load when:
• Its input voltage (= battery voltage) has decreased below a preset value.
• When its remote on/off terminal is pulled low. The BMS "load disconnect" output can control the remote on/off terminal of the
BatteryProtect.
3.3.2. Charger control
Charging the LiFePO₄ battery with a battery charger:
Battery charging must be reduced or stopped in time to prevent cell overvoltage or overtemperature from occurring.
The "Charge Disconnect" output of the BMS can be used for this purpose. The "Charge Disconnect" output is normally high
(equal to battery voltage) and switches to an open circuit state in case of an impending cell overvoltage.
Battery chargers with a remote on/off terminal that activates the charger when the terminal is pulled high (to battery positive) and
deactivates when the terminal is left free-floating can be controlled directly with the "Charge Disconnect" output of the BMS.
For battery chargers with a remote terminal that activates the charger when the terminal is pulled low (to battery minus) and
deactivates when the terminal is left free-floating, the Inverting remote on-off cable can be used.
Alternatively, a Cyrix-Li-Charge relay can be used. The Cyrix-Li-Charge relay is a unidirectional combiner that inserts between
a battery charger and the lithium battery. It will engage only when charge voltage from a battery charger is present on its
charge-side terminal. A control terminal connects to the "Charge Disconnect" output of the BMS.
Charging the LiFePO₄ battery with an alternator:
The Cyrix-Li-ct is recommended for this application. The microprocessor-controlled Cyrix-Li-ct includes a timer and voltage trend
detection. This will prevent frequent switching due to a system voltage drop when connecting to a discharged battery. See System
with an alternator [12] for an example of such a system.
3.4. Remote connector
The Remote L and remote H BMS terminals can turn the whole system off.
The remote H and L terminals switch the system on when:
VE.Bus BMS V2
Page 6 Installation
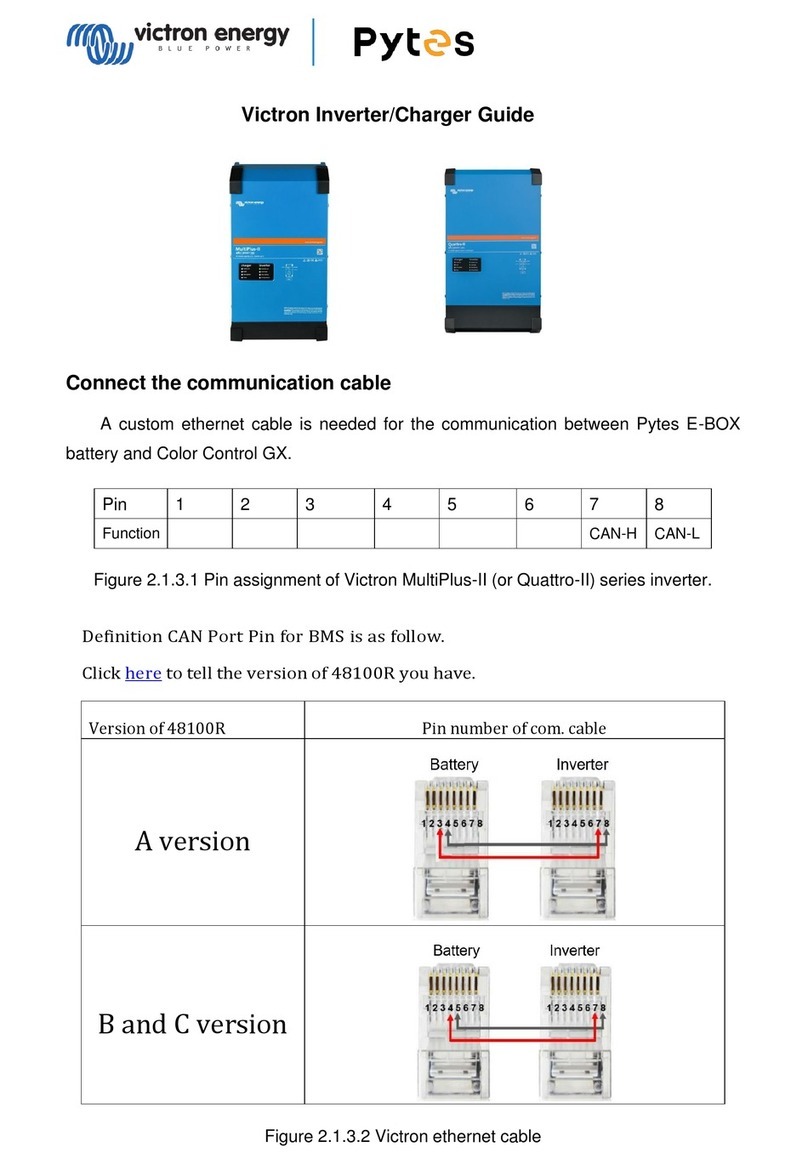
• Contact is made between the remote H terminal and L terminal, for example, via the wire bridge or a switch.
• Contact is made between the remote connector H terminal and battery positive.
• Contact is made between the remote connector L terminal and battery negative.
One usage example of the remote connector is if the system is situated in a vehicle and is only allowed to operate when the
engine is running. In this case, connect the remote connector H terminal to the vehicle ignition switch.
3.5. GX device
For an inverter/charger or an inverter to be controlled by the BMS via a GX device, the following requirements should be met:
• The inverter/charger or inverter VE.Bus firmware version must be version xxxx415 or above.
• The GX device Venus OS firmware must be version 2.80 or above.
• The GX device must be one of these models:
- Cerbo GX
- Color Control GX (CCGX) with serial number HQ1707 or newer
- Venus GX
- Octo GX
Installation:
1. Connect the GX device VE.Bus port to the "Remote panel" port on the BMS via an RJ45 cable (not included).
2. Connect the GX device "power +" terminal to the "GX-Power" terminal of the BMS and connect the GX device "power -"
terminal to the negative terminal of the battery.
3. Connect the positive wire of an (optional) AC-DC power supply to the "AUX-in" terminal of the BMS and connect the negative
wire to the negative battery terminal.
4. Perform a "VE.Bus re-detect system" action on the GX device. This action is available in the inverter/charger menu on the GX
device.
GX device connections.
The functionality of the "GX-Pow" and AUX-In" terminals:
The BMS "GX-Power" output supplies power to the GX device from the battery or from the BMS "Aux-In" input, whichever voltage
is higher. Connecting an AC-DC adaptor to the Aux-In input ensures that a GX device remains powered during a low cell state
providing an AC input (from the grid or a generator) is available.
VE.Bus BMS V2
Page 7 Installation

3.6. Digital Multi Control panel and VE.Bus Smart dongle
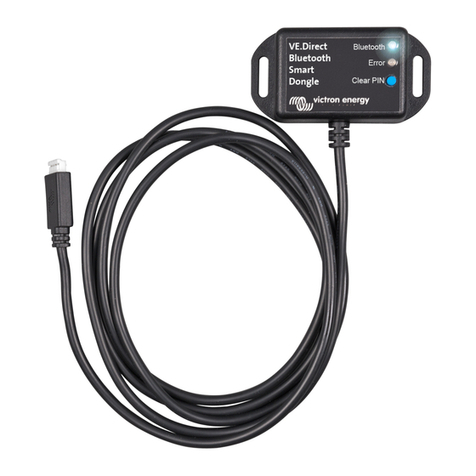
The VE.Bus Smart dongle or Digital Multi Control panel (DMC) can be connected to the "Remote Panel" port on the BMS.
Both a VE.Bus Smart dongle and GX device can be connected to the "Remote Panel" port, and both these devices have on/off/
charger-only control of the inverter/charger.
If a Digital Multi Control is also connected, the on/off/charger-only control of the inverter/charger via a GX device and/or a VE.Bus
Smart dongle is lost. Only the Digital Multi Control has on/off/charger-only control over the inverter/charger.
For example, the VE.Bus Smart dongle, Digital Multi Control panel and the GX device can all be connected simultaneously to the
"Remote Panel" port. However, in this scenario, on/off/charger-only control of the inverter/charger via the GX device and VE.Bus
dongle is disabled. Since inverter/charger control is disabled, the GX device or VE.Bus Smart Dongle can also be connected to
the BMS Multi/Quattro terminal for easy wiring.
For on/off/charger-only control of an inverter/charger or inverter via a VE.Bus Smart dongle or Digital Multi
Control panel, the inverter/charger or inverter VE.Bus firmware version must be version xxxx415 or above.
Left: System with a Digital Multi Control Panel. Right: System with a VE.Bus Smart dongle
# Description
1 Digital Multi Control panel
2 VE.Bus Smart dongle
3 MultiPlus-II Inverter/charger.
4 VE.Bus BMS V2.
The VE.Bus Smart dongle needs to measure the battery voltage. Therefore its Battery+ terminal needs to be
connected to the positive battery terminal. Be aware that the VE.Bus Smart dongle will not be turned off by the
BMS in case of a low cell warning and will continue to draw a little current from the battery.
5 Lithium Battery Smart or battery bank consisting of multiple batteries creating a 12V, 24V or 48V battery bank.
VE.Bus BMS V2
Page 8 Installation

4. System examples
4.1. System with a GX device, on/off switch and pre-alarm circuit
# Description
1 AC source, grid or generator.
2 Circuit breaker and RCD.
3 MultiPlus-II Inverter/charger.
4 System on/off switch.
5 VE.Bus BMS V2.
6 Cerbo GX.
7 AC-DC power supply, providing backup power to the Cerbo GX should the battery be too far discharged.
8 Pre-alarm warning circuit, giving an advanced warning in case of an imminent system shutdown due to a too far
discharged battery.
9 Lithium Battery Smart or battery bank consisting of multiple batteries creating a 12V, 24V or 48V battery bank.
VE.Bus BMS V2
Page 9 System examples

4.2. System with a BatteryProtect and solar charger
# Description
1 AC source, grid or generator.
2 Circuit breaker and RCD.
3 MultiPlus-II Inverter/charger.
4 Solar charger.
5VE.Direct non-inverting remote on/off cable connects between the solar charger VE.Direct port and the BMS "Charge
Disconnect" terminal.
6 VE.Bus BMS V2.
7 Lithium Battery Smart or battery bank consisting of multiple batteries creating a 12V, 24V or 48V battery bank.
8 BatteryProtect.
9 DC loads.
VE.Bus BMS V2
Page 10 System examples

4.3. System with a battery monitor
# Description
1 MultiPlus-II Inverter/charger.
2 VE.Bus V2 BMS.
3 SmartShunt power wire (B+) connected to the "load Disconnect" terminal on the VE.Bus V2 BMS.
4 Smart Shunt battery monitor. In case a BMV battery monitor is used, its shunt needs to be wired in a similar way.
5 Lithium Battery Smart or battery bank consisting of multiple batteries creating a 12V, 24V or 48V battery bank.
VE.Bus BMS V2
Page 11 System examples

4.4. System with an alternator
# Description
1 AC source, grid or generator.
2 Circuit breaker and RCD.
3 Orion DC-DC charger, the remote H terminal is connected to the "Charge Disconnect" terminal on the VE.Bus V2
BMS.
4 VE.Bus BMS V2.
5 MultiPlus-II Inverter/charger.
6 Starter monitor and alternator.
7 12V Starter battery.
8 Lithium Battery Smart or battery bank consisting of multiple batteries creating a 12V or 24V battery bank.
VE.Bus BMS V2
Page 12 System examples

4.5. Three-phase system with a Multi Control panel
# Description
1 Digital Multi Control panel.
2 MultiPlus-II Inverter/charger programmed as a 3-phase system.
3 VE.Bus BMS V2.
4 Lithium Battery Smart or battery bank consisting of multiple batteries creating a 12V, 24V or 48V battery bank.
VE.Bus BMS V2
Page 13 System examples

5. Operation
5.1. Important warning
Lithium batteries are expensive and can be damaged due to over discharge or over charge. Damage due to over discharge can
occur if small loads (such as: alarm systems, relays, standby current of certain loads, back current drain of battery chargers
or charge regulators) slowly discharge the battery when the system is not in use. In case of any doubt about possible residual
current draw, isolate the battery by opening the battery switch, pulling the battery fuse(s) or disconnecting the battery plus when
the system is not in use.
A residual discharge current is especially dangerous if the system has been discharged completely and a low cell voltage
shutdown has occurred. After shutdown due to low cell voltage, a capacity reserve of approximately 1Ah per 100Ah battery
capacity is left in the battery. The battery will be damaged if the remaining capacity reserve is drawn from the battery. A residual
current of 10mA for example may damage a 200Ah battery if the system is left in discharged state during more than 8 days.
5.2. LED indications
LED Colour Behaviour Meaning
Status Blue
Off BMS is off
Lights shortly
approximately once
every 10 seconds.
BMS is operating normally.
Flashes rapidly at
approximately 15 times
per second.
The BMS is stuck in boot loader mode due to a faulty application.
Cell > 2.8V Blue
Off
Low cell voltage.
The BMS has switched the DC loads and the inverter off.
Charge the battery or connect an AC supply to the inverter/charger.
Once the battery voltage has increased sufficiently, the DC loads
and inverter will be switched on again.
On Cell voltage within normal range.
Cell > 4V Red
Off Cell voltage and temperature within normal range.
On
High cell voltage or high temperature.
The BMS has switched off the chargers.
Check for a faulty charger and/or reduce battery temperature.
Once the battery voltage and/or temperature have been sufficiently
reduced, the BMS will switch the chargers back on.
VE.Bus BMS V2
Page 14 Operation

6. Frequently asked questions
Q1: I have disconnected the VE.Bus BMS, my inverter/charger will not switch on; why?
If the inverter/charger cannot find the BMS, it will go into an emergency mode. In this mode, the inverter/charger will charge the
batteries with a maximum of 5A, up to 12, 24 or 48V (depending on the system voltage). While the inverter/charger is in this
mode, only the "Mains on" LED is illuminated. If you disconnect the AC input, the inverter/charger will switch off and will not
start to invert since it cannot get verification on the battery health from the BMS. Note that when the batteries are depleted or
disconnected, a Quattro will need to be powered from AC input 1. Supplying power to AC Input 2 will not make a Quattro switch
on and start charging.
Q2: The batteries are empty, and the inverter/charger will not start to charge; how to get the system up and running
again?
When lithium batteries are depleted, the voltage is around 9V or lower, and the battery voltage might be below the operating
window of the BMS. In that case, the BMS will not be able to start the inverter/charger. To start the system again, disconnect
the BMS from the inverter/charger, and refer to Q1. Note that it might be necessary to disconnect the GX device, NMEA2000
interfaces or other similar products. As long as they are not switched on themselves, they can prevent the inverter/charger from
starting up. A more straightforward option to revive a depleted system might be to connect a small battery charger, for example, a
5A charger, and wait for the battery voltage to get back up to 12, 24 or 48V (depending on the system voltage).
Q3: What happens with the inverter/charger when the BMS gives a low cell voltage signal?
The inverter/charger will be set to "charger only mode", and the batteries are charged when an AC input is available. Should AC
not be available, the inverter/charger is off.
Q4: What happens with the inverter/charger when the BMS gives a high cell voltage signal?
The high cell voltage signal will only be given when there are unbalanced cells. The inverter/charger will switch to bulk and starts
charging with a reduced charge current. This allows the balancing system in the batteries to re-balance the cells.
Q5: What does it mean when the BMS displays an error 15?
With VE.Bus firmware versions below version xxxx415 the VE.Bus BMS V2 will generate a VE.Bus error 15, VE.Bus combination
error. This error indicates that the VE.Bus products or firmware versions cannot be combined. Resolution: Update the inverter/
charger to a firmware version xxxx415 or higher, if available.
VE.Bus BMS V2
Page 15 Frequently asked questions

7. Technical specifications VE.Bus BMS V2
Electrical
Input voltage range 9 – 70Vdc
Current draw, regular operation 10mA (excluding Load Disconnect current)
Current draw, low cell voltage 2mA
GX power output 1A
Aux-in input 1A
Pre-alarm output current rating 1A, not short circuit protected
Load disconnect output Normally high (output voltage ≈ supply voltage – 1V)
Floating when the load needs to be disconnected
Source current limit: 1A
Sink current: 0A
Charge disconnect output Normally high, (output voltage ≈ supply voltage – 1V)
Floating when charger should be disconnected
Source current limit: 10mA
Sink current: 0A
Remote on/off terminals Usage modes to turn the system on or off:
a. ON when the L and H terminal are interconnected (switch or relay contact)
b. ON when the L terminal is pulled to battery minus (V<3.5V)
c. ON when the H terminal is high (2.9V < VH < Vbat)
d. OFF in all other conditions
VE.Bus communications ports 2 x RJ45 sockets to connect to all VE.Bus products
General
Operating temperature -20 to +50°C 0 - 120°F
Humidity Max. 95% (non-condensing)
Protection grade IP20
Enclosure
Material ABS
Colour Matt black with a blue sticker
Weight 120gr
Dimension (h x w x d) 23.8mm x 94.5mm x 105.5mm
Standards
Safety EN 60950
Emission EN 61000-6-3, EN 55014-1
Immunity EN 61000-6-2, EN 61000-6-1, EN 55014-2
Automotive EN 50498
VE.Bus BMS V2
Page 16
Technical specifications VE.Bus BMS
V2

8. Appendix
8.1. Dimensions VE.Bus BMS V2
8.2. VE.Bus BMS V2 compared to VE.Bus BMS
This table highlights the differences between the VE.Bus BMS V2 compared to it's predecessor, the VE.Bus BMS.
Feature VE.Bus BMS V2 VE. Bus BMS
Product image.
MultiPlus Quattro port. Yes. Yes.
Remote panel port. To connect a GX device or a Digital
Multi Control panel.
Only to connect a Digital Multi Control
panel.
GX device communication.
Yes, the BMS broadcasts operational
data and the BMS can control
equipment that is connected to a GX
device, like solar chargers and certain
AC chargers via DVCC.
No.
GX Power terminal. Yes, to power a GX device. No.
VE.Bus BMS V2
Page 17 Appendix

Feature VE.Bus BMS V2 VE. Bus BMS
BMS firmware update. Yes, both locally and also remotely via
the VRM portal. Not possible.
Inverter/charger "in system"
firmware update.
Yes, both locally and also remotely via
the VRM portal.
No, the inverter/charger needs to be
disconnected while its firmware is
updated.
Usable without a VE.Bus
connection.
No. The BMS has no battery minus
connection, battery minus is supplied by
the VE.Bus. and VE.Bus needs to be
connected for the BMS to be powered.
Yes.
Load disconnect terminal. Yes. Yes.
Pre-alarm terminal. Yes. Yes.
Charge disconnect terminal. Yes. Yes.
Remote on/off terminal. Yes.
No. If remote on/off control is needed, a
switch needs to be placed in the positive
power supply line to the BMS.
Aux terminal. Yes. No.
MultiPlus/Quattro enabled LED. No.
Yes. This LED is on when the BMS is
sending a "standby" command to the
inverter/charger.
Status LED.
Yes, this LED indicates that the BMS
is sending information frames to the
inverter/charger. The LED can also
indicate if the BMS is stuck in boot
loader mode.
No.
Low cell voltage LED. Yes. Yes.
High cell voltage and/or
temperature LED. Yes. Yes.
VE.Bus BMS V2
Page 18 Appendix
Other manuals for VE.Bus BMS V2
1
Table of contents
Other Victron energy Computer Hardware manuals

Victron energy
Victron energy VE.Direct to Bluetooth User manual

Victron energy
Victron energy VE.Bus User manual

Victron energy
Victron energy VE.Direct to Bluetooth Smart dongle User manual

Victron energy
Victron energy Pytes User manual

Victron energy
Victron energy VE.Direct User manual

Victron energy
Victron energy VE.Direct Bluetooth Smart Dongle User manual

Victron energy
Victron energy Color Control GX User manual

Victron energy
Victron energy VE.Direct Technical manual

Victron energy
Victron energy VE.Bus User manual