3
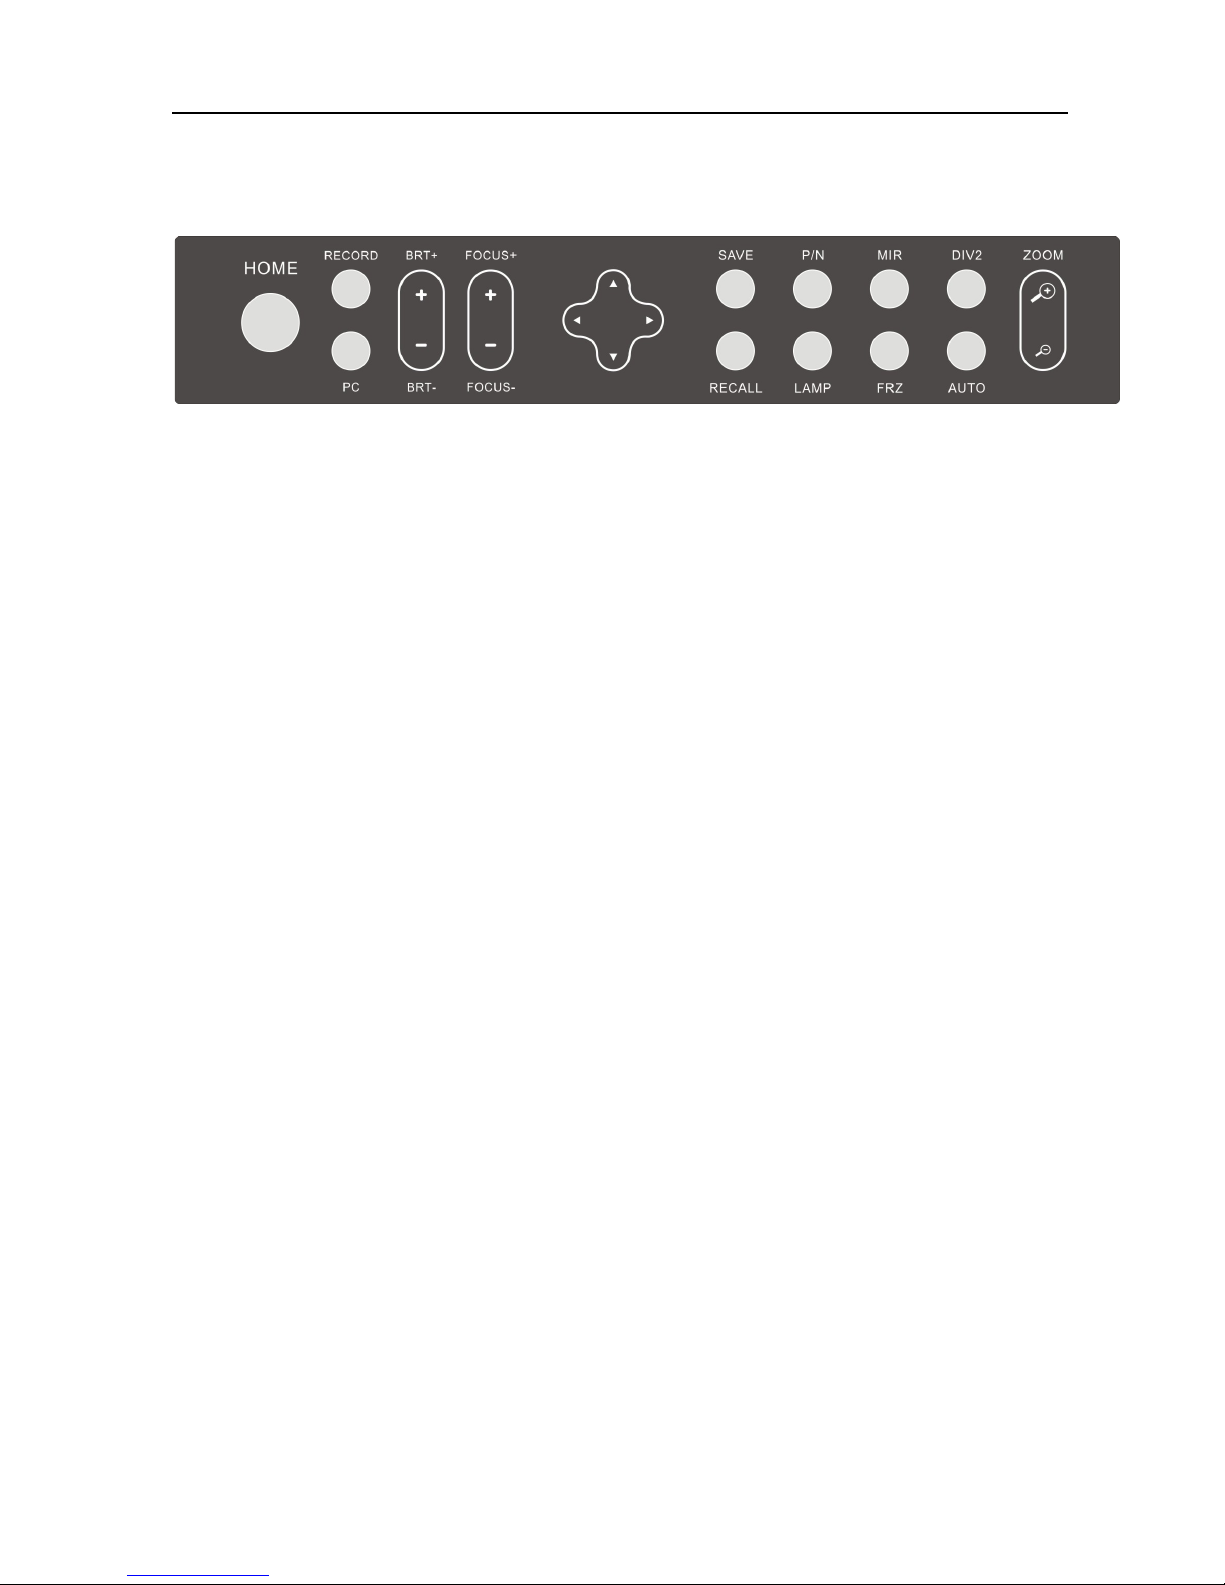
3.Control Panel
1.HOME:a. Switch back to the camera signal.
b. Display the selected image and video clips in image recall mode.
2.RECORD:Start/stop video recording, the video clip recorded will be automatically saved to a
USB memory stick, SD card, or built-in memory. DV 485 can detect an external storage
media and put the last detected storage as a priority storage site. If there is no external
storage detected, all video clips will be saved in the built-in memory.
3.PC:Switch to the PC signal.
4.BRT+, BRT-:Control the brightness of displaying image.
5.FOCUS+, FOCUS-:Adjust focus manually, focus far and focus near.
6.ARROWS:Select images and video clips in image recall mode.
7.SAVE: Capture and save the images to USB memory stick, SD card, or built-in memory. DV
485 can detect an external storage media and put the last detected storage as a priority
storage site. If there is no external storage detected, all video clips will be saved in the
built-in memory.
8.RECALL:Enable image recall mode, displaying the saved images and video clips.
9.P/N:Switch the image display between positive and negative.
10.LAMP:Toggle arm light, back light and no light.
11.MIR:Flip the current displaying image.
12.FRZ:Freeze the displaying image .
13.DIV2:Split the displaying image.
14.AUTO:Adjust white balance and focus automatically.
15.ZOOM+, ZOOM-: Zoom in and zoom out the current displaying image.