IM-FT 591480 0318
4
1.1 Intended use
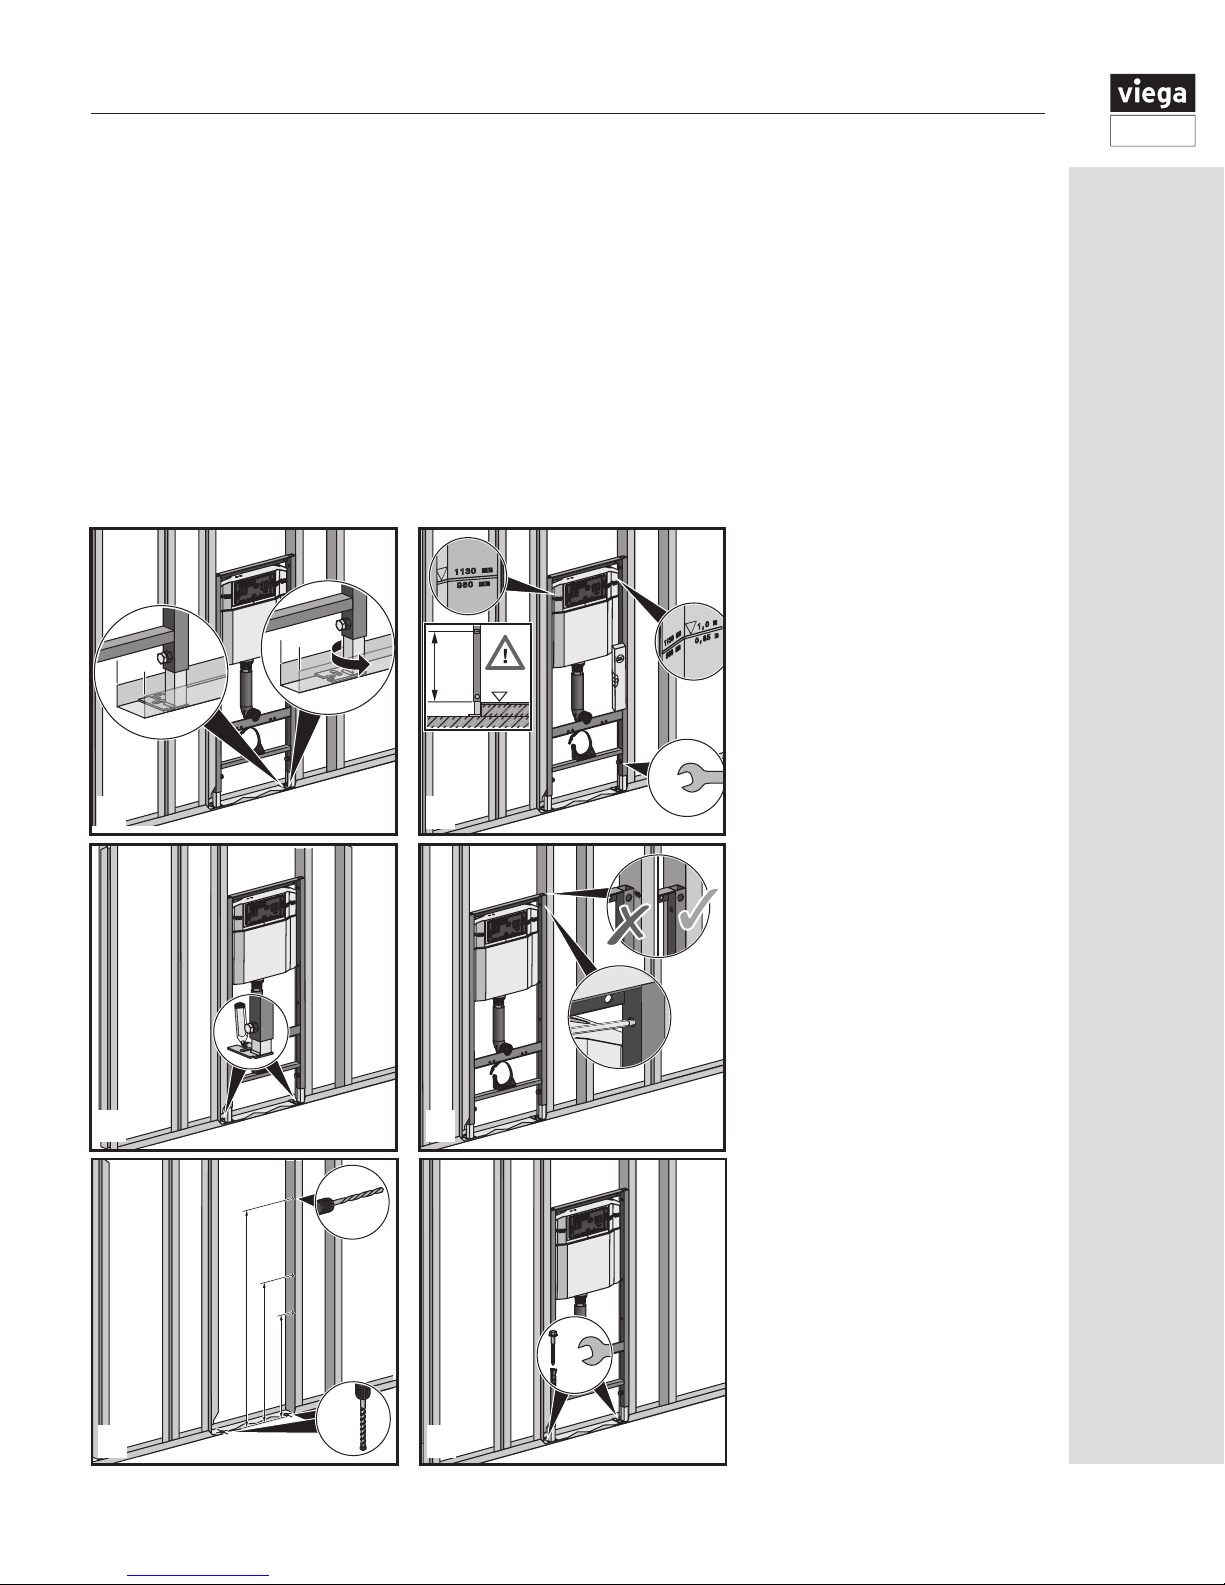
• The Viega Eco Plus WC carrier is suitable for
mounting in wood or steel stud walls
• The WC carrier may only be mounted on even
wall surfaces
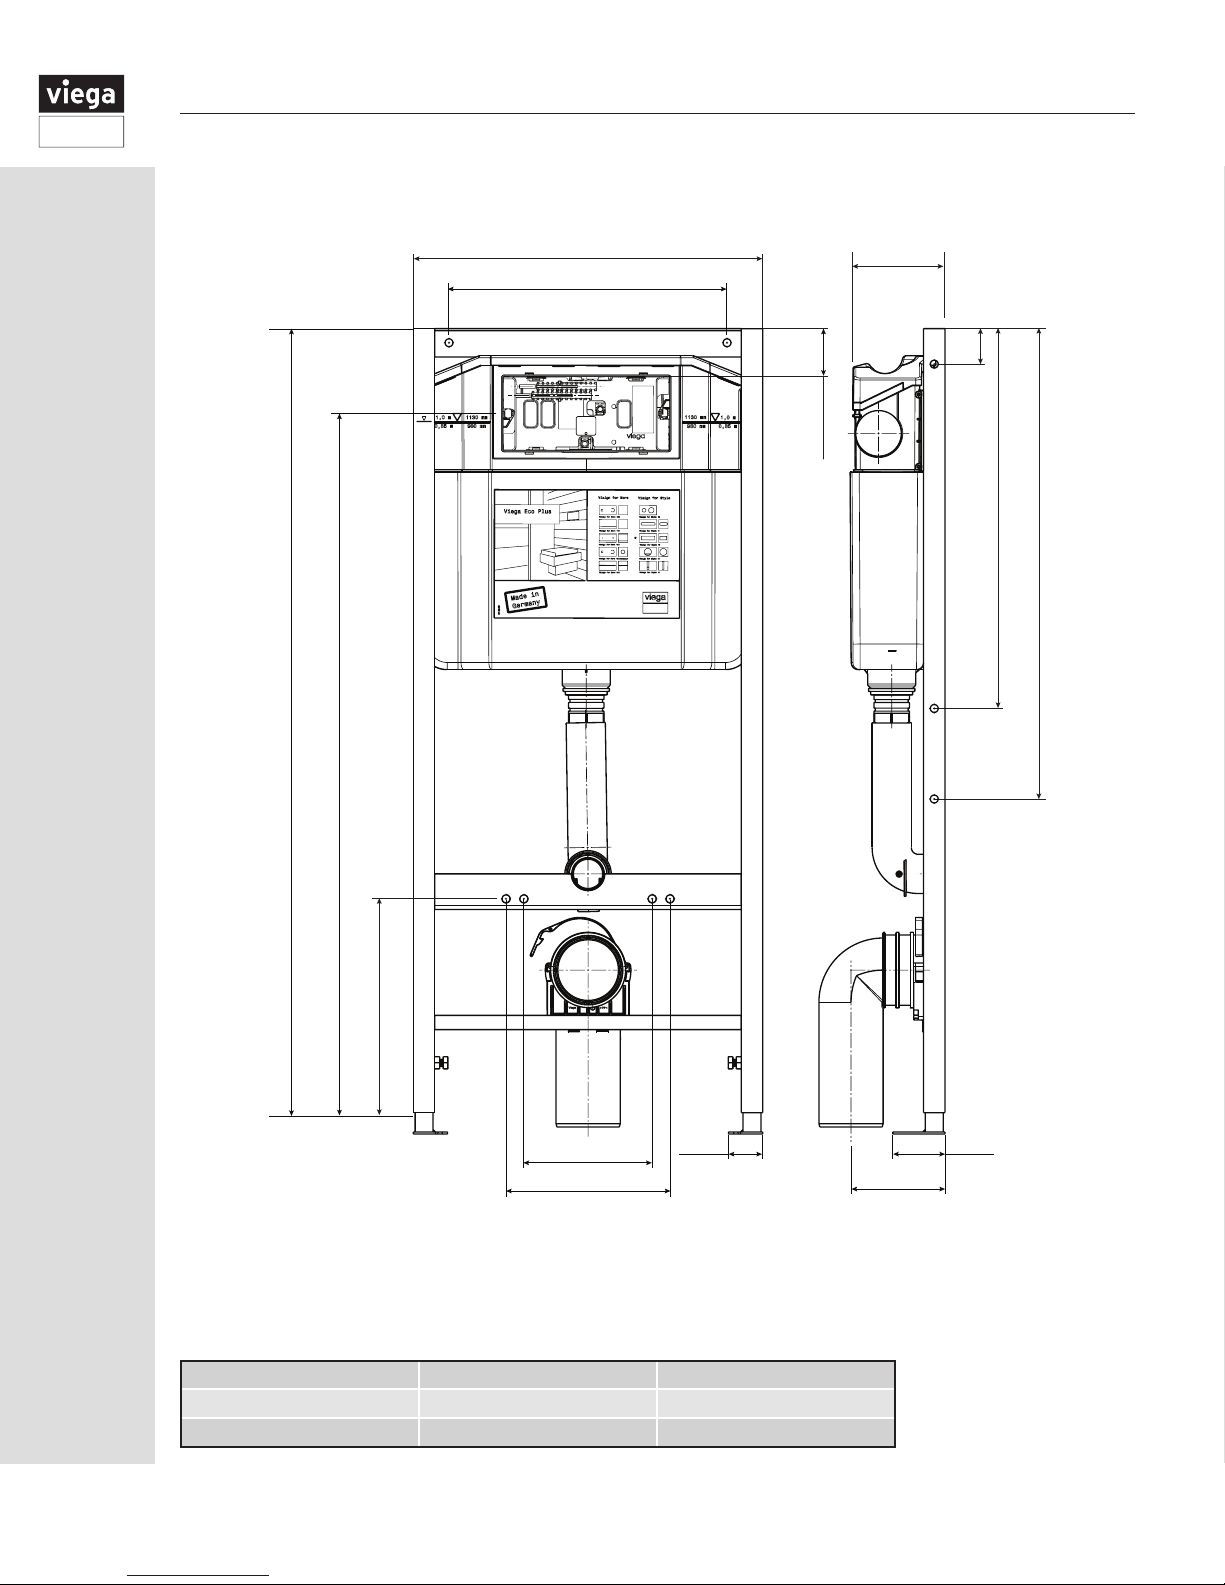
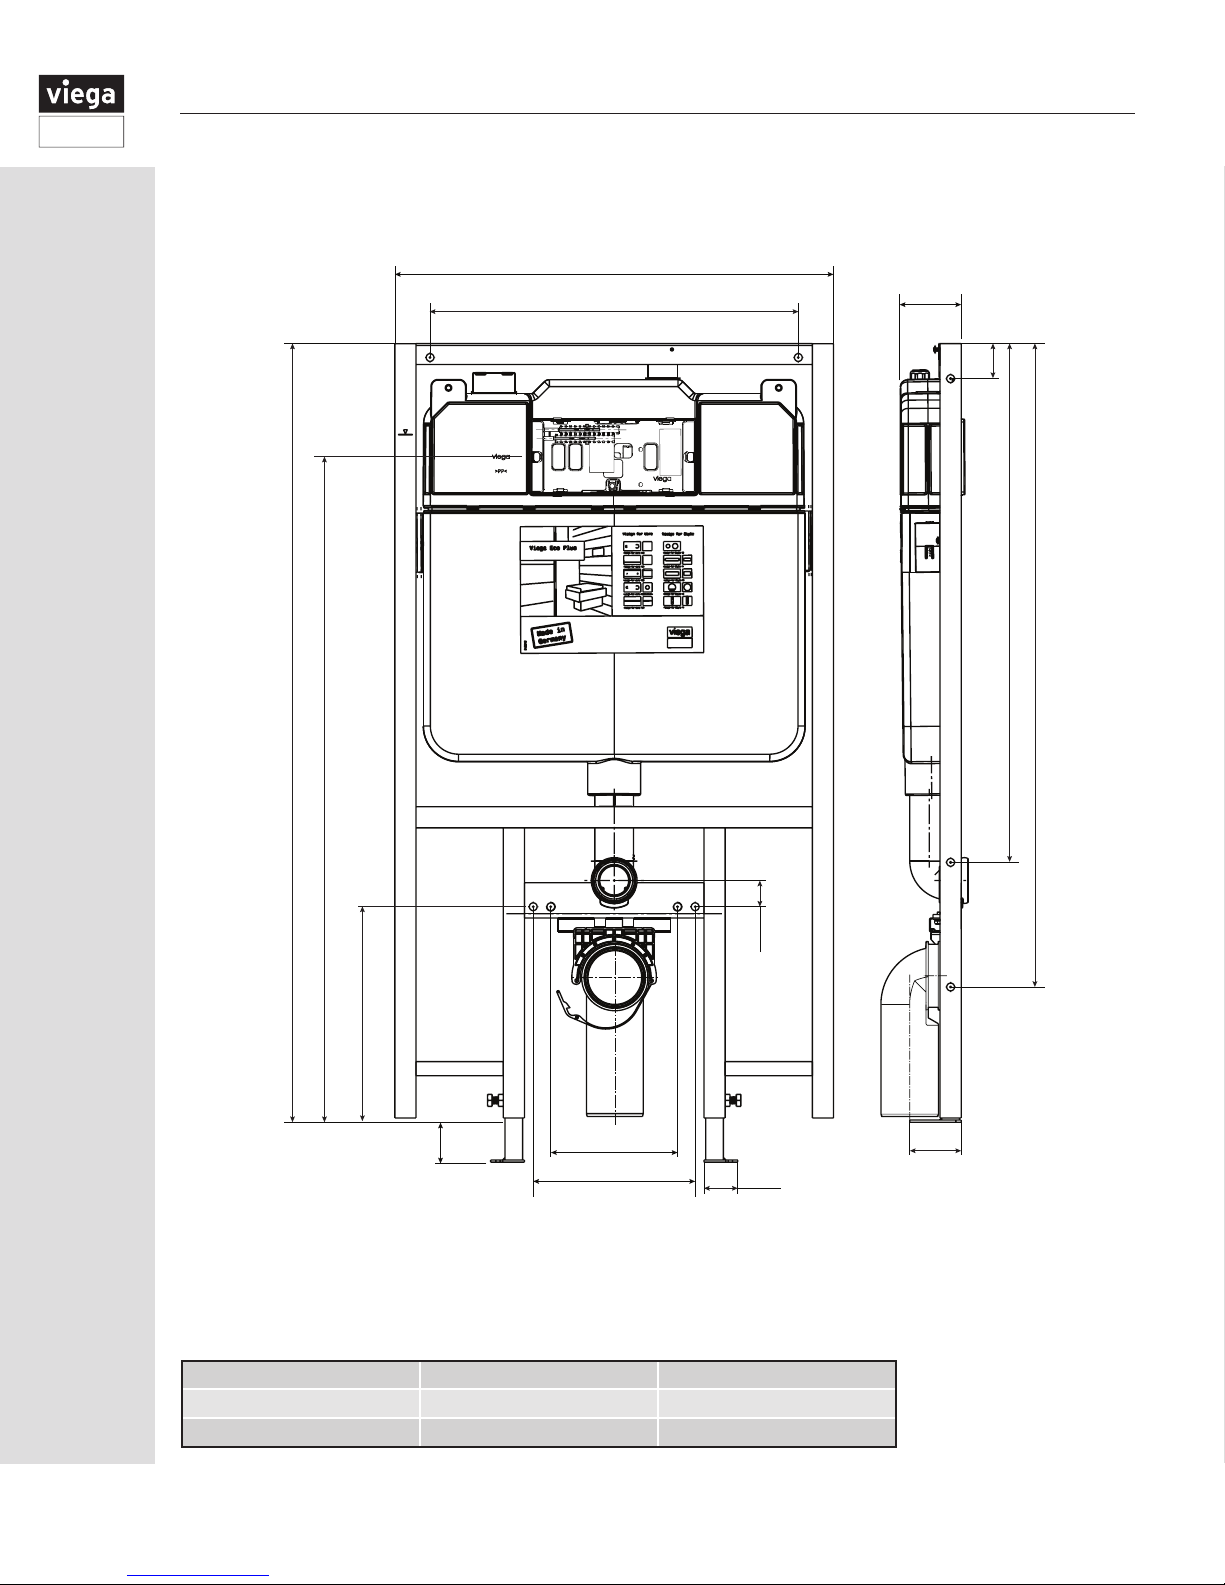
1.2 Construction height
• All references to construction height should be
measured from the nished oor. If measuring
from unnished oor, the thickness of the oor
covering should be added.
1 Instructions for Use
1.3 WC ceramic bowls
• The Viega WC carrier can only be used in
combination with compatible wall-hung bowls
(for threaded rods spacing of 7⅛" or 9" (180 or
230 mm)
Model Part No Product description
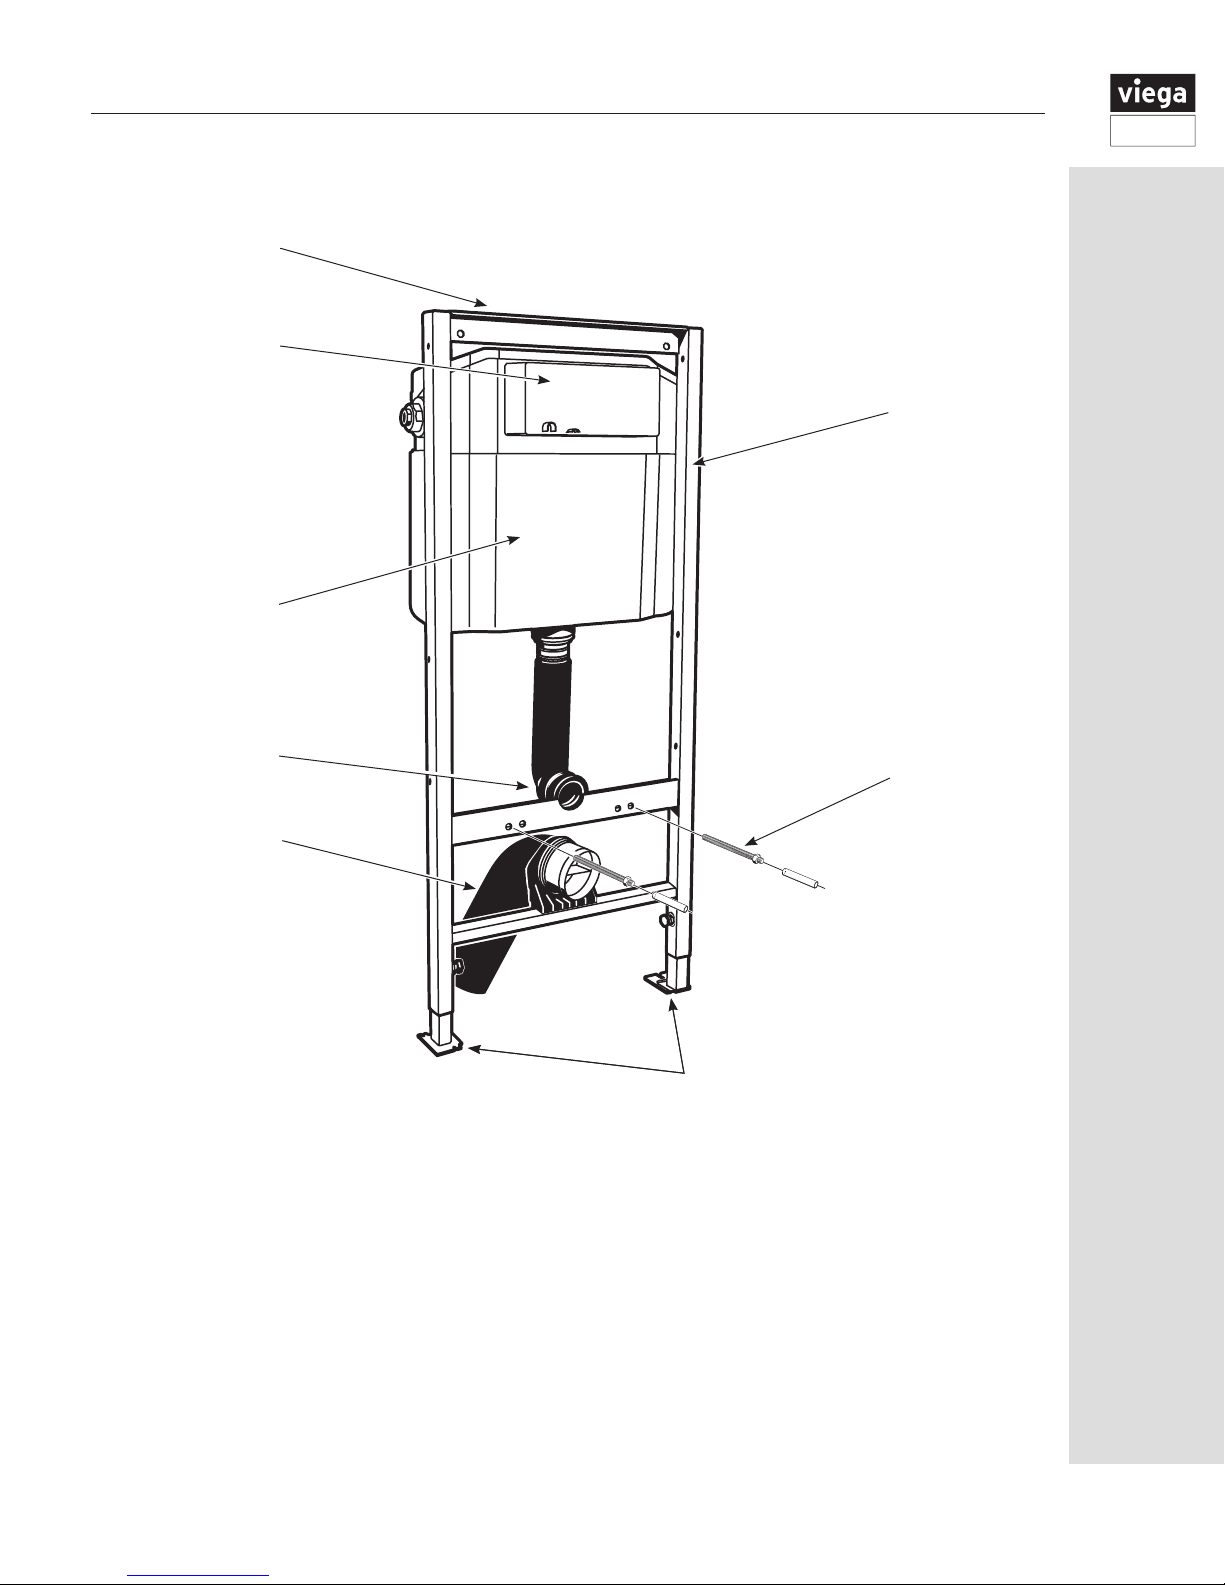
8180US 52700 Viega Eco Plus WC carrier
2x6
For Visign flush plates, manual or touchless actuation
Flush actuation from the front, dual flush technology, adjustable ceramic height, barrier-
free
Components
Powder-coated steel frame, concealed cistern, 3½" PP drain elbow, fernco coupling,
mounting hardware for 2x6 wood or metal studs, bowl mounting kit, trim guards
Cistern components
Pre-mounted angle stop with ½" NPT supply connection, fill valve, flush valve
Technical Data
sm. flush vol. factory setting approx. 0.8 gallon
sm. flush vol. setting approx. 0.8 - 1 gallon
full flush vol. factory setting approx. 1.6 gallon
810 8.1US 52710 Viega Eco Plus WC carrier
2x4
For Visign flush plates, manual or touchless actuation
Flush actuation from the front, dual flush technology, adjustable ceramic height, barrier-
free
Components
Powder-coated steel frame, concealed cistern, 3½” PP drain elbow, fernco coupling,
mounting hardware for 2x4 wood or metal studs, bowl mounting kit, trim guards
Cistern components
Pre-mounted angle stop with ½" NPT supply connection, fill valve, flush valve
Technical Data
sm. flush vol. factory setting approx. 0.8 gallon
sm. flush vol. setting approx. 0.8 - 1 gallon
full flush vol. factory setting approx. 1.6 gallon