The oscillation emission value is measured pursuant to
the applicable regulations and is suitable for comparing
the machine with other electrical tools, also refer to
Ä
‘Regulations from section: Technical data’ on page 6.
When using the Press Booster, the actual value depends
on which press machine (machine type) is used.
Combined with the Pressgun 5, the oscillation emission
value is for example < 2.5 m/s2.
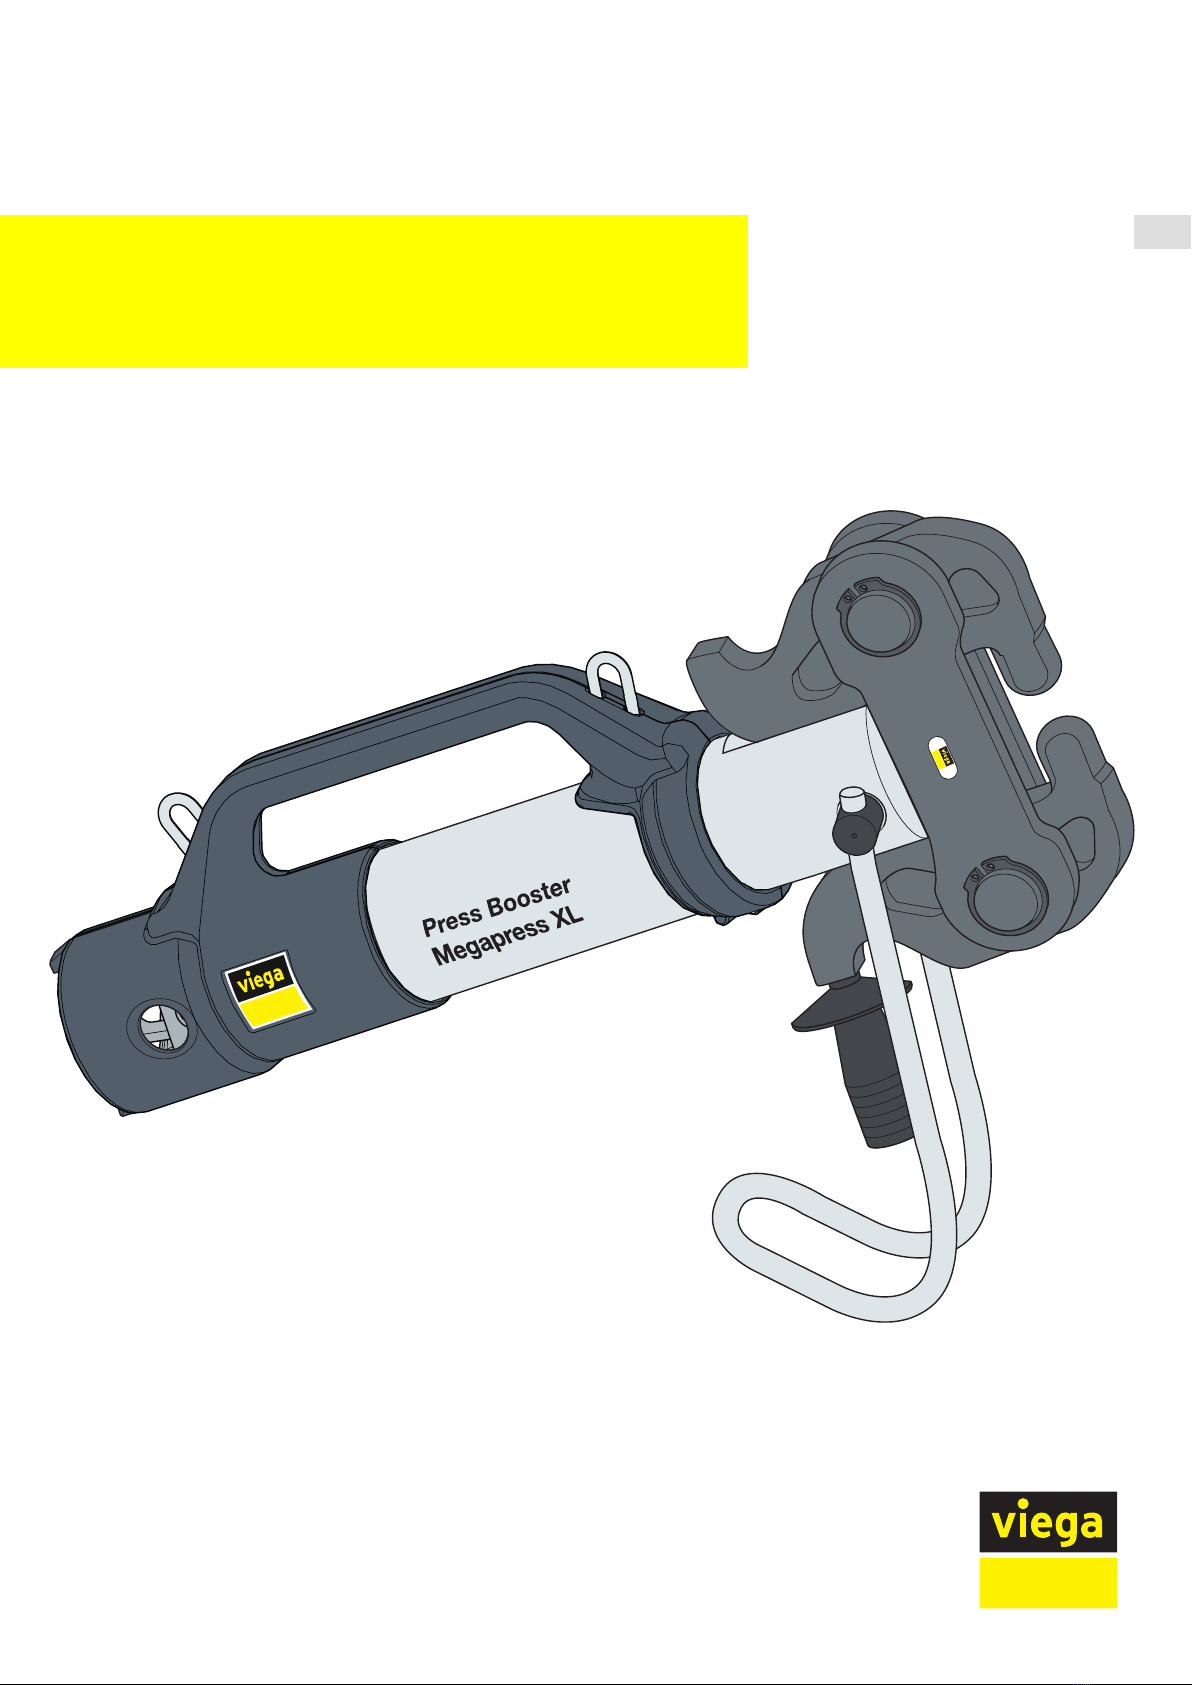
2.3.3 Operating mode
Combined with a Viega system press machine, the Press Booster acts
as a press capacity booster.
As a rule, the Press Booster needs two pressings of the driving press
machine to execute a complete pressing for Megapress XL press con‐
nectors.
During the first pressing, the press machine moves the roller head of the
Press Booster forward and presses the ball heads of the hinged adapter
jaw into the contact points of the press ring, building up pressure. A
second pressing following directly after the first completes the pressing
process, and causes the press machine and the Press Booster to move
back automatically.
For the next pressing, you may need to carry out a a reset stroke to
move the press machine and the Pressgun-Press Booster back to its
starting position.
Once the Press Booster opens automatically, the pressing
has been completed properly. If you cannot fully open the
hinged adapter jaw of the Press Booster via the handle
after completed pressing and removal from the press ring,
actuate the press machine once more and carry out a
reset stroke; also refer to
Ä
Chapter 3.3 ‘Pressing’
on page 12.
As soon as the first pressing is completed, locking takes
place and prevents a separation of the Press Booster
from the press ring until the entire pressing process is ter‐
minated.
If you nevertheless need to interrupt the pressing, see
Ä
Chapter 3.4 ‘Interrupting pressing’ on page 15.
Product information
Pressgun Press Booster PT2 9