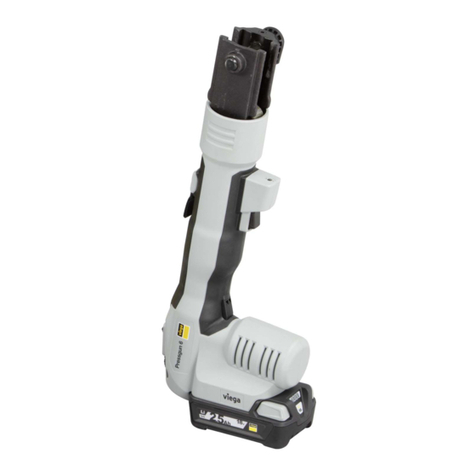
Viega Pressgun 6B User manual

Instructions for Use
Pressgun 6B press machine with
mains connection
for all Viega system press jaws, rings, chains and
(hinged) adapter jaws with PT2 interface
Model
2295.5
INT

Table of contents
1About these instructions for use 3
1.1 Target groups 3
1.2 Labelling of advisory text and safety symbols 3
1.3 About this translated version 4
1.4 Note on use of abbreviated terms 5
2Product information 6
2.1 Standards and regulations 6
2.2 General safety advice for electrical tools 6
2.3 Intended use 9
2.3.1 Areas of use 9
2.4 Product description 9
2.4.1 Overview 9
2.4.2 Technical data 11
2.4.3 Operating mode 12
2.4.4 Control elements and indicators at the press
machine 12
3Handling 14
3.1 Transport and storage 14
3.2 Commissioning 14
3.3 Carrying out the pressing process 16
3.4 Aborting the pressing process 17
3.5 Care and maintenance 18
3.5.1 Cleaning the press tools 18
3.5.2 Performing checks 19
3.6 Disposal 19
4Appendix 20
4.1 Warranty 20
4.2 EC Declaration of Conformity 21
4.3 Service partners 21
Table of contents
Pressgun 6B press machine with mains connection 2

1 About these instructions for use
Trade mark rights exist for this document; for further information, go to
viega.com/legal.
These instructions are a translation of the original operating instructions.
1.1 Target groups
The information in these operating instructions is directed at the fol‐
lowing groups of people:
nHeating and plumbing experts and trained personnel
This product must not be used by persons who do not have the afore‐
mentioned training or qualifications.
1.2 Labelling of advisory text and safety symbols
Warning and advisory texts are set aside from the remainder of the text
and are labelled with the relevant pictographs.
DANGER!
This symbol warns of possible life-threatening injury.
WARNING!
This symbol warns of possible serious injury.
CAUTION!
This symbol warns of possible injury.
NOTICE!
This symbol warns of possible damage to property.
This symbol gives additional information and hints.
About these instructions for use
Pressgun 6B press machine with mains connection 3

Pay attention to the warning signs and symbols on the press machine
and accessories:
Observe the operating instructions
Read the operating and safety instructions carefully prior to
the commissioning procedure.
Protection class II (double insulated casing)
The marked product must not be disposed of as household
waste.
Warning of flying fragments
Use of the retaining bolt
The maintenance label indicates the date of the next
service.
CE marking: Product safety in Europe
EAC marking: Registration of products in the territory of the
Eurasian Customs Union
1.3 About this translated version
This instruction for use contains important information about the choice
of product or system, assembly and commissioning as well as intended
use and, if required, maintenance measures. The information about the
products, their properties and application technology are based on the
current standards in Europe (e.g. EN) and/or in Germany
(e.g. DIN/DVGW).
Warning signs and symbols
About these instructions for use
Pressgun 6B press machine with mains connection 4

Some passages in the text may refer to technical codes in Europe/
Germany. These should serve as recommendations in the absence of
corresponding national regulations. The relevant national laws, stand‐
ards, regulations, directives and other technical provisions take priority
over the German/European directives specified in this manual: The
information herein is not binding for other countries and regions; as said
above, they should be understood as a recommendation.
1.4 Note on use of abbreviated terms
For reading comfort, the following abbreviated terms are used in these
instructions for use:
Term Abbreviated form
Viega system press machine
Pressgun 6B
Press machine
Viega system press jaws Press jaws
Viega system press rings Press rings
Viega system press tool Press tool
Combinations of for example:
nPress machine and press jaws
nPress machine with hinged
adapter jaws and press ring or
press chain
nPress machine and press-in
attachment tool
About these instructions for use
Pressgun 6B press machine with mains connection 5

2 Product information
2.1 Standards and regulations
The following standards and regulations apply to Germany / Europe and
are provided as a support feature.
Regulations from section: Technical data
Scope / Notice Regulations applicable in Ger‐
many
Oscillation emission value
Protection classes
EN 60745-1
2.2 General safety advice for electrical tools
This section contains general safety instructions for numerous different
products and electrical tools. Consequently, not every safety instruction
will apply to this tool.
WARNING!
Read all safety warnings, instructions, illus‐
trations and specifications provided with this
power tool.
Failure to follow all instructions listed below may result in
electric shock, fire and/or serious injury.
Save all warnings and instructions for future reference.
The term “power tool” in the warnings refers to your mains-operated
(corded) power tool or battery-operated (cordless) power tool.
a) Keep work area clean and well lit.
Cluttered or dark areas invite accidents.
b) Do not operate power tools in explosive atmospheres, such as in the
presence of flammable liquids, gases or dust.
Power tools create sparks which may ignite the dust or fumes.
c) Keep children and bystanders away while operating a power tool.
Distractions can cause you to lose control.
Work area safety
Product information
Pressgun 6B press machine with mains connection 6

a) Power tool plugs must match the outlet. Never modify the plug in any
way. Do not use any adapter plugs with earthed (grounded) power tools.
Unmodified plugs and matching outlets will reduce risk of electric shock.
b) Avoid body contact with earthed or grounded surfaces, such as
pipes, radiators, ranges and refrigerators.
There is an increased risk of electric shock if your body is earthed or
grounded.
c) Do not expose power tools to rain or wet conditions.
Water entering a power tool will increase the risk of electric shock.
d) Do not abuse the cord. Never use the cord for carrying, pulling or
unplugging the power tool. Keep cord away from heat, oil, sharp edges
or moving parts.
Damaged or entangled cords increase the risk of electric shock.
e) When operating a power tool outdoors, use an extension cord suit‐
able for outdoor use.
Use of a cord suitable for outdoor use reduces the risk of electric shock.
f) lf operating a power tool in a damp location is unavoidable, use a
residual current device (RCD) protected supply.
Use of an RCD reduces the risk of electric shock.
a) Stay alert, watch what you are doing and use common sense when
operating a power tool. Do not use a power tool while you are tired or
under the influence of drugs, alcohol or medication.
A moment of inattention while operating power tools may result in
serious personal injury.
b) Use personal protective equipment. Always wear eye protection.
Protective equipment such as a dust mask, non-skid safety shoes, hard
hat or hearing protection used for appropriate conditions will reduce
personal injuries.
c) Prevent unintentional starting. Ensure the switch is in the off-position
before connecting to power source and/or battery pack, picking up or
carrying the tool.
Carrying power tools with your finger on the switch or energising power
tools that have the switch on invites accidents.
d) Remove any adjusting key or wrench before turning the power tool
on.
A wrench or a key left attached to a rotating part of the power tool may
result in personal injury.
e) Do not overreach. Keep proper footing and balance at all times.
This enables better control of the power tool in unexpected situations.
f) Dress properly. Do not wear loose clothing or jewellery. Keep your hair
and clothing away from moving parts.
Loose clothes, jewellery or long hair can be caught in moving parts.
g) lf devices are provided for the connection of dust extraction and col‐
lection facilities, ensure these are connected and properly used.
Use of dust collection can reduce dust-related hazards.
Electrical safety
Personal safety
Product information
Pressgun 6B press machine with mains connection 7
h) Do not let familiarity gained from frequent use of tools allow you to
become complacent and ignore tool safety principles.
A careless action can cause severe injury within a fraction of a second.
a) Do not force the power tool. Use the correct power tool for your
application.
The correct power tool will do the job better and safer at the rate for
which it was designed.
b) Do not use the power tool if the switch does not turn it on and off.
Any power tool that cannot be controlled with the switch is dangerous
and must be repaired.
c) Disconnect the plug from the power source and/or remove the bat‐
tery pack, if detachable, from the power tool before making any adjust‐
ments, changing accessories, or storing power tools.
Such preventive safety measures reduce the risk of starting the power
tool accidentally.
d) Store idle power tools out of the reach of children and do not allow
persons unfamiliar with the power tool or these instructions to operate
the power tool.
Power tools are dangerous in the hands of untrained users.
e) Maintain power tools and accessories. Check for misalignment or
binding of moving parts, breakage of parts and any other condition that
may affect the power tool's operation. lf damaged, have the power tool
repaired before use.
Many accidents are caused by poorly maintained power tools.
f) Keep cutting tools sharp and clean.
Properly maintained cutting tools with sharp cutting edges are less likely
to bind and are easier to control.
g) Use the power tool, accessories and tool bits etc. in accordance with
these instructions, taking into account the working conditions and the
work to be performed.
Use of the power tool for operations different from those intended could
result in a hazardous situation.
h) Keep handles and grasping surfaces dry, clean and free from oil and
grease.
Slippery handles and grasping surfaces do not allow for safe handling
and control of the tool in unexpected situations.
a) Have your power tool serviced by a qualified repair person using only
identical replacement parts.
This will ensure that the safety of the power tool is maintained.
b) Never service damaged battery packs.
Service of battery packs should only be performed by the manufacturer
or authorized service providers.
Power tool use and care
Service
Product information
Pressgun 6B press machine with mains connection 8

a) Use the correct tools.
Only use the tools and accessories listed in the operating instructions.
Do not use electric tools for purposes or work they are not intended for.
b) Secure the workpiece.
Use clamping devices or a vice to hold the workpiece. lt is held more
securely than it would be by hand and both your hands are free to
operate the tool.
c) Leave protective equipment in place.
d) Hand-held devices must not to be used as stationary equipment.
e) Do not hold the device in the compression area.
f) Do not hold any body parts or foreign objects between the press jaws
when activating the pressing cycle. Do not hold the jaw lever during the
pressing cycle. Danger of crushing!
There is a danger of crushing the Fingers and hands.
g) Observe the safety instructions for the cleaning and corrosion protec‐
tion agents used by you.
h) Ensure that the workpiece is not under tension.
2.3 Intended use
2.3.1 Areas of use
The Viega system press machine Pressgun 6B is intended for pressing
press connectors into the respective piping systems. In combination
with Viega system press jaws, chains or rings, the press tool is suitable
for use with all Viega plumbing and heating installation systems up to
and including dimension 108, as well as Megapress press connectors in
dimensions ⅜ to 2 inches.
2.4 Product description
2.4.1 Overview
nPress machine Pressgun 6B
nOperating instructions
nTransport case with case inlay
Basic safety rules
Scope of delivery
Product information
Pressgun 6B press machine with mains connection 9

Fig. 1: Overview
1 Roller head
2 Cylinder head with press jaw fixture (180° rotatable)
3 Retaining bolt
4 Retaining bolt lever
5 Start button
6 Reset button
▶To avoid injuries during pressing, hold the press machine in both
hands as shown in the picture.
Gripping surfaces on the press machine
Product information
Pressgun 6B press machine with mains connection 10

Fig. 2: Specification plate
1 Manufacturer logo with address
2 Nominal force
3 Year of manufacture
4 Permitted constant operation ≤ 30 min
5 Nominal output
6 Maximum three pressings per minute (≤ DN 54)
7 QR code
8 Permitted frequency range
9 Permitted voltage area
10 Article number / serial number
11 Type designation for the press machine
For explanations on the symbols, see
Ä
Chapter 1.2 ‘Labelling of advi‐
sory text and safety symbols’ on page 3
2.4.2 Technical data
Nominal output 450 W
Voltage 220–240 VAC
Frequency 50–60 Hz
Machine monitoring hydraulic
Acoustic power level max. 87 dB(A) 1)
Sound pressure on ear 76 dB(A) 1)
Oscillation level < 2.5 m/s2 2)
Power transmission hydraulic
Thrust on piston 32 kN
Switch-on duration Maximum three pressings per
minute
Permitted continuous operation ≤ 30 min
1) measurement uncertainty 3 dB(A)
2) measurement uncertainty 1.5 m/s2
Data on the specification plate
Product information
Pressgun 6B press machine with mains connection 11

Weight 3000 g
Protection class II
Permitted operating temperature -10 °C up to 50 °C
1) measurement uncertainty 3 dB(A)
2) measurement uncertainty 1.5 m/s2
NOTICE!
Wear hearing protection.
The specified oscillation emission value was measured in accordance
with a standardised test procedure and can be used to compare the
machine with another device. The specified oscillation emission value
can also be used for an initial assessment of the intermittent duty.
When the device is actually being used, the oscillation emission value
may differ from specified value, depending on the manner in which the
device is used. Depending on the actual conditions of use (intermittent
duty), it may be necessary to specify safety measures to protect the
user.
2.4.3 Operating mode
The Viega Pressgun 6B is an electro-hydraulically operated press
machine. Pressing the start button and keeping it pressed triggers
pressing. The hydraulically operated roller head moves forwards into the
press jaw and closes it with a power of 32 kN.
Power is supplied via a mains connection 220–240 V AC with 50–60 Hz.
The press machine operates by a positively controlled process. This
means:
nDuring the pressing, even when the Start button is temporarily
released, the roller head of the press machine stays in the position
reached.
nThe pressing must be completed in order for the roller head to
return.
For safety reasons, the positive control is enabled only after the press
machine has reached a minimum force.
2.4.4 Control elements and indicators at the press machine
Use the Start button to trigger a pressing; see
Ä
Chapter 3.3 ‘Carrying
out the pressing process’ on page 16.
Positively controlled process
Start button
Product information
Pressgun 6B press machine with mains connection 12

Press the Reset button to abort pressing at any time, see
Ä
Chapter 3.4
‘Aborting the pressing process’ on page 17.
The press jaw fixture in the front part of the cylinder head is 180° rotat‐
able to allow for flexible alignment of the press jaws to the pressing
point.
Reset button
Rotatable cylinder head
Product information
Pressgun 6B press machine with mains connection 13

3 Handling
3.1 Transport and storage
NOTICE!
Risk of damage to and malfunctioning of the
press machine due to improper use!
Use a transport case for storage and transport.
Protect the press machine and accessories from the following external
influences:
nImpacts
nMoisture and humidity
nDust and dirt
nFrost and extreme heat
nChemical solutions and vapours
3.2 Commissioning
CAUTION!
Risk of crushing by operating the press
machine without press jaws!
If no press jaw is inserted, your fingers may get caught in
the danger zone and get crushed when the press machine
starts up.
nDo not use the press machine without a press jaw
inserted.
nDo not put your fingers in the danger zone.
CAUTION!
Risk of device damage due to failure to fully
lock the retaining bolt!
If the retaining bolt is not fully inserted and locked, the
cylinder may tear during pressing.
nEnsure that the retaining bolt is locked before starting
pressing.
Handling
Pressgun 6B press machine with mains connection 14

NOTICE!
Cooling phases during constant operation
The press machine is not suitable for constant operation.
nAfter 30 min of constant operation, stop using it for at
least 15 minutes to allow the device to cool down.
▶Check the scope of delivery.
▶Turn the retaining bolt lever of the retaining bolt by 180° to release it
from the lock position.
▶Pull out the retaining bolt.
▶Insert the press jaw in the press jaw fixture of the cylinder head.
INFO! The figures show the typical use of a press jaw. Use
the hinged adapter jaws in the same way.
▶Slide the retaining bolt in as far as it will go and turn the retaining
bolt lever by 180° to return it to its snap-in position.
1.2.
2.1.
Handling
Pressgun 6B press machine with mains connection 15

3.3 Carrying out the pressing process
CAUTION!
Risk of crushing due to improper use!
nDo not start the press machine without a press jaw
inserted.
nDo not reach into the area of the moving roller head or
press jaws during pressing.
nIn order to operate it safely, firmly hold the press
machine on both the handle and behind the press
machine head.
NOTICE!
Risk of property damage due to damaged
press jaws!
Using a damaged, incorrectly dimensioned, or worn press
jaw may result in an incorrect pressing.
nCheck the press jaw before use for any visible defect,
and if applicable replace the press jaw.
nOnly use press jaws that are the right dimension and
are compatible with the press connector system.
The press jaw must be able to lock properly during
pressing.
nEnsure that there is enough space on the press point.
nKeep the press jaw contour and the area around the
press point free from dirt and any objects that could
hinder complete pressing.
Handling
Pressgun 6B press machine with mains connection 16

Requirements:
nThere is a mains connection.
nA press jaw has been correctly inserted.
▶Check whether the nominal width of the press connector matches
the nominal width of the press jaw.
▶Fit the press machine with the press jaw inserted accurately and at
a right angle to the pipe axis on the press connector.
▶Keep the start button pressed until you note a speed increase of the
motor and a visible removal of the load off the press jaw.
▷The pressing process has terminated.
▶To retract the roller head to its initial position, release the Start
button.
▶After full retraction of the roller head, open the press jaw and loosen
it from the press connector.
In case of interruption of the power supply during
pressing, press the Reset button to return the roller head
to its initial position.
Then remove the incompletely pressed press connector
from the installation and use a new press connector.
3.4 Aborting the pressing process
When the roller head has not touched the press jaw yet and the press
machine has not yet built up any pressing force:
▶Release the Start button to interrupt the pressing.
90
1.1.2.
1.1.2.
Handling
Pressgun 6B press machine with mains connection 17

If the press machine is in positive control mode:
▶In order to abort the pressing, release the Start button and press the
Reset button.
3.5 Care and maintenance
The tools are subject to normal wear and tear; for this reason, they must
be maintained in regular intervals. The maintenance and servicing of the
tools must be carried out by service partners authorised by Viega.
Maintenance interval
nThe next maintenance date is indicated on the press machine. Have
the machine maintained at least every two years.
3.5.1 Cleaning the press tools
NOTICE!
Damage due to fluids!
Make sure that no fluids get inside the press machine.
Never dip the press machine into fluids.
Requirements:
nThe press machine is not energised (mains adapter has been
unplugged).
nNo press jaw is inserted.
▶Wipe the press machine down with a slightly damp cloth.
▶Clean the presser rolls of the roller head dry and then treat with
maintenance oil (art. no. 667 924).
▶Remove dirt and metallic residues from the press jaw or the press
ring.
▶Remove residues from the press jaw contour (e.g. using Viega
cleaning fleece, art. no. 104 412).
▶Apply maintenance oil to the hinges and all moving parts (art.
no. 667 924).
▶Then thinly spray the press jaw or press ring with maintenance oil
(art. no. 667 924) and let it work for a short time before wiping off
with a lint-free cloth.
Press machine
Press jaws and press rings
Handling
Pressgun 6B press machine with mains connection 18

3.5.2 Performing checks
To ensure trouble-free operation, perform checks at regular intervals:
▶Check the press machine for externally identifiable damage, torn
material, or visible wear. Do not use the machine unless it is free of
faults.
▶At the end of each use, check the press contour of the press jaws
and press rings for damage or visible wear.
▶Check the press jaws and press rings for smooth operation.
▶Check all press jaws and press rings for proper function by carrying
out a test pressing with press connector inserted.
NOTICE!
In case of malfunctions, contact an authorised service
partner. Do not attempt to carry out repairs yourself.
3.6 Disposal
Do not dispose of the press machine in household waste and do not
scrap it. For environmentally compatible disposal, send the press
machine to your local service partner or pass it to a recycling company.
Handling
Pressgun 6B press machine with mains connection 19

4 Appendix
4.1 Warranty
The warranty period for the Viega system tools, such as press
machines, press jaws, press rings, Steptech punches, pipe cutters, cali‐
brators etc. is in accordance with national statutory provisions appli‐
cable in the country where your headquarters is based. However, it is at
least two years from the date of purchase and transfer of risk.
Please retain the purchase receipt in case of a repair during the war‐
ranty period. If the defect is due to improper or unprofessional use or
due to the wear of consumable parts as intended, warranty claims shall
be precluded.
Appendix
Pressgun 6B press machine with mains connection 20
This manual suits for next models
1
Table of contents
Other Viega Power Tools manuals

Viega
Viega MegaPress XL User manual

Viega
Viega MegaPress XL PressBooster 4896.2XL User manual

Viega
Viega 4296.2XL User manual

Viega
Viega Pressgun 6 User manual

Viega
Viega Picco 6 User manual

Viega
Viega Pressgun Press Booster PT2 User manual

Viega
Viega ProPress User manual

Viega
Viega Pressgun 6 User manual

Viega
Viega Picco 6 User manual

Viega
Viega Eco Plus User manual