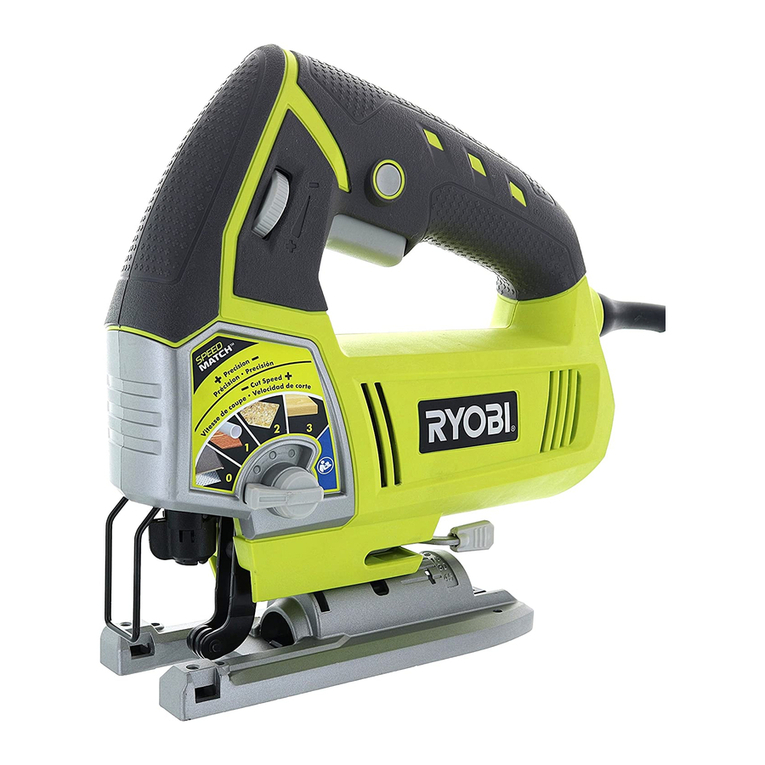
Ryobi EJ500 User manual

GB 500W JIGSAW USER’S MANUAL 1
FR SCIE SAUTEUSE 500W MANUEL D’UTILISATION 5
500W STICHSÄGE
BEDIENUNGSANLEITUNG 10
ES
SIERRA DE VAIVÉN 500W
MANUAL DE UTILIZACIÓN 15
IT
SEGHETTO DA 500W
MANUALE D’USO
20
NL
500W DECOUPEERZAAGMACHINE
GEBRUIKSHANDLEIDING
25
PT SERRA DE VAIVÉM DE 500W MANUAL DE UTILIZAÇÃO 30
DK 500W STIKSAV BRUGERVEJLEDNING 35
SE FIGURSÅG 500 W INSTRUKTIONSBOK 39
FI 500 W KUVIOSAHA KÄYTTÄJÄN KÄSIKIRJA 43
NO 500 W STIKKSAG BRUKSANVISNING 47
RU , 500 51
PL WYRZYNARKA 500 W INSTRUKCJA OBSUGI 56
CZ 500 W FIGRZIS NÁVOD K OBSLUZE 61
HU 500 W SIAURAPJKLIS HASZNÁLATI ÚTMUTATÓ 65
RO FERSTRU MECANIC 500 W MANUAL DE UTILIZARE 70
LV 500 W FIGRZIS LIETOTJA ROKASGRMATA 75
LT 500 W SIAURAPJKLIS NAUDOJIMO VADOVAS 79
EE TIKKSAAG 500 W KASUTAJAJUHEND 83
HR UBODNA PILA OD 500 W KORISNIKI PRIRUNIK 87
SI 500 W VBODNA ŽAGA UPORABNIŠKI PRIRONIK 91
SK 500W LUPIENKOVÁ PÍLKA NÁVOD NA POUŽITIE 95
GR 500W 99
TR 500W DEKUPAJ TESTERESI KULLANiM KILAVUZU 104
EJ500
GB ORIGINAL INSTRUCTIONS | FR TRADUCTION DES INSTRUCTIONS ORIGINALES | DE ÜBERSETZUNG DER ORIGINALANLEITUNG | ES TRADUCCIÓN DE LAS
INSTRUCCIONES ORIGINALES | IT TRADUZIONE DELLE ISTRUZIONI ORIGINALI | NL VERTALING VAN DE ORIGINELE INSTRUCTIES | PT TRADUÇÃO DAS INSTRUÇÕES
ORIGINAIS | DK OVERSÆTTELSE AF DE ORIGINALE INSTRUKTIONER | SE ÖVERSÄTTNING AV DE URSPRUNGLIGA INSTRUKTIONERNA | FI ALKUPERÄISTEN
OHJEIDEN SUOMENNOS | NO OVERSETTELSE AV DE ORIGINALE INSTRUKSJONENE | RU | PL TUMACZENIE INSTRUKCJI
ORYGINALNEJ | CZ PEKLAD ORIGINÁLNÍCH POKYN | HU AZ EREDETI ÚTMUTATÓ FORDÍTÁSA | RO TRADUCEREA INSTRUCIUNILOR ORIGINALE | LV TULKOTS
NO ORIINLS INSTRUKCIJAS | LT ORIGINALI INSTRUKCIJ VERTIMAS | EE ORIGINAALJUHENDI TÕLGE | HR PRIJEVOD ORIGINALNIH UPUTA | SI PREVOD
ORIGINALNIH NAVODIL | SK PREKLAD POKYNOV VORIGINÁLI | GR | TR ORIJINAL TALIMATLARIN TERCÜMESI
DE

Fig. 1
Fig. 2
6
13
9
3
13
4
5
12 10
9
7
8
14
1
2

Fig. 3
Fig. 5
Fig. 4
18
17
11
7
9
15
16
45˚
0˚
Fig. 6
Fig. 7 Fig. 8

5*4&44&/5*"-5)"59063&"%5)&*/4536$5*0/4*/5)*4."/6"-#&'03&01&3"5*/(5)*4."$)*/&
-&45*/%*41&/4"#-&26&7064-*4*&:-&4*/4536$5*0/4$0/5&/6&4%"/4$&."/6&-"7"/5-".*4&&/4&37*$&
%&-V"11"3&*-
*55&-&4&/*&6/#&%*/(5703/#&53*&#/").&%*&*/8&*4&%*&4&3&%*&/6/(4"/-&*56/(
4*.13&4$*/%*#-&26&-&"-"4*/4536$$*0/&4%&&45&."/6"-"/5&4%&-"16&45"&/4&37*$*0
3*."%*130$&%&3&"--".&44"*/'6/:*0/&B*/%*41&/4"#*-&-&((&3&"55&/5".&/5&-&*4536:*0/*$0/5&/65&
/&-."/6"-&
&5*47"/&44&/5*&&-#&-"/(%"56%&*/4536$5*&4*/%&:&($*,4""/8*+:*/(-&&457003"-&&3623H3
;/167<3*/($*,/&&.5
<*/%*41&/4=7&-26&-&*""4*/4536@G&4%&45&."/6"-"/5&4%&65*-*:"3".=26*/"
&//$(4"/7*4/*/(4,"--L4&4*(&//&.*/%&/*#36(5"(/*/(
&5>3/F%7>/%*(5"55->4"*/4536,5*0/&3/"*%&//"#36,4"/7*4/*/(*//"/"/7>/%/*/(
/&)%0550."/7>-55>.>5F/5>-6,&"5>44>,>955F0)+&&44""//&5650)+&&5&//&/,>955FF/0550"
!
&5&3.&(&57*,5*("5%6-&4&3%&//$,&37&*-&%/*/(&/'M3%65"3."4,*/&/*#36,
ÇÌËχÌËe! èee‰ Ò·ÓÍÓÈ Ë Á‡ÔÛÒÍÓÏ ËÌÒÚÛÏeÌÚ‡ ÌeÓ·ıÓ‰ËÏÓ ÔÓ˜eÒÚ¸ ËÌÒÚÛ͈ËË ËÁ ̇ÒÚÓfl˘e„Ó
ÛÍÓ‚Ó‰ÒÚ‚‡.
"#
3:&%13:9451*&/*&.%0695,08"/*"5&(063:%:&/*"/"-&9,0/*&$:/*&:"10:/"4*::"-&$&/*".*
:"8"359.*8/*/*&+4:9.10%3$:/*,6
$!%&'
&106TC7&+5&5&/501C4530+%C7&/&T4*1&5&5&10,9/967&%&/A750.50/=70%6
()!
&-5A5-&/I-'0/504)0(9"+&-&/)"4:/=-"5*H5.65"5E#"/'0(-"-5&-C3=40,"5":I:&.#&)&-9&:A4&-55
&-0-7"44"
45&&4&/*"-4$*5***/4536$*6/*-&%*/"$&45."/6"-D/"*/5&%&01&3"3&""$&456*"1"3"5
Uzmanību! Svarīgi, lai jūs pirms mašīnas darbināšanas izlasītu instrukcijas šajā rokasgrāmatā.
Dėmesio! Prieš pradėdami eksploatuoti šį prietaisą, svarbu, kad perskaitytumėte šiose instrukcijose pateiktus
nurodymus.
Tähtis! Enne trelli kasutama hakkamist tuleb käesolevas juhendis esitatud juhised kindlasti läbi lugeda.
&01)0%/0+&%"130*5"5&07&6165&13*+&6103"#&070(63&"+"
*
3&%6103"#05&("4530+"0#7&:/013&#&3*5&/"70%*-"*:5&("13*30/*,"
Dôležité! Pre prácou s týmto zariadením je dôležité, by ste si prečítali pokyny v tomto návode.
$++
*)":/@"-53-."4/%"/F/$,-"76:%"#6-6/"/5"-*."5-"30,6."/::036/-6%63
6#+&$5505&$)/*$"-.0%*'*$"5*0/40643A4&37&%&.0%*'*$"5*0/45&$)/*26&4&$)/*4$)&;/%&36/(&/703#&)"-5&/
6+&50".0%*'*$"$*0/&45A$/*$"40/3*4&37"%*&7&/56"-*.0%*'*$)&5&$/*$)&&$)/*4$)&8*+:*(*/(&/7003#&)06%&/
0.3&4&37"%&.0%*'*$"@G&45A$/*$"4&%'03#&)0-%'035&,/*4,&L/%3*/(&3&%'F3#&)?--'F35&,/*4,">/%3*/("3
&,/*4&5.6650,4&57"3"5""/&%'03#&)0-%0.5&,/*4,&&/%3*/(&3åÓ„ÛÚ ·˚Ú¸ ‚ÌeÒeÌ˚ ÚeıÌ˘eÒÍËe ËÁÏeÌeÌËfl
:"453:&&/*&..0%9'*,"$+*5&$)/*$:/9$)./95&$)/*$,U$)H%"+79)3":&/9 .4:",*.E%04C5=4+0(=5'&//5"35+6,
6#3&:&37".0%*'*$"**-035&)/*$&Paturam tiesības mainīt tehniskos raksturlielumus / Pasiliekant teisę daryti techninius pakeitimus /
Tehnilised muudatused võimalikud /&)/*/&413&.&.#&%016S&/&
Technické zmeny vyhradené / !"&,/*,%&**,-*,)",,4",-%3
*/%%

1
English
GB
FR DE ES IT NL PT DK SE FI NO RU PL CZ HU RO LV LT EE HR SI SK GR TR
DESCRIPTION
1. Switch
2. Lock-on button
3. Safety guard
4. Base
5. Notch
6. Saw blade
7. Dust blower button
8. Dust port
9. Roller guide
10. Slot
11. Optional edge guide (not included)
12. Edge guide lock screw
13. Quick release lever
14. Live tool indicator
15. Holder for roller guide
16. Screw
17. On
18. Off
SPECIAL SAFETY RULES
If operation is dusty, also wear a dust mask.
Wait for the cutter to stop before setting the tool
down. An exposed cutter may engage the surface
leading to possible loss of control and serious injury.
Hold power tool by insulated gripping surfaces
only, when performing an operation where the
cutting accessory may contact hidden wiring or its
own cord. Cutting accessory contacting a "live" wire
may make exposed metal parts of the power tool "live"
and could shock the operator.
If the power supply cord damaged, it must be
replaced only by the manufacturer or by an
authorized service center to avoid risk.
SPECIFICATIONS
Voltage 230 V 50 Hz
Input power 500 W
Stroke per minute 3000 min-1
Stroke length 19 mm
Max cutting capacity
Wood 65 mm
Steel 6 mm
FEATURES
KNOW YOUR SAW
Before attempting to use your saw, familiarize yourself
with all operating features and safety requirements.
ELECTRICAL CONNECTION
Your saw has a precision built electric motor. It should be
connected only to a power supply of the type specied by
its rating plate. Do not operate this tool on direct current
(DC). A substantial voltage drop will cause a loss of power
and overheating. If your tool does not operate when
plugged into an outlet, double-check the power supply.
WARNING
Do not allow familiarity with tools to make you careless.
Remember that a careless fraction of a second is
sufcient to inict serious injury.
OPERATION
SWITCH
See Figure 1.
To turn your saw on, depress the switch.
Release switch trigger to turn your saw OFF.
LOCK-ON BUTTON
See Figure 1.
Your saw is equipped with a lock-on feature, which is
convenient when continuous cutting for extended periods
of time is required. To lock-on, depress the switch trigger,
push in and hold the lock-on button located on the side of
the handle, then release switch trigger. Release lock-on
button and your saw will continue running.
To release the lock, depress the switch trigger and release.
If you have the lock-on feature engaged during use and
your saw becomes disconnected from power supply,
disengage the lock-on feature immediately.
WARNING
Before connecting your saw to power supply source,
always check to be sure it is not in lock-on position
(depress and release switch trigger). Failure to do so
could result in accidental starting of your saw resulting
in possible serious injury. Also, do not lock the trigger on
jobs where your saw may need to be stopped suddenly.

2
English
GB
FR DE ES IT NL PT DK SE FI NO RU PL CZ HU RO LV LT EE HR SI SK GR TR
TO INSTALL BLADES
See Figure 2.
Unplug the tool.
WARNING
Failure to unplug your saw could result in accidental
starting causing possible serious injury.
Turn the tool upside down.
Rotate the quick release lever counter-clockwise and
hold in position.
Insert the saw blade into the groove in the roller guide,
making sure the back of the saw blade is properly
positioned in the groove.
NOTE: Only T-shank saw blades can be used.
Push the saw blade into the blade clamp as far as it
will go.
Release the quick release lever.
WARNING
To avoid possible serious injury, always wear safety
goggles or safety glasses with side shields. Keep hands
and ngers away, from the motor housing and blade
clamp and do not reach underneath work while blade
is cutting.
WARNING
To avoid serious personal injury, do not use saw without
safety guard properly in place.
GENERAL CUTTING
See Figure 3.
Rest the front of the saw base on the workpiece and align
cutting edge of the blade with the line on your workpiece.
Make sure the power cord is out of the way of saw blade
and not in the line of cut. Start your saw and move it
forward on the work surface. Apply downward pressure to
keep the saw steady and only enough forward pressure to
keep the blade cutting.
WARNING
Do not force your saw. Forcing your saw may overheat
the motor and break saw blades.
SCROLL CUTTING
See Figure 4.
Scroll cuts can be made with your saw by guiding the
direction of the cut with applied pressure on the handle.
WARNING
Excessive side pressure to the blade could result in
broken blades or damage to the material being cut.
ANGLE CUTTING (BEVEL CUTTING)
See Figure 5.
Bevel cutting angles may be adjusted from 0° to 45° right
or left. Angles for cuts from 0° to 45° in 22.5° increments
are marked on a scale on both the left and right side of
the base.
The use of a protractor is recommended when accurate
cuts are required.
ADJUSTING THE ANGLE
See Figure 5.
Loosen the base retaining screw with the wrench until
the base can be moved.
Slide base forward slightly to release the base from
the tab on the motor housing.
Align the mark on the base of the desired angle with
the edge of the motor housing.
Once the desired angle is reached, slide the base
back until the tab on the motor housing aligns with the
appropriate notch on the rear of the base.
Position the holder for the roller guide in such a manner
that the guide roller faces against the back of the saw
blade. Precise cuts are possible only when the guide
roller faces tightly against the back of the saw blade.
Re-tighten the base retaining screw with the wrench to
secure the base.
TO MAKE A PLUNGE CUT
See Figure 6.
WARNING
To avoid loss of control, broken blades, or damage to
the material being cut, always use extreme caution
when making plunge cuts. We do not recommend
plunge cutting on materials other than wood.
Mark the line of cut clearly on the workpiece.
Set the cutting angle at 0°.
Tilt your saw forward so that it rests on the front edge
of the base and blade will not come in contact with the
workpiece when the saw is turned on.

3
English
GB
FR DE ES IT NL PT DK SE FI NO RU PL CZ HU RO LV LT EE HR SI SK GR TR
Make sure the blade is inside the area to be cut.
Start your saw by using high speed and slowly lower
the blade into the workpiece until the blade cuts
through the wood.
Continue lowering the blade into the workpiece until
the base rests flat on the work surface, then move the
saw forward to complete the cut.
Use only the 7 teeth per inch blade for this type of cut.
METAL CUTTING
Many kinds of metals can be cut with your saw.
Be careful not to twist or bend the blades. Do not force.
If the blade chatters or vibrates excessively, use a nertooth
blade or higher speed. If blade heats excessively, use lower
speed. If blade teeth become lled or clogged when cutting
soft metals, such as aluminum, use a coarser-tooth blade
or lower speed. We recommend the use of oil when cutting
metals to keep blades cool, increase cutting action, and
prolong blade life. Clamp the work rmly and cut close
to the clamping point to eliminate any vibration of the
workpiece being cut.
When cutting conduit, pipe or angle iron, clamp work in a
vise if possible and saw close to the vise. To cut thin sheet
materials smoothly, "sandwich" the material between
hardboard or plywood and clamp the layers to eliminate
vibration and material tearing. By doing this, the material
will be cut smoothly. Lay out your pattern or line of cut on
top of the “sandwich".
IMPORTANT!
When cutting metal, keep exposed portion of saw bar
clean and free of metal chips by wiping frequently with
an oily cloth. Use extreme caution in disposing of oily
cloth after completion of job to prevent potential re
hazard.
SAWDUST BLOWER DEVICE
See Figure 7.
With the air jet of the sawdust blower device, the
cutting line can be kept free of dust and chips.
Switching on the sawdust blower device: For cuts in
materials with high removal rate, such as in wood,
plastic, etc.. Push dust blower button up.
Switching off the sawdust blower device: For cuts
in metal and when a dust extraction system (not
included) is connected. Push dust blower button down.
TO CONNECT DUST EXTRACTION SYSTEM (NOT IN-
CLUDED)
Unplug the tool.
WARNING
Failure to unplug your saw could result in accidental
starting causing possible serious injury.
Connect the nozzle of the dust collection system to
the dust port.
OPTIONAL EDGE GUIDE (NOT INCLUDED)
See Figure 8.
An edge guide is available for use with your saw and can
be used for making crosscuts and rip cuts.
TO INSTALL:
Unplug your saw.
WARNING
Failure to unplug your saw could result in accidental
starting causing possible serious injury.
Insert arm of the edge guide through the two slots in
the base of your saw.
Adjust edge guide to the desired width and lock in
place with the edge guide screw.
WARNING
When servicing, use only identical replacement parts.
Use of any other parts may create a hazard or cause
product damage.
LIVE TOOL INDICATOR
This tool features a live tool indicator which illuminates as
soon as the tool is connected to the supply. This warns the
user that the tool is connected and will operate when the
switch is pressed.
MAINTENANCE
GENERAL
All other parts represent an important part of the class
II insulation system and should be serviced only by a
qualied service technician.
Avoid using solvents when cleaning plastic parts.
Most plastics are susceptible to damage from various
types of commercial solvents. Use clean cloths to remove
dirt, dust, oil, grease, etc.
4
English
GB
FR DE ES IT NL PT DK SE FI NO RU PL CZ HU RO LV LT EE HR SI SK GR TR
WARNING
Do not at any time let brake uids, gasoline, petroleum-
based products, penetrating oils, etc., come in contact
with plastic parts. They contain chemicals that can
damage, weaken or destroy plastic.
It has been found that electric tools are subject to
accelerated wear and possible premature failure when
they are used on berglass boats, sports cars, wallboard
or plaster.
The chips and grindings from these materials are highly
abrasive to electric tool parts such as bearings, brushes,
commutators, etc.. Consequently, it is not recommended
that this tool be used for extended work on any berglass
material, wallboard or plaster. During any use on these
materials it is extremely important that the tool is cleaned
frequently by blowing with an air jet.
LUBRICATION
All of the bearings in this tool are lubricated with a
sufcient amount of high grade lubricant for the life of
the unit under normal operating conditions. Therefore, no
further lubrication is required.
CAUTION
Keep extension cords away from the cutting area and
position the cord so that it will not get caught on lumber,
tools, etc., during cutting operation.
WARNING
Check extension cords before each use, if damaged
replace immediately. Never use tool with a damaged
cord as touching the damaged area could cause
electrical shock resulting in serious injury.
Extension cords suitable for use with your saw are
available at your nearest service center.
WARNING
Always wear safety goggles or safety glasses with side
shields during power tool operation or when blowing
dust. If operation is dusty, also wear a dust mask.
ENVIRONMENTAL PROTECTION
Recycle raw materials instead of disposing
of as waste. The machine, accessories
and packaging should be sorted for
environmental-friendly recycling.
SYMBOL
Safety Alert
V Volts
Hz Hertz
Alternating Current
W Watts
noNo-load speed
min-1Revolutions or reciprocations per minute
Maximum cutting capacity in wood
CE Conformity
Double Insulation
Wear ear protection
Wear eye protection
Please read the instructions carefully before
starting the machine.
Waste electrical products should not be
disposed of with household waste. Please
recycle where facilities exist. Check with your
Local Authority or retailer for recycling advice.
Other manuals for EJ500
1
Table of contents
Other Ryobi Power Tools manuals

Ryobi
Ryobi R866010 User manual

Ryobi
Ryobi CST-180M Operation manual

Ryobi
Ryobi CW-1801/165 User manual

Ryobi
Ryobi RE175 Operation manual

Ryobi
Ryobi R18RT-0 User manual

Ryobi
Ryobi EJS500RG Operation manual

Ryobi
Ryobi DP101 User manual

Ryobi
Ryobi RSDP4 User manual

Ryobi
Ryobi PCL28 User manual

Ryobi
Ryobi P521 User manual

Ryobi
Ryobi HG500 User manual

Ryobi
Ryobi RY18PCA User manual

Ryobi
Ryobi JS550LK Configuration guide

Ryobi
Ryobi EOJ550K Operation manual

Ryobi
Ryobi P524 User manual

Ryobi
Ryobi HG600 Quick setup guide

Ryobi
Ryobi JS451L Quick setup guide

Ryobi
Ryobi MC100L User manual

Ryobi
Ryobi R18JS7-0 User manual

Ryobi
Ryobi ONE+ R18SOI-0 User manual