3
2
IMPORTANT: PLEASE READ AND FOLLOW
1. Before beginning, please read t ese instructions completely and carefully.
2. Do not remove permanently affixed labels, warnings, or plates from product.
BEFORE INSTALLING GRILL TO CART: Remove dr p tray, gr ll grates, flavor gr ds, and warm ng racks from the gr ll.
To remove s de shelves:
T e side s elves on t e cart can be removed if needed. T is must be done before installing t e grill on t e cart.
Wit t e s elf in t e up position, remove t e screws in t e s elf support bracket. T is will allow you to remove bot
t e brackets and t e s elf.
To mount gr ll to cart:
Always wear gloves when handl ng the gas gr ll. Alt oug t e grill is deburred prior to s ipment, some edges may
still be s arp enoug to cause injury during andling. Wit a minimum of two (2) people, place t e grill in t e cart wit
about 3 to 4 inc es anging out t e front making sure t at t e male fitting on t e bottom of t e grill is inside t e cart.
Pus t e grill back until t e front sides of t e cart are flus wit t e back of t e landing ledge on t e grill.
Be careful: the gr ll un t s very heavy!
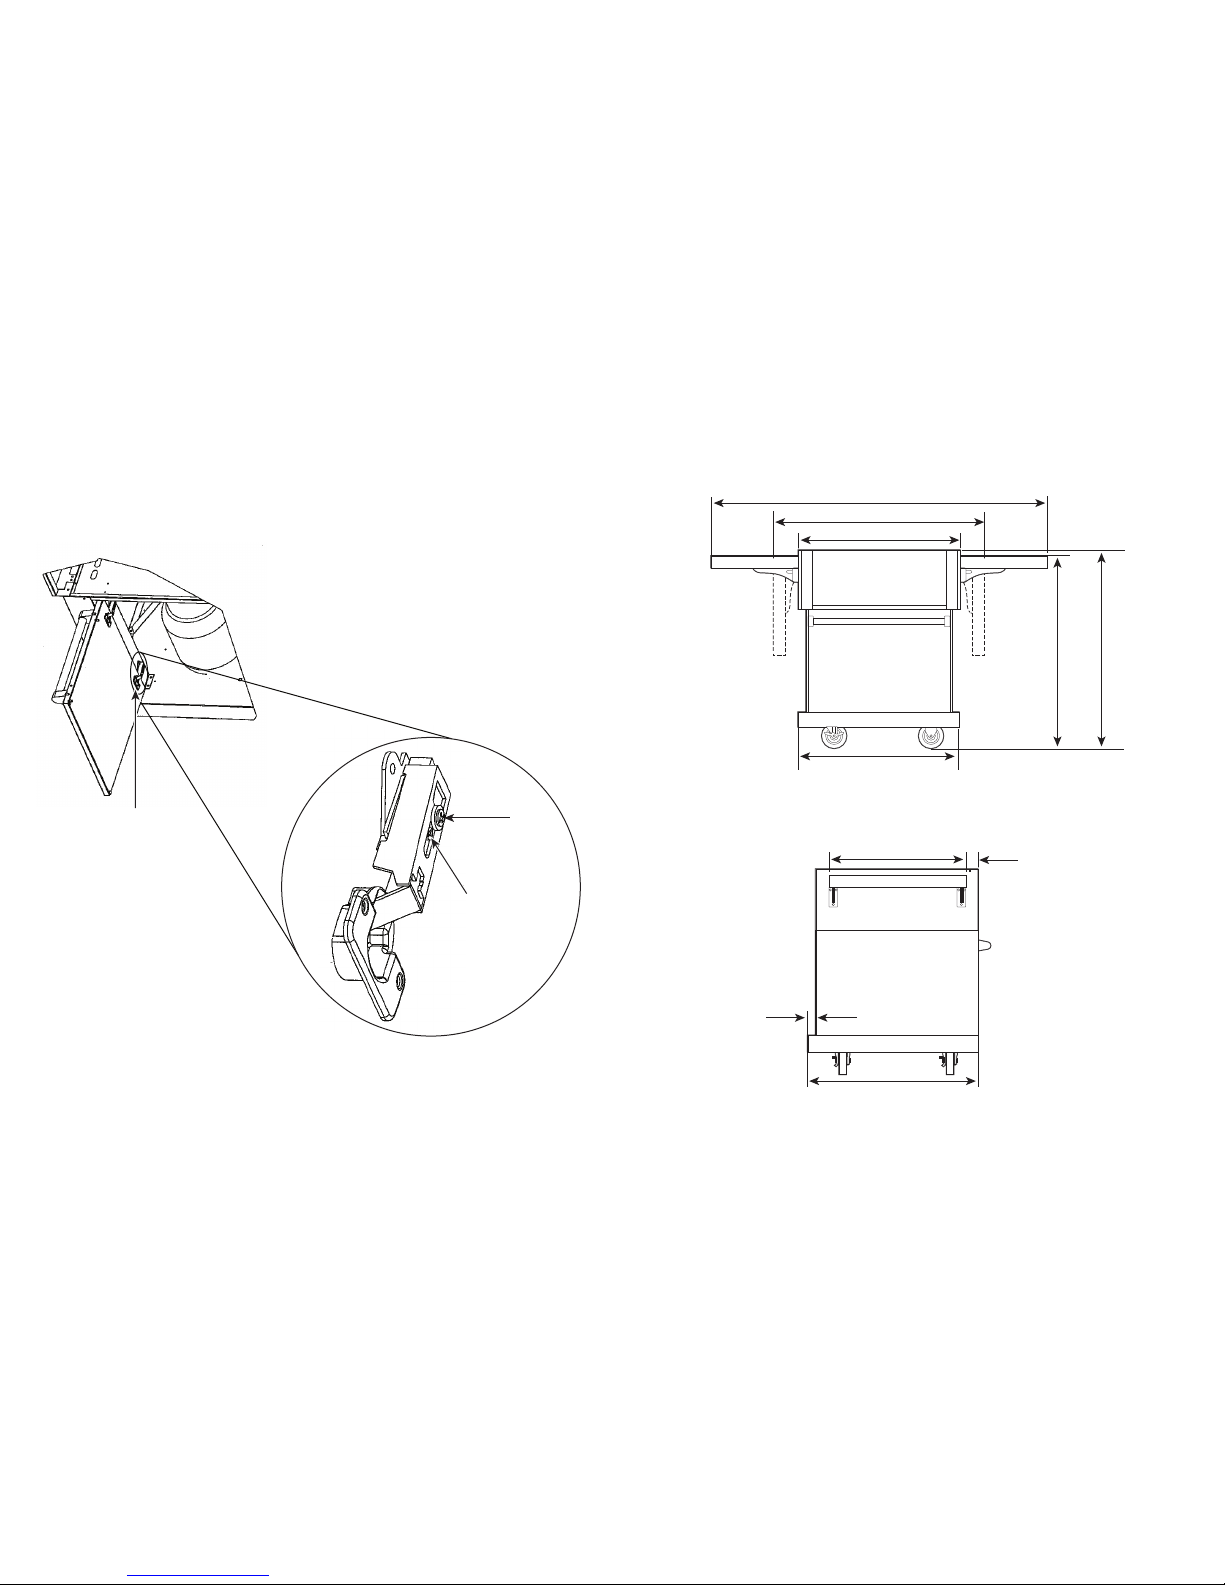
Attach ng the gr ll to the cart
Once t e grill as been mounted on
t e cart, t e back of t e landing
ledge s ould be flus wit t e front
sides of t e cart. T e 5/8” (1.6 cm)
ole on t e top front corners of t e
cart s ould be aligned wit t e
receiving oles in t e grill eat
s ields. If your grill does not ave
t e receiving oles in t e eat s ield,
you will need to drill t em out wit a
9/64” (.14 cm) drill bit. Wit t e grill
and cart mounted toget er, place t e
drill bit in t e 5/8 ole and center in
t e 1/4”x3/8” slot. Drill t roug t e
eat s ield. Take t e #10X3/4” (1.9
cm) s eet metal screws (A) supplied
wit t e cart and attac t e cart sides
to t e grill. After securing t e grill to
t e cart, snap t e ole covers (B)
supplied wit t e cart into t e 5/8”
(1.6 cm) oles in t e cart corners.