manuals.online logo
Brands
  1. Home
  2. •
  3. Brands
  4. •
  5. Viking
  6. •
  7. Network Hardware
  8. •
  9. Viking CPA-7B Installation and operating instructions
Viking CPA-7B Installation and operating instructions

APPLICATION
APPLICATION
N
No
ot
te
e
T
TE
EL
LE
EC
CO
OM
MS
SO
OL
LU
UT
TI
IO
ON
NS
SF
FO
OR
RT
TH
HE
E2
21
1S
ST
TC
CE
EN
NT
TU
UR
RY
Y
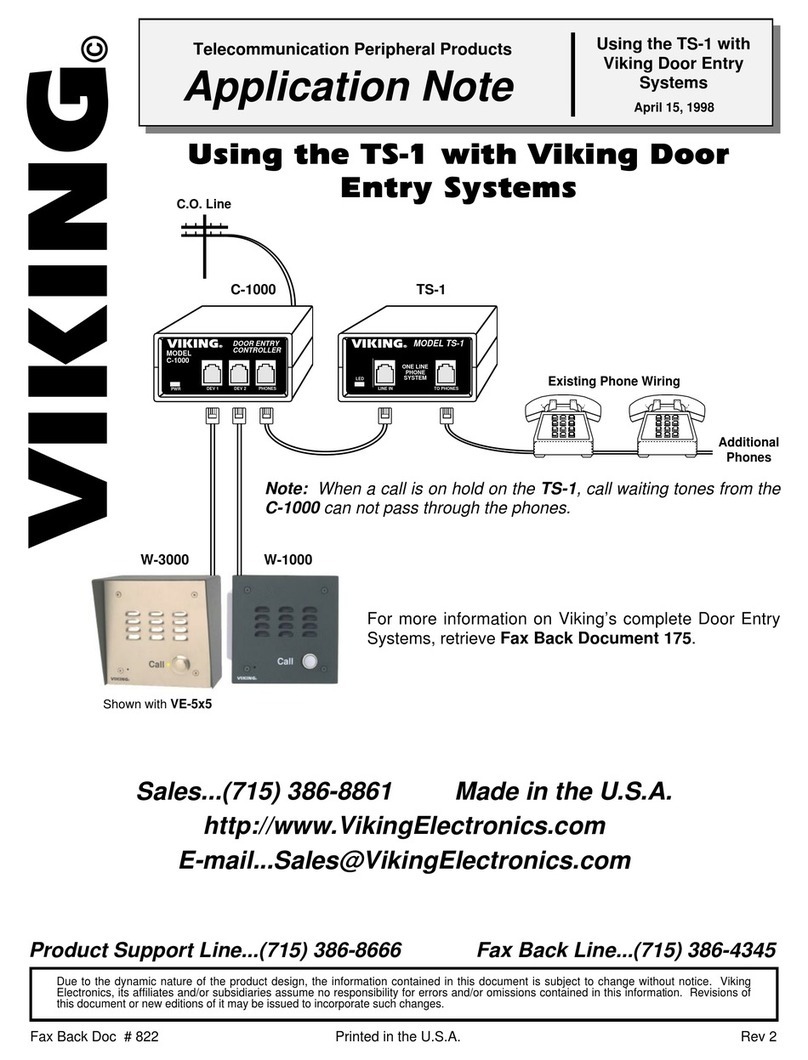
It is possible to install long speaker runs
with the CPA-7B, M15W and PA-2A.
To minimize the loss of audio power in long
speaker runs, a transformer is required at
both the amplifier end and at the speaker
end of a long wire run. A minimum of two
transformers are always required (Radio
Shack part # 32-1031). The transformer at
the amplifier is referred to as the step-up transformer; the transformer
at the speaker is referred to as the step down transformer.
Long Speaker Runs
with the CPA-7B,
M15W and PA-2A
September 20, 2002
Minimize the Loss of Audio in
Long Speaker Runs
P
Ph
ho
on
ne
e.
..
..
.7
71
15
5.
.3
38
86
6.
.8
88
86
61
1
h
ht
tt
tp
p:
:/
//
/w
ww
ww
w.
.v
vi
ik
ki
in
ng
ge
el
le
ec
ct
tr
ro
on
ni
ic
cs
s.
.c
co
om
m
At the amplifier, connect the 8 OHM AUDIO OUTPUT to the 8 OHM
and COM taps of the step-up transformer’s secondary coil as shown.
See chart below for pin selections.
Model CPA-7B Model PA-2A
Model M15W
PAGING - LOUD RINGING
AMPLIFIER SYSTEM
VIKING
ELECTRONICS
HUDSON, WI 54016
VIKING©MODEL PA-2A
POWER 13.8V AC
12345678 910
NIGHT TRANSFER
SWITCH INPUT
PAG ING
HORN
600 OHM
AUDIO OUTPUT
TRUNK / PAGING
PORT
DRY CONTACT
CLOSURE INPUT
RINGING
VOLUME
MAX
MIN
1 - 3 4 - 6
RINGING LINES
1 2 3 4
TALK BATTERY
ALERT TONE
WARBLE / CHIME
PAGING
VOLUME
MAX
MIN
POWER JP1
Step-Up
Transformer
Step-Down
Transformer
Long Wire Run
Radio Shack Part # 32-1031
(or equivalent)
8 OHM
COM
A. Step Up Transformer
I
In
ns
st
ta
al
ll
la
at
ti
io
on
n
1. Connecting the Audio Output
Select the step-up tranformer’s primary coil tap, which closest
matches the amplifier’s rated wattage output and connect
these taps to the beginning of the long wire run (see the chart
to the right).
Model
CPA-7B
M15W
PA-2A
Wattage
6
15
2
Tap
5
10
2.5
2. Selecting the Coil Tap
Model
CPA-7B
M15W
PA-2A
Pins
1 & 2
1 & 4
2 & 3
Due to the dynamic nature of the product design, the information contained in this document is subject to change without notice. Viking Electronics, and its affiliates and/or
subsidiaries assume no responsibility for errors and omissions contained in this information. Revisions of this document or new editions of it may be issued to incorporate
such changes.
Fax Back Doc 856
Rev 7
Printed in the U.S.A.
P
Pr
ro
od
du
uc
ct
tS
Su
up
pp
po
or
rt
tL
Li
in
ne
e.
..
..
.7
71
15
5.
.3
38
86
6.
.8
86
66
66
6F
Fa
ax
xB
Ba
ac
ck
kL
Li
in
ne
e.
..
..
.7
71
15
5.
.3
38
86
6.
.4
43
34
45
5
If only one speaker is used, only one step-down transformer would be required.
Connect the speaker to the 8 OHM and COM taps of the step-down transformer’s
secondary coil as shown. Connect the same wattage taps (as those used on the
step-up transformer’s primary coil) of the step-down transformer’s primary coil to
the end of the long wire run.
1. Using Only One Speaker
In using two speakers located close together, connect the two speakers in paral-
lel and connect them to the 4 OHM and COM taps of the step-down tranformer’s
secondary coil as shown. Connect the same wattage taps (as those used on the
step-up transformer’s primary coil) of the step-down transformer’s primary coil to
the end of the long wire run.
2. Using Two Speakers (close together)
Multiple speakers (three or more) or speakers located far apart will require multiple step-down transformers.
Connect each speaker to the 8 OHM and COM of each step-down transformer’s secondary coil. To determine which
taps to use on each step-down transformer’s primary coil, divide the wattage of the tap used on the step-up tran-
former’s primary coil (2.5 for a PA-2A, 5 for a CPA-7B, 10 for a M15W) by the number of speakers and connect each
of the step-down transformer’s primary coils to the end of each long wire run.
Example (shown below): APA-2A driving four speakers located far apart from each other would equal 2.5 watts
divided by 4 which is 0.625 watts, so use the .625 WATT and COM taps on each step-down transformer’s primary
coil.
3. Multiple Speakers or Speakers Located Far Apart
PAGING - LOUD RINGING
AMPLIFIER SYSTEM
VIKING
ELECTRONICS
HUDSON, WI 54016
VIKING©MODEL PA-2A
POWER 13.8V AC
12345678 910
NIGHT TRANSFER
SWITCH INPUT
PAG ING
HORN
600 OHM
AUDIO OUTPUT
TRUNK / PAGING
PORT
DRY CONTACT
CLOSURE INPUT
RINGING
VOLUME
MAX
MIN
1 - 3 4 - 6
RINGING LINES
1 2 3 4
TALK BATTERY
ALERT TONE
WARBLE / CHIME
PAGING
VOLUME
MAX
MIN
POWER JP1
Step-Up
Transformer
Step-Down
Transformer
Long Wire Run 2.5 WATT
COM
2.5 WATT
COM
8 OHM
COM
8 OHM
COM
PAGING - LOUD RINGING
AMPLIFIER SYSTEM
VIKING
ELECTRONICS
HUDSON, WI 54016
VIKING©MODEL PA-2A
POWER 13.8V AC
12345678 910
NIGHT TRANSFER
SWITCH INPUT
PAG ING
HORN
600 OHM
AUDIO OUTPUT
TRUNK / PAGING
PORT
DRY CONTACT
CLOSURE INPUT
RINGING
VOLUME
MAX
MIN
1 - 3 4 - 6
RINGING LINES
1 2 3 4
TALK BATTERY
ALERT TONE
WARBLE / CHIME
PAGING
VOLUME
MAX
MIN
POWER JP1
Step-Up
Transformer
Step-Down
Transformer
Long Wire Run 2.5 WATT
COM
2.5 WATT
COM
8 OHM
COM
4 OHM
COM
PAGING - LOUD RINGING
AMPLIFIER SYSTEM
VIKING
ELECTRONICS
HUDSON, WI 54016
VIKING©MODEL PA-2A
POWER 13.8V AC
12345678910
NIGHT TRANSFER
SWITCH INPUT
PAG ING
HORN
600 OHM
AUDIO OUTPUT
TRUNK / PAGING
PORT
DRY CONTACT
CLOSURE INPUT
RINGING
VOLUME
MAX
MIN
1 - 3 4 - 6
RINGING LINES
1 2 3 4
TALK BATTERY
ALERT TONE
WARBLE / CHIME
PAGING
VOLUME
MAX
MIN
POWER JP1
Step-Up
Transformer
Long Wire Run 2.5 WATT
COM
8 OHM
COM
Step-Down
Transformer
.625 WATT
COM
8 OHM
COM
Step-Down
Transformer
.625 WATT
COM
8 OHM
COM
Step-Down
Transformer
.625 WATT
COM
8 OHM
COM
Step-Down
Transformer
.625 WATT
COM
8 OHM
COM
Long Wire Run
Long Wire Run
Long Wire Run
B. Step Down Transformers
The number of step-down tranformers and the taps used will depend on the number of speakers and the distances
between the speakers as shown below.

This manual suits for next models

2

Other Viking Network Hardware manuals

Viking CPC-1 Instructions for use

Viking

Viking CPC-1 Instructions for use

Viking DVA-3003 Instructions for use

Viking

Viking DVA-3003 Instructions for use

Viking DVA-500A Instructions for use

Viking

Viking DVA-500A Instructions for use
Viking DVA-1003A Instructions for use

Viking

Viking DVA-1003A Instructions for use

Viking CTG-2 Instructions for use

Viking

Viking CTG-2 Instructions for use

Viking TDR-1 Instructions for use

Viking

Viking TDR-1 Instructions for use

Viking DVA-500 Instructions for use

Viking

Viking DVA-500 Instructions for use

Viking DVA-1003B User manual

Viking

Viking DVA-1003B User manual

Viking DNA-510 Instructions for use

Viking

Viking DNA-510 Instructions for use

Viking DVA-1002 Instructions for use

Viking

Viking DVA-1002 Instructions for use

Viking TR-1 Instructions for use

Viking

Viking TR-1 Instructions for use

Viking DVA-2WA Instructions for use

Viking

Viking DVA-2WA Instructions for use
Viking DVA-1003B Installation and operating instructions

Viking

Viking DVA-1003B Installation and operating instructions

Viking E-1600A series Installation and operating instructions

Viking

Viking E-1600A series Installation and operating instructions

Viking DVA-2WA Installation and operating instructions

Viking

Viking DVA-2WA Installation and operating instructions

Viking TR-1 Installation and operating instructions

Viking

Viking TR-1 Installation and operating instructions

Viking ONYX Series Installation instructions

Viking

Viking ONYX Series Installation instructions

Viking W-1000 Installation and operating instructions

Viking

Viking W-1000 Installation and operating instructions

Viking DVA-1003B Installation and operating instructions

Viking

Viking DVA-1003B Installation and operating instructions

Viking DVA-1003B Instructions for use

Viking

Viking DVA-1003B Instructions for use

Viking DNA-510 Instructions for use

Viking

Viking DNA-510 Instructions for use
Viking CPA-7B Installation and operating instructions
Viking

Viking CPA-7B Installation and operating instructions
Viking CPC-4 Instructions for use

Viking

Viking CPC-4 Instructions for use
Popular Network Hardware manuals by other brands

ATV DR-6232H-8TB Operation manual

ATV

ATV DR-6232H-8TB Operation manual

Positron G1002-M Self-installation guide

Positron

Positron G1002-M Self-installation guide

LG S1T1 user manual

LG

LG S1T1 user manual

Castelle Premier user guide

Castelle

Castelle Premier user guide

Iomega StorCenter ix4-200d user guide

Iomega

Iomega StorCenter ix4-200d user guide

TRENDnet TV-NVR416 user guide

TRENDnet

TRENDnet TV-NVR416 user guide

VIPA CP 1413plus manual

VIPA

VIPA CP 1413plus manual

Panasonic Photo IC PNA4601M Specifications

Panasonic

Panasonic Photo IC PNA4601M Specifications

Precision Digital Corporation PDW30 instruction manual

Precision Digital Corporation

Precision Digital Corporation PDW30 instruction manual

Abocom CR2000 Specification sheet

Abocom

Abocom CR2000 Specification sheet

Huawei LSBM1SRP Specifications

Huawei

Huawei LSBM1SRP Specifications

ADTRAN 3.125 Gigabit Ethernet Job aid

ADTRAN

ADTRAN 3.125 Gigabit Ethernet Job aid

Hillstone SG-6000 X Series Hardware reference guide

Hillstone

Hillstone SG-6000 X Series Hardware reference guide

Costar CR8020XDi quick guide

Costar

Costar CR8020XDi quick guide

Emerson AXP 1410 Installation and use

Emerson

Emerson AXP 1410 Installation and use

Cabletron Systems CBUPRI/E1 user manual

Cabletron Systems

Cabletron Systems CBUPRI/E1 user manual

Korenix JetNet 2205 Quick installation guide

Korenix

Korenix JetNet 2205 Quick installation guide

WatchNet ENM-04 POE Quick connection guide

WatchNet

WatchNet ENM-04 POE Quick connection guide

manuals.online logo
manuals.online logoBrands
  • About & Mission
  • Contact us
  • Privacy Policy
  • Terms and Conditions

Copyright 2025 Manuals.Online. All Rights Reserved.