manuals.online logo
Brands
  1. Home
  2. •
  3. Brands
  4. •
  5. Viking
  6. •
  7. Oven
  8. •
  9. Viking Designer DDOE305T User manual

Viking Designer DDOE305T User manual

Before Using Oven Oven Controls
TRU CONV (cont.)
Use this setting for foods that require gentle cooking
such as pastries, souffles, yeast breads,quick breads, and
cakes. Breads, cookies, and other baked goods come out
evenly textured with golden crusts. No special bakeware
is required. Use this function for single rack baking,
multiple rack baking, roasting, and preparation of
complete meals. This setting is also recommended when
baking large quantities of baked goods at one time.
CONV ROAST
(Convection
Roast)
The convection
element runs in
conjunction with the
inner and outer broil
elements. This transfer
of heat (mainly from
the convection
element) seals moisture inside of large roasts. A time
savings is gained over existing, single fan convection
roast modes. Use this setting for whole turkeys, whole
chickens, hams, etc.
CONV BROIL
(Convection
Broil)
The top element
operates at full power.
This function is exactly
the same as regular
broiling with the
additional benefit of
air circulation by the
motorized fan in the rear of the oven. Smoke is reduced
since the airflow also reduces peak temperatures on the
food. Use this setting for broiling thick cuts of meats.
BROIL
This function is a dry-
heat cooking method,
using direct or radiant
heat on three different
settings: low, medium
and high. The distance
between the foods
and the broil elements
determines broiling
speed. This function is recommended for small,
individualized cuts, such as steaks, chops, and patties.
Convection
Dehydrate
This oven is designed
not only to cook, but
also to dehydrate
fruits and vegetables.
1. Prepare the food as
recommended.
2. Choose and press
“UPPER OVEN” or
“LOWER OVEN.”
3. Arrange the food on drying racks (not included with
the oven, but available from specialty cooking
dealers).
4. Select “DEHYDRATE” from the oven function control
panel.
5. Press “SET” or “ENTER.” Dehydrate mode will begin
immediately.
Convection
Defrost
1. Place the frozen
food on a baking
sheet.
2. Choose and press
“UPPER OVEN” or
“LOWER OVEN.”
3. Select “DEFROST”
from the oven
function control panel.
4. Press “SET” or “ENTER” to begin defrosting. The
defrost mode will begin and the defrost temperature
will be displayed.
Self Clean Cycle
This range features a
self-cleaning cycle.
During this
cycle, the oven
reaches elevated
temperatures in order
to burn off soil and
deposits. A powder
ash residue is left in
the bottom of the oven after completion of the self-
clean cycle. See Use and Care Manual for self-clean
cycle instructions.
Oven Settings (cont.)
Preheat
For best results, it is extremely important that you preheat
your oven to the desired cooking temperature before
placing food items in the oven to begin cooking. In many
cooking modes, partial power from the broiler is used to
bring the oven to the preheat temperature. Therefore,
placing food items in the oven during the preheat mode
is not recommended. The Viking Rapid Ready™ Preheat
System is engineered so that the oven is brought to the
desired set temperature in a manner which will provide
the optimum cooking environment based on the selected
cooking mode in the shortest possible time.
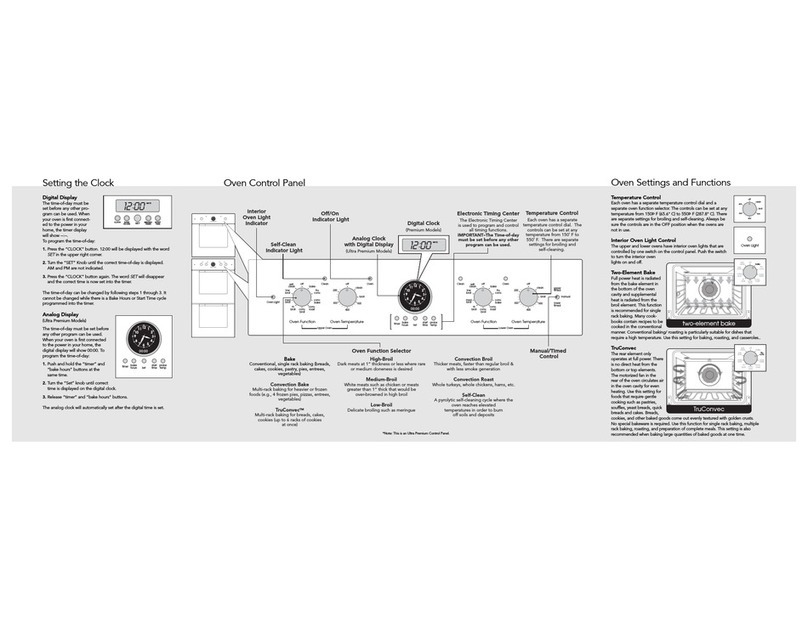
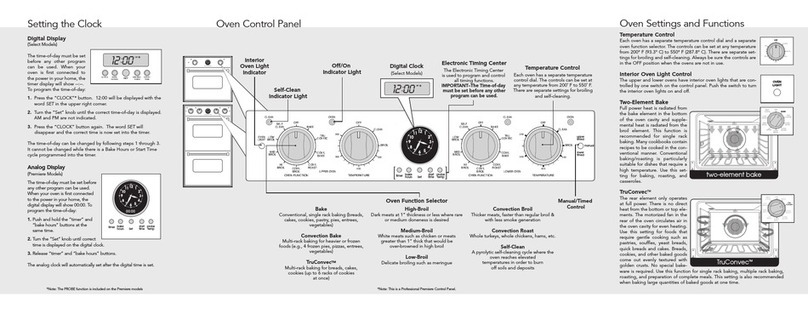
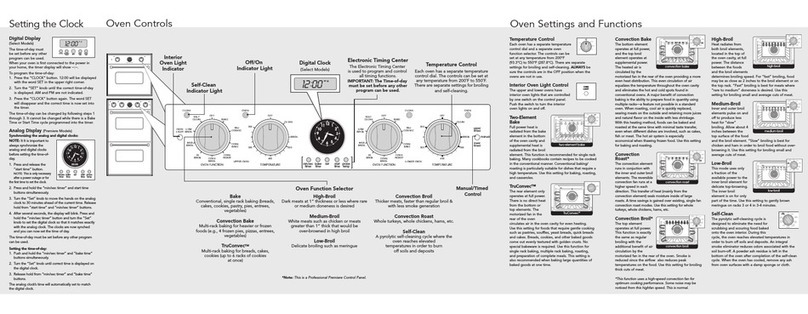
Setting the Clock
The time-of-day must be
set before any other
program can be used.
When your oven is first
connected to the power
in your home, the timer
display will show 12:00.
To program the Time Of Day:
1. Press either the “UPPER OVEN” or “LOWER
OVEN” button.
2. Press the “CLOCK SET” button. The clock will begin
to flash. The word “CLOCK” will be lit on the display.
3. Type in the correct time on the electronic
number keypad.
4. Press the “CLOCK SET” button again. The clock is
now set.
Alternate method:
1. Press either the “UPPER OVEN” or “LOWER
OVEN” button.
2. Press the “CLOCK SET” button. The clock will
begin to flash. The word “CLOCK” will be lit on
the display.
3. Use the up and down arrows to change the
current time.
4. Press the “SET” button on the temperature control
or the “CLOCK SET” button on the electronic
timing center. The clock is now set.
Note: The time-of-day cannot be changed while there is a
bake hours or start time cycle programmed into the timer.
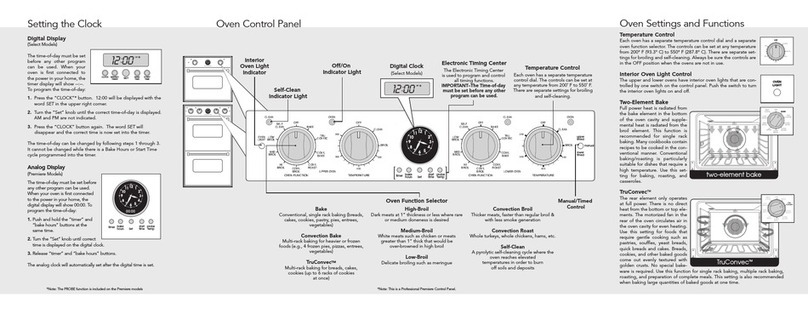
OVENFUNCTION TEMPERATURE OVENFUNCTION TEMPERATUREOVENFUNCTION TEMPERATURE OVENFUNCTION TEMPERATUREOVENFUNCTION TEMPERATURE OVENFUNCTION TEMPERATUREOVENFUNCTION TEMPERATURE OVENFUNCTION TEMPERATURE
Position 5
Position 4
Position 3
Position 2
Position 1
Oven Function and
Temperature Controls
Each oven function has a separate setting.
(See descriptions)
The SET control up and down arrows can
be used to set any temperature from
150˚ F (65.6˚ C) to 550˚ F (287.8˚ C).
Oven Selector Controls
The oven selector controls are
used to turn the upper or
lower oven on and off.
Electronic Timing Center
The electronic timing center is used to
program and control all timing
functions.
IMPORTANT–The time-of-day
must be set before any other
program can be used.
Electronic Keypad Entry
The electronic keypad entry is
used to program and control
all oven functions.
Broil
Three conventional broil
settings for cuts of flat
pieces of meat or meat
1-2 inches thick
Convection Broil
Faster than regular
broiling with less
smoke generation
for thicker meats
Dehydrate
Using the convection
fan over a period of
time, water is removed
from food by evaporation
Meat Probe
An audible alarm
sounds when the
internal temperature of
the meat being roasted
is reached
Oven Selector Options
Bake
Conventional, single-rack
baking (breads, cakes, cookies,
pastry, pies, entrees, vegetables)
Convection Bake
Multi-rack baking for
heavier or frozen
foods (e.g., frozen pies,
pizzas, entrees,
vegetables)
Defrost
Natural defrosting
of food using fan
without heat
Auto Roast
Automatic searing of
the outside of meats;
simplifies roasting
TruConvec™
Multi-rack baking for
breads, cakes,cookies (up to
5 racks of cookies at once)
Convection Roast
Roasting whole turkeys,
whole chickens, hams, etc.
Self-Clean
A self-cleaning cycle
using high heat to
burn off soils and deposits
Proof
Creates an optimal
environment for the
rising of yeast in many
kinds of dough
Recipes
Accesses, programs, and saves cooking
cycles from favorite recipes
Oven Light Controls
Controls the interior lights in the upper
and lower ovens
Oven Lock
Childproofing feature preventing the
controls from being activated when the
oven is not in use
Settings
Accesses custom features such as display
brightness, Sabbath mode, and tones
Oven Settings
BAKE (Two
Element Bake)
Full power heat is
radiated from the bake
element in the bottom
of the oven cavity and
supplemental heat is
radiated from the broil
element. This function
is recommended for
single rack baking. Many cookbooks contain recipes to
be cooked in the conventional manner. Conventional
baking/roasting is particularly suitable for dishes that
require a high temperature. Use this setting for baking,
roasting, and casseroles.
CONV BAKE
(Convection Bake)
The bottom element
operates at full power,
and the top broil
element operates at
supplemental power.
The heated air is
circulated by the
motorized fan in the rear of the oven providing a more
even heat distribution. This even circulation of air
equalizes the temperature throughout the oven cavity
and eliminates the hot and cold spots found in
conventional ovens. A major benefit of convection
baking is the ability to prepare food in quantity using
multiple racks—a feature not possible in a standard oven.
When roasting using this setting, cool air is quickly
replaced, searing meats on the outside and retaining
more juices and natural flavor on the inside with less
shrinkage. With this heating method, foods can be
baked and roasted at the same time with minimal taste
transfer, even when different dishes are involved, such
as cakes, fish or meat. The hot air system is especially
economical when thawing frozen food. Use this setting
for baking and roasting.
TRU CONV
(TruConvec™)
The rear element only
operates at full power.
There is no direct heat
from the bottom or
top elements. The
motorized fan in the
rear of the oven
circulates air in the
oven cavity for even heating. (continued on
following panel)
Rack Positions
Each oven is equipped with two standard tilt-proof racks
and one TruGlide™ rack. With the TruGlide™ rack, the
bottom section remains in the oven and the top section
smoothly glides outward when pulled. This reduces the
chances of spills from items that contain a lot of juice or
liquid. This rack can be used in any of the five rack
positions.
All ovens have five rack positions. Position 5 is the farthest
from the oven bottom. Position 1 is the closest to the oven
bottom. The racks can be easily removed and arranged at
various levels. For best results with conventional baking,
do not use more than one rack at a time. It is also
recommended, when using two racks, to bake with the
racks in positions 2 and 4 or positions 3 and 5.
1. Arrange the oven racks in the desired positions
BEFORE heating the oven. If cooking on two r acks at
the same time, use rack positions 2 and 4 or positions 3
and 5.
2. Turn the Oven Function selector to desired function.
Cooking starts immediately and stops when the Oven
Function selector is turned to “OFF”.
3. Set the Temperature Control to the desired
temperature.
4. Place the food in the oven after the oven indicator light
goes out.
Press and Release Press and Hold
LTime increases by
1 minute Time increases by
10 minutes
MTime decreases by
1 minute Time decreases by
10 minutes
Important Safety Notice and Warning
The California Safe Drinking Water and Toxic
Enforcement Act of 1986 (Proposition 65) requires the
Governor of California to publish a list of substances
known to the State of California to cause cancer or
reproductive harm, and requires businesses to warn
customers of potential exposures to such substances.
Users of this appliance are hereby warned that when
the oven is engaged in the self-clean cycle, there may
be some low-level exposure to some of the listed
substances, including carbon monoxide. Exposure to
these substances can be minimized by properly
venting the oven to the outdoors by opening the
windows and/or door in the room where the appliance
is located during the self-clean cycle.
Important notice regarding pet birds:
NEVER keep pet birds in the kitchen or in rooms
where the fumes from the kitchen could reach. Birds
have a very sensitive respiratory system. Fumes
released during an oven self-cleaning cycle may be
harmful or fatal to birds. Fumes released due to
overheated cooking oil, fat, margarine and overheated
non-stick cookware may be equally harmful.
F20687 EN (102909J)
VIKING RANGE CORPORATION
111 Front Street • Greenwood, Mississippi
38930 USA • (662) 455-1200
Warnings (cont.)Warnings (cont.)
Warnings
Warning and Important Safety Instructions appearing
in this manual are not meant to cover all possible
conditions and situations that may occur. Common
sense, caution, and care must be exercised when
installing, maintaining, or operating the appliance.
ALWAYS contact the manufacturer about problems or
conditions you do not understand.
Recognize Safety Symbols, Wor s, Labels
Read and follow all instructions before using this
appliance to prevent the potential risk of fire, electric
shock, personal injury or damage to the appliance as
a result of improper usage of the appliance. Use
appliance only for its intended purpose.
To ensure proper and safe operation: Appliance must
be properly installed and grounded by a qualified
technician. DO NOT attempt to adjust, repair, service,
or replace any part of your appliance unless it is
specifically recommended in this manual. All other
servicing should be referred to a qualified servicer.
WA R NING
To avoi sickness an foo waste when using
automatic time baking:
•DO NOT use foo s that will spoil while waiting for
cooking to start, such as ishes with milk or eggs,
cream soups, custar s, fish, pork, poultry, or foo s
with stuffing.
• Any foo that has to wait for cooking to start shoul
be very col or frozen before it is place in the oven.
• DO NOT use foo s containing baking pow er or
yeast with automatic time baking. They will not rise
properly.
• DO NOT allow foo to remain in the oven for more
than 2 hours after the en of the cooking cycle.
• To avoi sickness an foo waste, DO NOT allow
efroste foo to remain in the oven for more than
2 hours.
WA R NING
To avoi risk of property amage,
personal injury or eath; follow
information in this manual exactly to
prevent a fire or explosion. DO NOT
store or use gasoline or other flammable vapors
an liqui s in the vicinity of this or any appliance.
WA R NING
ELECTRICAL SHOCK HAZARD
DO NOT
touch a hot oven light bulb with
a amp cloth as the bulb coul break.
Shoul the bulb break, isconnect power
to the appliance before removing bulb to avoi
electrical shock.
WA R NING
ELECTRICAL SHOCK HAZARD
Disconnect the electric power at the main
fuse or circuit breaker before replacing bulb.
WA R NING
BURN OR ELECTRICAL
SHOCK HAZARD
Make sure all controls are “OFF” an
oven is COOL before cleaning. Failure to
o so can result in burns or electrical
shock.
CAUTION
To avoi sickness an foo waste, DO NOT allow
efroste foo to remain in the oven for more than
two hours.
NOTICE
DO NOT turn the Temperature Control on uring
efrosting. Turning the convection fan on will
accelerate the natural efrosting of the foo
without the heat.
WA R NING
BURN HAZARD
The oven oor, especially the glass, can
get hot. Danger of burning: DO NOT
touch the glass!
CAUTIO N
DO NOT touch the exterior portions of
the oven after self-cleaning cycle has
begun, since some parts become
extremely hot to the touch!
During the first few times the self-cleaning feature
is use , there may be some o or an smoking
from the “curing” of the bin er in the high- ensity
insulation use in the oven. When the insulation is
thoroughly cure , this o or will isappear. During
subsequent self-cleaning cycles, you may sense
an o or characteristic of high temperatures.
KEEP THE KITCHEN WELL-VENTED DURING
THE SELF-CLEAN CYCLE.
CAUTION
You must carefully check the foo uring the
ehy ration process to ensure that it oes not
catch fire.
CAUTIO N
BURN HAZARD
When self-cleaning, surfaces may get
hotter than usual. Therefore, chil ren
shoul be kept away.
CAUTIO N
DO NOT store items of interest to chil ren over
the unit. Chil ren climbing to reach items coul
be seriously injure .
Viking Quick Reference Guide
Designer Series Built-In Electric
Touch Control Single and Double Ovens
DANGER
Hazards or unsafe practices which WILL result in
severe personal injury or death
WARNING
Hazards or unsafe practices which COULD result in
death, severe personal injury or property damage
CAUTION
Hazar s or unsafe practices which COULD
result in minor personal injury.
All safety messages will i entify the hazar , tell you
how to re uce the chance of injury, an tell you what
can happen if the instructions are not followe .
WA R NING
This appliance features a self-cleaning cycle.
During this cycle, the oven reaches elevate
temperatures in or er to burn off soil an eposits.
A pow er ash resi ue is left in the bottom of the
oven after completion of the self-clean cycle.
Note: DO NOT use commercial oven cleaners
inside the oven. Use of these cleaners can
produce hazardous fumes or can damage the
porcelain finishes. DO NOT line the oven with
aluminum foil or other materials. These items can
melt or burn during a self-clean cycle, causing
permanent damage to the oven.
NOTICE
Avoi any amage to oven vents. The vents nee
to be unobstructe an open to provi e proper
airflow for optimal oven performance.
NOTICE
The cooling fan shoul be operating when the unit
is in operation. If you notice the cooling fan is not
operating or you observe unusual or excessive
noise coming from the cooling fan, contact a Viking
Authorize Service Center before continuing
operation. Failure to o so can result in amage to
the oven or surroun ing cabinets.
About Your Appliance
• For proper oven performance and operation,
DO NOT block or obstruct the oven vent duct
located on the right side of the air grille.
• Avoid touching oven vent area while oven is on
and for several minutes after oven is turned off.
When the oven is in use, the vent and surrounding
area become hot enough to cause burns. After
oven is turned off, DO NOT touch the oven vent or
surrounding areas until they have had sufficient time
to cool.
• Other potentially hot surfaces include oven vent,
surfaces near the vent opening, oven door, areas
around the oven door and oven window.
• The misuse of oven doors (e.g. stepping, sitting,
or leaning on them) can result in potential hazards
and/or injuries.
KEEP THESE INSTRUCTIONS FOR FUTURE
REFERENCE
WARNING
DO NOT use commercial oven cleaners insi e the
oven. Use of these cleaners can pro uce hazar ous
fumes or can amage the porcelain finishes.
WA R NING
NEVER cover any slots, holes or passages in the
oven bottom or cover an entire rack with materials
such as aluminum foil. Doing so blocks air flow
through the oven an may cause carbon monoxi e
poisoning. Aluminum foil linings may also trap heat,
causing a fire hazar .
WA R NING
NEVER use appliance as a space heater or warm a
room to prevent potential hazar to the user an
amage to the appliance. Also, DO NOT use the
oven as a storage area for foo or cooking utensils.
WA R NING
To prevent possible amage to cabinets an
cabinet finishes, use only materials an finishes
that will not iscolor or elaminate an will
withstan temperatures up to 194 F (90 C). Heat
an moisture resistant a hesive mus t be use if the
pro uct is to be installe in laminate cabinetry.
Check with your buil er or cabinet supplier to make
sure that the materials meet these requirements.
This manual suits for next models

3

Other Viking Oven manuals

Viking Designer DDOE301SS User manual

Viking

Viking Designer DDOE301SS User manual

Viking Designer DMWC171 Technical manual

Viking

Viking Designer DMWC171 Technical manual

Viking VESO166SS User manual

Viking

Viking VESO166SS User manual

Viking Designer Select DEDO127 User manual

Viking

Viking Designer Select DEDO127 User manual

Viking DEDO127SS User manual

Viking

Viking DEDO127SS User manual

Viking CVMOD241 User manual

Viking

Viking CVMOD241 User manual

Viking Professional Custom VESO1302T User manual

Viking

Viking Professional Custom VESO1302T User manual

Viking Professional VGSO166 User manual

Viking

Viking Professional VGSO166 User manual

Viking Professional VCSO244SS User manual

Viking

Viking Professional VCSO244SS User manual

Viking Professional VEDO127T User manual

Viking

Viking Professional VEDO127T User manual

Viking VMOD241 User manual

Viking

Viking VMOD241 User manual

Viking DEDO127SS User guide

Viking

Viking DEDO127SS User guide

Viking Professional VEOS100T User manual

Viking

Viking Professional VEOS100T User manual

Viking Double Ovens User manual

Viking

Viking Double Ovens User manual

Viking 3 Series User manual

Viking

Viking 3 Series User manual

Viking Professional Custom VESO1302 User manual

Viking

Viking Professional Custom VESO1302 User manual

Viking RVDOE330 User manual

Viking

Viking RVDOE330 User manual

Viking F20427 User manual

Viking

Viking F20427 User manual

Viking RVSOE330WH User manual

Viking

Viking RVSOE330WH User manual

Viking Professional VGSO166 User manual

Viking

Viking Professional VGSO166 User manual

Viking CVESO5302T User manual

Viking

Viking CVESO5302T User manual

Viking RDDOE306SS User manual

Viking

Viking RDDOE306SS User manual

Viking VCSO210SS User manual

Viking

Viking VCSO210SS User manual

Viking Designer Select DESO127 User manual

Viking

Viking Designer Select DESO127 User manual

Popular Oven manuals by other brands

DeLonghi DOUBLE OVEN instructions

DeLonghi

DeLonghi DOUBLE OVEN instructions

Bosch HBF010B 1S Series instruction manual

Bosch

Bosch HBF010B 1S Series instruction manual

Brandt BXP6575XS user guide

Brandt

Brandt BXP6575XS user guide

Infiniton HORNO 40ECD6 instruction manual

Infiniton

Infiniton HORNO 40ECD6 instruction manual

Kleenmaid OMF6020 Instructions for use and warranty details

Kleenmaid

Kleenmaid OMF6020 Instructions for use and warranty details

GE Profile PK956DR Dimensions and installation information

GE

GE Profile PK956DR Dimensions and installation information

Bosch OVEN instruction manual

Bosch

Bosch OVEN instruction manual

Smeg Classic SFA63M3TVX manual

Smeg

Smeg Classic SFA63M3TVX manual

Baumatic BO638.6 SS user manual

Baumatic

Baumatic BO638.6 SS user manual

Bosch HBG7542 1 Series User manual and installation instructions

Bosch

Bosch HBG7542 1 Series User manual and installation instructions

Hotpoint SKD 33J C X operating instructions

Hotpoint

Hotpoint SKD 33J C X operating instructions

Kernau KBO 1371 S TC B instruction manual

Kernau

Kernau KBO 1371 S TC B instruction manual

AEG NC4013001 user manual

AEG

AEG NC4013001 user manual

Comfee CFO-SA231 instruction manual

Comfee

Comfee CFO-SA231 instruction manual

Hotpoint SH89CX operating instructions

Hotpoint

Hotpoint SH89CX operating instructions

Kenmore 790. 4788 Use and care guide

Kenmore

Kenmore 790. 4788 Use and care guide

Daniela DAN90ASO user manual

Daniela

Daniela DAN90ASO user manual

Beko OIC 21003 user manual

Beko

Beko OIC 21003 user manual

manuals.online logo
manuals.online logoBrands
  • About & Mission
  • Contact us
  • Privacy Policy
  • Terms and Conditions

Copyright 2025 Manuals.Online. All Rights Reserved.