manuals.online logo
Brands
  1. Home
  2. •
  3. Brands
  4. •
  5. Viking
  6. •
  7. Oven
  8. •
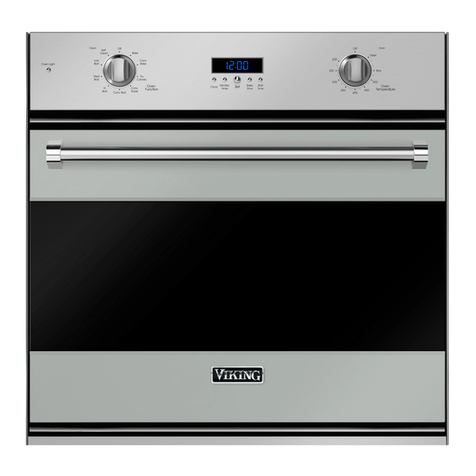
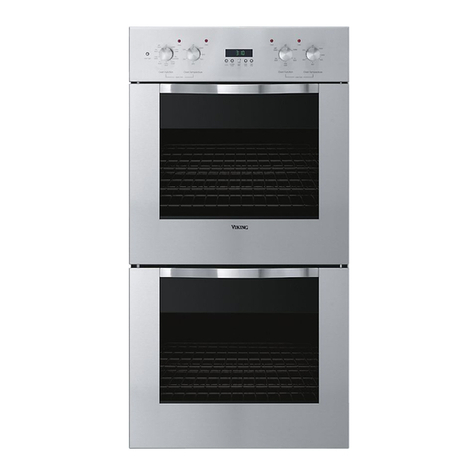
  9. Viking Professional Custom VESO1302T User manual

Viking Professional Custom VESO1302T User manual

Other manuals for Professional Custom VESO1302T

1

This manual suits for next models

7

Other Viking Oven manuals

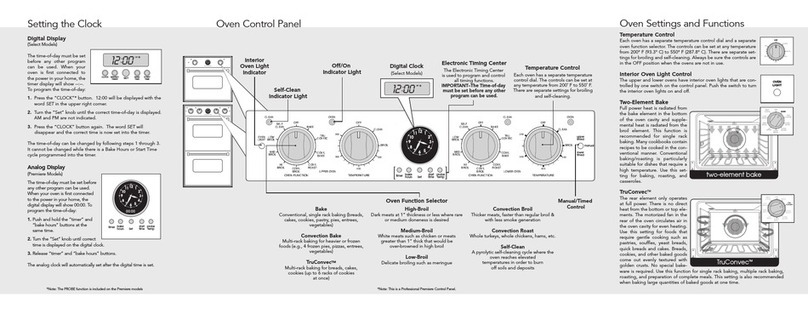
Viking DEDO127(T) User manual

Viking

Viking DEDO127(T) User manual

Viking F20362J User manual

Viking

Viking F20362J User manual

Viking F60067 User manual

Viking

Viking F60067 User manual

Viking VSOF730SS User manual

Viking

Viking VSOF730SS User manual

Viking RVDOE330 User manual

Viking

Viking RVDOE330 User manual

Viking DCSO244SS User manual

Viking

Viking DCSO244SS User manual

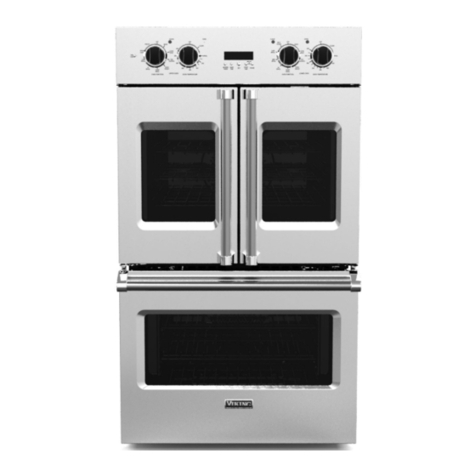
Viking Double Ovens User manual

Viking

Viking Double Ovens User manual

Viking VCSO210SS User manual

Viking

Viking VCSO210SS User manual

Viking Professional VEOS100TSS User manual

Viking

Viking Professional VEOS100TSS User manual

Viking Professional VEDO266SS User manual

Viking

Viking Professional VEDO266SS User manual

Viking DEDO127SS User manual

Viking

Viking DEDO127SS User manual

Viking Designer Select DESO127 User manual

Viking

Viking Designer Select DESO127 User manual

Viking Designer DMWC171 Technical manual

Viking

Viking Designer DMWC171 Technical manual

Viking RDDOE306SS User manual

Viking

Viking RDDOE306SS User manual

Viking MVDOE630 User manual

Viking

Viking MVDOE630 User manual

Viking Designer DDOE301 User manual

Viking

Viking Designer DDOE301 User manual

Viking F20686 User manual

Viking

Viking F20686 User manual

Viking Professional VGSO166 User manual

Viking

Viking Professional VGSO166 User manual

Viking F20024B User manual

Viking

Viking F20024B User manual

Viking RVDOE330 User manual

Viking

Viking RVDOE330 User manual

Viking Combi Steam/Convect VSOC530SS User manual

Viking

Viking Combi Steam/Convect VSOC530SS User manual

Viking VCTSO5200SS User manual

Viking

Viking VCTSO5200SS User manual

Viking Professional VEOS100T User manual

Viking

Viking Professional VEOS100T User manual

Viking VCSO244 Series User manual

Viking

Viking VCSO244 Series User manual

Popular Oven manuals by other brands

Brandt FC 222 user manual

Brandt

Brandt FC 222 user manual

aumate TOA20M04N-1E instruction manual

aumate

aumate TOA20M04N-1E instruction manual

Maytag CWE4100AC - 24" Single Electric Wall Oven Dimension Guide

Maytag

Maytag CWE4100AC - 24" Single Electric Wall Oven Dimension Guide

Kernau KBO 1076 S PT B instruction manual

Kernau

Kernau KBO 1076 S PT B instruction manual

Bosch HB 37 N Series User manual and installation instructions

Bosch

Bosch HB 37 N Series User manual and installation instructions

Electrolux EOD5420AA user manual

Electrolux

Electrolux EOD5420AA user manual

Mx Onda MX-HC2183 instruction manual

Mx Onda

Mx Onda MX-HC2183 instruction manual

Daewoo F6EV19SM2 Service manual

Daewoo

Daewoo F6EV19SM2 Service manual

Blodgett MT3870 Specifications

Blodgett

Blodgett MT3870 Specifications

GE ZET2F owner's manual

GE

GE ZET2F owner's manual

GE JK3000DF3WW owner's manual

GE

GE JK3000DF3WW owner's manual

eka EKF 523 NT Operating and instruction manual

eka

eka EKF 523 NT Operating and instruction manual

AEG Electrolux E3191-5 user manual

AEG Electrolux

AEG Electrolux E3191-5 user manual

Pratica Rocket Express quick start guide

Pratica

Pratica Rocket Express quick start guide

FM RX203 instruction manual

FM

FM RX203 instruction manual

Bosch HBN331 9B Series instruction manual

Bosch

Bosch HBN331 9B Series instruction manual

NEFF B95M42N0MK Instructions for use

NEFF

NEFF B95M42N0MK Instructions for use

Miele H 5961 B User instructions

Miele

Miele H 5961 B User instructions

manuals.online logo
manuals.online logoBrands
  • About & Mission
  • Contact us
  • Privacy Policy
  • Terms and Conditions

Copyright 2025 Manuals.Online. All Rights Reserved.

F20813 EN (022311)
Viking Range Corporation
111 Front Street
Greenwoo , Mississippi 38930 USA
(662) 455-1200
For pro uct information
call 1-888-VIKING1 (845-4641)
or visit the Viking Web Site at
vikingrange.com
Viking Use & Care Man al
Professional C stom B ilt-In Electric
To ch Control Single and Do ble Ovens
3
Warnings
2
Congratulations
Your purchase of this pro uct attests to the importance you
place upon the quality an performance of the major
appliances you use. With minimal care, as outline in this
gui e, this pro uct is esigne to provi e you with years of
epen able service. Please take the few minutes necessary to
learn the proper an efficient use an care of this quality
pro uct.
Some key features of this appliance inclu e:
• 14 ifferent cooking mo es to make even your most
challenging baking projects a success.
• Split baking an broiling elements, re ucing your
preheating time an heating your foo more evenly.
• An extra-large reversing fan, allowing you to cook even
large quantities of foo more quickly an evenly.
• Four convection mo es, offering greater air circulation to
shorten cooking times an cook foo s more evenly.
• Dual broiling elements, pro ucing intense ra iant heat for
faster broiling an a larger coverage area.
• Three broiling mo es, inclu ing a special low-broil mo e for
elicate broiling an top-browning.
• A profile , hi en bake element for easier cleaning.
• Six a justable rack positions with the largest usable baking
space available in this class.
Your complete satisfaction is our ultimate goal. If you have
any questions or comments about this pro uct, please
contact the ealer from whom you purchase this pro uct, or
contact our consumer support center at 1-888-VIKING1.
We appreciate your choosing a Viking Range Corporation
pro uct an hope that you will again select our pro ucts for
your other major appliance nee s. For more information
about the complete selection of Viking pro ucts, contact your
ealer or go to vikingrange.com.
WARNING
If the information in this manual is not followe exactly, a fire or
explosion may result causing property amage, personal injury
or eath.
WARNING
NEVER use this appliance as a space heater to heat or warm
the room. Doing so may result in carbon monoxi e poisoning
an overheating of the oven.
WARNING
Do not use commercial oven cleaners insi e the oven. Use of
these cleaners can pro uce hazar ous fumes or can amage
the porcelain finishes.
WARNING
NEVER cover any slots, holes or passages in the oven bottom
or cover an entire rack with materials such as aluminum foil.
Doing so blocks air flow through the oven an may cause
carbon monoxi e poisoning. Aluminum foil linings may also
trap heat, causing a fire hazar .
WARNING
To avoi sickness an foo waste when using automatic time
baking:
• Do not use foo s that will spoil while waiting for cooking to
start, such as ishes with milk or eggs, cream soups, custar s,
fish, pork, poultry, or foo s with stuffing.
• Any foo that has to wait for cooking to start shoul be very
col or frozen before it is place in the oven.
• Do not use foo s containing baking pow er or yeast when
automatic time baking. They will not rise properly.
• Do not allow foo to remain in the oven for more than two
hours after the en of the cooking cycle.
WARNING
To avoi sickness an foo waste, o not allow efroste foo
to remain in the oven for more than two hours.
4 5
Cooking Tips
Rack Positions ______________________________________ 39
Preheat ____________________________________________ 40
Pan Placement Tips _________________________________ 42
Baking Tips ________________________________________ 42
Multiple Rack Baking _______________________________ 43
Conventional Baking Chart __________________________ 44
Convection Baking Chart ____________________________ 45
Solving Baking Problems ____________________________ 46
Broiling Tips ________________________________________ 47
Broiling Chart ______________________________________ 48
Roasting Tips _______________________________________ 49
Conventional Roasting Chart ________________________ 50
Convection Roasting Chart __________________________ 51
Product Car
Cleaning an Maintenance __________________________ 52
Self-Clean Cycle _______________________________ 54
Replacing Light _____________________________________ 56
Trouble Shooting ___________________________________ 57
Error Han ling ______________________________________ 57
Service Information _________________________________ 58
Warranty ___________________________________________ 59
G tting Start d
Important Safety Instrutions ________________________ 6
Product Controls
Oven Control Panel________________________________ 8
Built-In Electric Oven Features ______________________ 10
Touch Pa Functions_______________________________ 11
Programming Mod s
Clocks an Timers
Setting the Clock _____________________________ 16
Setting the Timer _____________________________ 17
Cook Time an Stop Time ____________________ 18
Oven Settings
Brightness ____________________________________ 20
Degree Format (Fahrenheit or Celsius) _________ 20
Tones ________________________________________ 21
Tone Volume _________________________________ 23
Timeouts ____________________________________ 23
Clock Format (12-hour or 24-hour) _____________ 24
Sabbath Mo e _______________________________ 25
Showroom Mo e __________________________________ 25
Lock an Unlock ______________________________ 26
Interior Oven Lights ___________________________ 26
Recipe Function ___________________________________ 27
Warming Mo es __________________________________ 29
Bake Mo es ______________________________________ 30
Broil Mo es ______________________________________ 33
Roast Mo es ______________________________________ 35
Meat Probe _______________________________________ 37
Table of Contents Table of Contents
6 7
G tting Start d
G tting Start d
• Do not heat unopene foo containers; buil -up of pressure
may cause the container to explo e an result in injury.
• Always position oven racks in esire location while oven is
cool. If rack must be move while oven is hot, o not let
pothol er contact hot heating element in oven.
• Use care when opening oven oor. Let hot air or steam
escape before removing or replacing foo . Hot air or steam
can cause burns to han s, face an /or eyes.
• Keep oven vents unobstructe . The oven vent is locate at
the front of the oven an vents into the room.
• Do not clean oor gasket. It is essential for a goo tight
seal. Care shoul be taken not to rub, amage, or move
the gasket.
• No commercial oven cleaner or oven liner protective
coating such as aluminum foil shoul be use in or aroun
any part of the oven. Improper oven liners may result in a
risk of electric shock or fire. Keep oven free from grease
buil up.
• Before self-cleaning the oven, remove broiler pan, broiler
gri , oven racks, an other utensils. Do not use your oven
to clean other parts. A fan noise shoul be hear uring
the cleaning cycle. If not, call service before self-cleaning
again.
•DO NOT TOUCH HEATING ELEMENTS OR INTERIOR
SURFACES OF OVEN. Heating elements may be hot even
though they are ark in color. Interior surfaces of an oven
become hot enough to cause burns. During an after use,
o not touch or let clothing or other flammable materials
contact heating elements or interior surfaces of oven until
they have ha sufficient time to cool. Other surfaces of the
oven may become hot enough to cause burns, such as the
oven vent opening, the surface near the vent opening, an
the oven oor win ow.
• Use this appliance only for its inten e use as escribe in
this manual. Never use your appliance for warming or
heating the room. This is base on safety consi erations.
• Your unit shoul be installe by a qualifie technician. The
appliance must be installe an electrically groun e
accor ing to local co es.
• Do not attempt to repair or replace any part of this
appliance unless specifically recommen e in this manual.
All servicing shoul be referre to a qualifie technician.
Warranty service must be performe by an authorize
service agency.
• Chil ren shoul not be left alone in the kitchen while the
oven is in use. They shoul never be allowe to sit or stan
on any part of the appliance.
CAUTION: Do not store items of interest to chil ren over
the unit. Chil ren climbing to reach items coul be seriously
injure . They shoul never be allowe to sit or stan on any
part of the appliance.
• GREASE - Grease is flammable an shoul be han le
carefully. Do not use water on grease fires. Flaming grease
can be extinguishe with baking so a or, if available, a
multipurpose ry chemical or foam-type extinguisher. Let fat
cool before attempting to han le it. Do not allow grease to
collect aroun the oven or in vents. Wipe up spillovers
imme iately.
• Loose-fitting or hanging garments shoul never be worn
while using the appliance. Do not rape towels or materials
on oven oor han les. These items coul ignite an cause
burns.
• Use only ry pothol ers. Moist or amp pothol ers on
hot surfaces may result in burns from steam. Do not let
pothol er touch hot surface areas. Do not use a towel or
other bulky cloth.
• Keep area clean an free from combustible materials,
gasoline, an other flammable liqui s. Never use your oven
as a storage space. Combustible items (paper, plastic, etc.)
may ignite, an metallic items may become hot an cause
burns.
Important Safety Instructions Important Safety Instructions
98
Oven Control Panel
Product Controls
Product Controls
*Note: Professional Series Premiere mo el control panel an features are shown.
Ov n Function and
T mp ratur Controls
Each oven function has a separate setting.
(See escriptions)
The SET control up an own arrows can be
use to set any temperature from
150°F (65.6°C) to 550°F (287.8°C).
El ctronic Timing C nt r
The Electronic Timing Center is
use to program an control all
timing functions.
IMPORTANT–The time-of- ay
must be set before any other
program can be use .
El ctronic K ypad
Entry
The Electronic Keypa
Entry is use to program
an control all oven
functions.
Bak
Conventional, single-rack baking
(brea s, cakes, cookies, pastry, pies,
entrees, vegetables)
Conv ction Bak
Multi-rack baking for heavier or frozen
foo s (e.g., frozen pies, pizzas, entrees,
vegetables)
D frost
Natural efrosting of foo using fan
without heat
Auto Roast*
Automatic searing of the outsi e of
meats; simplifies roasting
TruConv cTM
Multi-rack baking for brea s, cakes,
cookies (up to 6 racks of cookies at once)
Conv ction Roast
Roasting whole turkeys, whole chickens,
hams, etc.
S lf-Cl an
A self-cleaning cycle using high heat to
burn off soils an eposits
Proof*
Creates an optimal environment for the
rising of yeast in many kin s of ough
R cip s*
Accesses, programs, an saves cooking
cycles from favorite recipes
Ov n Light Controls
Controls the interior lights in the upper
an lower ovens
Ov n Lock
Chil proofing feature preventing the
controls from being activate when the
oven is not in use
S ttings
Accesses custom features such as isplay
brightness, Sabbath/Showroom mo es,
an tones
Broil
Three conventional broil settings for cuts of
flat pieces of meat or meat 1-2 inches thick
Conv ction Broil
Faster than regular broiling with less smoke
generation for thicker meats
D hydrat
Using the convection fan over a
perio of time, water is remove
from foo by evaporation
M at Prob *
Automatically turns the oven off when the
internal temperature of the meat being
roaste is reache
Ov n S l ctor Options
Ov n S l ctor
Controls
The Oven Selector Controls
are use to turn the upper or
lower oven on an off.
Oven Control Panel
10
Built-In Electric Oven Features
11
Touch Pa Functions
T mp ratur Control
Both ovens share the temperature control. To use this feature, select the
upper or lower oven, an then set the esire temperature. The controls
can be set at any temperature from 150° F (65.6° C) to 550° F (287.8° C).
El ctronic K ypad Entry
Both ovens share the electronic keypa entry. The alphanumeric keys can
be use to program an control all oven functions.
Ov n Function S l ctor Control
Both ovens offer 14 separate cooking mo es from which you can choose
the one that best meets your cooking nee s.
Bak
When using this function, full-
power heat is ra iate from
the bake element in the
bottom of the oven cavity,
while supplemental heat is
ra iate from the broil
element. This function is
recommen e for single-rack
baking. Use this setting for
baking, roasting, an
casseroles.
Broil
This function is a ry-heat
cooking metho , using irect
or ra iant heat on three
ifferent settings: low,
me ium an high. The
istance between the foo s
an the broil elements
etermines broiling spee .
This function is recommen e
for small, in ivi ualize cuts,
such as steaks, chops an
patties.
Bake
Product Controls
Product Controls
Professional Series Premiere double oven is s own above.
Broil El m nt
Int rior
Ov n Light
Ov n Racks
(3/upp r ov n;
3/low r ov n)
Bak El m nt
Low r Ov n
Mod l/S rial
Numb r Plat
(und r control
pan l)
TruConv c™
El m nt
(b hind baffl )
Int rior Ov n Light
Ov n Function
and T mp ratur
Controls
Broil
Ov n Control Pan l
El ctronic K y
Pad Entry
M at Prob (available on Premiere mo els)
Plug
Cable Probe
Handles
M at Prob Jack
12
TruConv c™
With this function, only the rear
element operates at full power.
There is no irect heat from the
bottom or top elements, an
the motorize fan in the rear of
the oven circulates for even
heating. Use this setting for
foo s that require gentle
cooking, such as pastries,
soufflés, yeast brea s, quick
brea s, an cakes. This setting
pro uces brea s, cookies, an
other bake goo s with an
even texture an gol en crusts. No special bakeware is require . Use this
function for single-rack baking, multiple-rack baking, roasting, an preparation
of complete meals. This setting is also recommen e when preparing large
quantities of bake goo s at one time.
Conv ction Bak
With this function, the bottom
element operates at full power,
an the top broil element
operates at supplemental
power. The motorize fan in the
rear of the oven circulates
heate air, provi ing a more
even heat istribution. This
even circulation of air equalizes
the temperature throughout
the oven cavity an eliminates
the hot an col spots foun in
conventional ovens. A major benefit of convection baking is the ability to
prepare foo in larger quantities using multiple racks. When roasting using this
setting, cool air is quickly replace , searing meats on the outsi e an retaining
more juices an natural flavor on the insi e with less shrinkage. With this
heating metho , foo s can be bake an roaste at the same time with
minimal taste transfer, even when ifferent ishes are involve , such as cakes,
fish, or meat. The hot air system is especially economical when thawing frozen
foo . Use this setting for baking an roasting.
13
Touch Pa Functions Touch Pa Functions
Conv ction Broil
Using this function, the top
element operates at full
power. This function is exactly
the same as regular broiling
with the a itional benefit of
air circulation by the
motorize fan in the rear of
the oven. Smoke is re uce
since the airflow also re uces
peak temperatures on the
foo . Use this setting for
broiling thick cuts of meat.
Conv ction Roast
With this function, the
convection element runs in
conjunction with the inner
an outer broil elements.
The reversible convection
fan runs at a higher spee
in each irection, allowing
the moisture to be seale
insi e large cuts of meat,
such as roasts. This saves
time when compare with
single fan convection roast
mo es. Use this setting for
whole turkeys, whole
chickens, an roasts.
NOTE: Because t is function uses a ig -speed convection fan for
optimum cooking performance, some noise may be noticed from t is
ig fan speed. T is is normal.
D frost
With the temperature control off, a motorize fan in the
rear of the oven circulates air. This fan accelerates natural
efrosting of the foo without heat.
NOTE: To avoid sickness and food waste, do not allow
defrosted food to remain in t e oven for more t an
two ours.
TruConvecTM
convection bake
Product Controls
Product Controls
convection broil
convection roast
1514
Touch Pa Functions Touch Pa Functions
Proof*
This function uses a low temperature to create an optimal
environment for the yeast to rise in many types of ough.
R cip s*
This setting accesses, programs, an saves
cooking cycles from favorite recipes.
Int rior Ov n Light Controls
The upper an lower ovens have interior oven lights
controlle by the right touch pa . Push the light button to
turn the interior oven lights on an off.
Ov n Lock
This chil protection function prevents the oven controls
from being activate when the oven is not in use.
S ttings
Use this function to access, program, an customize special
features of your oven. Special features inclu e tones,
timeouts, isplay brightness, an the Sabbath mo e.
*Note: The AUTO-ROAST, PROOF, RECIPE an PROBE functions are
inclu e on the Premiere mo els.
D hydrat
With this function, a motorize fan in the rear of the oven
circulates warm air. Over a perio of time, the water is
remove from the foo by evaporation. Removal of water
inhibits growth of microorganisms an retar s the activity
of enzymes. It is important to remember that ehy ration
oes not improve quality; only fresh, top-quality foo s
shoul be ehy rate in your oven.
S lf-Cl an
The self-cleaning cycle is esigne to eliminate the nee
for scrubbing an scouring foo bake onto the oven
interior. During this cycle, the oven uses high temperatures
to burn off soils an eposits. An integral smoke eliminator
re uces o ors associate with the soil burn-off. A pow er
ash resi ue is left in the bottom of the oven after
completion of the self-clean cycle. When the oven has
coole , remove any ash from oven surfaces with a amp
sponge or cloth.
Auto Roast*
This function further simplifies roasting by automatically
searing the outsi e of meats, raising the pre-set
temperature by 100° F for a short time to sear the outsi e
of the meat. The temperature then returns to the pre-set
temperature in the stan ar convection roast mo e.
M at Prob *
The probe temperature function is use to automatically
turn the oven off when the internal temperature of meat
being cooke is reache .
Product Controls
Product Controls
17
16
Clocks an Timers
El ctronic
Timing C nt r
The Electronic Timing
Center is use to
program an control
all timing functions on
your Viking appliance.
It has four isplay an programming mo es that are activate by
the four push buttons. Both the Timer an the Cook Time/Stop
Time Mo es can be use to time cooking perio s. These
features can even be use at the same time when both ovens are
in use. For example, you can time-bake a casserole in the upper
oven using the Cook Time/Stop Time Mo e, while broiling in the
lower oven using the Timer. One oven can also be cleane while
timing foo s in the other oven using the timer.
Tim r Alarm
• At the en of a program, the alarm will consist of three beeps,
followe by two beeps every 10 secon s until the “CLEAR”
button is presse .
• Whenever a vali function key is presse or when a control
function starts automatically, one beep will soun .
• When an invali function key is presse , two beeps will soun .
S tting th Clock
The time-of- ay must be set before any other program can be
use . When your oven is first connecte to the power in your
home, the timer isplay will show 12:00.
To Program th Tim -Of-Day:
1. Press either the “UPPER OVEN” or “LOWER OVEN” button.
2. Press the “CLOCK SET” button. The clock will begin to flash.
The wor “CLOCK” will be lit on the isplay.
3. Type in the correct time on the electronic number keypa .
4. Press the “CLOCK SET” button again. The clock is now set.
Alt rnat M thod:
1. Press either the “UPPER OVEN” or “LOWER OVEN” button.
2. Press the “CLOCK SET” button. The clock will begin to flash.
The wor “CLOCK” will be lit on the isplay.
3. Use the up an own arrows to change the current time.
4. Press the “SET” button on the temperature control or the
“CLOCK SET” button on the electronic timing center. The
clock is now set.
Note: T e time-of-day cannot be c anged w ile t ere is a
Bake Hours or Start Time cycle programmed into t e timer.
S tting th Tim r
The timer is esigne for accurate timing an is i eal for baking
elicate items such as biscuits, cookies, an popovers, an for
precise broiling. The timer can be use for timing up to 12 hours.
When setting the timer, the time isplaye will ecrease in 1
minute increments. When the timer counts own to 1 minute, the
timer alarm will give one short beep an the isplay will change
to secon s. When the timer reaches 0:00, the alarm will give one
long beep.
To S t th Tim r:
1. Press the “TIMER” button. The timer will isplay “0:00” an
the wor “TIMER.”
2. Type in the esire uration time on the electronic number
keypa .
3. The timer will start automatically. (To cancel the entry, press the
“CLEAR” button on the left si e of the control panel before
the count own begins an the time is still flashing.)
4.The timer is now set.
Alt rnat M thod:
1. Press the “TIMER” button. The timer will isplay “0:00” an
the wor “TIMER” will be lit on the isplay.
Pr ss and R l as Pr ss and Hold
LTime increases by
one minute
Time increases by
10 minutes
MTime ecreases by
one minute
Time ecreases by
10 minutes
Clocks an Timers
Programming Mod s
Programming Mod s
19
18
Clocks an Timers
2. Use the up an own arrows to set the timer.
3. Press “SET” or “TIMER” to program the timer. (To cancel the
entry, press the “CLEAR” button on the left si e of the control
panel.)
4. The timer is now set.
Cook Tim and Stop Tim
With the Viking oven, you can choose what times you nee to
start an stop cooking your foo . The Cook Time an Stop Time
functions allow you to program your preferences.
H r ’s how it works:
It is 2:00 PM an you woul like to have your inner rea y at 6:00
PM. By programming your oven with a two-hour cook time an a
6:00 PM stop time, your oven will elay cooking until 3:50 PM. At
3:50, the oven will begin preheating. At 4:00 PM, the oven will
begin its two-hour cook time.
Cook Tim and Stop Tim Facts:
Both ovens can be set in ivi ually for Cook Time an Stop Time
functions.
To S t Cook Tim :
1. Select UPPER OVEN or LOWER OVEN.
2. Select an oven function an temperature before setting Cook
Time an Stop Time functions.
3. Press “COOK TIME” an the isplay will flash “0:00” an
“COOK TIME” will be lit below.
4. Use numeric keyboar to enter the amount of time nee e for
cooking.
5. After the time is entere , the isplay will show “COOK TIME”
un er the timer fiel . (To cancel the entry, press the “CLEAR”
button on the left si e of the control panel.)
6. Press “SET” or “ENTER” if the cook time is correct. Cook time
is set.
NOTE: To cancel cook time during its cycle, press “COOK TIME”
and t en press t e “CLEAR” button on t e left side of t e oven
control. Cooking will continue if t e oven is on.
To S t Stop Tim :
1. Set Cook Time, following the steps provi e in the previous
section.
2. Press “STOP TIME” an “STOP TIME” will be lit on the isplay.
3. Use numeric keyboar to enter the time you want to stop for
cooking.
4. After the time is entere , the isplay will flash the time. (To
cancel stop time, press the “CLEAR” button on the left si e of
the control panel.)
5. Press “SET” or “STOP TIME” if the stop time is correct. Stop
time is set an will begin when the oven is preheate .
NOTE: Display will s ow Cook Time and Stop Time. If you
ave entered a time incorrectly, you will ear a long beep
and t e display will not c ange.
NOTE: To cancel stop time during its cycle, press “STOP TIME”
and t en press t e “CLEAR” button on t e left side of t e oven
control. Cooking will continue if t e oven is on.
When Stop Time has been reache :
1. Your oven will soun three beeps, an “HOLD” will appear on
the isplay.
• The oven will stay at 150º F in hol mo e for two hours.
• After two hours, the oven will soun four long beeps an
shut off.
2. Press “OFF” to turn off the oven manually.
Clocks an Timers
Pr ss and R l as Pr ss and Hold
LTime increases by
one minute
Time increases by
10 minutes
MTime ecreases by
one minute
Time ecreases by
10 minutes
Programming Mod s
Programming Mod s