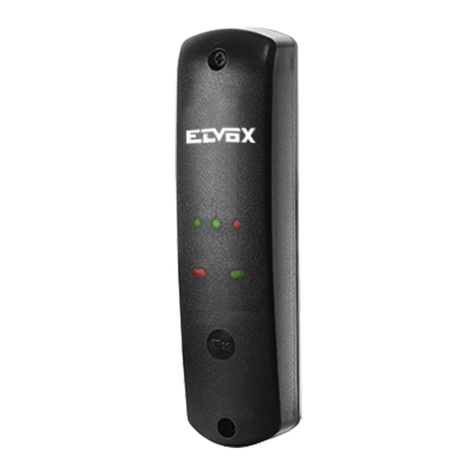
Vimar Elvox ECRU.1 User guide

Installer manual
ECRU.1
2-channel receiver 12/24 V 433 Mhz

2EN
ECRU.1
Contents:...........................................................................................................................................................Page
Product features .................................................................................................................................................1
Power supply......................................................................................................................................................1
Connecting the aerial..........................................................................................................................................1
Output conguration and activation time programming......................................................................................2
Output conguration deletion..............................................................................................................................3
Saving the remote controls.................................................................................................................................3
Saving remote controls via radio .......................................................................................................................4
Deleting a single remote control.........................................................................................................................4
Deleting all the remote controls..........................................................................................................................5
LED signals in normal operation.........................................................................................................................5
WARNINGS FOR THE INSTALLER
Carefully read all instructions and warnings in this document as they provide important information regarding
safety during installation, operation and maintenance.
After removing the packing, check the condition of the device. The packaging must not be left within reach
of children as it is potentially harmful. Installation must be carried out in accordance with national safety
regulations.
This device must only be used for the purpose for which it was expressly designed, e.g. for automation
systems for gates and garage doors.
Any other use is considered improper and therefore hazardous. The manufacturer declines all liability for
damage caused by improper, incorrect or unreasonable use.
Always disconnect the device from the power supply at the main switch before performing maintenance or
cleaning procedures.
In the event of faults and/or malfunctions, disconnect the power supply immediately by means of the switch
and do not tamper with any part. For repairs, contact only a service centre authorized by the manufacturer.
Failure to observe the above may impair equipment safety.
All devices within the installation must be used exclusively for the purpose for which they are intended.
This document must always be kept with all paperwork regarding the installation.
Directive 2002/96/EC (WEEE).
The crossed out wheelie bin symbol marked on the equipment indicates that, at the end of its useful working
life, the product must be handled separately from household refuse and must therefore be assigned to a
differentiated collection centre for electrical and electronic equipment or returned to the dealer upon purchase
of a new, equivalent item of equipment.
The user is responsible for ensuring the appliance is disposed of through the correct channels when no longer
in service. Proper sorted waste collection for subsequent recycling, processing and environmentally conscious
disposal of the old appliance helps to prevent any possible negative impact on the environment and human
health while promoting the practice of recycling materials used in manufacture. For more detailed information
regarding available waste collection systems, contact your local waste disposal service or the shop from which
the appliance was purchased.
Risks associated with substances considered hazardous (WEEE).
According to the new WEEE Directive, substances which for some time have been widely used in electrical and
electronic equipment are considered hazardous to human heath and the environment. Proper sorted waste
collection for subsequent recycling, processing and environmentally conscious disposal of the old equipment
helps to prevent any possible negative impact on the environment and human health while promoting the
practice of recycling materials used in manufacture.

1
VIMAR group EN
ECRU.1
1 - Product features:
Outdoor radio receiver 433 MHz for Elvox Rolling-code or xed code remote controls, with 2 on-board outputs, can work
with outputs in impulsive, two-position stable or timed modes and has programming and diagnostics buttons and LEDs
Technical data:
Power supply 1224 Vac/dc
Max absorption (stand-by) @24 Vdc 10 mA (40 mA)
Frequency 433 MHz
Code Elvox Rolling-code or xed code
Memory 300 radio codes
Number of outputs 2
Output state NO
Relay contacts rating 30 Vdc 1 A max (resistive loads)
Receiver frequency 433 MHz
Aerial input impedance 50 Ω
Sensitivity -100 dBm
Protection rating IP44
Dimensions 156x62x46 mm
Operating temperature -20 to +60°C
ECRU.1
BUZ1
IBRIDO RX
DL1 DL2
P1 P2
JP1
- ANT
PS CH1 CH2 ANT
2 - Power supply:
3 - Connecting the aerial:
-
A
12/24 Vac
~
~
PS CH1 CH2
-
A
12/24 Vdc
-
+
PS CH1 CH2
ECRU.1
BUZ1
IBRIDO RX
DL1 DL2
P1 P2
JP1
- ANT
PS CH1 CH2
ANT

2EN
ECRU.1
Output conguration Description
Impulsive (default setting)
x n
P1
DL1 DL4
DL5
JP3
DL1 DL4
DL5
JP3
DL1 DL4
DL5
JP3
The selected output is activated only while the control button is pressed.
The relay closing time is equal to 0.5 s.
Two-position stable
x n
P1
DL1 DL4
DL5
JP3
DL1 DL4
DL5
JP3
DL1 DL4
DL5
JP3
The outputs are controlled in the following way:
First command: => output activated
Second command: => output deactivated
Timed
x n
P1
DL1 DL4
DL5
JP3
DL1 DL4
DL5
JP3
DL1 DL4
DL5
JP3
The selected output is activated when you press the remote control button and
it remains active for the assigned time interval (independent for each output).
The default value of the activation time is 20 s.
4 - Output conguration and activation time programming:
The outputs can be congured independently as:
- impulsive
- two-position stable
- timed
Step Action Signal
1Press P1 for 3 s to enter the output
conguration programming P1
3 s
DL1 ashes
DL1
x n
P1
DL1 DL4
DL5
JP3
DL1 DL4
DL5
JP3
DL1 DL4
DL5
JP3
2
Press P1 to scroll the outputs and
select the required output:
0 press => output 1
1 press => output 2
P1
x n
The ashing LED signals the selection of the
corresponding output:
DL1 => output 1
DL2 => output 2
DLX
x n
P1
DL1 DL4
DL5
JP3
DL1 DL4
DL5
JP3
DL1 DL4
DL5
JP3
3
Press P2 to select the setting of
the output operating mode as per
the LED DL3 signal. P2
x n
LED DL3 is on, the light colour corresponds to
the output setting:
green => impulsive
red => two-position stable
orange => timed
DL3
x n
P1
DL1 DL4
DL5
JP3
DL1 DL4
DL5
JP3
DL1 DL4
DL5
JP3
When setting the timed output, you will be asked to programme the output activation time:
4Press P2 for 3 s until LED DL3
starts to ash P2
3 s
DL3 ashes to indicate that the activation time
is saved
DL3
x n
P1
DL1 DL4
DL5
JP3
DL1 DL4
DL5
JP3
DL1 DL4
DL5
JP3
5
Press P2 to select the output
activation time:
1 press => 20 s
2 presses => 40 s
3 presses => 60 s
4 presses => 2 min
5 presses => 3 min
6 presses => 4 min
7 presses => 5 min
P2
x n
LED DL3 ashes a number of times equal to
the activation time setting:
1 ash => 20 s
2 ashes => 40 s
3 ashes => 60 s
4 ashes => 2 min
5 ashes => 3 min
6 ashes => 4 min
7 ashes => 5 min
DL3
x n
P1
DL1 DL4
DL5
JP3
DL1 DL4
DL5
JP3
DL1 DL4
DL5
JP3
Programming timing ended
6
Press P1 to scroll the outputs after
the selected one.
Congure other outputs or scroll
through the outputs to the end of
the procedure
P1
x n
All LEDs are switched off
To congure the outputs proceed as shown in the table below:

3
VIMAR group EN
ECRU.1
6 - Saving remote controls:
Note:
The receiver can save rolling-code and xed code remote controls. The rst saved remote control determines the code
accepted by the receiver. The receiver memory does not accept mixed coding.
To change the coding accepted by the receiver, delete all remote controls in the memory.
To save the remote controls proceed as shown in the table below:
Step Action Signal
1Switch off the receiver ECRU.1
2With the receiver off, press and hold down P1
P1
3Holding down P1, switch the receiver on
P1
LED DL1 comes on steady
DL1
x n
P1
DL1 DL4
DL5
JP3
DL1 DL4
DL5
JP3
DL1 DL4
DL5
JP3
4Keep holding down P1 (10 s) P1
10 s
LED DL1 switches off
5 Release P1 to end the deletion
Step Action Signal
1Press P1 to enter remote control programming P1
x 1
DL1 ashes rapidly DL1
x n
P1
DL1 DL4
DL5
JP3
DL1 DL4
DL5
JP3
DL1 DL4
DL5
JP3
2
Press P1 to select the required output to save
the remote control on:
0 press => output 1
1 press => output 2
P1
x n
The rapidly ashing LED signals
the selection of the corresponding
output:
DL1 => output 1
DL2 => output 2
DLX
x n
P1
DL1 DL4
DL5
JP3
DL1 DL4
DL5
JP3
DL1 DL4
DL5
JP3
3Press the push button of the remote control
you want to save
LEDs DL1, DL2 come on steady
for 1 s to conrm the saving.
DL1
DL2
DL3
4Repeat the procedure to save other remote
control buttons
5 - Output conguration deletion:
The output congurations are deleted and restored to the following settings:
all outputs in impulsive mode
activation time for each output 20 s
To congure the outputs proceed as shown in the table below:
x n
P1
DL1 DL4
DL5
JP3
DL1 DL4
DL5
JP3
DL1 DL4
DL5
JP3

4EN
ECRU.1
7 - Saving remote controls via radio:
The saving via radio function is used to save remote controls not in the memory without directly using the receiver
programming buttons, but using only the rst remote control saved or another remote control already in the memory.
This function is available only for rolling-code remote controls.
To enable or disable remote control saving via radio select the following jumper position JP1:
Position jumper JP1 Type of saving via radio
x n
P1
DL1 DL4
DL5
JP3
DL1 DL4
DL5
JP3
DL1 DL4
DL5
JP3
Saving via radio not enabled
x n
P1
DL1 DL4
DL5
JP3
DL1 DL4
DL5
JP3
DL1 DL4
DL5
JP3
Saving via radio available only with the rst remote control in the memory
x n
P1
DL1 DL4
DL5
JP3
DL1 DL4
DL5
JP3
DL1 DL4
DL5
JP3
Saving via radio available with all remote controls in the memory
To save the remote controls via radio proceed as shown in the table below:
Step Action Signal
1
Press button 1 and button 2 on a remote
control already in the memory to enable
the programming via radio procedure
Note: the programming via radio procedure
is active for 10 s, after 10 s the receiver
automatically exits the programming
x n
P1
DL1 DL4
DL5
JP3
DL1 DL4
DL5
JP3
DL1 DL4
DL5
JP3
The receiver buzzer gives off an
intermittent beep.
Note: as long as the buzzer is beeping
the programming via radio is active
x n
P1
DL1 DL4
DL5
JP3
DL1 DL4
DL5
JP3
DL1 DL4
DL5
JP3
2
Press the button on the remote control
already saved to copy on the new remote
control. The receiver buzzer beeps to
indicate which output is associated to the
pressed button
x n
P1
DL1 DL4
DL5
JP3
DL1 DL4
DL5
JP3
DL1 DL4
DL5
JP3
1 beep => output 1
2 beep => output 2
x n
P1
DL1 DL4
DL5
JP3
DL1 DL4
DL5
JP3
DL1 DL4
DL5
JP3
3Press the push button of the remote
control you want to save
x n
P1
DL1 DL4
DL5
JP3
DL1 DL4
DL5
JP3
DL1 DL4
DL5
JP3
The buzzer gives off a long beep to
conrm the saving
x n
P1
DL1 DL4
DL5
JP3
DL1 DL4
DL5
JP3
DL1 DL4
DL5
JP3
4Repeat the procedure to save other
remote control buttons The buzzer is switched off
8 - Deleting a single remote control:
To delete a single remote control proceed as shown in the table below:
Step Action Signal
1Press P2 to enter remote control deletion P2
x1
LEDs DL1, DL2 ash rapidly
x n
P1
DL1 DL4
DL5
JP3
DL1 DL4
DL5
JP3
DL1 DL4
DL5
JP3
2Press the button on the remote control to
delete
x n
P1
DL1 DL4
DL5
JP3
DL1 DL4
DL5
JP3
DL1 DL4
DL5
JP3
LEDs DL1, DL2 come on
steady for 1 s to conrm the
deletion.
x n
P1
DL1 DL4
DL5
JP3
DL1 DL4
DL5
JP3
DL1 DL4
DL5
JP3
3Repeat the same procedure to delete
other remote controls All LEDs are switched off
Note:
The delete procedure for a single remote control deletes all the buttons on the remote control associated to the receiver
DL1
DL2
DL1
DL2

5
VIMAR group EN
ECRU.1
9 - Deleting all the remote controls:
To delete all the remote controls proceed as shown in the table below:
Step Action Signal
1 Press and hold down P1 and P2
P1+P2
LEDs DL1, DL2 ash rapidly DL1
DL2
2 Keep holding down P1 and P2
P1+P2 LEDs DL1, DL2, DL3 come on steady
for 1 s
DL1
DL2
3 Deletion successful All LEDs are switched off
x n
P1
DL1 DL4
DL5
JP3
DL1 DL4
DL5
JP3
DL1 DL4
DL5
JP3
x n
P1
DL1 DL4
DL5
JP3
DL1 DL4
DL5
JP3
DL1 DL4
DL5
JP3
10 - LED signals in normal operation:
Event LED Colour Signal
Reception of a radio signal from a remote
control in the memory on output CH1-2 DL1-2 Red 1 blink
Reception of a radio signal from a valid remote
control not in the memory DL1-2 Red 1 ash in sequence DL2-DL1
Several ashes while held down
Reception of a radio signal from an invalid
remote control DL1-3 - No signalling
Note:
You can now change the type of remote control coding accepted by the receiver

Viale Vicenza 14
36063 Marostica VI - Italy
www.vimar.com
ECRU.1 installer EN 00 1705
Table of contents
Other Vimar Receiver manuals
Vimar
Vimar Elvox ECR2.RX User manual
Vimar
Vimar Elvox ECRU.W User guide
Vimar
Vimar Clima 01923 User guide
Vimar
Vimar Eikon 20175 User manual
Vimar
Vimar Elvox 46861.R01 User manual
Vimar
Vimar Eikon 20173 User manual
Vimar
Vimar Clima Series manual
Vimar
Vimar by-me Eikon 20516 User manual
Vimar
Vimar Eikon 20172 User manual
