INSTALLAZIONE E USO DEGLI ARMADI PORTAFUCILI E PORTADOCUMENTI
1 – Installazione
ATTENZIONE: per la vostra sicurezza l’armadio
deve essere solidamente ancorato alla parete
retrostante utilizzando dei tasselli (non forniti in
dotazione) di dimensioni e resistenza opportune,
sfruttando gli appositi fori presenti nella parete
posteriore. Prima dell’installazione si consiglia di
verificare il funzionamento di tutte le parti dell’armadio
(vedi paragrafi 2-10): all’acquisto l’armadio è chiuso. Se
l’armadio è meccanico procedere all’apertura utilizzando
la chiave o, se l’armadio è elettronico, utilizzare la chiave
di emergenza. N.B. : per la pulizia degli armadi tinta
legno utilizzare solo un panno inumidito con acqua.
2 – Applicazione dell’appoggio canna
Prendere l’appoggio canna, togliere la pellicola protettiva
dell’adesivo o degli adesivi (a seconda del modello) e
fissarlo alla parete posteriore dell’armadio ad una altezza
di circa 95 cm. dalla base (vedi fig. 1a). Solo per gli artt.
4430 e 4430.L è possibile posizionare l’appoggio canna
come in fig. 1b.
3 – Montaggio dei ripiani interni (solo
per armadi portadocumenti – vedi fig.2)
1. Posizionare il sostegno laterale Acon il foro di
diametro 8 mm. all’interno dell’armadio a contatto con
la parete destra.
2. Posizionare il sostegno laterale Ball’interno
dell’armadio a contatto con la paretesinistra.
3. Fissare i ripiani Csui sostegni utilizzando gli appositi
ganci. N.B.: la portata massima per ciascun
ripiano è di 15 kg.
4 – Montaggio dei ripiani interni,
dell’appoggio canna e dell’appoggio
calcio (solo per armadi modulari – vedi
fig. 3)
1. Posizionare il sostegno laterale Aall’interno
dell’armadio a contatto con la paretesinistra.
2. Fissare i ripiani Bsui sostegni utilizzando gli appositi ganci. N.B.: la portata massima per
ciascun ripiano è di 15 kg.
3. Prendere l’appoggio calcio C, togliere la pellicola protettiva degli adesivi e fissarlo alla base.
4. Prendere l’appoggio canna, togliere la pellicola protettiva dell’adesivo e fissarlo alla parete posteriore dell’armadio ad una altezza di circa 95 cm.
dalla base (vedi fig. 1a).
5 – Prima apertura / Apertura con chiave
di emergenza (solo per armadi elettronici)
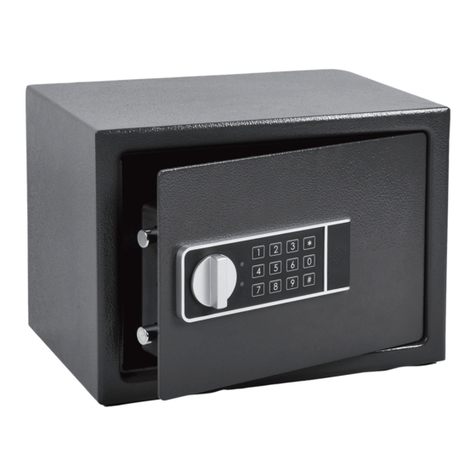
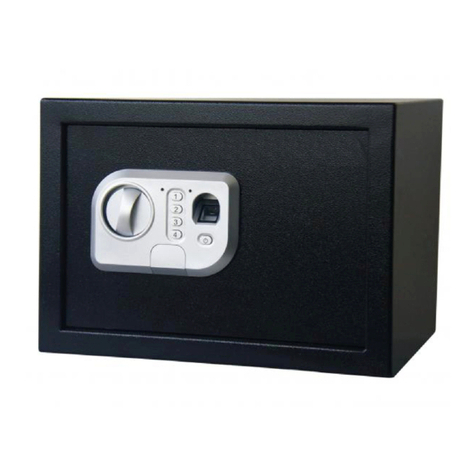
La chiave meccanica di emergenza è contenuta in una busta sigillata posta
all’interno dell’imballo e, oltre che per la prima apertura, serve per aprire l’armadio
anche in caso di danneggiamento della scheda elettronica, di assenza di
alimentazione (pile scariche) o nel caso in cui non si ricordi il codice impostato. Per
aprire la cassaforte con la chiave meccanica di emergenza è necessario:
1. Rimuovere il tappo di plastica posto in alto rispetto alla tastiera così da
accedere al foro d’introduzione della chiave (vedi fig. 4).
2. Inserire a fondo la chiave e ruotare in senso orariofino al fermo.
3. Tenendo la chiave in questa posizione, ruotare il pomolo in senso orario.
Una volta aperto lo sportello, estrarre la chiave e reinserire il tappo nel foro
d’introduzione. La chiave d'emergenza e queste istruzioni sono da conservare con
riservatezza, in ogni caso mai all’interno della cassaforte.
6 - Inserimento / Sostituzione batterie (solo per armadi elettronici)
1. Dopo avere aperto lo sportello dell’armadio accedere al vano portapile rimuovendo l’apposito coperchietto (vedi fig. 1a).
2. Sfilare dal vano il box portapile.
3. Rimuovere le pile (in caso di sostituzione).
4. Inserire le pile nuove facendo particolare attenzione alla polarità,seguendo il senso d’inserimento stampato sul box portapile.
5. Verificare il funzionamento dell’armadio premendo un tasto qualsiasi e controllando che il LED verde ”OK” emetta un breve lampeggio.
6. Infilare il portapile nel vano e richiudere con il coperchietto.
ATTENZIONE: utilizzare solo pile alcaline di tipo AA LR6 da 1,5V. Le 4 pile di una stessa cassaforte devono essere sostituite
contemporaneamente. Evitare che pile di tipo diverso o di differente età e qualità siano utilizzate nello stesso armadio. Quando le pile sono
prossime ad esaurirsi qualunque tasto venga premuto lampeggerà il LED rosso “BATTERY”: procedere pertanto alla sostituzione.
N.B.: la memoria della scheda elettronica non è volatile, cioè l’assenza o la sostituzione delle pile non cancella il codice in memoria.
7 - Inserimento codice (min.3 - max. 8 cifre; solo per armadi elettronici)
1. A sportello aperto (catenacci retratti) tenere premuto il tasto “C” o “COMB” (a seconda del modello) sulla tastiera fino all’accensione del led
verde “NEW CODE”.
2. Entro 10 secondi digitare un codice personale composto da min.3 - max.8 cifre. (N.B.: trascorsi i 10 secondi, se non è stato inserito alcun
codice, ricominciare dal punto 1).
3. Premere il tasto “ENTER” o “E” (a seconda del modello). Un motivo acustico conferma che il codice è stato memorizzato. Attenzione a non
dimenticarlo. Prima di chiudere l’armadio è molto importante verificare che il codice sia stato inserito correttamente seguendo
la procedura descritta nel paragrafo 8.
8 - Verifica codice (solo per armadi elettronici)
1. A sportello aperto (catenacci retratti) ruotare il pomolo in senso antiorario come per chiudere l’armadio facendo uscire completamente i
catenacci dalla serratura.
2. Digitare il codice impostato.
3. Premere il tasto “ENTER” o “E” (a seconda del modello).
4. Ruotare il pomolo in senso orario entro 4 secondi. Se i catenacci non rientrano all’interno della serratura vi è stato un errore di inserimento
codice. Per correggere un eventuale errore ruotare il pomolo in senso orario dopo aver utilizzato la chiave d’emergenza (vedi paragrafo 5) e
ripetere la procedura di inserimento codice descritta nel paragrafo 7.
ATTENZIONE: Viro non risponde di eventuali inconvenienti causati da un errato inserimento o dalla dimenticanza del codice.
9 – Chiusura (solo per gli armadi elettronici)
1. Accostare manualmente lo sportello.
2. Ruotare il pomolo in senso antiorario.
10 – Apertura (solo per gli armadi elettronici)
1. Digitare il codice impostato.
2. Premere il tasto “E” o “ENTER” (a seconda del modello).
3. Ruotare il pomolo in senso orario entro 4 secondi.
11 – Sostituzione del cilindro (solo per gli armadi
con rosetta di sicurezza)
1. A sportello aperto ruotare la chiave in senso antiorario come per
chiudere l’armadio facendo fuoriuscire completamente i catenacci ed
estrarre la chiave.
2. Con un cacciavite a stella svitare le viti Aposte all’interno dello
sportello e sfilare la rosetta di sicurezza B.
3. Inserire la chiave direttamente nel cilindro e, con un cacciavite a
taglio, svitare la vite Cposta all’interno dello sportello sotto i
catenacci.
4. Ruotare leggermente la chiave tirando contemporaneamente verso di
sé fino a sbloccare il cilindro ed estrarlo.
5. Sostituire con un nuovo cilindro con la chiave inserita, ruotandola
leggermente, e spingendo il nuovo cilindro fino in fondo.
6. Con un cacciavite a taglio avvitare con forza la vite C.
7. Verificare il corretto funzionamento del cilindro, a sportello aperto, ruotando la chiave in senso orario e subito dopo in senso antiorario
facendo alternativamente rientrare e fuoriuscire i catenacci. ATTENZIONE: eventuali durezze nella rotazione della chiave sono dovute
ad un errato allineamento del cilindro nella sede. In questo caso svitare la vite C e riposizionare correttamente il cilindro.
8. Estrarre la chiave ed applicare sul cilindro la rosetta di sicurezza. N.B.: l’anello mobile Ddeve trovarsi nella posizione illustrata nella fig. 5.
9. Tenendo con una mano la rosetta di sicurezza, con un cacciavite a stella avvitare con forza le viti A.
10. A sportello aperto inserire la chiave nel cilindro e verificare che la rotazione avvenga senza attriti eccessivi. ATTENZIONE: eventuali
durezze nella rotazione della chiave sono dovute ad un errato posizionamento della rosetta di sicurezza. In questo caso svitare
le viti B e riposizionarla correttamente.
Condizioni e contenuto della garanzia
Tutti i prodotti Viro, essendo sottoposti ai più rigidi collaudi, assicurano la massima affidabilità. Viro S.p.A. si riserva il diritto di apportare modifiche e miglioramenti
senza essere obbligata a modificare le casseforti/armadi prodotte in precedenza. Viro S.p.A. offre garanzia per il periodo previsto dalla legge vigente al momento
dell’acquisto (Decreto Legislativo 02/02/02 n.24 attuativo della Direttiva 1099/44/CE). Previo esame tecnico della Casa o di un Centro Tecnico Autorizzato, Viro
provvede riparando o sostituendo gratuitamente, tutte le parti componenti l’apparecchiatura che risultino difettose per vizio di materiale o di produzione. La garanzia
copre la sostituzione franco Viro dei pezzi, se riconosciuti originariamente difettosi, ma non si estende alle spese di apertura delle casseforti/armadi né ai costi di
rimozione e successiva nuova installazione del prodotto, né ad ogni altro danno o costo, anche se causalmente collegato o connesso ad un malfunzionamento del
prodotto venduto. L’eventuale responsabilità patrimoniale della Viro non potrà andare oltre il limite massimo del prezzo di vendita del prodotto medesimo, anche nel
caso in cui il danno – estendibile al contenuto della cassaforte – sia cagionato da effrazione, furto o scasso. La presente garanzia non copre quelle parti che
dovessero risultare difettose a causa di negligenza o trascuratezza nell’utilizzo, mancata osservanza delle istruzioni d’uso e d’installazione o manutenzione, errata
alimentazione, non idoneità dell’ambiente in cui la cassaforte/armadio è installata, riparazioni effettuate da personale non autorizzato, danni da trasporto o da
circostanze non addebitabili a difetti di fabbricazione. La Viro S.p.A. inoltre non risponde di danni diretti o indiretti provocati a persone o cose da eventuali avarie
della cassaforte/armadio se causati da negligenza, imprudenza, imperizia o dal mancato rispetto di quanto previsto nel libretto istruzioni d’installazione e uso. La
garanzia decorre dalla data di acquisto purché comprovata da un documento probante (ricevuta fiscale, scontrino di cassa, fattura, bolla di accompagnamento o
simili), indipendentemente dalla effettiva installazione del prodotto. In caso contrario la garanzia decorre dalla data di costruzione dell’apparecchiatura a cui si risale
attraverso il numero di matricola. Nel caso di acquisto di modello di cassaforte/armadio dotato dei contatti esterni per l’apertura di emergenza e pertanto privo della
serratura meccanica di emergenza, nel caso fosse impedita la normale apertura dello sportello per situazioni di blocco o malfunzionamento, anche se dovuto ad
incuria o negligenza dell'utilizzatore o a tentativi di effrazione, si libera la Viro S.p.A. da ogni responsabilità per danni causati a cose o persone, anche se connessi o
dipendenti al malfunzionamento, compresi i beni contenuti nella cassaforte, del tutto esonerando la Venditrice dalle spese e i costi per la apertura forzata delle
casseforti/armadi, e da quelli di rimozione e successiva nuova installazione del prodotto e di ripristino dello stato dei luoghi.
fig. 4
fig. 5
N.B.: per la sostituzione del
cilindro utilizzare un qualsiasi
modello avente il nottolino DIN
e le dimensioni indicate nel
riquadro.
COPERCHIETTO
SOLO PER
ARTT. 4430 E 4430.L
fig. 1a
fig. 1b
FORO
GANCIO
fig. 2
GANCIO
fig. 3
Produit conforme à la directive européenne 2014/30/UE
(compatibilité électromagnétique) et à la directive 2011/65/UE
(ROHS). La déclaration UE est téléchargeable du
. Via Garibaldi n.4 - 40069 Zola Predosa (BO) Italy
-
- E-mail: viro@viro.it
Tel. +39 051 6176511 (chiedere del Servizio Assistenza) - Fax +39 051 755079 - Fax Servizio Assistenza +39 051 6176627
