4 - Code check
1.
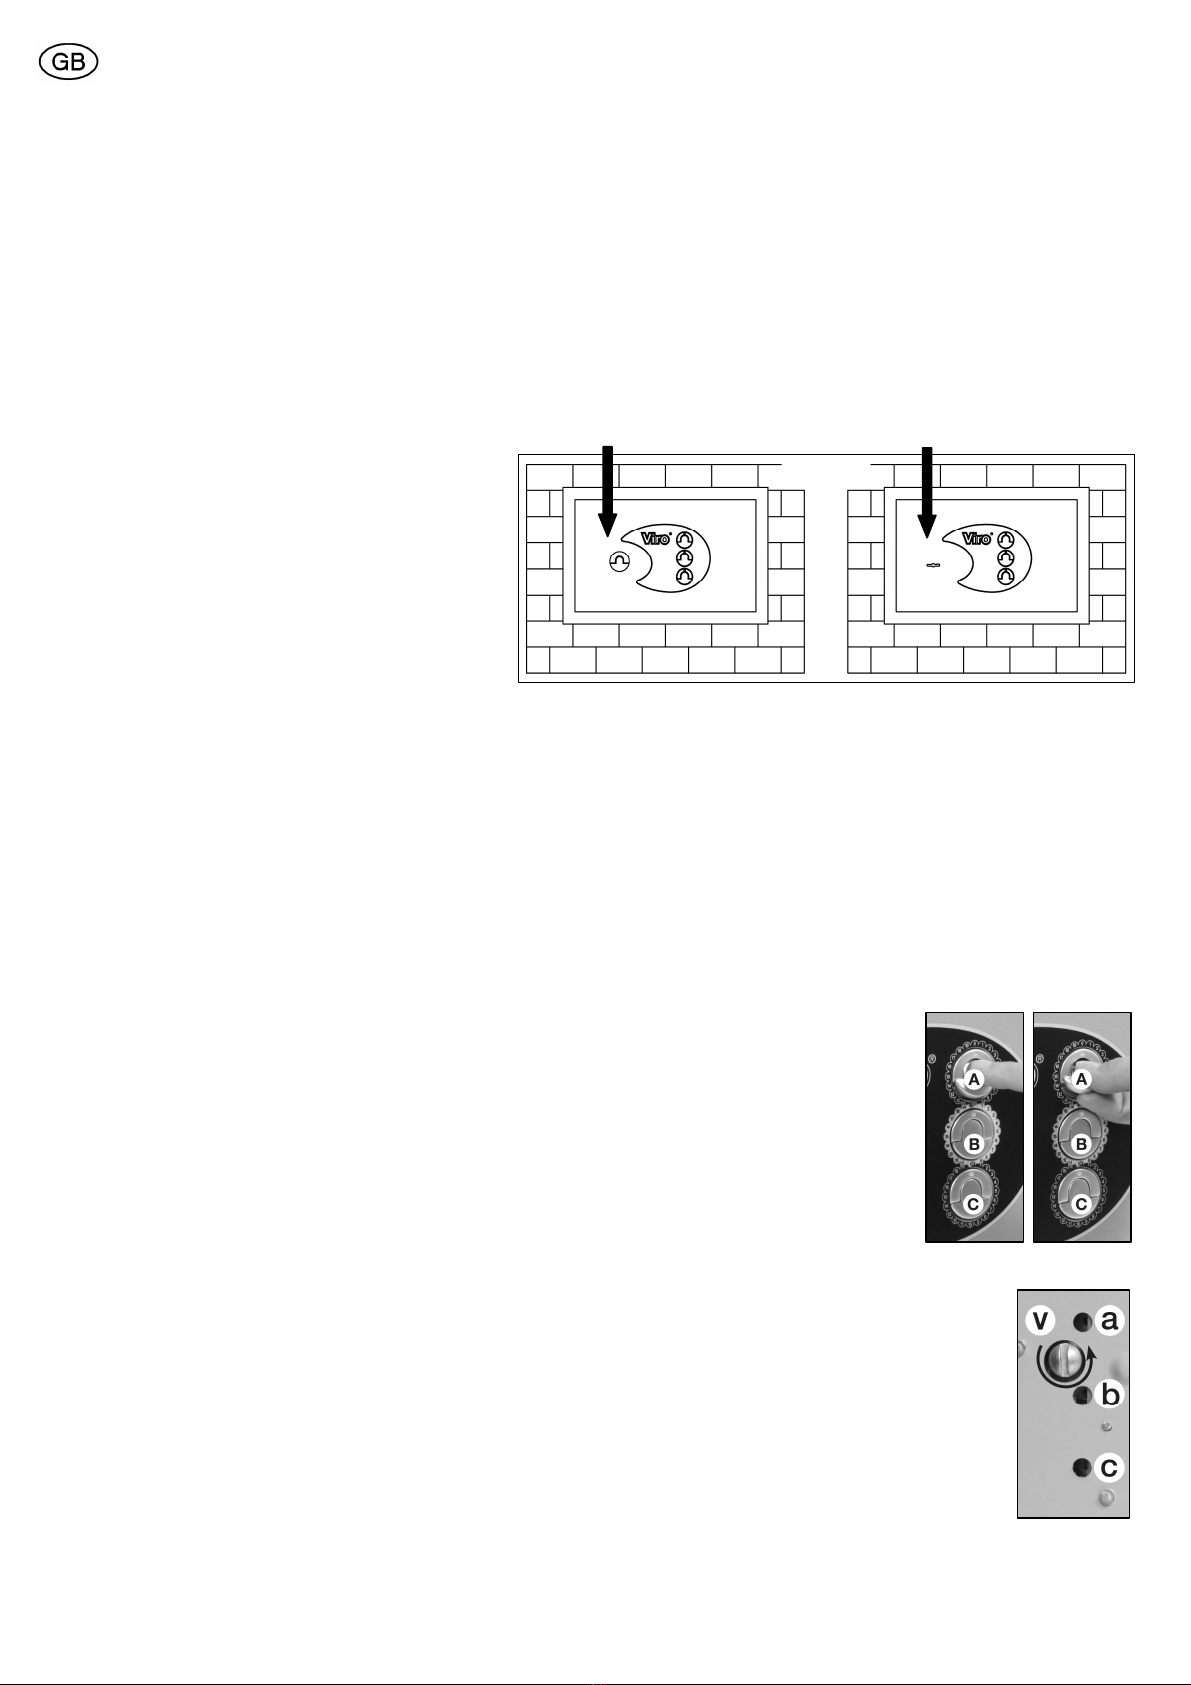
With the door open
, rotate the key (or pull up the knob handle and rotate it) clockwise as for opening the safe.
2. If the deadbolts fall inside the lock, it means the code has been correctly stored and it is possible to close the door. If
deadbolts do not fall inside the lock, it means a mistake has been made during the code setting. In order to correct any
mistake, it is necessary to follow the procedure as per section 5.
ATTENTION: Viro is not responsible for any incon enience caused by an erroneous code setting or if code
is forgotten.
5 - Code reset
This procedure has to be followed in case of erroneous code setting or if the
code has been forgotten and should be effected by means of the three holes
placed inside the door in correspondence of the external knobs.
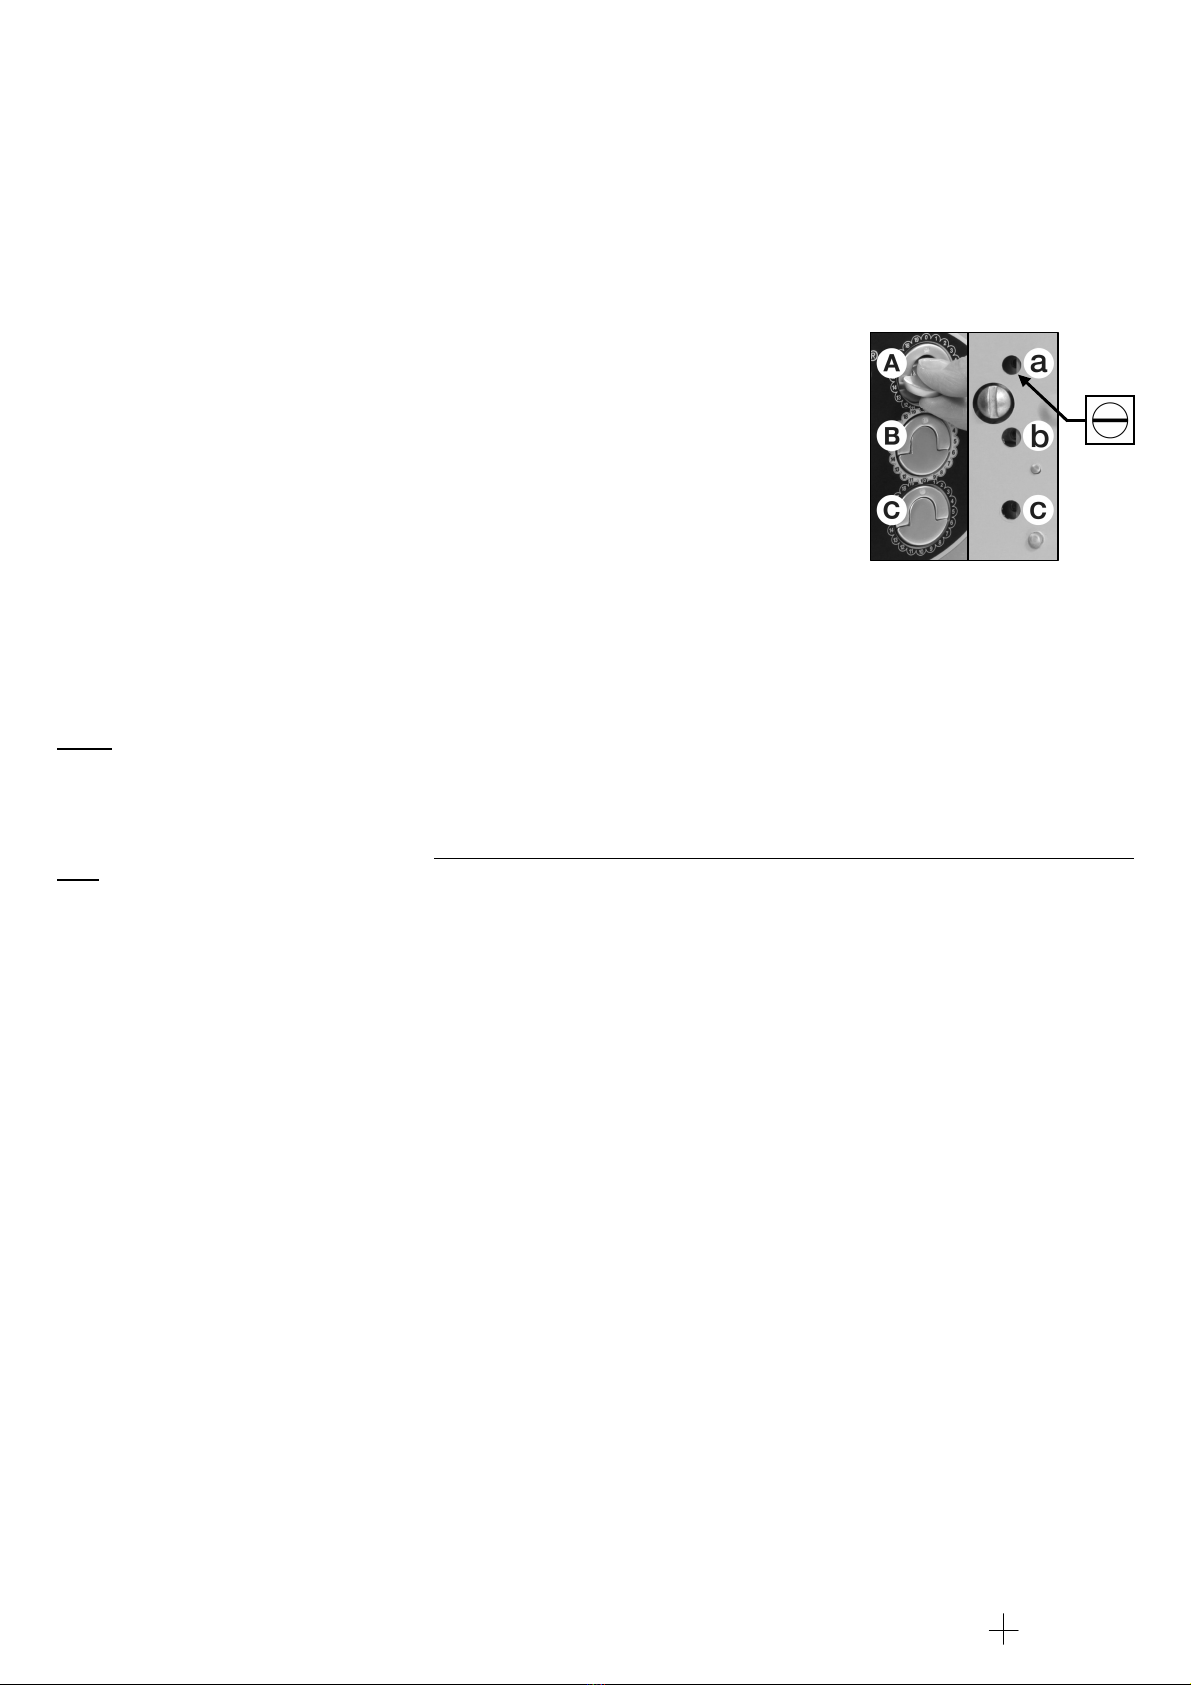
1. Put the three external knobs A
AA
A, B
BB
B and C
CC
C in the position “zero”, pulling their handles up
(see Photo I) and rotating them counter-clockwise until they stop (yellow dots
corresponding Nr. 0).
2. tarting from hole a
aa
a placed inside the door (see Photo III), rotate clockwise handle
corresponding knob A
AA
A until an horizontal line appears inside the hole (see Photo IV).
3. Repeat point 2 for the hole b
bb
b and the knob B
BB
B and for the hole c
cc
c and the knob C
CC
C.
4. et a new code as described in section 3.
6 - Closing
1. Draw near the door manually.
2. Rotate the key (or the knob) counter-clockwise.
3. et a random code on the knobs.
Note: keep the spare key in a safe place and not inside the safe. Do not lea e the spare key in a place
where it can be seen or temporarily withdrawn to make an illegal copy. If the keys falls down and a
deformation of one or more teeth can be noticed, make a copy and destroy the damaged key. Do not e en
entrust the key to a third party, not e en for short periods. If any questions arise concerning the
confidentiality of the place where the spare key is kept do not hesitate to contact your dealer to purchase
a replacement door with a new lock. To request duplicate keys to Viro, it is necessary sending the sample
key.
Warranty conditions and contents
Warranty conditions and contentsWarranty conditions and contents
Warranty conditions and contents
All Viro products undergo the most stringent testing and therefore guarantee reliability. Viro pA reserves the right to introduce modifications or
improvements to its products, which may deem desirable without obligating itself to install such improvements to its previously manufactured safes. Viro
pA guarantee their products to be free from defects in material and manufacturing for the period provided for by effective law on purchasing time (Decr.
Leg. 2/02/02 n.24 that puts into effect Directive No 1099/44/CE) and will replace or repair at no charge all component parts of the product under warranty
– after consultation with our technical department or an authorised ervice Centre - should they be defective due to a manufacturing or material flaw. The
warranty covers the replacement of the components, ex-works, if defective, but does not include the safe opening costs, the removing costs and the final
replacement, or any other cost or damage, even though related to the defective product. The property damage responsibility of Viro pA will be in no
case higher than the selling price of the article itself, even if the damage – including the content of the safe – is due to forcing, theft or burglary. The
warranty shall not apply to any Viro component part which has been subject to misuse, neglect, incorrect installation of maintenance, or to a use in
contravention of instructions furnished by the Company. The warranty does not extend to safes which have been installed in unsuitable environments or
which have been repaired by unauthorised personnel or suffered damage in transit, or to any other circumstance not ascribable to faults in manufacture.
Viro pA shall not be liable for any direct, indirect and consequential damage and/or injury arising from the malfunctioning of their product or from the
safes, or if caused by negligence or by lack of compliance with the instructions manual. The warranty shall take effect from the date of purchase. ales
receipt (fiscal receipt, cash-desk receipt, invoice, delivery note or the like) validates the date of purchase, irrespective of the actual fitting date. Failing a
sales receipt, the warranty shall be calculated from the date of manufacture of the product, which shall be determined from its serial number. In case of
purchasing of safe/cabinet supplied complete with external contacts for the emergency opening (without mechanical emergency opening), should the
safe not be open due to its block or malfunctioning, Viro .p.A. is free from any responsibility for damages caused to things or persons, even if
connected or depending to the malfunctioning, including the content of the safe. The eller is completely excluded from any costs and charges for forced
opening of the safes/cabinets, their removal and further new installation of the product and the restoration of the places conditions.
ENVIRONMENTAL INFORMATION:
the product at the end of its life must be collected separately from other waste. After
use, the user will be responsible for the product and will bring it to an appropriate recycling center or return it to the dealer when
purchasing a new produ
.
VIA GARIBALDI 4 - 40069 ZOLA PREDOSA (BO) ITALY
TEL. +39.051.6176511 - FAX +39.051.755079
21434249300410C Rev.1 - 06/13
Photo IV
OUT IDE
OUT IDEOUT IDE
OUT IDE