Minibar Systems SmartBox User manual

OPERATING MANUAL
SmartBox
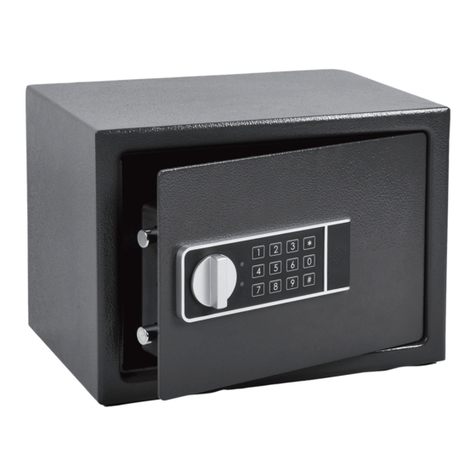
Digital Code Safe

SMARTBOX OPERATING MANUAL—JUNE 200
2
Index
1. How to lock and o en the safe 3
1) To Lock the Safe with a Personal Code 3
2) To Open the Safe with a Personal Code 3
2. How to set room number to safe 4
3. Override rocedures 5
1) To Open the Safe with Master Code using Safe Keypad 5
2) To Open the Safe with the Emergency Key 6
3) To Open the Safe with the Handheld Unit 7
4. Audit Functions 8
1) How to Download Data from Safe to Handheld Unit (last 100 records) 8
2) How to Download Data from Safe to Handheld Unit (last 50 errors) 8
3) How to Download Data from Handheld Unit to Computer
5. Programming Instructions 13
1) Handheld Unit Manager Code 13
2) Handheld Unit Opening Code 13
3) Handheld Unit Serial Code 13
4) Safe Master Code 14
5) Safe Parameters 14
6. Trouble Shooting Guide 17
7. Installation 18
8. How to Insert/Re lace Batteries 19
9. Global Offices 20

SMARTBOX OPERATING MANUAL—JUNE 200
3
1. How to Lock and O en Safe
For the ur ose of security, lease change the factory master codes rior to use.
1) TO LOCK THE SAFE WITH A PERSONAL CODE
a) Close the safe door.
b) Enter a personal code (4 digits) and press “#” key. The door will be locked automatically,
and the display will show “CLOSED”.
Note: If the door is not shut properly, the display will show “ERROR2” and the bolts are
retracted automatically. Remove the barrier and try again.
c) In case of an incorrectly entered digit, you can delete it by pressing “*”.
2) TO OPEN THE SAFE WITH A PERSONAL CODE
a) Enter the same code.
b) The door will open automatically, and the display will show “OPENED”.
Note: The display will show “ERROR” if incorrect code is entered.

SMARTBOX OPERATING MANUAL—JUNE 200
4
2. How to Set Room Number to Safe
1) TO SET ROOM NUMBER TO THE SAFE
a) Connect the Handheld Unit to the safe
b) Press “*” button twice, and the LED display will show “PROG”
c) Enter “8100”, and then press “*” button and “6” before it disappears
d) The LED display will show “NO”
e) Enter a 4 digit room number (ex. “0301”), then press “#” to confirm
Switch off the Handheld Unit to reserve battery ower

SMARTBOX OPERATING MANUAL—JUNE 200
5
3. Override Procedures
For the ur ose of security, lease change the factory master codes rior
to use. Please kee the emergency key in a safe lace.
1) TO OPEN THE SAFE WITH MASTER CODE USING SAFE KEYPAD
a) Enter the master code in use (pre-selected 0-0-0-0-0-0)
b) the door will open automatically, display will show “OPENED”
To Set a New Master Code (it must be 6 digits)
To change the master code, the safe must be opened (i.e. the bolts are retracted).
a) Press key “*” twice, the display shows “PROG”
b) enter old master code (pre-selected 0-0-0-0-0-0).
c) When display shows “NEW”, enter a new master code of 6 digits.
d) The display will show “AGAIN”. Re-enter the new master code, the display will show
“DONE” to indicate that new master code has been changed successfully.
Note: Do not use Master Code if override rocedure is done with Handheld Unit
(see Cha ter 3.3 To O en the Safe with Handheld Unit)

SMARTBOX OPERATING MANUAL—JUNE 200
6
3. Override Procedures (cont.)
2) TO OPEN THE SAFE WITH THE EMERGENCY KEY
Note: This rocedure to be used only if electronic ones failed
a) Unscrew the Allen Key plastic cover to access the keyhole.
b) Make a hole in the plate of the door using metal drill diameter 5/16” (8 mm).
c) Insert the emergency key and turn clockwise 0 degrees to open the door
d) Open the door safe
Front panel with key
hole location
Insert key here after drilling the
plate
Emergency key

SMARTBOX OPERATING MANUAL—JUNE 200
7
3. Override Procedures (cont.)
3) TO OPEN THE SAFE WITH THE HANDHELD UNIT
There are two Emergency Codes:
1) Manager Code
2) Opening Code
In case you forget the MANAGER CODE or OPENING CODE, lease call your
Minibar Systems office to reset your Handheld Unit.
To open the safe with emergency unit, please follow the following instructions:
a) Connect handheld unit to the safe
b) Emergency unit position: On
c) Input the Manager Code: (pre-selected 5555), the screen will show: 5 5 5 5 - -, then press
“#” (ENTER).
d) The word “GOOD” will appear on the screen. Now the Handheld Unit is programmed and
ready for entering the second code.
e) Input the opening code (pre-selected 6666), the screen will show: 6 6 6 6 - -, then press
“#” (ENTER).
f) The LED display on the Handheld Unit and on the safe will show “OPEN” and then
“OPENED”, the safe door will be opened.

SMARTBOX OPERATING MANUAL—JUNE 200
8
4. Audit Functions
Each safe should have its own room number rior to any audit function
(see Cha ter 2 of this manual)
1) HOW TO DOWNLOAD DATA FROM SAFE TO HANDHELD UNIT (last 100
records)
a) Connect the Handheld Unit to the safe
b) Press “*” button twice, and the LED display will show “PROG”
c) Enter “8100”, and then press “*” button and “8” before it disappears
d) Handheld Unit will read the 100 last opening records from the hotel safe, and when the
LED display counted to 100 and shows “END” this means Handheld Unit has completed
reading of the audit records.
Switch off the Handheld Unit to reserve battery
2) HOW TO DOWNLOAD DATA FROM SAFE TO HANDHELD UNIT (last 50 errors)
a) Connect the Handheld Unit to the safe
b) Press “*” button twice, and the LED display will show “PROG”
c) Enter “8100” and then press “*” button and “7” before it disappears
d)
Handheld Unit will read the last 54 incorrect attempt records from the hotel safe. The
screen will appear “ENA” when it is done.
Switch off the Handheld Unit to reserve battery

SMARTBOX OPERATING MANUAL—JUNE 200
4. Audit Functions (cont.)
3) HOW TO TRANSFER DATA FROM HANDHELD UNIT TO COMPUTER
Before you roceed:
Make sure the audit software has been ro erly installed. For
installation details refer to instructions su lied with Software CD.
a) If you HAVE a serial ort on your com uter: Connect Handheld Unit to the
converter and plug into serial port on your computer.
If you DO NOT HAVE a serial ort on your com uter: Connect Handheld Unit to
the Converter and the Converter to the Serial/USB adapter (not supplied) in blue).
Connect to any USB port on your computer.

SMARTBOX OPERATING MANUAL—JUNE 200
10
4. Audit Functions (cont.)
b) Start Hotel Ver: R7.2.06 Software on your computer. You are requested to enter the CD
Key: 70081-43642-68082
Enter your login and Password, press “Log On”
to access the main screen

SMARTBOX OPERATING MANUAL—JUNE 200
11
4. Audit Functions (cont.)
c) Press “System Setu ” to assign a Comm Port to the serial port. If you need assistance
please contact your Minibar Systems Representative.
d) Press “Read Records”. Switch on Handheld Unit and press “Communication” to get
the list of rooms you can download
Select the room number from the list
e) Press “Start” to start reading the records, and then “Close” the window

SMARTBOX OPERATING MANUAL—JUNE 200
12
4. Audit Functions (cont.)
f) Press “Browse” to display all records
g) Press “Preview” to view records
h) Press “Print”, “Print Preview” and “Save as” to print and save your records

SMARTBOX OPERATING MANUAL—JUNE 200
13
5. Programming Instructions
1) HOW TO MODIFY THE MANAGER CODE OF HANDHELD UNIT
a) Emergency unit position: On
b) Press the “*” (CLEAR) button, the word “PROG” will appear on the screen.
c) Enter the current existing code (factory code is 5555)
d) Press “*” (CLEAR) key, then Press “1”, the word “NEW- C1” will appear on the screen.
e) Enter a new 4 digit code and “#” (ENTER). The word “DONE” will appear on the screen.
2) HOW TO MODIFY OPENING CODE OF HANDHELD UNIT
a) Press the “*” (CLEAR) button twice, the word “PROG ”will appear on the screen.
b) Enter the current existing code (factory code is 6666)
c) Press “*” (CLEAR) and “2.” The word “NEW- C2 ” will appear on the screen.
e) Enter a new 4 digit code and “#” (ENTER). The word “DONE” will appear on the
screen.
3) HOW TO SET SERIAL CODE ON THE HANDHELD
a) Press twice the “*” (CLEAR) button. “PROG” will appear on the screen.
b) Press “8100 * 5,” “NEW” will appear on the screen.
c) Enter new serial code on handheld unit (same as safe serial code) and press “#”
(ENTER). “AGAIN” will appear on the screen.
d) Enter the serial code again and press “#” (ENTER) to confirm, “DONE” will appear on
the screen, the new serial code is set.
Explanation
1) The bac -up serial code for the safe and corresponding Handheld on delivery from manufacturer is
“000000.” Please note that the safe’s serial code is fixed, but you may modify the Handheld Unit’s
serial code according to the above instructions. You can open the safe with the Handheld Unit only
when both the handheld and safe codes are identical. We differ the serial code for the safe and
Handheld Unit in order to secure the customer’s property.
2) When you forget the opening code or manager code and execute the emergency operation to reset
them to 5555 and 6666 respectively, you must reset the Handheld Unit’s serial code to “000000”
synchronously. So you must modify the Handheld Unit’s serial code to eep it consistent with the
safe.

SMARTBOX OPERATING MANUAL—JUNE 200
14
4) HOW TO MODIFY MASTER CODE ON SAFE (IF USED)
To change master code, safe must be open (i.e., the bolts retracted)
a) Press the “*” button twice. The word “PROG” will appear on the screen.
b) Enter old master code (pre-selected 0-0-0-0-0-0). Display shows “NEW”
c) Enter a new 6 digit master code. The display will show “AGAIN”
d) Re-enter the new master code. The display will show “DONE” to indicate new master
code has bee changed successfully.
5) HOW TO SET SAFE PARAMETERS
a) Leave the door open
b) Press “*” twice quickly, the display will show “PROG”
c) Enter programming code “810018” and the screen will be ready for setting program
codes of the safe. Three displays for program code setting are available, as explained
below:
A) First screen
Default number is 172331
(1) Code dis lay osition:
Tap 0 – do not show each personal code entered
Tap 1 – show each personal code entered
Tap 2 – show each personal code entered, the code won’t show when closed
(2) Setting number of digits for code
Tap 3— set the 3-digit code
Tap 4— set the 4-digit code
Tap 5— set the 5-digit code
Tap 6— set the 6-digit code
Tap 7— set the 3–6 digit code
5. Programming Instructions (cont.)
(1) (2) (3) (4) (5) (6)
1 7 2 3 3 1

SMARTBOX OPERATING MANUAL—JUNE 200
15
(3) Setting lock time after 4 failed attem ts to in ut o en code
Tap 0 – locking time 0 minutes
Tap 1 – locking time 15 minutes
Tap 2 – locking time 30 minutes
(4) Setting use of master code
Tap 2 – master code disabled
Tap 3 – master code enabled
(5) Recording information
Tap 0 – record door opening information
Tap 3 – record door opening/closing information
(6) Setting working mode
Tap 0 – User will enter a personal code and then press the locking key “#” to close the door.
The safe will save the code at the last closing. User will need only press “#” to close the
door next time
Tap 1 – The user will enter their personal code and then press locking key “#” to close the door.
Now you can set a new code while the door is open. This is suitable for hotel use.
Press the confirmation key “#” and the system will proceed to second screen.
B) Second screen: Date
To set current date: dd/mm/yy
0 6 0 2 0 4
(1) (2) (3) (4) (5) (6)
d d m m y y
This indicates the current date is February 6, 2004.
Press the confirmation key “#”, and the system will proceed to third screen
5. Programming Instructions (cont.)

SMARTBOX OPERATING MANUAL—JUNE 200
16
5. Programming Instructions (cont.)
C) Third screen: Time
To set current time: hh/mm/ss
1 4 2 5 0 0
(1) (2) (3) (4) (5) (6)
h h m m s s
This indicates the current time is 14:25:00.
Press confirmation key “#”, and the system will exit the programming mode.

SMARTBOX OPERATING MANUAL—JUNE 200
17
6. Troubleshooting Guide
1) ERROR CODES SHOWN ON THE LED DISPLAY AND
a) ERROR – The code you have entered is not correct. Check the code and re-enter.
b) ERROR 1 – The locking bolts are blocked and cannot retract. Push the door inward to
release the blocked bolts. Try to open the safe by re-entering the code.
c) ERROR 2 – The door is not shut properly and the bolts have been retracted
automatically. Remove the barrier and try it again.
2) Battery Condition—BA-HI/LO (Battery high/low )
The batteries will last for 12 months for normal use. The display will show “BA-LO” if the
batteries need to be replaced. Use 4 AA / LR6 alkaline batteries only.
Note: Please refer to local ordinances and environmental standards for proper battery disposal.

SMARTBOX OPERATING MANUAL—JUNE 200
18
7. Installation
Anchoring bolts
The safe must be anchored by securing
either the back or the bottom of the safe.
You may select the expansion bolt for a
concrete wall surface or select a clamping
bolt for a wooden surface.
Example of a clamping bolt
Securing the bottom of the safe
Securing the back of the safe
Safe Dimensions
Model Dimensions
H x W x D (mm)
Net weight
(kgs)
Volume
(litres)
S 200 x 350 x 220 10
M 200 x 435 x 383 14
22
L 254 x 483 x 400
17 34
Technical S ecifications
Thickness of body
Thickness of door
Material of body, door and bolt work
Material of fixing screws
2 mm
5 mm
solid steel DIN ST37-2

SMARTBOX OPERATING MANUAL—JUNE 200
1
8. How to Install/Re lace Batteries
To install/replace the batteries in the safe a small cross headed screwdriver is required.
The battery type used is size 1.5v, AA/LR6 (AM3).
NB Replace all four batteries complete, do NOT mix with old batteries or use with other types.
To install/replace the batteries in the SmartBox product, proceed as follows:
a) Open the SmartBox door.
b) Remove screw from battery compartment in the door and unclip the compartment
cover (see Diagram A)
Diagram A Diagram B
Battery compartment 4 AA/LR6 type batteries.
cover retaining screw Note orientation
c) Install the four batteries provided or replace with new batteries (see Diagram B). Note
the correct orientation of the batteries when inserting. The base of the plastic
compartment has imprinted guidance to help you.
d) Clip the cover into place and retain with the screw.
Please dispose and recycle the spent batteries in accordance with local ordinances and environmental
standards legislation.
The re lacement batteries must conform to the latest Battery Regulations Directive
Retaining
screw

SMARTBOX OPERATING MANUAL—JUNE 200
20
9. Global Offices
Switzerland & Austria
Minibar Enterprises AG
Blegistrasse
CH-6340 Baar
tel +41 41 767 23 00
fax +41 41 767 23 23
info@minibar.ch
www.minibar.ch
Asia
Minibar Systems Asia Pte Ltd
31 Kaki Bukit Road 3, #03-01C
Singapore 417818
tel +65 6741 3373
fax +65 6741 6303
msasia@singnet.com.sg
www.minibar.ch
Nordic & Scandinavia
Minibar Norge AS
Fagernes 4
N-5043 Bergen
tel +47 7 5 4 84
fax +47 55 31 10 85
minibar.norge@minibar.ch
www.minibar.ch
Canada
Minibar Systems Canada
21 Queen Street East, Unit #201
Brampton, Ontario L6W 3P1
tel 05-487-0620
fax 05-487-0622
www.minibarNA.com
United States
Minibar North America, Inc.
7340 Westmore Road
Rockville, MD 20850
tel +1 301 30 1100
fax +1 301 30 1115
info@minibarNA.com
www.minibarNA.com
France & Benelux
Minibar Services (France) Sarl
4, Passage Saint-Antoine
FR- 2508 Rueil-Malmaison Cedex
tel +33 1 55 47 07 07
fax +33 1 47 4 61 62
minibar.france@minibar.ch
www.minibar.ch
Germany
Minibar (Germany) GmbH & Co.
Venloer Strasse 151-153
D-50672 Köln
tel +4 2271 3 120
fax +4 2271 3 11
minibar.germany@minibar.ch
www.minibar.ch
S ain & Portugal
Minibar S.A.
c/o Pedro Avila Suarez
Calle Tutor n
o
43
28008 Madrid
tel +34 630 061 433
minibar.spa[email protected]
United Kingdom & Ireland
Minibar UK Ltd
Suite 18 Maple Court
Grove Park Business Estate
White Waltham, Maidenhead
Berks SL6 3LW United Kingdom
tel +44 1628 820 800
fax +44 1628 820 801
minibar.uk@minibar.ch
www.minibar.ch
Table of contents