Virtuox VPOD-H User manual

VPOD-H Product Features:
• FDA Approved
• Data storage and transmission to VirtuOx
Laboratory for Oxygen Qualification
• Data storage and transmission to VirtuOx
O.E. Office Edition for Non Qualification
• USB interface for data transfer
• 72 hours of data storage
• Records at 1 second intervals
• Three display modes
• Special design for sleep monitoring
• LCD Displays SpO2, SpO2 waveform & Pulse Rate
• Low power consumption, uses 2 AAA battery
• Battery low indicator
• 3 year warranty
VPOD-H, a VirtuOx Pulse Oximetry Device
PATIENT RANGE
Adult, Pediatric and Neonatal patients
SpO2
Measurement range 0%-99%
Resolution 1%
Accuracy 80%-99%: +2%
70%-80%: +3%
0%-69%:unspecified
HEART (PULSE) RATE
Range 0-254 bpm
Resolution 1bpm
Accuracy +2bpm or +2%
Voice PR tone modulation
DISPLAY
Type LCD
Parameters SpO2, PR, Waveform,
Bargraph
Mode Three display modes
Brightness Adjustable 10 levels
STORAGE
Patient ID 10 patients
Data records up to 72 hours
ENVIRONMENTAL
Operating Temperature 0°C-50°C
Storage Temperature -10°C - 60°C
Operating Humidity 15%RH - 95%RH
Storage Humidity 10%RH - 95%RH
BATTERY
Type 2AA alkaline or rechargeable
batteries
Operation time About 24 hours for normal
operation
CLASSIFICATION
Type of protection Internally powered equipment
Safety IEC 60601-1
MECHANICAL
Dimensions 130 x 40 27 mm
Weight 120g (including battery)
VPOD-H
$219 with
FREE Software!
Technical Specifications
VirtuOx, Inc, is also a nationwide Medicare approved Independent Diagnostic Testing Facility. “The VirtuOx Total
Solution” consists of our flagship Overnight Oximetry Testing platform VirtuOxTM now at NO CHARGE, combined
with our new, FDA approved VirtuOx compatible Pulse Oximeter Devices called VirtuOx VPODs. The VPOD line
consists of both handheld and wrist worn Oximeters that can store up to 72 hours of recorded memory. By combining a
NO CHARGE software with inexpensive hardware “The VirtuOx Total Solution” is the industry’s most cost effective
way to qualify oxygen patients.
VirtuOxTM is the latest generation of CMS approved Overnight Oximetry Testing software. It is designed to be an easy
to use, trouble free software application available to all HME providers. There is no software to download or purchase
and no contracts to sign. Best of all, the report is available quickly provided you have fulfilled CMS guidelines as a
predicate to obtaining the report. VirtuOxTM is compatible with the VPOD-Wrist, VPOD-Handheld, 920M, 920M Plus,
8500, 2500A and Wrist Ox pulse oximeters.
Data Transmission to VirtuOx
View Summary and Detail
Oximetry Reports
Manage Business with Dashboards
Call Toll-Free 877-337-7111
Call Toll-Free 877-337-7111 • https://www.virtuox.net
No cost software + low cost oximeters =
The industry’s most cost effective way to qualify oxygen patients!
The VirtuOx Total Solution
No cost software + low cost oximeters =
The industry’s most cost effective way to qualify oxygen patients!
The VirtuOx Total Solution
Call Toll-Free 877-337-7111 •
https://www.virtuox.net
Click here
to get yours
NOW!

Ver1.2
VPOD OPERATOR'S MANUAL
1
CONTENTS
CHAPTER 1 INTRODUCTION...................................1
1.1 BRIEF INTRODUCTION ........................................................................................... 1
1.3 ELECTROMAGNETIC COMPATIBILITY.................................................................. 2
1.4 EQUIPMENT CLASSIFICATION .............................................................................. 2
2.1 OUTER VIEW............................................................................................................ 2
2.2 INSTALL THE BATTERIES ...................................................................................... 3
2.4 MONITORING ........................................................................................................... 3
2.5 FACTORS THAT MAY AFFECT THE MEASUREMENT.......................................... 3
3.1 DISPLAY ................................................................................................................... 4
3.2 MODE INTRODUCTION ........................................................................................... 4
3.3 KEY FUNCTIONS ..................................................................................................... 4
3.4 DATA REPLAY AND TRANSMISSION..................................................................... 5
CHAPTER 4 MAINTAINANCE AND REPAIR............5
4.1 MAINTENANCE ........................................................................................................ 5
4.2 TROUBLESHOOTING .............................................................................................. 5
4.3 WARRANTY AND REPAIR....................................................................................... 6
APPENDIX A SPECIFICATIONS.............................7
APPENDIX B ..............................................................7
CHAPTER 1 INTRODUCTION
1.1 Brief Introduction
Thank you for purchasing the handheld pulse oximeter for SpO
2
and Pulse Rate (PR) measurement. The pulse oximeter features PR tone modulation, data storage and data transmission capabilities.
Please read the operator's manual carefully before using this instrument.
Intended use: The purpose and function of the handheld pulse oximeter is to indicate measure and display the functional oxygen saturation of arterial hemoglobin (SpO
2
) and pulse rate for adults and
pediatric patients in hospital, ambulatory, home, and EMS (emergency medical service) environments. The pulse oximeter is intended for spot-checking these levels and not indicated for continuous
monitoring. It can assist the clinician diagnostically by quickly displaying the patient’s %SpO
2
and pulse rate and can additionally store 72 hours of data.
Measurement principle
The principle of pulse oximetry is based on the red and infrared (IR) light absorption of oxygenated and deoxygenated hemoglobin present in the circulating blood. Oxygenated hemoglobin absorbs
more IR and allows more red light to pass through. Deoxygenated hemoglobin conversely absorbs more red light and allows IR light to pass through. The detector probe is placed on the finger. The
probe contains two light emitting diodes (LED’s), one in the visible red spectrum (660nm) and one in the IR spectrum (940 nm). The beams of light from this probe pass through the tissues and some
light is absorbed by the blood and soft tissues depending on hemoglobin concentration. The amount of light absorption at each light frequency is dependent on the degree of oxygenation of
hemoglobin within the tissues.
The microprocessor can select out the absorbance of the pulsatile fraction of blood, i.e. that due to arterial blood, from constant absorbance due to non-pulsatile venous or capillary blood and other
tissue pigments
Principal of Operation
1. Red and Infrared-ray Emitter Diode
2. Red and Infrared-ray Receptor Diode
1.2 Safety Information
Warning, Precaution and Notice
Warning, Precaution and Notice in the manual are special information that prompts the operator’s attention.
Warning - Information concerning something that could possibly hurt the patient or operator.
Precaution - Reminds the user to pay close attention to device operation, failure of which may cause abnormal function of the instrument.
Notice - Informs the user of other important information by suggestion, requirement and supplement.
Warning
Please read this manual carefully before using this device. The user must check that the equipment functions safely and ensure that it is in proper working condition before being used.
Do not use the pulse oximeter in an explosive atmosphere.
Do not use the pulse oximeter in an MRI or CT environment
The pulse oximeter is indicted for use by medical professionals only
The device has no SpO
2
alarms or PR alarms, it is not for continuous monitoring, as indicated by the symbol.
Prolonged use of the probe/sensor or the patient’s condition may require changing the sensor site periodically. Change the sensor site and check skin integrity, circulatory status, and correct
alignment at least every 4 hours. Prolonged use may cause blisters, skin deterioration, and discomfort.
When connecting this monitor to any instrument, verify proper operation before clinical use. Refer to the instrument’s user manual for full instructions. The equipment connected to the pulse
oximeter’s data interface must be certified according to the respective IEC standards, i.e., IEC950 for data processing equipment or IEC 601-1 for medical electrical equipment. All combinations of
equipment must be in compliance with IEC601-1-1 systems requirements.

Ver1.2
VPOD OPERATOR'S MANUAL
2
Sensor malfunction may cause inaccurate data possibly resulting in patient injury or death, so pay close attention to the sensor and inspect it often.
Worn-out data cables may also cause inaccurate data, so if the data is used as a reference to treat a patient, pay special attention to data cable and check it more frequently.
Do not tangle the SpO
2
cable with the wires of ES (Electrosurgery) equipment.
Single use accessories should never be reused.
Precautions
Autoclaving, ethylene oxide sterilizing, or immersing the sensors in liquid may cause inaccurate readings.
The operator must be thoroughly familiar with the information in this manual before using the device.
Unplug the sensor from the monitor before cleaning or disinfecting it.
If liquid is accidentally spilled on the unit, clean and dry thoroughly before reuse.
Do not try to use the SpO
2
and NIBP measurement on the same arm at the same time. This could potentially affect measurement accuracy.
Notices
Operation of this device in an electromagnetic field may influence its accuracy.
SpO
2
measurements may be influenced by high ambient light, especially sunlight. Shield the sensor area as necessary.
Dyes introduced into the bloodstream, such as methylene blue, indocyanine green, indigo carmine, and fluorescein, may influence the accuracy of the SpO
2
reading.
Any condition that restricts blood flow, such as use of a blood pressure cuff or extremes in systemic vascular resistance, may cause a failure to determine accurate pulse rate and SpO
2
readings.
Remove fingernail polish or artificial fingernails before applying SpO
2
sensors. Fingernail polish or artificial fingernails may cause inaccurate SpO
2
readings.
Optical cross-talk can occur when two or more sensors are located in adjoining areas. It can be eliminated by covering each site with opaque material. Optical cross-talk may adversely affect the
accuracy of the SpO
2
readings.
Obstructions or dirt on the sensor’s red light or detector may cause a sensor failure. Make sure there are no obstructions and the sensor is clean.
For routine equipment maintenance, please refer to the service procedures at the associated section as indicated in the manual.
As to the other concerns for attention, please carefully look through the specific chapter in this instruction.
1.3 Electromagnetic Compatibility
This oximeter is designed and tested in compliance with the EMC standard, complying with the international standard for the EMC of the medical electrical device - IEC 60601-1-2. However, because
of the proliferation of radio frequency transmitting equipment and other sources of electrical noise in the health-care and home environments (e.g. cellular phones, mobile two-way radios, electrical
appliances) it is possible that high levels of such interference due to close proximity or strength of a source, may result in disruption of performance of this device.
This apparatus complies with the IEC 60601-1-2 international standard. The requirements of this international standard are: CISPR11, GROP1, and CLASS B.
1.4 Equipment classification
1.5 Accessory
Standard accessories:
Operator’s manual
VPROBE V_SOFT Finger sensor: compatible with The VPOD
Two AA-Size Alkaline batteries
Subscription to Virtuox
Optional accessories:
1. Finger sensor for pediatric and infant: compatible with BCI
(Pediatric 15-45 Kg, Infant 3-15 Kg)
2. Finger sensor for neonate: compatible with BCI (Neonate<3kg)
3. Software license
5. Data cable for transmission to Virtuox
6. 2 year extended warranty
Confirm that the items listed are packed with the pulse oximeter. If any item on this list is missing or damaged, contact your distributor. Contact the carrier immediately if the shipping carton is
damaged.
CHAPTER 2 BASIC OPERATION
2.1 Outer View
Figure2.1 Front view

Ver1.2
VPOD OPERATOR'S MANUAL
3
Figure 2.2 rear view
2.2 Install the batteries
The oximeter can be powered by 2 AA-Size alkaline batteries (which will typically provide 50 hours of continuous operation), or by the optional rechargeable NiMH battery pack.
When battery power is lower than 2.4V, the sign
will flicker in its display area. Replace the battery (or rechargeable NiMH battery pack) as soon as possible. The installation steps are shown as
figure 2.3.
Be sure to insert the batteries in the correct polarity, as indicated by polarity marking (+ and -) inside the battery compartment.
Figure 2.3
2.3 Connect the sensor
Connect the oximeter sensor to the top of the oximeter as shown in figure 2.4. Ensure that the sensor is firmly plugged in.
Figure2.4
2.4 Monitoring
Clip the sensor to the patient’s finger, and ensure that the patient’s nail surface is facing upward, as shown in figure 2.5.
Fig2.5 Placement of the finger
2.4.1 Power on the oximeter
Press the function key (left key) to power it on. Several seconds later, the measurement value will appear.
Notice: To maintain the highest degree of accuracy, it is recommended that the finger and the oximeter sensor/probe is kept as still as possible.
2.4.2 Brightness adjustment
When you press the function key (left key) for more than one second, the brightness level headed with “Br” will be shown on the top right of the screen. You can adjust the brightness by degrees by
pressing the setting key (right key). There are 10 levels of brightness. The default is level four.
Figure 2.6
2.4.3 Mode switch
After turning on the oximeter, each time the function key (left key) is pressed, the oximeter will switch to another display mode, shown as Figure 3.1.
2.5 Factors that may affect the measurement
During operation, the accuracy of oximetry readings can be affected by the following factors:
2.5.1 Instrument performance depends on the pulsatile character of the artery. The measurement would not be considered reliable and accurate if the following conditions are present during
measurement.
Shock or cardiac arrest
Temperature of the digit
After the administration of a cardiovascular drug
Anemia
Evidence of ventilation-perfusion mismatch
2.5.2 Instrument performance depends on the wavelength absorption for oxyhemoglobin and deoxyhemoglobin. If there are substances absorbing the same wavelength, this would induce false or
low SpO
2
values. The following may affect these values:
carboxyhemoglobin
methemoglobin
methylene blue
Indigo carmine

Ver1.2
VPOD OPERATOR'S MANUAL
4
2.5.3 Extremely high illumination could affect the SpO
2
measurement. Use a semi-translucent or opaque cover to shield the sensor.
2.5.4 Other factors
a) High-frequency electrosurgical interference from external devices, including defibrillators.
b) Placement of a sensor on an extremity that currently has installed a blood pressure cuff, arterial catheter, or intravascular line;
c) The patient has hypotension, severe vasoconstriction, severe anemia, or hypothermia;
d) An arterial occlusion proximal to the sensor.
Warning
Use only SpO
2
sensors provided by manufacturer. Other SpO
2
sensors may cause improper performance.
Do not use an SpO
2
sensor with exposed optical components.
Excessive patient movement may cause inaccurate measurements.
Tissue damage can be caused by incorrect operation or misusing sensor; for example, by wrapping the sensor too tight. Inspect the sensor site to ensure the skin’s integrity and the adhesion
position of the sensor is correct. More frequent inspection should be taken if necessary.
Loss of pulse signal can occur in any of the following situations:
a) The sensor is too tight;
b) There is excessive illumination from light sources such as a surgical lamp, a bilirubin lamp, or sunlight;
c) A blood pressure cuff is inflated on the same extremity as the one to which an SpO
2
sensor is attached.
CHAPTER 3 DETAILED OPERATION
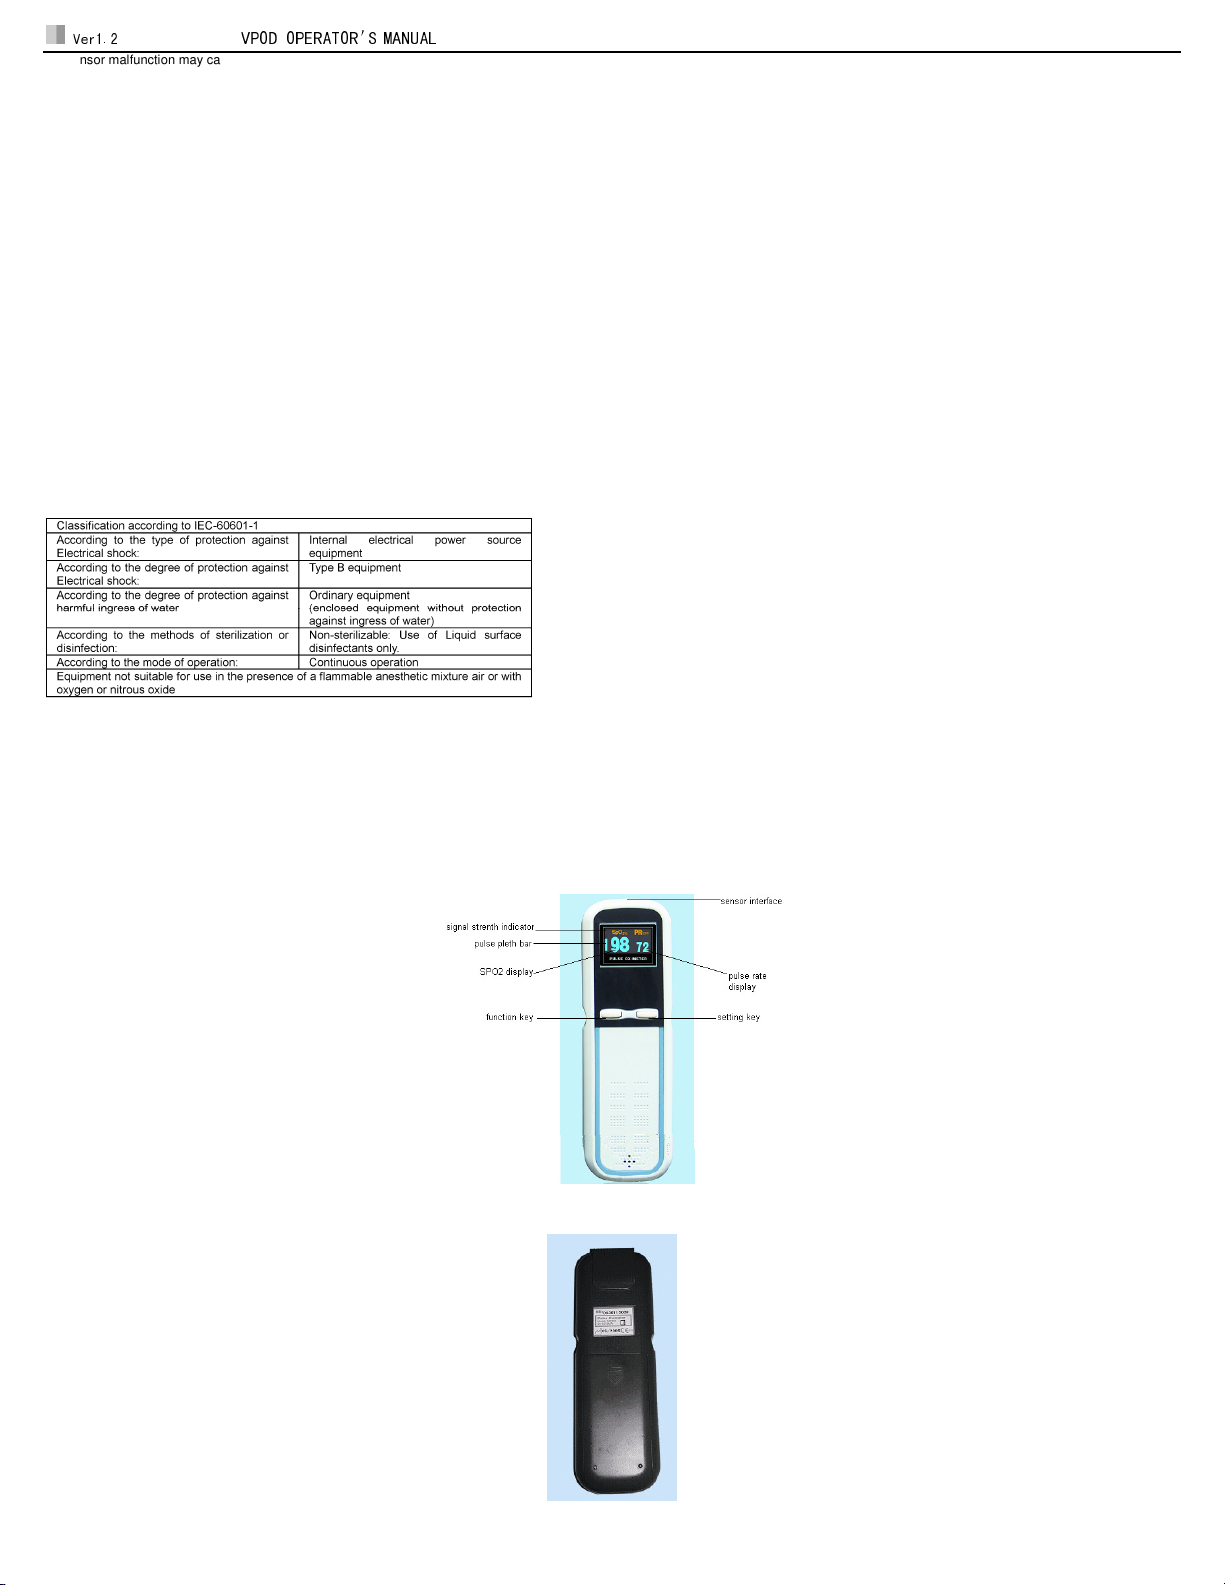
3.1 Display
The handheld pulse oximeter uses an LCD display for readout. It can display the SpO
2
and pulse rate (PR) value, as well as a pulse column and SpO
2
waveform.
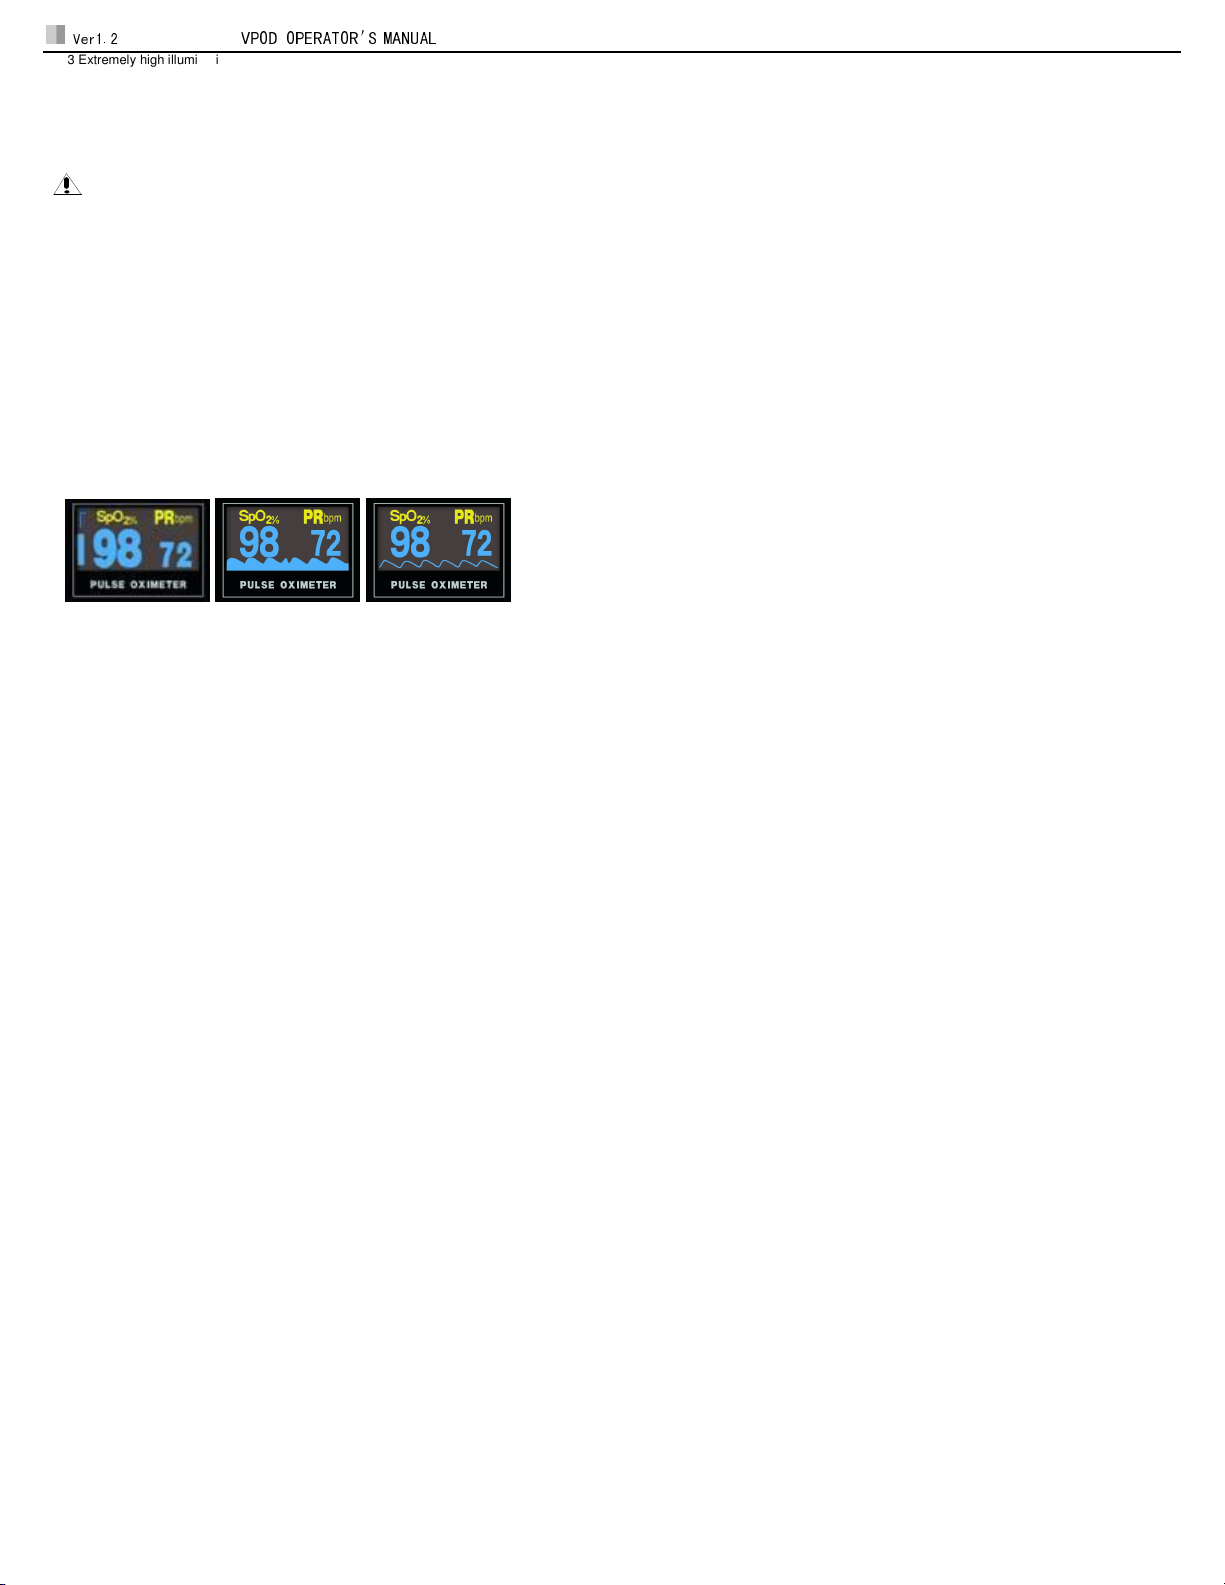
There are three display modes shown in Fig 3.1. The first figure is pulse column display mode. The second figure is filled waveform mode. The third figure is line waveform mode indicating SpO
2
%
trend.
(1) (2) (3)
Fig 3.1 Three display modes
SpO2: Percent oxygen saturation value displayed above is 98%
PR: Pulse rate value displayed is 72 bpm
Pulse column: This is used for signal identification and quality indication during motion and low signal to noise situations. The bar rises and falls with the pulse, its height indicating signal
quality. When the bar is very low, the SpO2 and pulse rate values may be suspect.
Signal strength: Indicates arterial pulse signal strength and may be used as a diagnostic tool during low perfusion for the accurate prediction of illness severity. The bar is highest when the
quality of the perfusion state is best and low when the perfusion is poor.
PR tone modulation: Beeps in sync with the patient’s pulse, even under most challenging patient motion conditions.
3.2 Mode Introduction
Power On - Measurement and operation can be done normally. There are three display modes: “Measure mode”, “Information display mode” and “Trouble display mode”.
1) Display modes
“Measure mode”: the sensor is plugged in correctly, and the finger is properly in the sensor, the oximeter is in the measurement mode for both SpO
2
and PR.
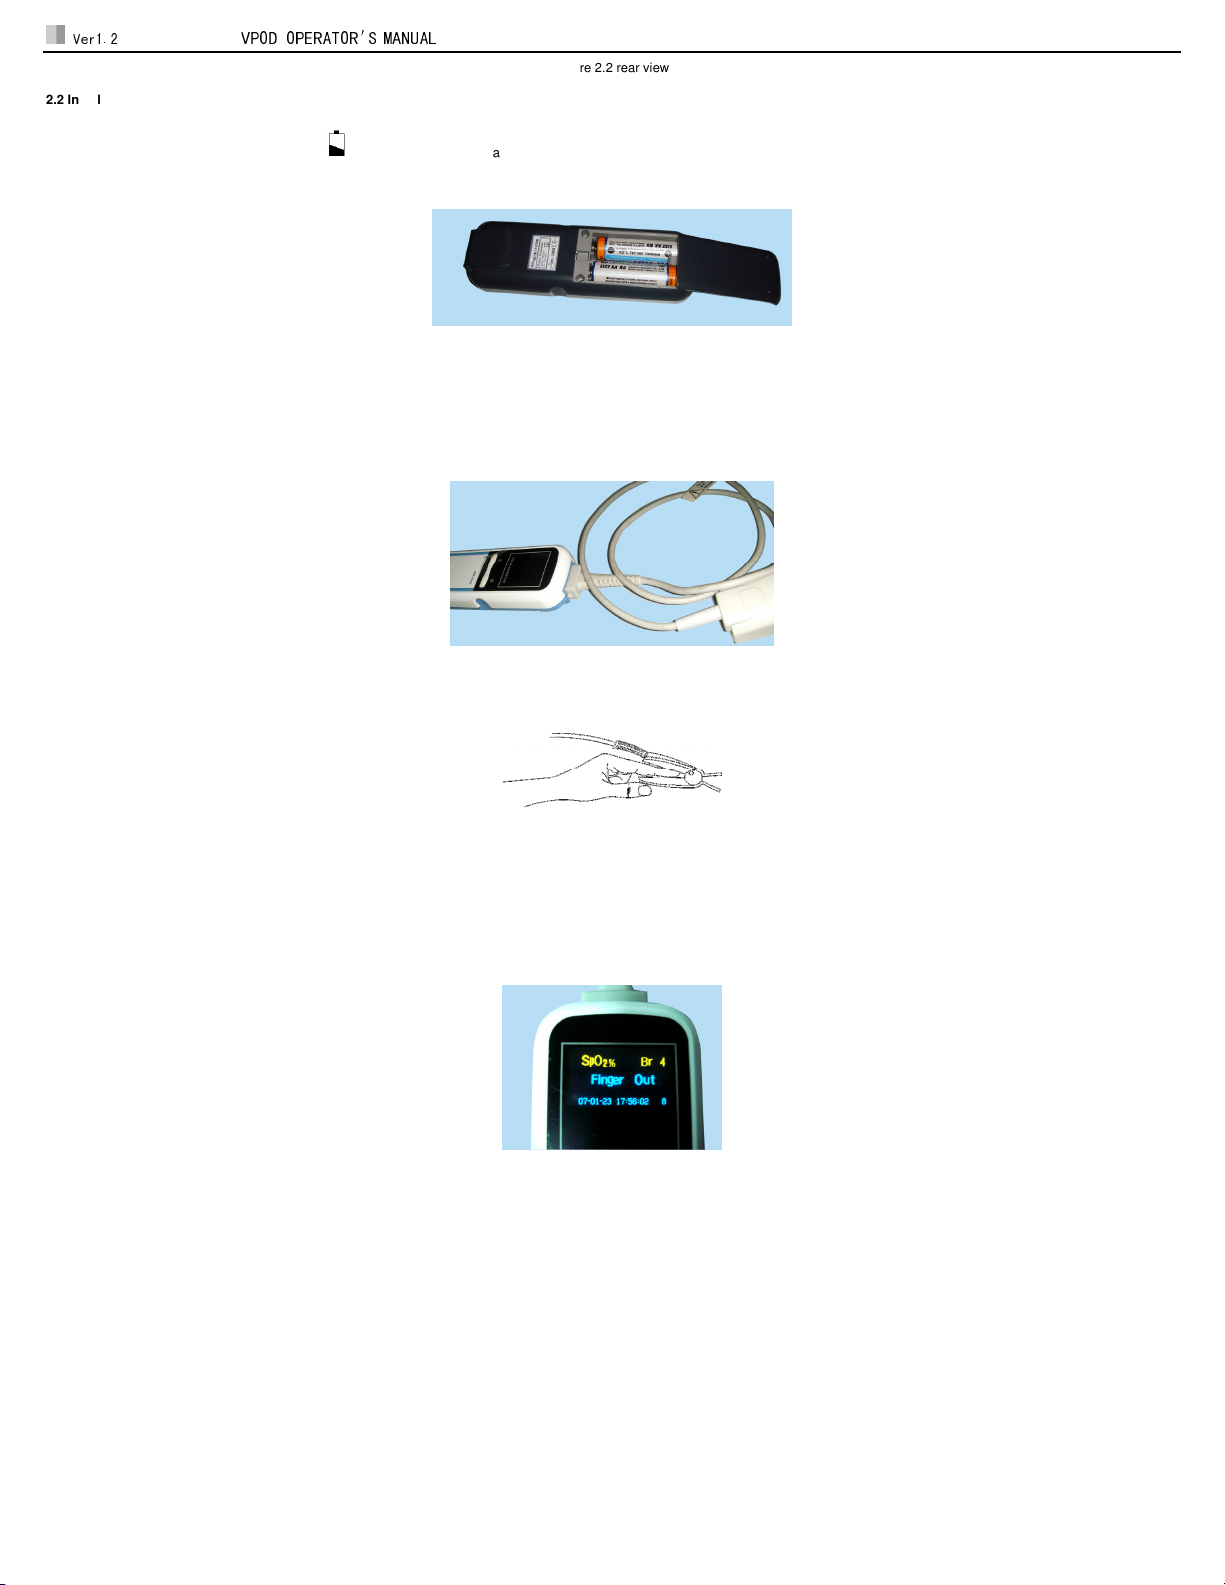
“Information display mode”: The sensor is not plugged into the oximeter or the sensor is plugged in the oximeter but the finger is not in the sensor, “Probe off” or “Finger off” will be displayed
respectively, and it will automatically power Off if either information display lasts for more than 8 seconds.
“Trouble display mode”: In the failure state, the oximeter will display error information, and will automatically power Off if the information display lasts for more than 8 seconds. For error information
details and definitions, please refer to chapter 4.2.
2) Definition of key
There are two keys in the oximeter: “Function key (left key)” and “Setting key (right key)”.
“Function Key”: Located at the left of the oximeter, this acts as a Power On switch when the unit is in an Off condition. When the unit is On, it acts as a Function key
“Setting key”: Located at the right of the oximeter, it has no function when the power is off. When the unit is On, it acts as a Setting key.
3) Definition of Key Press
There are three ways to press the key:
Press: press the key quickly, the duration time should no more than 1 second.
Double press: Two-time continuous press, the time between the two press actions should be no more than 0.5 second.
Extended press: Press the key for more than 1.5 seconds.
3.3 Key Functions
1) Power On/Off
Press the Function key (left key) to power on.
The oximeter will power off automatically under the “information display mode” or “trouble mode” for 8 seconds.
2) The Display Mode setting can only be enabled under “Measure mode” and “Information Display mode”. Pressing the Function key (left key) or Setting key (right key), the display mode may be
changed sequentially between “Filled Waveform”, “Line Waveform” and “Pulse Column Waveform”. Once you choose a certain mode, the oximeter will continually display in this mode until changed
by the user.
3) Setting Mode
Entering or exiting the Setting Mode can be done only under the “information display mode”. You can set Brightness, Patient ID, Date and Time under the “Setting Mode”. Current parameters and data
will be displayed at the top right corner which is used to display the “PR”. The various parameters display title is as follows:
Br – Brightness (range:1-10)
ID - Patient ID (range:1-10)
Y – Year (range:0-99)
M - Month (range:1-12)
D – Day (range:1-31)
H – Hour (range:0-23)
M - Minute, (range:0-59)
S – Second (range:0-59)
a) Enter “Setting mode”
Table of contents
Other Virtuox Medical Equipment manuals
Popular Medical Equipment manuals by other brands

Getinge
Getinge Arjohuntleigh Nimbus 3 Professional Instructions for use

Mettler Electronics
Mettler Electronics Sonicator 730 Maintenance manual

Pressalit Care
Pressalit Care R1100 Mounting instruction

Denas MS
Denas MS DENAS-T operating manual

bort medical
bort medical ActiveColor quick guide

AccuVein
AccuVein AV400 user manual