Vision R32ETR User manual

11
11
1
Owner's ManualOwner's Manual
Owner's Manual
R32ETR & R32ETSR32ETR & R32ETS
R32ETR & R32ETS
AdAd
AdAd
Advv
vv
vancedanced
ancedanced
anced TT
TT
Trr
rr
ransporanspor
ansporanspor
ansportata
tata
tation Prtion Pr
tion Prtion Pr
tion Productsoducts
oductsoducts
oducts,,
,,
,IncInc
IncInc
Inc..
..
.
6304 215thStSW, MountlakeTerrace,WA 98043
TollFree:877-433-4273 Fax:425-673-4668
E-Mail:[email protected]
Web:www.visionrecumbents.com
2424
2424
24
The Advanced Transportation Products Inc. Warranty
Advanced Transportation Products Inc. warrants each new VISION bicycle
frame, fork, and seat frame against defects in workmanship and materials for the life-
time of the original owner. Paint and decals, seat fabric, and all original parts, are
warrantedforaperiodofoneyearfromthedateofpurchase. Thiswarrantyisexpresssly
limited to the repair or replacement of a defective frame, fork, seat or defective parts
and is the sole remedy of the warranty. This warranty applies to the original owner and
is not transferable.
Claims under this warranty are to be made through an authorized VISION
dealer. Proof of purchase is required. A Warranty Registration Card must be com-
pleted and received byAdvanced Transportation Products Inc. before warranty claims
may be processed.
The warranty does not cover normal wear and tear, improper assembly or
maintenance, or installation of parts or accessories not originally intended or compat-
ible with the bicycle as sold.
The warranty does not apply to damage or failure due to accident, abuse or
neglect. Advanced Transportation Products Inc. shall not be responsible for inciden-
tal or consequential damages. Labor charges for part changeovers is not covered by
this warranty. The user assumes the risk of any personal injury or damage to the bi-
cycle or other losses if the bicycle is used in any competitive event including but not
limited to bicycle racing, triathalons, or similar activities.
QuicQuic
QuicQuic
Quick Infk Inf
k Infk Inf
k Inforor
oror
ormama
mama
mationtion
tiontion
tion
Tire & Wheel information
Rear: R32: 406 bead seat diameter, 1"-1.75" (ex 20 x 1.35")
Front: R32: 406 bead seat diameter, 1"-1.75" (ex 20 x 1.35")
Inflation pressures: Inflate to the pressure moulded on tire
sidewall
Torque specifications
Handlebar Extension: 65 in-lbs (6 N-M)
Handlebar Stem: 65 in-lbs (6 N-M)
Chain 3x7 Hub, Standard Frame = 205 Links
Serial number location
Stamped on the back plate, at the end of the main frame.
© Copyright 1999 ATP Inc. All rights reserved. Do not copy or reproduce.

22
22
2
Table of Contents
Thank You! ............................................ 3
Chapter 1: Read me First! ................... 4
Chapter 2: Adjustments....................... 7
The VISION® Seat............................. 8
Adjusting the VISION® Seat ............. 9
Rear Suspension ............................... 10
Anatomy of a Vision R32 .................. 12
Transport & Storage ......................... 14
Transport & Storage ......................... 15
General Maintenance ....................... 16
Chapter 3: Riding the VISION......... 17
Chapter 4: Accessories ...................... 23
Quick Information.............................. 24
2323
2323
23
Now that you are comfortable riding your new R32, I’m sure that you will
want to customize it for your particular riding needs. Your Vision recumbent
has been designed to accept a full range of standard bicycling accessories, as
well as some custom items that have been designed byATP.
Rhode Gear MirRhode Gear Mir
Rhode Gear Mirrr
rr
roror
oror
or
If you ride in traffic, a mirror is a must. We recommend the Rhode Gear bar-
end mounted (Mt. Bike style) mirror. You should be able to find this at your
local bike shop, or it's available from us.
ChainguarChainguar
ChainguarChainguar
Chainguardd
dd
d
If you ride with loose/floppy pants, or just find yourself getting chain goo on
your legs, we have lexan chainguard available.
SeaSea
SeaSea
Seat Bact Bac
t Bact Bac
t Back Bak Ba
k Bak Ba
k Bagg
gg
g
Advanced Transportation Products has designed a custom bag to sit on your
seat back. It has approx. 800 cubic inches of storage capacity in two sections:
a main storage compartment with flap, and a zippered pouch on the main flap
for wallet, keys, etc. Off the bike it features a comfortable shoulder strap. The
bag is ideal as a day bag, or a touring companion bag for carrying valuable
items. Also available is a 70 ounce water bladder that fits inside the day bag,
with a drinking tube you can clip to your shirt.
RR
RR
Rear Rear R
ear Rear R
ear Racac
acac
ack / Pk / P
k / Pk / P
k / Pannierannier
annierannier
annierss
ss
s
We have an underseat rack available for the R32 that will accept paniers.
FF
FF
Fenderender
enderender
enderss
ss
s
We have a fender set available for your R32. Keep yourself dry!
KicKic
KicKic
Kickstandkstand
kstandkstand
kstand
I hate always looking for a tree or wall to lean my bike against. We've built in
an attachment point for a standard Greenfield kickstand.You should be able to
get one of these at your local bike shop.
TT
TT
T-Shir-Shir
-Shir-Shir
-Shirtsts
tsts
ts
Declare to the world that you are a Vision recumbent owner - has the Vision
recumbent logo over the left breast.
ChaCha
ChaCha
Chapter 4:pter 4:
pter 4:pter 4:
pter 4:
AccessoriesAccessories
Accessories

33
33
3
Thank you for choosing a Vision® Recumbent! Here at Ad-
vanced Transportation Products have built the most advanced,
full featured recumbent available. Please take a few moments
now to fill out your warranty registration card - we want to know
what you think about your new bike.
Before we explore your new Vision recumbent's features, we
wouldlike to take a few moments to discuss some important points
about recumbents and bike riding in general, so please read this
manual completely. If you have any questions or concerns about
the proper operation of your Vision R32, be sure to talk to your
bike shop or to us before you ride.
TT
TT
Thankhank
hankhank
hank YY
YY
You!ou!
ou!ou!
ou!
2222
2222
22
the bike. Practice stopping and dismounting, then starting off
again. You should also practice stopping by dropping only one
leg, typically your non-dominant leg. This exercise will help you
deal with momentary stops, such as at stop signs and traffic lights.
It does take a little practice to balance the bike leaning onto a
single leg. Remember to keep one hand clamped on a brake to
prevent the bike from rolling, it really helps. I usually immedi-
ately cock my “crank-bound” leg for the start, and then hold pres-
sure against the brake until I’m ready to go.You should also care-
fully investigate what happens to the bike with gradually increas-
ing brake lever pressure, so you will be comfortable with quick
decisions on the road.
Don’t fall asleep on me yet, we’re almost done. The last thing
you should practice before hitting the open road is your shifting.
You really need to be work on being aware of how the gears work.
Be aware that you must be pedaling to shift the derailleur. Sachs
3x7 hub can be shifted when the bike is stopped, although some-
times you have to kick the pedals backwards a bit to finish the
shift. Shifting either derailleurs or internal gear systems should
be done under light pedaling pressure. Make sure you practice
shifting into your start-up gear before you stop.
You shouldn’t feel like you have to do everything in one session.
Many novice riders actually do much better working up to the
open road in several short training sessions, often days apart.
ChaCha
ChaCha
Chapter 3:pter 3:
pter 3:pter 3:
pter 3: Riding theRiding the
Riding theRiding the
Riding the VISIONVISION
VISIONVISION
VISION

44
44
4
ChaCha
ChaCha
Chapter 1:pter 1:
pter 1:pter 1:
pter 1: RR
RR
Read me Firead me Fir
ead me Firead me Fir
ead me First!st!
st!st!
st!
Always wear an ANSI or Snell approved helmet
Yes, with their lower center of gravity and feet-first position, re-
cumbents are significantly safer than upright bicycles. You still
need to protect your most valuable body part. Modern bicycle
helmets are light, cool, and offer lifesaving protection.
Check your bike carefully before each ride
Spend a few moments before each ride inspecting your VISION
for problems.
*Check all the nuts, bolts and other fasteners to make sure none
are loose.
*The tires should be inflated to the pressure moulded on the
sidewall, and free of cuts or imperfections.
*The wheel quick release skewers should be clamped shut with
at least 20 pounds (14kgf) of force, and a sharp blow to the top of
the tire should not knock the wheel loose. Study the quick release
skewer operation diagram - the skewer handle has a curve in it
that will face the tire when properly closed. The skewer nut sets
the tension of the system; it should be adjusted so that it takes
20-45 pounds of force to close the handle as shown. Generally,
properadjustment isachieved whenthe nutis setso thatthe handle
starts to resist movement about 1/2 way through it's travel.
Open
Close here
with 20 - 45
lbs force Rotate here to
tighten/loosen
Skewer
Handle
Skewer
Nut
Wheel / Seat Skewer Operation
Closed
2121
2121
21
you’re not about to take a long ride on a short pier—practice
swinging your head to the left and right, taking quick glances
behind you. The first time you do this you will inevitably shift
your weight and hand position, causing the bike to swerve. Don’t
panic, this is why we are practicing in the park instead of a con-
gested street. While many riders like to use a helmet or bicycle
mounted mirror—and we sell a beautiful unit that mounts onto
the handlebar, see Chapter four of this manual—it’s important to
be able to actually look around behind you. This not only gives
you options on checking out traffic, but practicing this will in-
crease your skills and confidence on the bike.
At this point you should be feeling pretty good about life, zoom-
ing along nice and comfortable, relaxed and thinking about how
much fun you are going to have on this thing. Well don’t get too
cocky yet. Before you hit the open road there are a some more
exercises you should do. Practice circling, both to the right and
to the left. Start out with gentle curves, and progress to tighter
and tighter radius “U” turns.You should really try to master turn-
ing slowly in as tight a curve as possible quite a few times, this
gets you ready for the real world of poor directions and detours.
If you find yourself wobbling or jerking the handlebars around,
you are probably too tense. Relax, let your hands grasp the bars
in a light but firm manner. Let your shoulders droop, relax your
neck, don’t “death-clench” your teeth. Once you relax you will
have more control over the bike.
Next, you should practice using the brakes. Stop and take off a
few times, getting a feel for how much pressure on the lever it
takes to slow down or stop the bike. Remember to always use
both brakes together, with gentle pressure at first to stop the bike
smoothly. Drop both your feet to the pavement while giving the
brakes the final squeeze to stop the bike. Lean forward a bit and
stand up, while reaching behind you for the seat frame to steady
ChaCha
ChaCha
Chapter 3:pter 3:
pter 3:pter 3:
pter 3: Riding theRiding the
Riding theRiding the
Riding the VISIONVISION
VISIONVISION
VISION

55
55
5
Check your bike carefully before each ride
* The wheels should be straight and not wobble.
*Squeeze each brake lever to make sure there is no binding and
the brake pads press hard enough on the rims to stop the bike.
The brake pads should be adjusted so they are 1/16" (2mm) away
from the rim when not applied. The brake pads should be cen-
tered on the rim and not touching the tire itself.
*The seat quick release skewers should be closed with at least 20
pounds (14kgf) of force (see the skewer diagram on page 4).
*Sittingon the bike, swing the handlebars from side to side check-
ing for binding or interference. Check to make sure the attach-
ment bolt is tight.
*If you are unsure of the condition of your Vision recumbent, Do
Not Ride It until the problem has been corrected. If you have
any questions at all, see your Vision dealer.
Wear gloves
With its low center of gravity, you don't fall very far on a recum-
bent, but you will touch down with your hand first! A set of
bicycling gloves will protect your skin.
Wear eye protection
Riding down the road at speed is no time to get a bug or dirt stuck
in your eye! Goggles, glasses or both can save your sight.
Practice riding your Vision
Before you mix it up with traffic, spend enough time on your
recumbent on a parking lot, driveway or other open area to get
used to its unique riding position and handling characteristics.
RR
RR
Read me Firead me Fir
ead me Firead me Fir
ead me First! (cont.)st! (cont.)
st! (cont.)st! (cont.)
st! (cont.)
2020
2020
20
foot, but keep the strap nice and
loose to start with. Swing the crank
around until your foot is in a
“cocked” position; somewhere
close to the top of the pedal stroke.
This spot is different for everyone,
thekey is to find the spot whereyou
feel best about putting a lot of
power into the pedal. It helps to
hold the bike from rolling with ei-
ther brake.
When you’re ready, release the brake, and push forward firmly
on the pedal. As you start moving, lift your other foot up and
keep peddling.At first you probably will wobble a little, but don’t
panic and tense up! Just relax and concentrate on making small
corrections with the handlebars. The most common beginners'
error is to overcontrol the bike, ending up steering a set of “S”
curves down the lane. If you relax and let your hands sit lightly
on the handlebars, you will find it easier to avoid this syndrome.
Lean back! You are probably trying to lean forward, to mimic
that "other" type bike you've been riding. Another common first
time mistake is to stare at your feet — after all, you’ve never seen
them before! Look ahead, see the scenery you’ve been missing.
Once you’re riding smoothly in a straight line, it’s time to prac-
tice looking around. Now don’t laugh, I’m not being funny nor
condescending.Compared to a traditional bike you will find your-
self looking at the world from a whole new perspective, a com-
fortable one. The biggest problem you will face is keeping your
mind on the road. Since you are riding in a relaxing reclined po-
sition it’s all too easy to forget about everything except the scen-
ery in front of you. Looking behind you is not difficult, but it
does take practice. As you ride in a straight line—and are sure
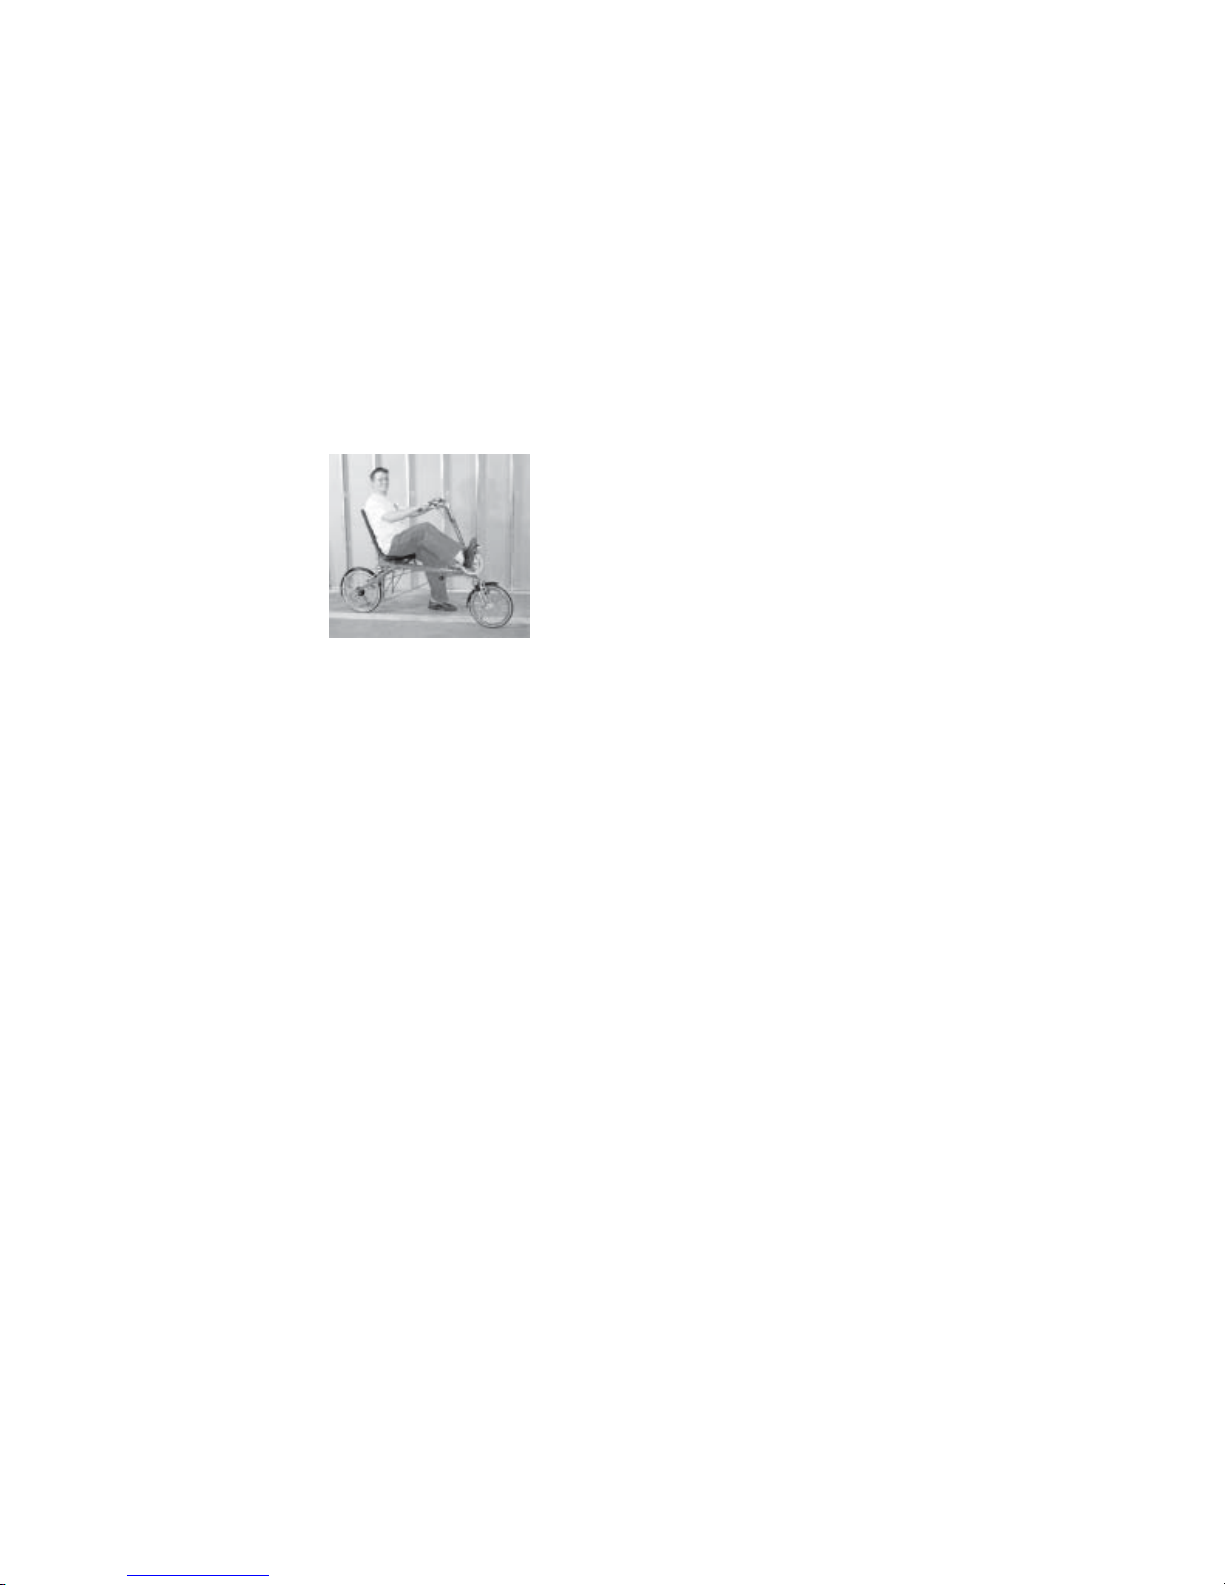
ChaCha
ChaCha
Chapter 3:pter 3:
pter 3:pter 3:
pter 3: Riding theRiding the
Riding theRiding the
Riding the VISIONVISION
VISIONVISION
VISION

66
66
6
Never ride at night without a front and rear light!
Never, ever. Your Vision is equiped with a full reflector set, but
these are not intended to make the bike meet state and federal
regulation for night time riding. Be sure to add front and rear
lights if you ride at night. See your local dealer for a selection of
lights to fit you needs and budget.
Adjustments
Experiment with different seat and handlebar positions during
your practice period. Your Vision recumbent has many adjust-
ments and special features that fit the bike to you. Try them all!
Be careful when riding in wet conditions
No brakes, whatever their design, work as effectively in wet
weather as they do in dry. Stopping distances and brake lever
pressures will increase.
Keep your pedal cadence high
You can overstress your knees with the tremendous leverage you
have on a recumbent. We recommend that you pedal in the 80-
90RPM range. If you experience knee pain, spin faster and check
your leg length setting. It is probably too short - see Chapter 2
for leg length adjustment.
RR
RR
Read me Firead me Fir
ead me Firead me Fir
ead me First! (cont.)st! (cont.)
st! (cont.)st! (cont.)
st! (cont.)
1919
1919
19
don't have to take your hands off the handlebar at all to shift - just
grab the grip between your thumb and forefinger, and twist!
Now let’s get on the bike. I tend to al-
ways mount from the left, like on a
horse, but the important thing is to es-
tablish a pattern and do it the same way
everytime so itbe-
comes a habit.
Grab the seat back
with your right
hand, the middle of
the handlebars with
your left hand. Now
step through the space between the seat
andthe handlebar with your right leg, and
sit down on the seat. Grab the brakes and
apply lightly. Settle yourself into the seat and get comfortable.
Sit awhile, rock back and forth and from side to side. Notice how
the seat cradles you, and how comfortably close to the ground
you are. Grasp the handlebars and rock the front wheel from side
to side. Squeeze the brake levers. Yodel a few times. Do what-
ever it takes to relax. Many first time riders try to sit forward on
the seat, not being used to the relaxed, laid back position. Sit
back! Enjoy the comfort!
Now pick a dominant leg. For most people this is your right leg,
but go with whatever is most comfortable for you. Pick your leg
up and swing the crank arm around so you can easily reach the
pedal. If you are using toe straps, flip the pedal clip over your
ChaCha
ChaCha
Chapter 3:pter 3:
pter 3:pter 3:
pter 3: Riding theRiding the
Riding theRiding the
Riding the VISIONVISION
VISIONVISION
VISION

77
77
7
There are no assembly instructions included in this manual, your
Vision Recumbent dealer will have put your bike together and
set the adjustments for you. This section is intended to familiar-
ize you with the adjustments you can make on your R32 to fit the
bike to you. We will also discuss several of the unique features of
the R32.
ChaCha
ChaCha
Chapter 2:pter 2:
pter 2:pter 2:
pter 2:
AdjustmentsAdjustments
Adjustments
The Handlebar
The handlebar can be adjusted up or down, as well as toward or
away from the rider. These adjustments are intended to help you
find the most comfortable position for you. Never attempt to ad-
just the handlebar while riding.You will need a 6mm hex wrench
to do these adjustments, see the illustration below.
Loosen these
bolts to adjust
the stem
Fore and Aft.
Loosen this bolt to adjust the
height of the stem.
1818
1818
18
ChaCha
ChaCha
Chapter 3:pter 3:
pter 3:pter 3:
pter 3: Riding theRiding the
Riding theRiding the
Riding the VISIONVISION
VISIONVISION
VISION
when you ride. If you do have an accident and fall over, you’ll
probably catch yourself with your hands, so save your palms and
wear gloves. You should also wear protective eyewear; road grit
and flying insects do not make for happy eyes. Wearing cycling
shoes, shorts and jerseys can help you be more comfortable, but
they are not as essential as the helmet, gloves and glasses.
Now you’re all set to hop on your Vision and pedal away into the
sunset, right? Wrong! The key to riding smoothly and in a con-
trolled fashion on any bicycle, recumbent or not, is to be com-
fortable enough to relax. If you are nervous and tense, you will
tend to ride in a jerky, overcontrolling fashion. Not only does this
make you more uncomfortable, which leads to even worse riding,
but it doesn’t look cool. So you need to approach the bike as your
friend, someone you’ll enjoy spending the day with. The intent
here is to spend some relaxed time getting to know your bike
before you get 20 miles into nowhere, or involved with city traf-
fic. Pack a lunch and head for the park, relax and enjoy the day
for a bit, and then set yourself up to ride in the parking lot, or any
open space with no traffic.
Before you start to ride, look at your gears and make sure that
you are set in a good gear to start in. On a flat surface this usually
is in the middle range of the internal hub ("2" on the left shifter)
and in one of the three largest cogs. If the bike is not in one of
these gears, have someone hold the rear wheel off the ground so
you can spin the cranks and shift the gears. Don’t forget that you
should only shift the rear derailluer when pedaling, although you
can shift the internal hub when standing still by kicking the ped-
als backwards as you shift the left lever.As you gain experience
you will find yourself thinking ahead and shifting into your fa-
vorite “start-up” gear before you come to a stop. Your VISION's
gears are shifted with "twist grip" type shifters - they're right un-
der your hands, on the forward part of the handlebar grips. You

88
88
8
To install the seat on your R32, first make sure both quick release
skewers are open. Slide the seat rails onto the main frame track
from the front (see illustration No 1 below)
Slide the seat to the middle
of the track (see illustration
No.2 below) and tighten the
quick release skewers. See
page 4 for details on this.
Make sure the closed skewer
handles do not interfere with
the suspension swingarm. (il-
lustration No. 3 below)
To adjust the seat position for
your leg length, simply loosen
bothskewers andslide theseat
forward or back as needed.
No. 1
No. 2
No. 3
TT
TT
Thehe
hehe
he VISION® SeaVISION® Sea
VISION® SeaVISION® Sea
VISION® Seatt
tt
t
1717
1717
17
Photo of
enjoy
Lube your components.
Using your chain lube, or better still, a drip bottle of general bi-
cycle lubricant (NOT "3 in 1" oil), carefully apply drops of lubri-
cant to all the pivot points of the components. Do the brakes and
thederailleur.Asyou move around the bike examine all thecables
and casing pieces for wear and tear. Also examine the compo-
nents for any damage.
Know your bike.
It's simple—just get to know the feel of your bike. If something
feels different, and you can't figure out what it is, bring your bike
to a shop to have it checked out. All of the components on the
R32 are bicycle standards, and any competent shop can service
it.
Riding a Vision recumbent is no more difficult than riding a tra-
ditional diamond frame bicycle, just slightly different. If you are
new to cycling, you’ll find it easy to learn to ride on a Vision. If
you are an experienced rider, you’ll have to learn some new hab-
its, but the benefits of riding a recumbent far outweigh the small
learning curve involved. Either way, it’s important to spend a
little time adjusting to your new bike before riding in traffic or
committing to a long ride. In this chapter I’m going to discuss
some things that will make the transition to recumbents, or learn-
ing to ride on a recumbent, easier.
First of all, be sure to read the section of this manual about the set
up of the bike. To ride well you have to be comfortable, and to be
comfortable you need to be sure that your Vision is adjusted to fit
you properly.
If you’re comfortable on your bike, it’s time to go riding. First
and foremost, the most important part of riding any bike is to
wear proper safety equipment. It is essential to wear a helmet, all
the time, anytime you ride. It’s also very important to wear gloves
ChaCha
ChaCha
Chapter 3:pter 3:
pter 3:pter 3:
pter 3: Riding theRiding the
Riding theRiding the
Riding the VISIONVISION
VISIONVISION
VISION

99
99
9
Adjusting theAdjusting the
Adjusting the VISION® SeaVISION® Sea
VISION® SeaVISION® Sea
VISION® Seatt
tt
t
It is very important to set the seat for your leg length correctly. If
possible, set your R32 on a rear wheel type wind trainer. If you
don't have access to such a trainer, have a friend hold the bike up
behind your seat while you sit and back pedal the bike.
When the leg length is set properly, you should have a slight bend
in your knee at full extension (see the illustration below).
To change the adjustment, get off the seat, loosen the seat quick
release skewers and slide the seat forward or back to approxi-
mately the right spot for you. Tighten both seat QR skewers and
sit down again. If you need further adjustment to get the proper
leg extension, get off the seat and try again.Take your time—this
is a very important adjustment. Once you have your leg exten-
sion set—and confirm this by spending some time riding the
bike—you might want to make a discreet mark on the seat track.
This way you can remove the seat for transport, and still get it
back exactly where you like it.
1616
1616
16
GenerGener
GenerGener
General Maintenanceal Maintenance
al Maintenanceal Maintenance
al Maintenance
It's important to maintain your R32 properly, to keep it in good
running condition. A regular visit to your bike shop is very im-
portant to keep your bike running smooth and safe, but between
trips to the shop your bike will love some simple attention.
Lube your chain.
This is probably the most important regular maintenance item on
any bike, and just as probably the most ignored.You should lube
your chain at least every month. More if you ride a lot and do it
every time you get rained on. It's simple, if you start when your
ride is finished, rather than 2 minutes before you head out. First,
grab a trashy rag (not a paper towel) and wipe the chain down
completely. I wrap my hand with the rag, grab the lower section
of the chain and turn the pedals backwards. Do this until the chain
has travelled through the rag several times. Now apply a com-
mercial bicycle chain lubricant (NOT WD-40!) to the chain. Fol-
low the manufacturers directions, but what works for me is to
drip it lightly onto the inner side of the chain, first the outer plates
and then the inner. Now allow the bike to sit overnight.After the
lube has had a chance to penetrate the links, it's important to wipe
off all the excess lube.This helps to keep the chain free of excess
road grit. Do this by repeating the wiping procedure outlined
above.
Take care of your chain and it will take care of you. If your chain
gets really nasty, there are some nice cleaning systems on the
market—boxes that enclose the chain in it's own little washing
machine. We recommend these over removing the chain from
the bike to soak it.You should avoid breaking the chain any more
than is absolutely necessary.
Pump up your tires.
It is normal for tire pressure to drop slowly. Check the pressure
every week with a good hand pump. Inflate the tires to the pres-
sure rating printed on the tire itself. Don't use pumps at gas sta-
tions... you'll be sorry if you do, your tires might blow off the rim.

1010
1010
10
Features
The R32 suspension system has more benefits than just the com-
fort of the cushioned ride. Up until now, it was often difficult to
transport recumbents that did not have wheelbase lengths that
were the same as typical upright bikes. Tandem racks often were
needed. The R32 has the ability to fold itself into two positions;
fully folded, with the rear wheel tucked under the frame for a
"minimized" storage size, and partially folded, setting the wheel-
base to a typical 36", so transport on a standard car top carrier
(fork clamp style) is a snap.
System Pre-Load
To have the rear suspension operate efficiently, you need to set
the "pre-load" on the air shock to suit your weight. This is very
easy to do. Simply use a shock pump (a very high pressure pump
designed for suspension systems) to set the air pressure in the
rear shock. The exact air pressure needed depends on your size
(i.e. the seat position) and your riding style. You should start by
setting the shock to a pressure equal to your body weight. You
might need to run 40-60 psi over your body weight. If you want a
softer rider, reduce the air pressure. If you are getting excessive
"pogo-ing" on climbs, increase the air pressure.
RR
RR
Rear Suspensionear Suspension
ear Suspensionear Suspension
ear Suspension
1515
1515
15
ternal hub into the first gear position
("1" on the twist grip).
Now, without pedaling, twist the right
shifter back to the "#7" position, and
the left shifter to the #3 position. This
will slack up both cables.You will now
be able to pull the rear derailleur and
internalhub casings free from their cas-
ing stops on the right side of the frame,
just behind the crankset (Fig. 1)
You will need to pop the front brake
open at the caliper. (Fig 2)
Now, loosen up the riser clamp bolt
with a 5mm hex wrench. (Fig 3)
You should be able to pull the grey
handlebar riser free from the fork
steerer now.You can lay the riser along
the frame of the bike, and tie it in place
with bungee cords. Be careful not to
damage the gear or brake control
cables.
To re-install the handlebars, lift the
riser into place and slide it fully down
the fork steerer.Align the handlbars so they are perpendicular to
the front wheel, and firmly tighten the riser clamp bolt. Re-attach
the front brake cable at the brake caliper, and then pop the two
gear control cables back into their casing stops. Make sure both
the twist grip controls are set to the #1 position.You might have
to manually push the rear derailleur over until it's under the larg-
est cog to get enough slack in the system to get the casing back
into it's stop. Lift the rear wheel from the ground and lightly pedal
the cranks around a few times to get the gears re-settled.
Fig 2
Fig 3
Fig 1
TT
TT
Trr
rr
ransporanspor
ansporanspor
ansport & Stort & Stor
t & Stort & Stor
t & Storaa
aa
agg
gg
gee
ee
e

1111
1111
11
Some of the Crew
1414
1414
14
Folding your R32
The first step to folding the R32 is to
remove the shock upper support bolt.
Undo the bolt completely, and be sure
not to loose the hardware on the shock
body. Fold the swing arm forward.
If you want the partially folded position for car-top transport,
then stop the swingarm when the hole
in the swingarm brace lines up with the
partial fold hole on the main frame of
the bike. Capture the chain by looping
cable of the chain hanger/locking pin
aroundthe chain, then insert thepin into
the appropriate hole, locking the
swingarm in place.
Fortighter storage, allow the swingarm
to move all the way forward, and align
the swingarm brace hole with the fully
folded position hole on the main frame,
then capture the chain and insert the
pin.
Handlebar removal
To get the bike as small as possible for storage or transport, first
fold the swingarm to the fully folded position described above.
Next we need to remove the handlebar riser from the fork steerer.
First, you must disconnect the control cables. This doesn't mean
that you have to unhook the cables from the brakes or derailluers,
you simply have to pop the casings free from the split casing
stops. To do this you need to shift the rear derailleur into the
easiest to pedal gear (largest cog, #1 on the twist grip, be sure to
pedal the bike when shifting the rear derailleur) and shift the in-
TT
TT
Trr
rr
ransporanspor
ansporanspor
ansport & Stort & Stor
t & Stort & Stor
t & Storaa
aa
agg
gg
gee
ee
e

1212
1212
12
AnaAna
AnaAna
Anatomtom
tomtom
tomy ofy of
y ofy of
y of aa
aa
a VV
VV
Vision R32ision R32
ision R32ision R32
ision R32
Seat
Seat Track
Rear Shock
Rear Derailleur
Interernal Hub
1313
1313
13
Handlebar
Riser
Crankset
Front Brake
Chain Idler
Front Fork
This manual suits for next models
1
Other Vision Bicycle manuals