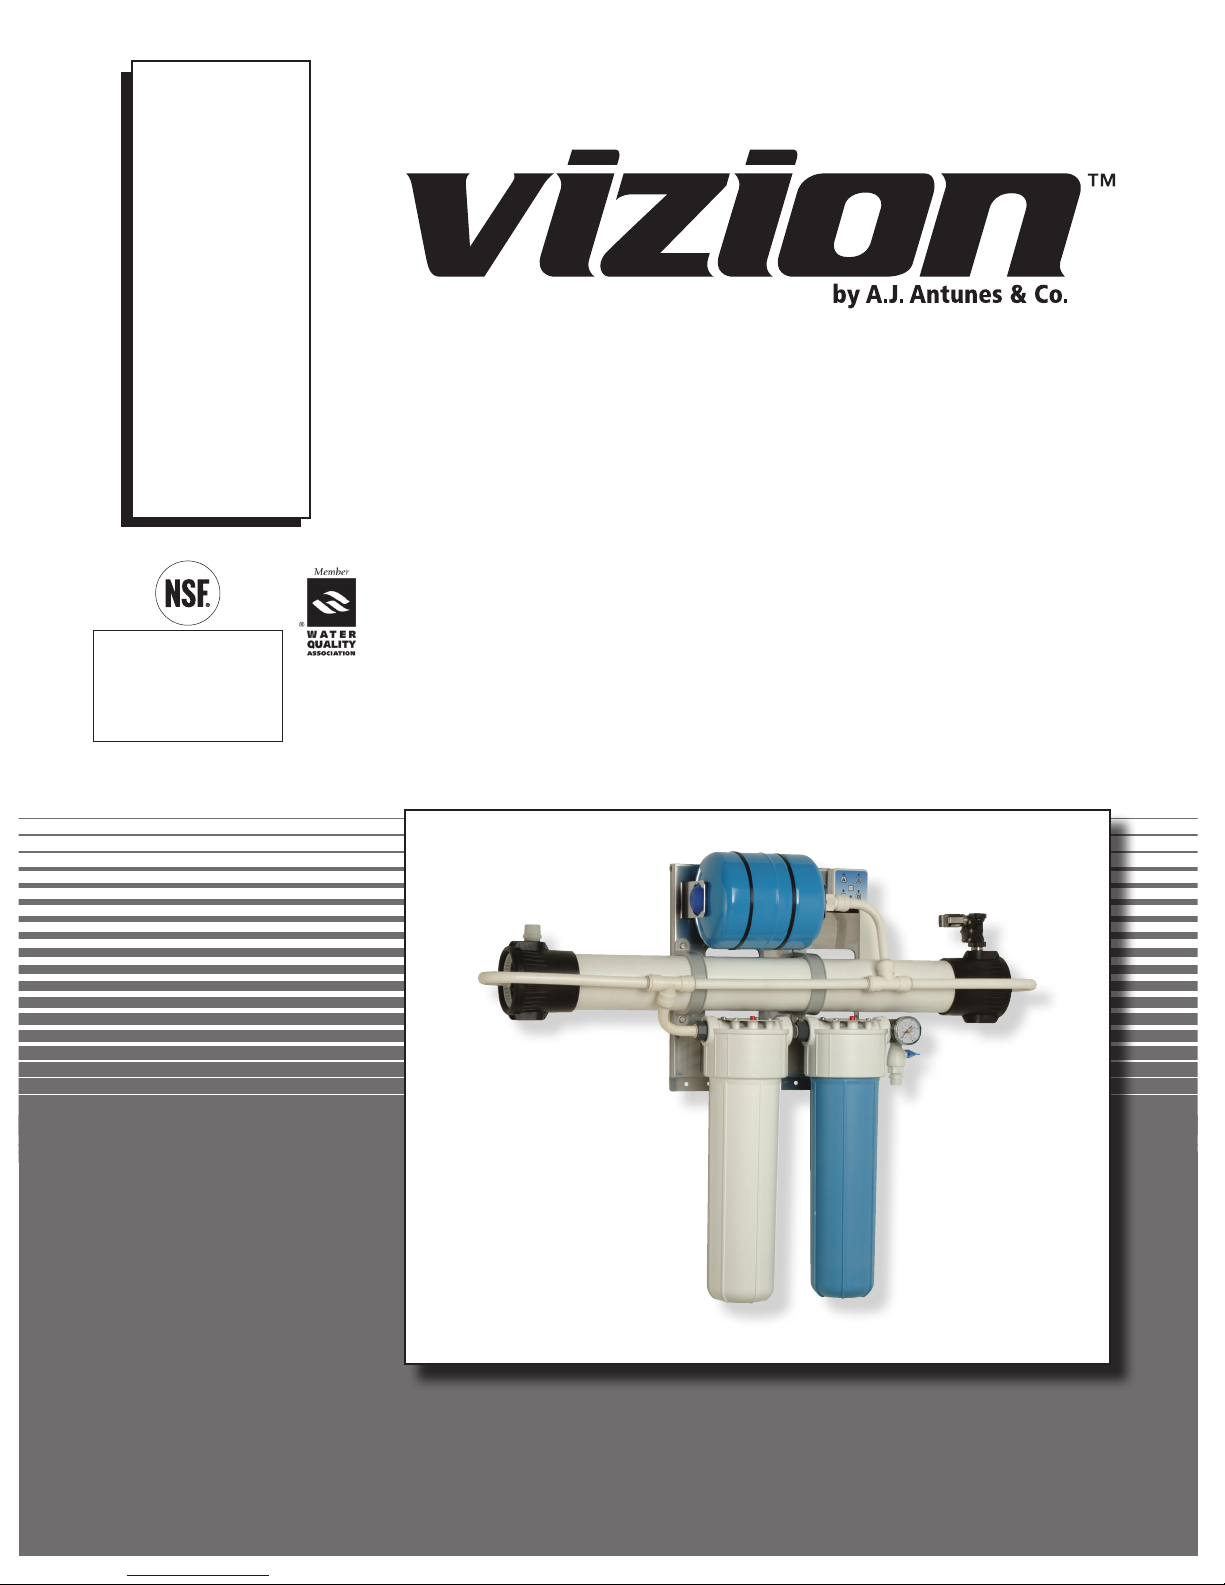
Vision VZN-441H User manual

VZN H SERIES
WATER FILTRATION
VZN-441H, 1" NPT
VZN-441H-T5, 1" NPT
Owner’s Manual
P/N 1011103 Rev. E 05/13
MANUFACTURING
NUMBERS:
9700760
9700765
System Tested and Certified by NSF
International against NSF/ANSI
Standard 42 and 53 for the reduction of:
Standard No. 42: Aesthetic Effects
Nominal Particulate Reduction Class I
Standard No. 53: Health Effects
Cyst Reduction
Turbidity Reduction.

VZN H SERIES
2P/N 1011103 Rev. E 05/13
OWNER INFORMATION
TABLE OF CONTENTS
IMPORTANT! Keep these instructions for future reference. If the system changes
ownership, be sure this manual accompanies the equipment.
Owner Information ...............................................................2
General............................................................................... 2
Warranty Information.......................................................... 2
Service/Technical Assistance ............................................. 3
Important Safety Information ..............................................4
Specifications .......................................................................6
Dimensions......................................................................... 6
Electrical Ratings and Plug Configurations........................ 6
Replacement Cartridges .................................................... 6
Electrical Cord & Plug Configurations................................ 6
Performance Data Sheet......................................................7
Filter Cartridge Capacities.................................................. 7
Performance Claims for Percent Reduction....................... 7
Operation...............................................................................8
Overview ............................................................................ 8
Manual Flushing................................................................. 8
Installation.............................................................................9
Unpacking .......................................................................... 9
Equipment Setup................................................................ 9
Mounting the System ....................................................... 10
Drain Valve Connection.....................................................11
Rinse Valve Connection ................................................... 12
System Inlet Connection .................................................. 12
Filtered Water Permeate Outlet Connection .................... 12
Inlet Water Plumbing........................................................ 12
Installing a Bypass ........................................................... 13
Starting the Controller ...................................................... 13
Rinsing the Ultra Filter Cartridge...................................... 13
Sanitizing the System and Lines...................................... 14
Rinsing the Carbon Element and TAC Cartridge ............. 14
Maintenance........................................................................15
Replacing the Ultra Filter Cartridge.................................. 15
Rinsing and Replacing the Carbon Element.................... 16
Rinsing and Replacing the TAC Cartridge ...................... 17
System Sanitization.......................................................... 17
Changing the Interval Setting........................................... 18
Resetting the Timer Program ........................................... 18
Check Permeate Tank Air Pre-Charge............................. 18
Troubleshooting .................................................................19
Replacement Parts .............................................................20
Notes....................................................................................23
Limited Warranty ................................................................24
General
The VZN system is an innovative filtration system that uses
proprietary multi-bore hollow fiber membranes as well as a
carbon element to provide the latest innovation in filtration
technology.
This manual provides the safety, installation, and
operating procedures for the VZN water filtration system. All
information contained in this manual should be read prior to
installing and operating the system. Your VZN system is man-
ufactured from the finest materials available and is assembled
to strict quality standards. This system has been tested at the
factory to ensure dependable trouble-free operation.
Warranty Information
Please read the full text of the Limited Warranty in this
manual.
If the system arrives damaged, contact the carrier immediate-
ly and file a damage claim with them. Save all packing materi-
als when filing a claim. Freight damage claims are the respon-
sibility of the purchaser and are not covered under warranty.
The warranty does NOT extend to:
• Damagescausedinshipmentordamageasresultof
improper use.
• Installationofelectricalservice.
• Normalmaintenanceasoutlinedinthismanual.
• Malfunctionresultingfromimpropermaintenance.
• Damagefrommoistureleakingintoelectrical
components.
• Damagefromtamperingwith,removalof,orchanging
any preset control or safety device.

VZN H SERIES
3
P/N 1011103 Rev. E 05/13
Purchased From:
Date of Purchase:
Model No.:
Serial No.:
Mfg. No.:
Service/Technical Assistance
If you experience any problems with the installation or opera-
tion of your system, contact A.J. Antunes & Co. at 1-630-784-
1000, or toll free in the United States at 1-800-253-2991.
Fill in the information in the next column and have it handy
when calling for assistance. The serial number is on the
specification plate located on the system.
OWNER INFORMATION (continued)
IMPORTANT
A.J. Antunes and Company reserves the right to change specifications and product
design without notice. Such revisions do NOT entitle the buyer to corresponding
changes, improvements, additions, or replacements for previously purchased equipment.
Suggested replacement period for the Ultra Filter Cartridge is
approximately 3 years.
For sales in the state of Iowa:
Seller: Date:
Buyer: Date:

VZN H SERIES
4P/N 1011103 Rev. E 05/13
IMPORTANT SAFETY INFORMATION
In addition to the warnings and cautions in this manual, use
the following guidelines to safely operate the system:
• Readallinstructionsbeforeusingequipment.
• Installorlocatetheequipmentonlyforitsintendeduse
as described in this manual.
• DoNOTusecorrosivechemicalsinthisequipment.
• DoNOToperatethisequipmentifithasadamaged
cord or plug; if it is not working properly, or if it has
been damaged or dropped.
• Thisequipmentshouldbeservicedbyqualifiedperson-
nel only. Contact A.J. Antunes & Co. for repair.
• DoNOTimmersecordorpluginwater.
• Keepcordawayfromheatedsurfaces.
• Thisequipmentshouldbesuppliedwithonlycold
water.
• ForinstallationsinMassachusetts,theCommonwealth
of Massachusetts Plumbing Code 248 CMR shall be
adhered to. The use of saddle valves are not permitted.
Please consult your local plumber.
The following warnings and cautions appear throughout this
manual and should be carefully observed.
• Unplugthepowercordbeforeperformingany
service or maintenance on the unit.
• Allelectricalconnectionsmustbeinaccordancewith
local electrical codes and any other applicable codes.
• WARNINGELECTRICALSHOCKHAZARD.FAILURE
TO FOLLOW THESE INSTRUCTIONS COULD
RESULT IN SERIOUS INJURY OR DEATH.
- Do NOT modify the power supply cord plug. If it
does not fit the outlet, have a proper outlet installed
by a qualified electrician.
- Do NOT use an extension cord with this unit.
• Ifthesupplycordisdamaged,itmustbereplacedby
the manufacturer, its service agent, or a similarly quali-
fied person.
• Thisequipmentistobeinstalledtocomplywiththe
local plumbing code and any other applicable code.
• Waterpressuremustnotexceed100psig(690kPa).
To reduce water pressure, install a water pressure
regulator and set to suit the application.
• Thetransmembranepressure(inletpressureminus
thepermeatewaterpressure)mustnotexceed45psi
(310kPa).
• Agroundfaultcircuitinterrupter(GFCI)mustbe
installed on the circuit to this system.
• Wheninstalledonmetallicplumbing,aproperlysized
electrical bonding jumper must be installed across the
inlet and outlet pipes serving this unit.
NOTE: If the inlet water pressure is less than 50 psig (345
kPa), it is recommended that a suitably-sized booster
system (outlet pressure 60 psig - 100 psig max (414 kPa -
690 kPa max) be installed.

VZN H SERIES
5
P/N 1011103 Rev. E 05/13
IMPORTANT SAFETY INFORMATION (continued)
Protect from becoming dry
If the membrane dries out, irreversible damage to the Ultra
Filter membrane may result. Protect the filter from becoming
dry by keeping it wet and sealed at all times.
Protect from freezing
If the Ultra Filter membrane freezes during operation or stor-
age, irreversible damage to the membrane and brittle cracking
of the cartridge or housing may result.
Protect from direct sunlight or other UV sources
Avoid long-term exposure to direct sunlight or other UV
sources. The Ultra Filter should be stored in a dark location.
Protect from high temperatures or abrupt variation in
temperature
Themaximumoperatingtemperatureis104°F(40°C).Avoid
abrupt variations in temperature. Any temperature variation
should be made slowly.
Protect from rough handling or dropping
Mechanical damage, external breakage, and/or internal break-
age of the filter can result if the system is dropped or bumped.
Handle with care at all times during transportation and instal-
lation.
Protect from organic solvents and concentrated acids
Prevent any and all contact of the membrane with strong sol-
vents, solvents containing chlorine, or concentrated acids. Do
NOT use strong solvents or concentrated acids on any plastic
parts of the filter system. Examples of some solvents to avoid:
acetone,methylacetate(nailpolishremover);hexane(spot
removers);turpentine,toluene(paintthinners);drycleaning
solutions, insecticides.
Protect from abrasive material
The membranes must be protected from abrasive materials
like shavings left in a pipe. Abrasive materials in contact with
the membrane can cause irreversible damage to the mem-
brane. All pipes must be flushed clean before installing the fil-
ter. All plastic parts of the filter system must be protected from
sharp objects like knives, sand paper, or other tools. Cutting
or nicking a plastic part can weaken it and cause a leak. Do
NOT use abrasive cleansers on any plastic parts.
Protect from water hammer
The system must be protected from shock, pressure surges,
or pulsation that may occur inside water pipes. Water ham-
mer occurs in pipes when a valve or faucet shuts quickly.
Installawaterhammerarrestor(pressurevesselcontaining
compressedairseparatedfromthewaterbyadiaphragm)to
reduce pressure shock.
CAUTION
This equipment is to be installed to comply with the
basic plumbing code of the Building Officials and Code
Administrators, Inc. (BOCA) and the Food Service
Sanitation Manual of the Food and Drug Administration
(FDA).
CAUTION
All electrical connections must be in accordance with
local electrical codes and any other applicable codes.
A ground fault circuit interrupter (GFCI) must be
installed on the circuit to this system.
When installed on metallic plumbing, a properly sized
electrical bonding jumper must be installed across the
inlet and outlet pipes serving this unit.
CAUTION
Water Flow Regulator Assemblies are NOT interchange-
able. Operating the system with the wrong Water Flow
Regulator or without a regulator can damage the sys-
tem, cause personal injury, and voids the warranty!

VZN H SERIES
6P/N 1011103 Rev. E 05/13
B
A
C
B
A
C
SPECIFICATIONS
Dimensions
VZN-441H-T5VZN-441H
Replacement Cartridges
Replacement Part Number
VZN-441H
VZN-441H-T5 L-440 Ultra Filter 7000412
VZN-441H
VZN-441H-T5 Carbon Element 7000669
VZN-441H-T5 TAC-05 Cartridge 7000554
NOTE: Includes plug adaptors for US, Europe, Australia, and UK.
Model &
Mfg. No.
Height
(A)
Width
(B)
Depth
(C)
VZN-441H
9700760
38"
(99cm)
50"
(127cm)
9"
(23cm)
VZN-441H-T5
9700765
38"
(99cm)
50"
(127cm)
9"
(23cm)
Electrical Ratings and Plug Configurations
Model &
Mfg. No. Volts Watts Amps Hertz
VZN-441H
9700760 100–240 10 .08 50/60
VZN-441H-T5
9700765 100–240 10 .08 50/60
CAUTION
All electrical connections must be in accordance with
local electrical codes and any other applicable codes.
A ground fault circuit interrupter (GFCI) must be
installed on the circuit to this system.
When installed on metallic plumbing, a properly sized
electrical bonding jumper must be installed across the
inlet and outlet pipes serving this unit.
Electrical Cord & Plug Configurations
Kit Model
Number Description Configuration
0012146
DC Power Supply
100 - 240 VAC
Includes the
4 plug adaptors
below NOTE: PLUG STYLE
MAY VARY
US
NEMA1-15(2pin)
or NEMA 5-15
(3Pin)
US
NEMA 1-15 (2 PIN)
or NEMA 5-15
(3 PIN)
Euro
CEE 7/16
EURO
CEE 7/16
AS/NZS
3112
AUS
(2Pin)
AS/NZS 3112
(2 PIN)
AUS
UK
BS 1363
BS 1363
UKUK

VZN H SERIES
7
P/N 1011103 Rev. E 05/13
PERFORMANCE DATA SHEET
Cartridge Tested and Certified by NSF
International against NSF/ANSI
Standard 42 and 53 for the reduction of:
Standard No. 42: Aesthetic Effects
Nominal Particulate Reduction Class I
Standard No. 53: Health Effects
Cyst Reduction
Turbidity Reduction
Cartridge has been tested according to NSF/ANSI Standard
42 and 53 for reduction of the substances listed below. The
concentration of the indicated substances in water enter-
ing the system was reduced to a concentration less than or
equal to the permissible limit for water leaving the system, as
specified in NSF/ANSI 42 or 53. While testing was performed
under standard laboratory conditions, actual performance may
vary.
Performance Claims for Percent Reduction
NOTE: The NSF information provided applies to the Ultra
Filter cartridge.
Do not use with water that is microbiologically unsafe or
of unknown quality without adequate disinfection before
or after the system. Systems certified for cyst reduction
may be used on disinfected waters that may contain fil-
terable cysts.
Filter Cartridge Capacities
Maximum Operating Pressure 100psig(690kPa)
Maximum Operating Temperature 104°F(40°C)
Minimum Operating Temperature 40°F(4°C)
Maximum Trans Membrane Pressure 45PSI(3.1Bar)
pH Range 3-10
MWCO 100 kD
NSF Certified Rated Service Flow:
VZN-441H 13gpm(49l/m)
VZN-441H-T5 13gpm(49l/m)
Substance Influent
Challenge
Concentration
Reduction
Requirement
Minimum
%
Reduction
cyst1minimum
50,000/L
99.95% 99.95%
Turbidity 11 ± 1 NTU ≤0.5NTU 99.1%
Particulate Class I
Particles 0.5 to <
1µm
at least 10,000
particles /mL
≥85% N/A
1based on the use of microspheres or Cryptosporium parvum oocysts

VZN H SERIES
8P/N 1011103 Rev. E 05/13
OPERATION
CAUTION
Changing the flush interval can cause the Ultra Filter to
plug prematurely and may reduce the life of the filter.
Consult the factory for more information.
Ultra Filtration
Cartridge
Rinse
Ball Valve
(Manual)
Carbon Element
Housing
System
Flush
Solenoid
Valve
(Automatic)
Check Valve
Assembly
with Outlet
Pressure Gauge
TAC Cartridge
Housing
Figure 1. System Components
Overview
The VZN system operates in two modes:
• Normal Operation Mode
• Flush Mode
During Normal Operation Mode, water enters the Inlet and
flows through the Ultra Filter before exiting the Permeate
Outlet as usable product water.
During Flush Mode, the Drain Valve opens and water enter-
ing the Inlet flushes and cleans the Ultra Filter membrane by
removing any debris collecting on the membrane wall.
The Drain Valve is only powered during Flush Mode.
NOTE: Do NOT unplug the power cord or turn off the sys-
tem during Flush Mode. If there is a power outage or the
system is unplugged, water will continue to be filtered
but the system will NOT flush. This could cause the Ultra
Filter to plug prematurely and may reduce the life of the
filter.
The flush is automated by the Universal Pulse Controller to
last 10 seconds and take place in one-hour intervals. This
intervalcanbechanged(seeChanging the Interval Setting
intheMaintenancesectionofthismanual).
Manual Flushing
A manual flush can be activated at any time by pressing the
FLUSH button on the Universal Pulse Controller.
When the FLUSH button is pressed, the Flush LED on the
controller flashes and the Drain Valve opens for 10 seconds.
After flushing is complete, the Drain Valve will close, the Flush
LED will stop flashing and the unit will automatically return to
Normal Operation Mode.
NOTE: A manual flush will not affect the interval flush
setting.

VZN H SERIES
9
P/N 1011103 Rev. E 05/13
INSTALLATION
Unpacking
1. Open the large box. It should contain:
A. Plate-mounted VZN system with Ultra Filter
Cartridge installed
B. Padded envelope containing:
• PowerAdaptor
• AdaptorPlugs
• Owner’sManual
• MountingBracket
• FilterWrench
• GloveandStickerKit
• SanitizingT-FittingandPlug
C. Carbon Element and Carbon Element Housing
D. TAC Cartridge and TAC Cartridge Housing
(VZN-441H-T5only)
3. Remove all packing materials and protective coverings
from the system.
4. Remove the information packet. Fill out and mail the
warranty card immediately to prevent any delay in
obtaining warranty coverage.
NOTE: If any parts are damaged, contact A.J. Antunes &
Co. IMMEDIATELY at 1-800-253-2991 (toll free in the U.S.
and Canada) or 1-630-784-1000.
Equipment Setup
GENERAL
When placing the system into service, pay attention to the
following guidelines:
• DoNOTimmersecordorpluginwater.
• Keepcordawayfromheatedsurfaces.
ELECTRICAL
The line voltage must match the voltage on the specification
label. The plug on the power cord must match the appropriate
outlet. Do NOT connect the system to a switched electrical
outlet.
PLUMBING
NOTE: The system must be connected to the COLD water
line. Do NOT connect the system to the hot water line.
The VZN system uses the following connections:
System Inlet 1" NPT
System Outlet
(Product Water) 1" NPT
Drain 3/4" FNPT
Rinse Outlet 3/4"GHT(GardenHose)
It is recommended that ball valves be installed on the inlet
and outlet of the system. This will aid in replacing cartridges
and servicing the system.
When making a plumbing connection to the system, use a
back-up wrench on the supporting plumbing. Always use a
quality, approved pipe sealant or thread seal tape on pipe
threads. Do NOT allow pipe sealant inside pipes.
Do NOT over tighten the connections. Use plastic fittings
when connecting to the plastic connections of the system.
If soldered plumbing is used, do NOT apply heat to, or near,
thefiltrationsystem.Useunion(O-ringseal)connectionsfor
ease of installation and future servicing.
SUGGESTED TOOLS AND SUPPLIES FOR INSTALLATION
The following tools and supplies are suggested to help with
the installation:
• Screwdriver • AdjustableWrenches
• DrillwithBits • Level
• TapeMeasure • PipeDopeorThreadSealTape
• TwoGallonBucket • Fresh,UnscentedLiquidChlorine
Bleach
• PipeWrenches • Hoseorpipefordrainline

VZN H SERIES
10 P/N 1011103 Rev. E 05/13
CAUTION
Due to its weight and size, the VZN system MUST be
mounted with the provided Mounting Bracket. Read
the Mounting the System section before attempting to
mount the VZN system. Use care when lifting heavy
objects.
Mounting the System
NOTE: Use caution when lifting and mounting the sys-
tem. The system MUST be mounted using the provided
Mounting Bracket.
The VZN system comes with a Mounting Bracket. When
mounting the system, pay attention to the following guidelines:
• Allow sufficient access for cartridge replacement. The
VZN-441H and VZN-441H-T5 should be mounted with 40
inches to the left or right.
• Mount the system near but NOT above an appropriate
electrical outlet.
• Mount the system near a drain for flushing operations.
• Mount the system before all consumable water
filtration processes.
• Mount the system with the provided Mounting Bracket
and hardware capable of supporting 120 lbs. or more.
• Secure the Mounting Bracket into wall studs or with the
appropriate heavy duty mounting hardware.
The system is pre-assembled to a Back Plate. The Back Plate
has mounting holes across the bottom portion to secure the
bottom of the system to the wall. Some of the bottom mount-
ing holes may be obscured. Plan your mounting accordingly.
Follow these steps to secure the Mounting Bracket to the wall
and seat the VZN system:
1. Use a stud finder and level to attach the Mounting
Bracket securely to the wall with the appropriate
mountinghardware(Figure2).
2. The Mounting Bracket is designed so that the VZN
system can be lifted and hung on the Mounting Bracket.
With assistance, lift the system and seat it onto the
MountingBracketsecurely(Figure2).
INSTALLATION (continued)
3. Secure the bottom portion of the VZN system to the
wall using the holes provided. Make sure the mounting
hardware secures the system into wall studs or use the
appropriate mounting hardware.
4. Screw the Carbon Element Housing onto the Carbon
Element Head without the Carbon Element installed.
NOTE: Do NOT install the Carbon Element at this time.
The Carbon Element should only be installed after the
Ultra Filter Cartridge has been rinsed.
5. On VZN-441H-T5 units, screw the TAC Housing onto
the TAC Head without the TAC Cartridge installed.
NOTE: Do NOT install the TAC Cartridge at this time. The
TAC Cartridge should only be installed after the Ultra
Filter Cartridge has been rinsed.
Secure Mounting Bracket
to wall studs using
appropriate hardware.
The system is
designed to hang from
the Mounting Bracket.
Back Plate
(holes along bottom
for additional
mounting stability)
Figure 2. Mounting the System

VZN H SERIES
11
P/N 1011103 Rev. E 05/13
INSTALLATION (continued)
Drain Valve Connection
The drain is for flushing particle buildup out of the
system during self cleaning.
1. Cutalengthoftubing(notsupplied)soitreachesthe
drain from the Drain Valve.
2. Connect one end of the hose to the Drain Valve with an
appropriatefitting(notsupplied)(Figure3).
3. Directtheotherendofthehosetothedrain(Figure3).
When connecting the drain hose, pay attention to the follow-
ing guidelines:
• Thedrainlineplumbingmustbeablesupporttheflow
rate whenever the system flushes. This flow rate is
dependent on the inlet water pressure, inlet pipe size,
and system.
• Thedrainlineleadingoutofthesystemmustbeas
short as possible and slope downwards without any
kinks or loops.
• Thedrainlineplumbingmustbepositionedand
securedatleast2inchesabovethedrain(Figure4).
This air gap protects the system from contamination in
the event of a backed-up drain.
• Thedrainusedmustnotbeblockedorrestricted.
• Thedrainusedmustbeaslargeorlargerthanthe
drain line plumbing.
2” (5.1 cm)
minimum
2” (5.1 cm)
minimum
Floor
Drain
Secure
End
Drain Line
from System
Drain Line
from System
Secure
End
Drain
Standpipe
Figure 4. Drain Line Plumbing
Secure Hose
with Worm
Clamp
Direct Hose
to Drain
Example Drain Valve
Connection
Figure 3. Drain Valve Connection

VZN H SERIES
12 P/N 1011103 Rev. E 05/13
INSTALLATION (continued)
System Inlet Connection
TheSystemInlethasa1”NPTmalethread(Figure6).Itis
recommended that a 1" ball valve be installed at the System
Inlet. Do NOT overtighten fittings as this could cause the plas-
tic ball valve to crack.
Use plastic fittings and a pipe thread sealant approved for use
on PVC fittings when making connections.
CAUTION
Do NOT use the Rinse Valve for consumable water.
Inlet Water Plumbing
The"T"Fittingwithplug(supplied)shouldbeinstalledatthe
System Inlet. This fitting will be used for sanitizing the system
anddownstreamplumbing(Figure6a).
Before connecting the fitting to the System Inlet, the plumb-
ing to the system must be flushed clear of all debris. Hold a
bucket at the inlet water line and slowly open the Inlet Water
Valve. Allow the pipe to flush until all debris is removed.
Filtered Water Permeate Outlet Connection
TheSystemOutlethasa1”NPTmalethread(Figure6).Itis
recommended that a 1" ball valve be installed at the System
Outlet. Do NOT overtighten fittings as this could cause the
plastic ball valve to crack.
Use plastic fittings and a pipe thread sealant approved for use
on PVC fittings when making connections.
3/4”
Garden
Hose
Connection
3/4”
Garden Hose
(not supplied)
directed
to drain
Rinse Valve Connection
Inlet
Outlet
Figure 5. Rinse Valve Connection
Figure 6. Inlet and Outlet Connections
Rinse Valve Connection
1. Obtain a length of 3/4” garden hose long enough to
reach from the Rinse Valve to the drain.
2. Installagasketintheendofthehose(non-drainend).
3. Connect the hose to the Rinse Valve fitting. Use a back-
upwrenchonthefittingifrequired(Figure5).
4. Direct the other end of the hose to the drain. Secure as
necessary.
NOTE: The drain MUST accommodate a flow of up to
15 gpm.
Figure 6a. Installing a T-Fitting for Sanitizing
Inlet Ball
Valve
Sanitation
Plug
T-Fitting Inlet

VZN H SERIES
13
P/N 1011103 Rev. E 05/13
INSTALLATION (continued)
Rinsing the Ultra Filter Cartridge
The Ultra Filter Cartridge comes pre-installed in the VZN
system. The Ultra Filter Cartridge must be rinsed before the
system is used to remove any air and protective solution.
NOTE: Ultra Filter Cartridge must be rinsed to drain
before use. Rinsing to drain removes storage solution
and air. Do NOT rinse into carbon if present. Carbon life
and/or performance may be affected.
NOTE: Make sure the Carbon Element and TAC Cartridge,
if present, are NOT installed. These should only be
installed after the Ultra Filter Cartridge has been rinsed.
1. Direct water from the Rinse Ball Valve to a drain.
2. Close the Outlet Ball Valve.
3. Close the Inlet Ball Valve.
4. Open the Rinse Ball Valve.
5. Slowly turn on the water supply to the VZN system.
6. Slowly open the Inlet Ball Valve. Air and water will come
out of the Rinse Ball Valve.
7. Press the FLUSH button. The Drain Valve will open and
air and water will come out of the drain line. Repeat six
times to ensure all air and storage solution are flushed
out of the Ultra Filter Cartridge.
8. Continue to allow water to run at full flow out of the
Rinse Ball Valve for at least 15 minutes.
9. After 15 minutes, close the Rinse Ball Valve and allow
the system to sit for 15 minutes without any water
flow to release any trapped air from the Ultra Filter
Cartridge.
10. Inspect the unit for any leaks, repairing as needed.
11. After 15 minutes, open the Rinse Ball Valve and wait for
five minutes to flush out any remaining air.
12. Close the Rinse Ball Valve and disconnect the garden
hose.
13. Press the FLUSH button to open the Drain Valve.
Repeat six times to ensure any remaining air is flushed
out of the system.
14. Open the closest downstream tap or faucet.
15. Slowly open the Outlet Ball Valve and allow water to run
through the system and out the faucet for five minutes.
Installing a Bypass
• It is recommended that an optional bypass be
installed to help with replacing cartridges and servicing the
system.
• 1. Install Ball Valves on the System Inlet and Outlet.
• 2. Install tees on the end of the Inlet and Outlet Ball
Valves.
• 3. Connect the two tees by installing plumbing and a
fullyported(preferably1”)BallValve.
• 4. When the system is in use, open the Inlet and Outlet
Ball Valves and close the Bypass Ball Valve.
• 5. When servicing is needed, close the Inlet and Outlet
Ball Valves and open the Bypass Ball Valve.
Water
Flow
Inlet Ball
Valve
(not supplied)
Fully
Ported
Ball Valve
Tee
Water
Flow
Outlet Ball
Valve
(not supplied)
Figure 7. Install Bypass
Starting the Controller
1. Select the proper AC plug for your electrical outlet and
install it onto the power supply.
2. Plug the appropriate end of the power cord into the
controller.
3. Plug the other end of the power cord into the electrical
outlet. The LEDs on the controller will light up.
4. The controller automatically enters Flush Mode and the
Flush LED starts to flash.
5. When flushing is complete, the Flush LED will stop
flashing and one or more LEDs will remain lit, indicating
the unit has power and which interval is selected in the
controller.

VZN H SERIES
14 P/N 1011103 Rev. E 05/13
INSTALLATION (continued)
Rinsing the Carbon Element and TAC Cartridge
The Carbon Element and TAC Cartridge MUST be rinsed
before using the system the first time and immediately after
the Carbon Element or TAC Cartridge have been replaced.
NOTE: If Installed, remove the TAC Cartridge Element
before proceeding. Do not rinse a new Carbon Element
with the TAC Cartridge Element installed.
1. Install the Carbon Element into the Carbon Element
Housing.
2. ScrewtheCarbonElementHousing(containingthe
CarbonElement)intoplaceontheCarbonElement
Head. The Housing will come to a hard stop at the end
of the thread. Use a Filter Wrench if necessary.
3. If installed, remove the TAC Cartridge Element from the
TAC Cartridge Housing.
4. Screw the empty TAC Housing into place on the TAC
Head. The Housing comes to a hard stop at the end of
the thread. Use a Filter Wrench if necessary.
5. Direct water from the Rinse Ball Valve to a drain. Then
open the Rinse Ball Valve and close the Outlet Ball
Valve.
6. Turn on the water to the system by slowly opening the
Inlet Ball Valve.
7. Allow water to flow through the Carbon Element and
TAC Housings to flush out trapped air and any debris
that may be present.
8. To help remove trapped air from the Housings, press
the RED Pressure Relief Button on the top of the hous-
ings until water just begins to come out.
9. Flush the Carbon Element for at least 5 minutes.
10. Install the TAC Cartridge Element into the TAC Housing
with the arrow on the cartridge pointing up. Reattach
the TAC Housing to the system. Flush for at least 5
minutes.
NOTE: Do NOT consume water used during this process.
11. Close the Rinse Ball Valve when rinsing completes.
12. Open the Outlet Ball Valve. The system is now ready
for use.
13. For new piping installations: After making the
connection to the System Outlet:
a. Open the faucet or tap closest to the filter system
b. Slowly open the Inlet Valve.
c. Allow the pipe to flush until all debris is removed.
Sanitizing the System and Lines
The plumbing must be sanitized to eliminate possible contam-
ination that may have occurred during the installation process.
Oneounce(30ml)ofliquidchlorinebleach(regularbleach,
unscented5.25%-6%sodiumhypochlorite)orKay-5
sanitizersolution(SodiumDichloro-s-TriazinetrioneDihydrate,
6%)orequivalentcanbeusedtosanitizetheplumbing.
TheKay-5sanitizersolutionismadebydissolvinga1oz.
packetofKay-5powderin2oz.(60ml)ofcleanwarmwater.
This can be done by removing 1 inch from the top of the
Kay-5packetandaddingthe2oz.ofwarmwatertothepack-
et. Mix with a coffee stirrer to dissolve. When added to the
system, this will create a 60-100 ppm chlorine solution.
NOTE: Follow the handling and safety instructions
supplied with the sanitizer.
NOTE: If installed, remove the Carbon Element and TAC
Cartridge from the system BEFORE Sanitizing.
1. Follow the steps in the Rinsing the Ultra Filter
Cartridge in the Installation section of this manual.
2. Turn off the water to the system.
3. Open the faucet or tap closest downstream to the
system.
4. Allow the system and plumbing to drain.
5. Remove the plug installed in the sanitizing "T" fitting at
the inlet of the system. Allow the water to drain out of
the system.
6. Pour the sanitizer into the inlet sanitation fitting using a
cup or funnel. Be careful not to spill the sanitizer onto
clothing or skin.
7. Reattach the plug on the sanitation fitting.
8. Slowly turn on the water supply to the system.
9. Allow water to flow through the system and out of the
open faucet or tap until the smell of sanitizer is present.
10. Close the faucet or tap.
11. Let the system stand without water flow for at least 15
minutes to allow the sanitizer to sanitize the pipes.
12. After 15 minutes without water flow, open the faucet or
tap.
13. Allow water to flow through the system until the
presence of sanitizer is gone.
14. Open all other faucets and taps in line with the system
to flush any remaining sanitizer from the plumbing.
15. Close all faucets and taps.

VZN H SERIES
15
P/N 1011103 Rev. E 05/13
MAINTENANCE
Replacing the Ultra Filter Cartridge
NOTE: Always install new Carbon Element and new
TAC Cartridge Element after replacing the Ultra Filter
Cartridge.
1. Turn off water to the system by closing the Inlet Ball
Valve and Outlet Ball Valve.
2. Press the FLUSH button to flush the system and relieve
pressure. Repeat several times to ensure permeate
tank is empty.
3. Remove the Carbon Element and remove the TAC
Cartridge Element if present.
4. Locate the long hooked tubing on the right and discon-
nect the long end from the tee by pushing the collet
squarely against the face of the fitting.
5. With the collet pushed in place, pull the tubing from the
fitting with your right hand.
NOTE: Water may drain from the tubing as it is removed.
Make sure there is enough room next to the system to
remove the cartridge.
6. RemovetheSnapRing(Figure8)fromtheUltraFilter
Housing. Grab the raised lug with a pair of pliers and
pull towards the center of the End Cap and away. The
Snap Ring should lift out of its groove.
7. Remove the End Cap, End Cap O-Ring, and Cartridge
(Figure8)fromthehousing.
NOTE: If the Cartridge does not easily come out of the
Housing, remove the opposite End Cap for assistance
during Step 5.
8. Inspect the Large End Cap O-rings and End Cap O-ring
for nicks or cuts. Replace as needed.
9. Lubricate all O-rings with a food-grade silicone lubri-
cant. Apply a light coating of lubricant to the inside
center tube at both ends of the new cartridge.
10. Record the serial number of the new cartridge. The
cartridge serial number is engraved on one end of the
outertube(forexample:05K12013).
11. Install the End Cap O-ring on the End Cap and insert
the Large End Cap into the end of the new cartridge.
12. Position the new cartridge and End Cap at the housing
and gently insert into the housing.
13. Press the End Cap into position until it is fully seated
and the Snap Ring groove is visible.
14. Install the Snap Ring by guiding the non-lugged end
into the groove first, pushing outward and working
around the ring until it snaps into place.
NOTE: Make sure that the Snap Ring is fully seated
before turning the water on.
15. Reattach the tubing that was removed in Steps 3 and 4.
Be sure the tubing is pushed past the O-ring.
NOTE: Make sure the fitting is completely inserted onto
the tubing past the O-ring. A loose connection results in
leaking at the point of connection.
16. Rinse the new Ultra Filter Cartridge before placing the
system back into operation. Follow the Rinsing the
Ultra Filter Cartridge, Sanitizing the System and
Lines, and Rinsing the Carbon Element and TAC
Cartridge procedures in the Installation section of this
manual to complete the cartridge change.
17. When rinsing is complete, repressurize the system by
opening the Outlet Ball Valve then opening the Inlet Ball
Valve.
Figure 8. Replacing the Ultra Filter Cartridge
Snap Ring
Ultra Filter
Housing
Ultra Filter
Cartridge
End Cap
O-Rings
End Cap
Snap Ring
End Cap
End Cap
O-Rings
Cartridge
O-Ring
Cartridge
O-Ring

VZN H SERIES
16 P/N 1011103 Rev. E 05/13
Rinsing and Replacing the Carbon Element
1. Turn off the water supply to the system and turn off the
water to all downstream equipment.
2. Open the Rinse Ball Valve and allow the system to
drain to ensure the permeate tank is empty.
3. Press and hold the RED Pressure Relief Button on the
top of each of the Carbon Element Housing to lower the
water level inside the housings by 2 to 3 inches.
4. RemovetheCarbonElementHousing(Figure9).
5. Empty any water into a drain and discard the old
Carbon Element.
6. Inspect the O-ring on the Carbon Element Housing
(Figure9).ReplacetheO-ringifitiscracked,twisted,
or missing.
7. Lubricate the O-ring with an approved food grade
lubricant and install into the Carbon Element Housing.
8. Install the new Carbon Elements into the Carbon
Element Housing.
NOTE: Make sure the Gasket remains in place in the
recessed grooves on both ends of the Carbon Element.
9. ScrewtheCarbonElementHousing(containingthe
CarbonElement)intoplaceontheCarbonElement
Head. The Housing will come to a hard stop at the end
of the thread. Use a Filter Wrench if necessary.
NOTE: Do NOT overtighten the Carbon Element Housing.
10. Direct water from the Rinse Ball Valve to a drain.
NOTE: It is important to direct the System Outlet to the
drain as the water resulting from the flush should NOT be
used.
11. Ensure the Rinse Ball Valve is open. Then turn on the
water supply to the VZN system. Allow water to flow
through the Carbon Element and Housing to clear out
trapped air and any carbon fines that may be present.
12. To help remove trapped air from the Carbon Element
Housing, press the RED Pressure Relief button on the
top of the Housing until water just begins to come out.
13. Rinse the Carbon Element for at least 5 minutes.
NOTE: Do NOT consume the water used for rinsing the
Carbon Element.
14. When the rinsing is complete, close the Rinse Ball
Valve and turn on the water to all downstream
equipment.
15. The system is now ready for use.
O-Ring
Carbon
Element
Housing
Carbon
Element
Carbon
Element
Head
RED Pressure
Relief Button
Gasket
MAINTENANCE (continued)
Figure 9. Carbon Element

VZN H SERIES
17
P/N 1011103 Rev. E 05/13
MAINTENANCE (continued)
Rinsing and Replacing the TAC Cartridge
(VZN-441H-T5 ONLY)
1. Turn off the water supply to the system and turn off the
water to all downstream equipment.
2. Press the FLUSH button to initiate the flush cycle.
Repeat several times to ensure the permeate tank is
empty.
3. Press and hold the Red Pressure Relief Button on the
topoftheTACHousing(Figure11)tolowerthewater
level inside the housing by 2 to 3 inches.
4. RemovetheTACHousing(Figure10).
5. Empty any water into a drain and discard the old TAC
Cartridge(Figure11).
6. Inspect the O-ring on the TAC Housing. Replace the
O-ring if it is cracked, twisted, or missing.
7. Lubricate the O-ring with an approved food grade
lubricant and install into the TAC Housing.
8. Install the new TAC Cartridge into the TAC Housing.
NOTE: Make sure the End Seal gaskets are in place in
the recessed grooves on both ends of the TAC Cartridge
(Figure 12).
9. ScrewtheTACHousing(containingtheTACCartridge)
into place on the TAC Head. The Housing will come
to a hard stop at the end of the thread. Use a Filter
Wrench if necessary.
10. Direct the water from the Rinse Ball Valve to a drain.
NOTE: It is important to direct the system outlet to drain
as the water resulting from the flush should NOT be used.
11. Slowly turn on the water to the system and allow water
to flow through the TAC Cartridge and Housing to clear
out trapped air and any carbon fines that may be pres-
ent.
12. To help remove trapped air from the TAC Housing,
press the Red Pressure Relief button on the top of the
Housing until water just begins to come out.
13. Rinse the TAC Cartridge for at least 5 minutes.
NOTE: Do NOT consume the water used for rinsing the
TAC Cartridge.
14. When the TAC Cartridge rinsing is complete, close the
Rinse Ball Valve and turn on the water to all down-
stream equipment.
15. Reconnect the water to service. The system is now
ready for use.
System Sanitization
The system and downstream plumbing should be sanitized
every six months. When necessary, follow the procedure in
Sanitizing the System and Lines in the Installation section
of this manual.
O-ring
TAC
Housing
TAC
Cartridge
TAC
Head
Red Pressure
Relief Button
Gasket
TAC
Housing
TAC
Cartridge
Figure 10. Removing the TAC Housing (VZN-441H-T5 only)
Figure 11. Replacing the TAC Cartridge (VZN-441H-T5 only)

VZN H SERIES
18 P/N 1011103 Rev. E 05/13
MAINTENANCE (continued)
Changing the Interval Setting Resetting the Timer Program
During the normal operation, the system will flush accord-
ing to the set interval. It is possible the system will flush at a
time of high water use. If this poses a problem, the controller
can be reset. Unplug the power supply, wait for 5 seconds,
and then plug the power supply in. When power is restored
to the controller, it will automatically enter Flush Mode. The
controller will then begin timing from the point when power is
restored based on the interval setting selected.
Check Permeate Tank Air Pre-Charge
It is recommended the permeate tank air charge be checked
every six months.
Tools and supplies required:
• AirPressureGauge,5‒40psirange(0.3‒2.7bar)with
tirevalve(SchraderValve)connection
• Sourceofcompressedair(manualbicycletirepumpor
aircompressor)
Flush
Interval Button Hold Time Button
LED
Flush
LED
15 minutes A10 seconds On On
30 minutes B10 seconds On On
45 minutes C10 seconds On On
1 hour A5 seconds On Off
4 hour B5 seconds On Off
6 hours C5 seconds On Off
12 hours D5 seconds On Off
24 hours D10 seconds On On
CAUTION
Changing the flush interval can cause the Ultra Filter to
plug prematurely and may reduce the life of the filter.
Consult the factory for more information.
CAUTION
Air pre-charge should only be checked and adjusted
under zero system pressure. The system must be
depressurized before checking the tank pre-charge.
Do NOT adjust the tank air pre-charge with the system
under pressure.
CAUTION
Be careful when adding air to the tank. Do NOT add too
much air pressure to the tank.
Though not recommended, the interval setting on the
Universal Pulse Controller can be changed. If the setting must
be changed, use the chart below. Press and hold the corre-
sponding button. After 5 seconds, the Button LED will turn on.
After 10 seconds, the Flush LED will also turn on.
Figure 12. Universal Pulse Controller
1. Depressurize and make sure the Permeate Tank is fully
drained.
2. Unscrew the protective cap from the air valve on the
tank.
3. Use the pressure gauge to check the tank pre-charge
for pressure.
NOTE: If any water comes out the air valve, the tank
bladder has ruptured and the tank needs to be replaced.
4. The permeate tank should have a pressure of 28-31
PSI.
• To add pressure to the permeate tank, use a manual
bicycle tire pump or other source of compressed air.
• To release pressure from the permeate tank, press
the center pin on the air inlet valve.
5. Once the permeate tank is at 28-31 PSI, replace the
protective cap on the air valve.
6. Pressurize system.

VZN H SERIES
19
P/N 1011103 Rev. E 05/13
TROUBLESHOOTING
Problem Possible Cause Corrective Action
Unit does not have power.
The power cord is not plugged into the
appropriate outlet or control box. Plug power cord into the appropriate outlet.
The unit is plugged into a switched
electrical outlet. Plug the power cord into an unswitched outlet.
Universal Pulse Controller is inoperable. Contact your maintenance person or Authorized
Service Agency.
Transformer is defective.
No water comes out of the
filter system.
Inlet/Outlet Ball Valves closed. Open the Inlet/Outlet Ball Valves.
System depressurized. Pressurize system.
Drain Valve is stuck open. Clean, rebuild, and/or replace the Drain Valve.
Rinse Ball Valve is open. Close the Rinse Ball Valve.
The system may be in a flush cycle. Wait for the flush cycle to end.
InletStrainer(ifinstalled)isplugged. Clean or replace Inlet Strainer
Ultra Filter Cartridge is plugged. Check Permeate Tank air pre-charge.
Replace Ultra Filter Cartridge.
Carbon Element is plugged. Replace Carbon Element.
Low water flow comes out of the
filter system.
See above. See above.
The inlet water pressure is too low. Boost the inlet water pressure.
The outlet check valve may be plugged
or defective.
Clean or replace the outlet check valve
assembly.
The inlet flow restrictor may be plugged. Clean or replace the inlet flow restrictor.
Water tastes bad.
Carbon Element need replacing. Replace Carbon Element.
Storage/shipping solution not completely
rinsed out of the system.
Rinse the system for a longer period of time;
replace Carbon Element.
Biological growth in pipes. Sanitize plumbing.
Water condition changed. Consider installing additional filtration.
Broken capillaries in Ultra Filter
Cartridge. Replace Ultra Filter Cartridge.
Flush runs continuously.
Drain Valve stuck open. Clean, rebuild, or replace the Drain Valve.
Controller sending continuous signals to
valve. Replace the controller.
Water splashes at drain during
flush.
Drain line not positioned properly. Reposition the end of the drain line.
Drain not capable of handling high flow
rate. Clean drain; find alternate drain.
Water leaks at ends of the Ultra
Filter cartridge after changing
cartridge.
O-ring not lubricated. Lubricate O-ring with food grade lubricant.
O-ring is split, cut, or twisted. Replace O-ring.
Water leaks from Carbon
Element.
O-ring not lubricated. Lubricate O-ring with food grade lubricant.
O-ring is split, cut, or twisted. Replace O-ring.
Water leaks from system
fitting or connection.
Fitting broken or loose. Tighten or replace the fitting.
Not enough pipe thread sealant used. Redo the fitting with the proper amount of seal-
ant.

VZN H SERIES
20 P/N 1011103 Rev. E 05/13
REPLACEMENT PARTS
VZN-441H Systems
30
33
25
1
2
37
3
31
34
12
28
20
14
35
29
16
32
15
36
19
4
56
7
8
9
11
17
21
13
26
27
18
20
21
22
23
24
9
8
10
10
This manual suits for next models
1
Table of contents
Popular Water Filtration System manuals by other brands

Lutz
Lutz Jesco Easychlorgen 4250 Installation, operation & maintenance instructions

Berkey
Berkey Black Berkey Elements instructions

Cuckoo
Cuckoo CP-QN1401SW/WHCBMYCI user manual

Watts
Watts Premier WP4V-50 Installation, operation and maintenance manual

Teka
Teka Spark operating instructions

Westfalia
Westfalia 15 36 27 instruction manual