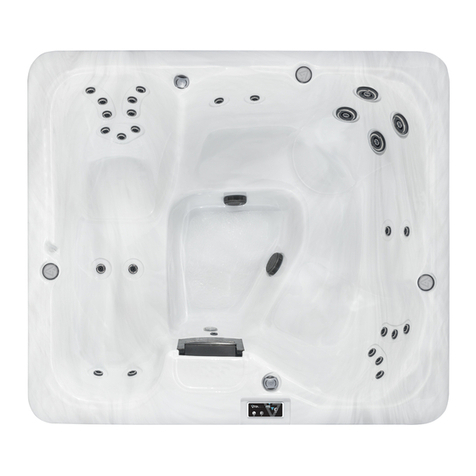
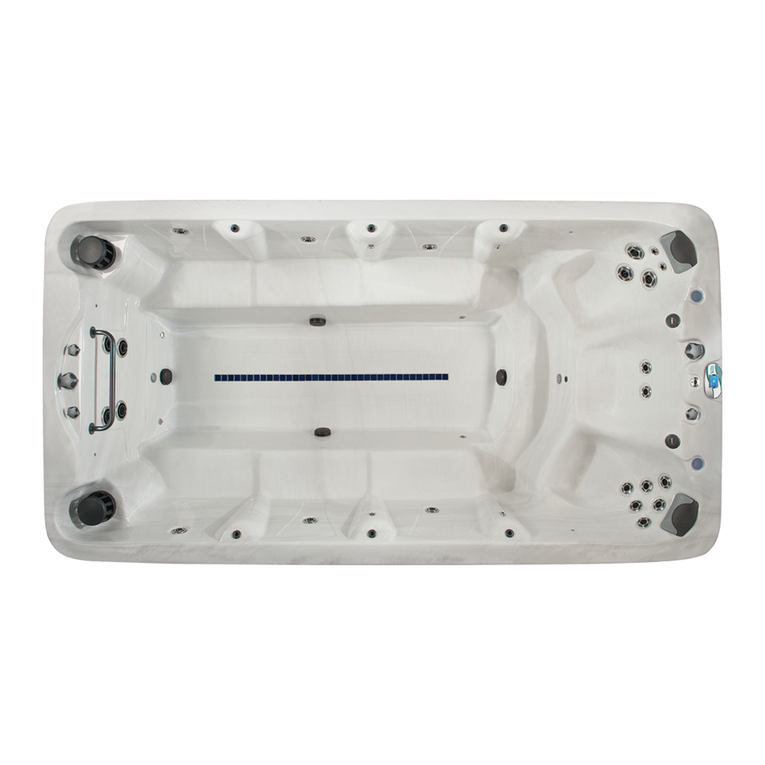
Vita Spa M15 Series User manual

\.

GENERAL INFORMATION
Owner's Record 3
Important Safety Instructions 4
Do's and Don'ts 5
INSTALLATION INSTRUCTIONS
Site Selection 6
Elechical Requirements and Installation 6
OPERATION INSTRUCTIONS
Filling Your SpaTurning Power On 7
Function Selection : 7
Heating Your Spa 7
TImer Operation 8
.Freeze Protection 8
Start-up O1emicals 8
Light OperationJet Operation 8-9
SPA MAINTENANCE
Drail141g Your Spa 9
Winterizing Your Spa 10
Filter Maintenance 10
Redwood Cabinet Majntenance ; 10
Marine Vmyl Cover 10
WATER QUALITY AND MAINTENANCE
Sanitizing 11
pH Control 11
VitaZone 11
ATTACHMENT
Wiring Diagram
w

This Owner's Manual has been designed to familiarize you with your Vita Spa opera-
tions and general maintenance. We suggest that you take some time to carefully review
it. Please keep this manual available for reference.
1£you have any questions regarding your Vita Spa set-up, operation, or maintenancel
contact your Authorized Vita Spa Dealer.
OWNER'S RECORD
DATE PURCHASED.
DATE INSTALLED:--
DEALER:
ADDRESS:
TELEPHONE :
SERIAL #:
To contact our Customer ServiceDepartment, pleasecal11-Soo-vrrA-SPA, or 1-305-685-5739,during
normal business hours, Monday through Friday, Sam.to 5pm, E.S.T.
The Serial Nwnber is located on the cabinet (Left of Door) or within the equipment com-
1, tment. Please verify that the serial nwnber is noted on your dealer's purchase contract.
(1]

a metal surface if each metal surface is perma-
nently connected by a minimum No.8 AWG
(8.42mm2) solid copper conductor attached to the
wire connector on the terminal box that is provid-
ed for this purpose). National Electrical Code
ANSI/ NMfP A7O-1993.
WHEN INSTAlliNG AND USING THIS ELEC-
TRICAl EQUIPMENT, BASIC SAFETY PRE-
CAUTIONS SHOULD ALWAYS BE FOL-
LOWED, INCLUDING THE fOllOWING: 7. DANGER. RISK OF ELECTRICAl SHOCK.
Do not permit any electrical appliances, such as a
light, telephone, radio, or television within 5 feet
(1.5 m) of the spa.
READ AND fOlLOW INSTRUCTIONS.
1. WARNING -To reduce the risk of injury, do
not permit children to use this product unless
theyare closely supervised at all times.
8. WARNING. TO REDUCE THE RISK OF
INJURY:
A. The water in a spa should never exceed 40
degrees Celsius (104 degrees F). Water tem-
peratures between 38 degrees C (100 1') and 40
degrees C (104 F) are considered safe for a
healthy adult. Lower water temperatures are
recommended for extended use (exceeding 10
minutes) and for young children.
2. DANGER. RISK Of ACCIDENTAL
DROWNING. Extreme caution must be exercised
to prevent unauthorized access by children. To
avoid accidents, ensure that children cannot use a
hot tub or spa uIlless they are supervised at all
times. BSmce excessive water temperatures have a
high potential for causingfetal damage during
the early months of pregnancy, pregnant or
possibly pregnant women should limit spa or
hot tub temperatures to 38degreesC (100F.)
3. A ground tennlnal (pressure wire connector)
is provided on the control box inside the unit to
permit connection of a minimum No.8 AWG (8.4
mm2) solid copper bonding conductor between
thjs point and any metal equipment, metal water
pipe, metal enclosures of electrical equipment, or
conduit within five feet (1.5 m) of the unit. c. Beforeentering aspa,the user should measure
the water temperature with an accurate ther-
mometer, since the tolerances of water tem-
perature regulating devices vary.
4. DANGER -To reduce the risk ,9finjury to per-
sons, DO NOT remove suction fittings. The suc-
tion fittings in this spa aresized to match the spe-
cific water flow created by the pump. Should the
need arise to replace the suction fittings or the
pump, be sure that the flow rates arecompatible.
Never operate the spa if the suction fittings are
broken or missing. Never replace a suction fitting
\vith one rated less than the flow rate marked on
the original suction fitting.
D. The use of alcohol, drugs or medication,
before or during spa use, may lead to uncon-
sciousnesswith the possibility of drowning.
E, Personssuffering from obesity or with a med-
ical history of heart disease,low or high blood
pressure, circulation system problems, or dia-
betesshould consult a physician before using
aspa.
5. Install the spa so proper drainage is provid-
ed for the compartment containing the electrical
components. F. Persons using medication should consult a
physician before w;ing aspa,sincesome med-
ication may induce drowsiness, while other
medication may affect heart rate, blood pres.
sure and circulation.
6. DANGER -RISK OF ELECTRICAL SHOCK.
Install at least 5 feet (1.5 m) from all metal sur-
-faces. (A spa may be installed within 5 feet of
GJ

Make sure the spa is connected to a
Ground Fault Interrupter (GFCI)
protected circuit. This GFCI is
required by the N ational Electrical
Code (NEC) and must be installed
by a licensed electridan. Test GFO
monthly.
'10 Prolonged immersion in water that is warmer
than normal body temperature can result in a
dangerous condition known as HypoTHER-
MIA. The causes, symptoms, and effects of
hypothermia may be described as follows:
Hypothermia occurs when the internal tempera-
ture of the body reachesa level several degrees
above the normal body temperature of 98.6
degreesF.The symptoms of hypothermia include
dizziness, fainting, drowsiness, lethargy, and an
increasein the internal temperature of the body.
The effects of hypothern1ia include (1) unaware-
nessof impending hazard, (2) failure to perceive
heat, (3) failure to recognize the need to exit the
spa, (4) physical inability to exit the spa, (5) fetal
damage in pregnant women, and (6) uncon-
sciousnessresulting in a danger of drowning.
Test the water with your hand
before entering the spa to be sure it
is comfortable.
DO
Remember that wet surfacescan be
slippery. Take care when entering
and exiting the spa.
DO
Use the thermal cov,erwhen the spa
is not in use,empty or full.
DO
Take steps to prevent the intrusion
of sand and dirt into the spa.
DO WARNING -The use of alcohol, drugs, or med-
ication can greatly increase the risk of fatal
hypothermia in hot tubs and spas.
DO Maintain proper water chemistry.
Personstaking medications which induce drowsi-
nesssuch astranquilizers, antihistamines or anti-
coagulants should not use the spa. Pregnant
women and persons with a medical history of
heart disease, circulatory problems, diabetes or
high blood pressure should consult their physi-
cian beforeusing the spa.
Clean the filter cartridge weekly.
J O
Use the spafor long periods of time
at temperatures over 104F.
DON'T
Operate spa without water. Turn
circuit breaker off before emptying
the spaand while it is empty~
DON'T
O1ildren are especially sensitive to hot water. At
no time should children have unsupervised
accessto the spa.Theuseof elevated decking may
encourage children to climb onto the thermal
cover -IT IS NOT DESIGNED AS A -SAFETY
OR CHILD RESISTANT COVER!
Store chemicals in~the spa's equip-
ment compartment.
DON'T
Open the electrical box. There are
no user serviceableparts inside.
DON'T
Operate the pump(s) on hi-speed
for extended periods of time with
the cover on. Extended hi-speed
pump operation will cause a slow
heat build-up due to water friction,
which could trip the spa's hi-limit
thermostat.
DONT Every Vita Spacomeswith athermal cover which
is provided with locking straps. INSTALL the
locks for your child's safety.
[!1

inspection authority.
1) The National Electrical Code (NEC)
requires that the IKJwer supply to this spa
must be a dedicated, ground fauh circuit
(GFCI) protected circuit with no oUter appli-
ances or lights sharing power off this circuit.
SITE SELECTION/PREPARATION:
Thespamust beinstalled on astructurally strong,
solid and reasonably level surface. The site
should allow for drainage away from the equip-
ment compartment in which the electrical compo-
nents arehoused. Takeinto accountthe following
when considering prospective sites. Refer to spa
equipment/ cabinet accessaddendum.
NOTE: All spas from the factory are set for
50 amp 220 volt. For 110 volt 20 amp oper-
atIon, an Internal conversion must be made
by a qualIfied, lIcensed electrician or your
dealer ac&urdlng to the instructions located
on die wiring diagram.
2) When opting for l10 volt 20 amp operation
(1.5 HORSEPOWER EQUll'MENT ONLY), the
power cord must reach the dedicated outlet. The
use of an extension cord is prohibited and will
void both the manufacturer's warranty and the
independent testing agency listing .
LOCAL CODES:
There may be certain restrictions and / or require-
ments that are particular to your locality.
DELIVERY PASSAGEWAY: "
,
Doors, halls, stairs, etc. may pose*obstructions to
deliver the spa to its intended site. 3) Refer to the wiring diagram to determine the
current, voltage and wire size requirements for
this spa.
MAl NTENAN CE:
Trees, lawn, placement surfaces, etc. can create
extra work in keeping your spaand spaareaclean
and safe. llffiN type wire is recommended.
WIre size for the distance of the wire nm must
conform to NEC and local electrical codes.
PRIVACY AND WIND SHIELDING:,
A sheltered environment can result in lower oper-
ating and maintenance costs. Use copper conductor only to ensureproper con-
nections. DO NOT USE ALUMINUM WIRE.
Your VITA SPA dealer is your best resource to
answer any questions or provide suggestions for
your spainstallation. 4) To obtain accessto the spa's power tern1ina1
strip, remove equipment accessdoor and remove
the control box cover.
5) Feedsupply conductors through power supply
ports provided on spa and install into control box.
6) Connect wires to terminal block (TBI) color for
color. All wires must be connected or damage
may result. TIGHTEN SECURELY!
7) A separate #8 (.4mm2) solid copper ground
wire should be connected between the spa
grounding lug and a recognized grounding rod
that is fully driven into the ground. N OTE: Do
not turn power on to the spa until the start-up
instructions have been followed.
IMPORTANT: All electrical wiring to the spa
must meet the requirements of the National
Electrical Code (N'EC)and any applicable stateor
local codes.The electrical circuit must beinstalled
by aqualified, LICENSED electrical contractor
[I1 and approved by a local building /electrical

NOTE: When power to the spa is turned on, the
spa should be in selection one mode. Before acti-
vating the heater,depresstheselectionbuttons on
the spa side control to engagethe various func.
tions asfollows:
NOTE: For best results, read each step carefully
and entirely before proceeding to the next. SELECnON ONE
Low speed pump is controlled by the time clock
(seeTImer Operation sec.) When low speed is on,
the heater will operate Wlti1 the desired tempera-
ture is reached.
I) FILL YOUR SPA
Wipe the interior of the spa with a damp, soft
cloth to remove any residue that may be on the
surface.Fill with a garden hose.As the spa is fill-
mg, check in the equipment accessarea for any
leak5. On occasion, it may benecessaryto hand
tighten a union fitting that may have come
loose during transit. Also check that the gate
valves are pulled out to the open position and
that the hose bib is closed. Continue to fill to
,
the water level line. "
SELECTION TWO
High speed pump (JETS)only. The heater will
operateif neededonly if the supply current to the
spais 220volt 50 amp.
SELECTION THREE
Blower only. The heater will not operate in this
mode.
N OTE: If your water is extremely hard, it is
preferable to fill the spa halfway with hard water
and the rest with softened water. Never fill the
spa entirely with softened water.
SELECTION FOUR
High speedpump (JETS)and blower. The heater
will operateif neededonly if the supply current to
the spa is 220volt 50amp. NOTE: Selectionstwo
through £our can be accessedregardless 0£ the
timer position by depressingthe selection button.
-2) TURNING POWER ON
Before turning the power to the spaon, rotate the
thermostat knob to the off position and place the
timer selection switch to the manual (up) posi-
tion. (SeeTImer Operation) Oose the equipment
accessdoor and turn the power on.
For dual pump systems,you will have a third but-
ton which operates the second pump (see Item
"A", m.l).
3) FUNCTION SELECTION & LIGHT
(See Item "B" 111.1)
4) HEATING YOUR SPA
After sequencingfunctions and returning to selec-
tion one (LOW SPEEDPillvfi'), turn the thermo-
stat knob to the hot position. The time it will take
to reach your desired temperature will vary
depending on the supply current to the spa. On
l10 volt 20amp, temperature will risetwo to three
degreesper hour. On 220 volt, the temperature
will rise sevento ten degreesper hour. When the
desired temperature is reached, place the timer
selectionswitch to the centerposition and setthe
time of day and the amount of run time required.
Item
wAw
Item
"U" NOTE: While heating t11espa, keep the air con-
trols closed.
mustration 1 [ZJ

5) TIMER OPERATION NOTE: When using a VITAZONE water purifica-
tion system, the minimal amount of run time will
increase. Refer to the vrrAZONE owners manual
for instructions.
6) FREEZE PROTECTION
Freeze protection is provided by setting the ther-
mostat at an adequate temperature level and by
setting the TImer Selection Switch (ill. 1 ) to the
ON (up) position.
Illumation 2 7) ADD START UPlcHEMICALs
Carefully follow the;directions and add the start-
up chemicals recommended to you by your deal-
er. Contact your dealer to clarify any questions
you may have.
The timer, which is located on the front panel of
the control box, controls the low speed pump
only. All other functions of the spa are accessible
regardless of the timer setting. 8) LIGHT OPERAnON
Thelight button is located on the spaside control.
Depressthe button oncefor the light to come on
and again to go off. There are two mood setting
colored lensesincluded with your spawhich may
be placed over the light lens in the spa.
SEmNG THE nME OF DAY
Rotate the outer ring 0£the timer clockwise until
present time of day (AM/PM) is aligned with
time indicator arrow. NOTE: The center dial will
also turn asthe outer ring is rotated and will cor-
respond to the time 0£day ~tting . 9-) JET OPERATION
Your Vita Spa is designed with a unique jet system
to allow you to select a wide variety of massage
patterns. The following is a description 0£the vari-
ous types of jets and their operation you may use
to tailor your spa t°tYour specific massage needs.
\,
.\t
DIREcnONAL 'a ROTAnoNAL
MASSAGE JETS
oP£. OPEN
TIMER SELECTION SWITCH
This switch has three positions for the various
operations of low speed. In the III" position the
low speed is permanently off. In the center posi-
tion (rIMER MODE)~ the low speed will turn on
and off asselected with the position of the timer
pins. In the lIOn position, which is used when ini-
tially heating the spa and also for freeze protec-
tion, low speed pump will run constantly regard-
less of the position of the timer pins.
SETTING THE RUN TIME
The outer ring of the timer is comprised of aseries
of pins that will slide in toward the center or out
toward the edge of the timer. Eachpin represents
fifteen minutes. When the pins areslid in towards
the center of the timer the low speed pump will
run. When they areslid to the outer edgethe low
speedis off. The minimal amount of run time rec-
ommended per day is four hours. The low speed
pump is used for mtration and maintaining the
desired water temperature in your spa. The
amount of nm time will vary depending on the
chosen temperature, supply voltage and the
external temperature. When selecting the run
time, all the pins between the time selectedmust
be slid in towards the center-
[[]
Cl.0SE
ClOU mustration3
When the pump is on and the turbo massage jet
is in the off position, the directional and rotation-
al massage jets will 00 operational. The water
flow direction is adjustable by rotating the direc-
tional jet nozzle. The amount of pressure can 00
adjusted by rota9ng the outer rim of the jet(s):
clockwise for m¥'imum pressure and counter
clockwise for maXimum pressure. Pressure may
also 00 varied by the use of the air control. .
)

EURO MASSAGE JET
(E-100 on MT Models)
TheSe'EUro jets are
used in various mod-
els for various purpos-
es, In cluster configu-
ration for back and
neck massage, they
Illustration 4 d l' f' ,
e lver a lrm pm-
point jet stream of massaging action, They can-
not be completely shut off, The Euro jet is not
directional nor adjustable, but can be pressure
controlled by adjusting the air volume,
Your VITA SPAis manufactured with the highest
quality and most durable materials available. A
spa care and maintenance program is recom-
mended to increase your comfort, maintain the
spa's reliability and protect your investment.
(
1. DRAINING YOUR SPA
Detergent residues from bathing suits as well as
soap film from your body may gradually accu-
mulate in the water. Foam inhibitors will sup-
pressthe foam but will not remove the soapfrom
the water. Eventually, the soap build-up in the
water will concentrate enough to leave an
unclean feeling on the user's skin, causesudsing
and make the water impossible to clarify.
Depending on the amount of soap input, the spa
water should last between two and three months.
AIR CONTROLS The air controls are
used to introduce air
into the water jet
stream. Marked with
arro~s for open or
closed: position, these
I' contr6ls all.ow the
user to Increase
rnustration 5 (open) jet pressure or
decrease (close) jet pressure as desired.
To drain your Spa:
A. Turn the power off at the GFCI breaker.
B. Attach a garden hose to the yellow hose bib
located under the filter housing i11Sidethe
equipment area, and"route the outlet of the
hoseto an appropriate draining ,area.The spa
will empty by gravity. Siphon or scoop out the
balance of the water.
FINGER MASSAGE JETS
Located at various points in the
spa. Creates a "finger massage"
action when blower is turned on.
mustration 6 IMPORTANT: Spawater with ahigh sanitizer
level may harm plants and grass.
TURBO MASSAGE JET
TI.bo ...
~
?
".-/
/ -0'
/' .-
J
-,f
If you aredraining your spafor the winter, be
sureto fully drain water from the pipe by:dis-
connecting the two unions at the gate valves.
Drain the water pump by removing the pump
plug. Then reinstall the valves and pump
plug.
~I
5~r
c. Remove the filter and clean as required.
D. fuspect the spa shell and clean as required.nlustration 7
The turbo massage jet allows water to be
diverted from other jets to full water pressure
from the turbo jet itself. (Not furnished on all
models).
E. Refill the spa BEFORErestoring power to it.
[?]

c. Use a rag to remove any debris at the bottom
of the filter housing. Replacethe cartridge.
2. WINTERIZING YOUR SPA
Your VITA SPA has been designed and engi-
neered for year-round use in any climate. D. We recommend the use of a spare filter. This
way one can be soaking and cleaning while
you continue to enjoy the use of your spa.
A. If the spa will not be used, drain it completely
following t11e instructions on //DRAINING
THE SPA./f
If you intend to use the spa during the winter,
keep the spa warm and set the timer to bring
the pump on atnight and a couple hours dur-
ing the day.It is recommended to setthe timer
to FREEZE PROTECfION (Seepg. 6) when
the temperahIre drops below 30 F. This will
keep the low-speed pump running 24 hours
per day and protect against potential freezing
of pipes. Note that accidental freezing could
result due to prolonged power failures.
B4. REDWOOD CA~INET MAINTENANCE
Your VITA SPAcabinet is made with ahigh qual-
ity redwood. It ~. factory stained and sealed.
Depending on the ~ocation and exposure of the
spa to the rain and sun, it is recommended to seal
the redwood cabinet once or twice a year with a
wood sealant. Vita's specially formulated red-
wood sealeris available at your vrrA SPA dealer.
5. MARINE VINYL COVER
Your cover is manufactured from a durable
marine grade, U.V. resistant material. Even SO,
monthly cleanmg and periodic conditioning is
recommended to maintain its beauty. To clean
and condition the vinyl cover:
3. FILTER MAINTENANCE
Vita Spasare designed with,the most efficient top
loading filtration system in the industry. Filter
maintenance is the most critical factor in keeping
your spa water clean. A. Lightly spray the cover with a garden hose to
rinse it and remove the debris.
To clean the filter: .
(NOTE: Never run spawithout filter) B. Using a large sponge or soft cloth and a mild
soapsolution (1teaspoon dish washing liquid
with 2gallons of water), scrub lightly in circu-
lar motion. Then rinse it thoroughly with
plenty of water.
Remove the cartridge and spray it with agar-
den hose.It will benecessaryto rotate the car-
tridge while spraying so as to thoroughly
remove the debris lodged between the liter
pleats.
A
c. Condition the vinyl after cleanjngby applying
a thin film of vinyl conditioner such as
ArmorA1l. NOTE: To remove tree saps, use
lighter fluid (not charcoal lighter, but the kind
used in cigarette lighters). Use sparingly and
rinse with mild soap solution afterwards.
Wipe dry.
After allowing to d~ inspect the cartridge for
calcium deposit (scaling) or an oil film. Rapid
mineral build-up from hard water, or oil build
up from the use of oil-based water scent or
body oil may coat the filter carhidge. A filter
cleaner to soak the cartridge is available from
your vrrA SPAdealer and should be used as
part of your spa maintenance.
B
[!Q]

ulating the amount of tablets, the amount the
floater js open, and the length of the filtration
cycles, you can control the amount of bromine in
your spa. A bromine residual of 2 to 3 ppm is gen-
erally considered desirable. A two-part bromine
system or granular chlorine (dichlor) are also
acceptable sanitizers.
GENERAL GUIDELINES FOR WATER
QUALITY MAINTENANCE
Maintaining water quality within specific limits
will enhanceyour enjoyment and prolong the life
of the spa.Safe,comfortable, and cleanspa water
is a fairly simple task to achieve, but it does
require regular attention becauseof thenumerous
factors that canalter it. Thereisno oneforn1ulato
be followed becauseof the variables, i.e. quality
of the water used to fill the spa, water tempera-
ture, user load, etc. For specific guidelines for
water quality maintenance, consult your VITA
SF41\dealer who can assistyou i,odevelop a pro-
gram based on your specific nee~s.Disregard for
water maintenance will result in poor soaking
conditions, damageyour spainv~stment and pos-
~ibly void your warranty. ~
pH CONTROL
pH is a measure of acidity and alkalinity of the
spa water. The recommended pH for spa water is
7.4 to 7.6 ppm. Below 7.0 (considered neutral), the
spa water is acidic and can cause damage to the
heating system. Above 7.8, the water is too alka-
line and can result in cloudy water and scale for-
mation on the spa shell, heater and cover.
IMPORTANT: NEVER USE CHLORINE
TABLETS (TRICHLOR) I. YOUR SP:A.
This chemical can have an extremely corrosive
effect on certain materials in the spa. Also, the use
of liquids, chlorine or acid, are not recommended.
Damage caused by use of these chemicals, or
improper use of any chemical, is not covered
under the spa warranty.
Spa water malntena9ce consIsts of dlree
separat~ easily developed programs:
1. Sanitizing and maintaining a safelevel of sani-
tizer in the spa water. OPJJOMAl VITAZONE WATER
PURIRCAnON SYSTEM
If you have elected to equip your spa with the
optional VITAZONE ozone water purification
system,you will find that your water stays fresh
and clean with significantly less usage of dlemi-
calsanitizer and you will alsobe ableto go longer
between spa draining. Read and follow the
instructions included with your VITAZONE
ozone water purification system to determine
how to adjust your chemical usage and filter
cycles.
2. Balancing the pH and maintaining the recom-
mended mineral content level.
3. Achieving and maintaining water clarity.
SANITIZING "
To destroy bacteria and organic d:ompounds in the
spa water, a sanitizer must be u~d regularly. The
use of a bromine floater is recommended. By reg-
[!.!1

PROBLEM AREAS TO CHECK
N othing works If power light on
No };leat
Low heat
Too hot
Leak By equipment
Location not visible
Blower not working
Blower
No light
.O1eck circuitry
.Reset "GFO" red button
.Make sUIethat timer is in
center or bottom position
.O1eck that valves are pulled open
.Turn thermostat knob up
.Reset hi~t switch
.Make sure that timer switch is
on "Bottom" position and low
speed pump is operating
.Turn up thermostat clockwise
.Set longer hours on your time
and let nm for 24hours
.O1eck that valves are pulled open
.Turn down thermostat
counter clockwise
.Make SUIethat timer switch is
in center position .
.Make sUIethat jet or high speed
is not "On"
.O1eck all 3 unions (hand
tighten only)
.deck for cracks at unions -
if cracks are found call dealer
for service
.Call dealer for service
.O1eck if blower cord is
connected to equipment £ak
.Switch selection bUtton till
blower li~ on
.Call dealer for service
.Check bulb; replace if bad
.Make sUIe air fine from push
button to equipment is on
.Push light switcl1 button one
time OIl,one time off
.Check GFO; if tripped, reset
(Elan 220volts only)
.Call dealer for service
Nohigh speedpump
High speedpump .Oteck valves are~ulled open ;
.Switch .Selection button until
..t" li~ is on
.Call dealer for service
.Make sure timer switch is on the
center or bottom position
.Make sure valves arepulled open
.Call.dealer for service
No low speedpump
Low Speedpump
VITA INTERN ATI O N AL
2320 NW 147th Street
Miami, Florida 33054
"',~
-0-"-
This manual suits for next models
2
Table of contents
Other Vita Spa Hot Tub manuals

Vita Spa
Vita Spa L100 SERIES User manual

Vita Spa
Vita Spa DUET User manual

Vita Spa
Vita Spa L100 SERIES User manual

Vita Spa
Vita Spa GRAPHIC SERIES User manual

Vita Spa
Vita Spa 100 Series User manual

Vita Spa
Vita Spa L200 series User manual

Vita Spa
Vita Spa Spa User manual

Vita Spa
Vita Spa xStream User manual

Vita Spa
Vita Spa LX series User manual
Popular Hot Tub manuals by other brands

Coast Spas
Coast Spas Buoyant Operating Spa System user manual

welldana
welldana Comfortana user manual

Dimension One Spas
Dimension One Spas Companion Specifications

Dimension One Spas
Dimension One Spas Aurora II Specifications

Kohler
Kohler K-1111-VLN-0 installation instructions

MAAX Spas
MAAX Spas DT6 owner's manual