1. Unplug machine from power source.
2. Remove the centering pad. Lift up on each corner of the centering pad and pulling up towards the center of the
drive socket. Repeat on each corner.
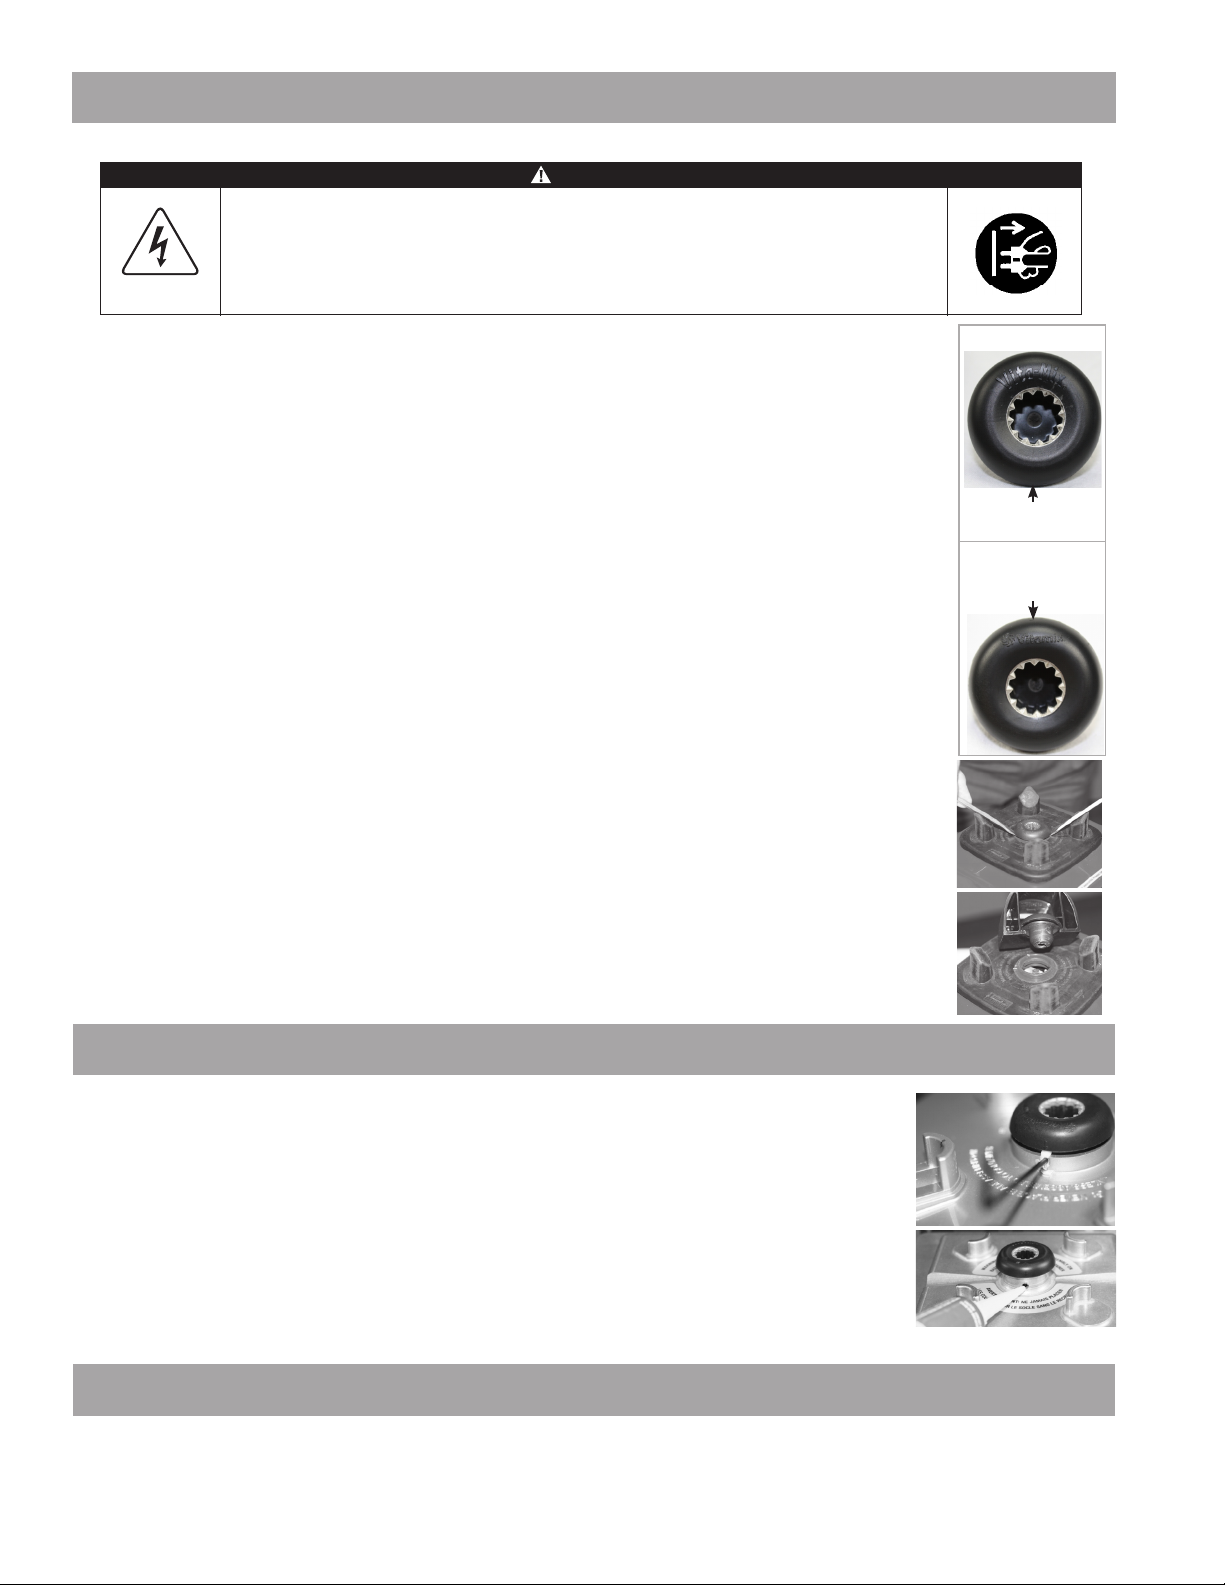
3. Locate the raised arrow and set screw:
Drive Socket A
Drive Socket B
Raised arrow and
set screw are here
Raised arrow and
set screw are here
• Drive Socket A: the set screw and raised arrow are located opposite of the Vitamix logo
• Drive Socket B: the set screw and raised arrow are on the same side of the Vitamix logo
4. Rotate the drive socket until the raised arrow is aligned with the small hole in the back of the top cover.
5. Insert a /” hex wrench through the hole in the top cover and find the setscrew in the drive socket.
Note: It may be necessary to push the wrench through the silicone sealant.
6. Turn the hex wrench 4 to 5 complete counter-clockwise turns.
7. Pull up on the drive socket to remove it from the blender.
Note: If the drive socket cannot be easily removed from the blender, perform one of the following procedures to pry
the drive socket o of the base:
• Use two screw drivers
a. Replace the centering pad on the base.
b. Apply equal pressure to both screwdrivers.
c. Once drive socket is o, remove rubber centering pad.
• Use Vitamix retainer nut wrench (Item 015596)
a. Replace the centering pad on the base.
b. Put the retainer nut wrench cutout in place underneath the drive socket.
c. Push down on the retainer nut wrench to release the drive socket from the drive shaft.
Note:
Be very careful when you are cleaning the drive shaft. There is a rubber gasket that protects the motor bearings.
It is very important that you do not remove any of the gasket material during the cleaning process.
8.
Check for any plastic that may be stuck to the drive shaft. Carefully remove plastic with a small screw driver or
something sharp. The motor shaft should be completely free from plastic.
WARNING
Electrical Shock Hazard.
Power MUST be DISCONNECTED from all sources of supply before performing service on
the machine.
Failure to follow instructions can cause death or electrical shock.
1. Align squared bottom of drive socket with squared top of motor shaft.
2. Push drive socket straight down onto the motor shaft and rotate until the raised arrow is aligned with slot
in housing.
3. Locate the set screw with a
/”
hex wrench. Turn the wrench clockwise until you feel the set screw make
contact with the motor shaft. Back o ¼ turn. Do not overtighten.
4. Pinch the drive socket between two fingers. Pull up on the drive socket. An audible “click” will be heard and
there should be slight play up and down.
5. Apply a small amount of silicone over the access hole in the housing. Use enough silicone to cover the hole
in the housing to prevent liquid from entering the housing.
6. Install the center pad with the Vitamix logo facing the front of the blender.
Plug machine in, fill container half full with water and test function.
Note: If the container vibrates excessively, remove the drive socket. Turn the drive socket a quarter turn before installation. If necessary, try all quarter
positions to find the best balance.
ASSEMBLY
DISASSEMBLY
TEST


