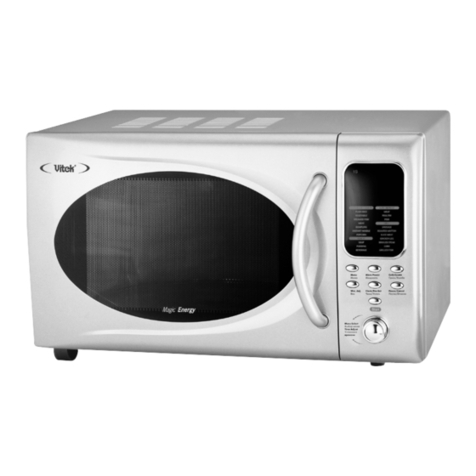
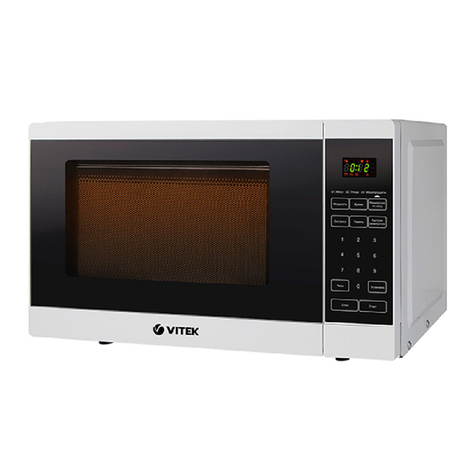
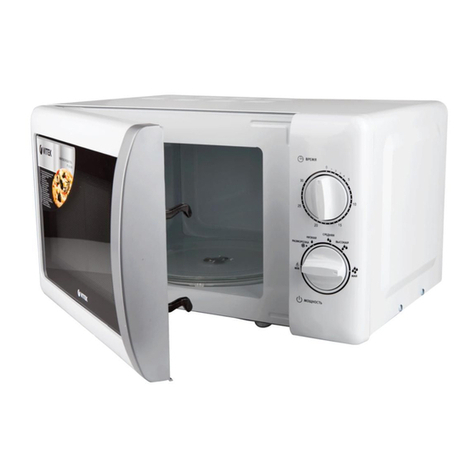
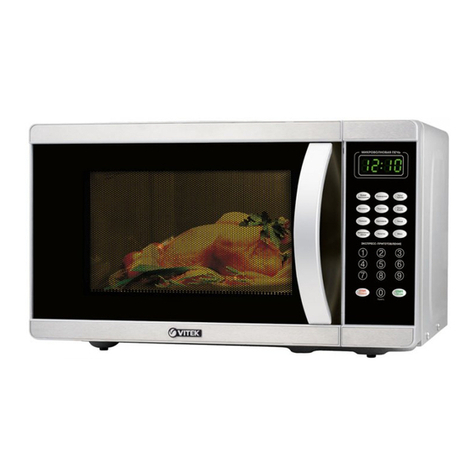
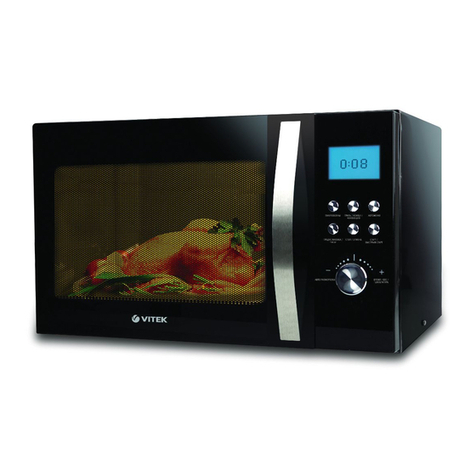
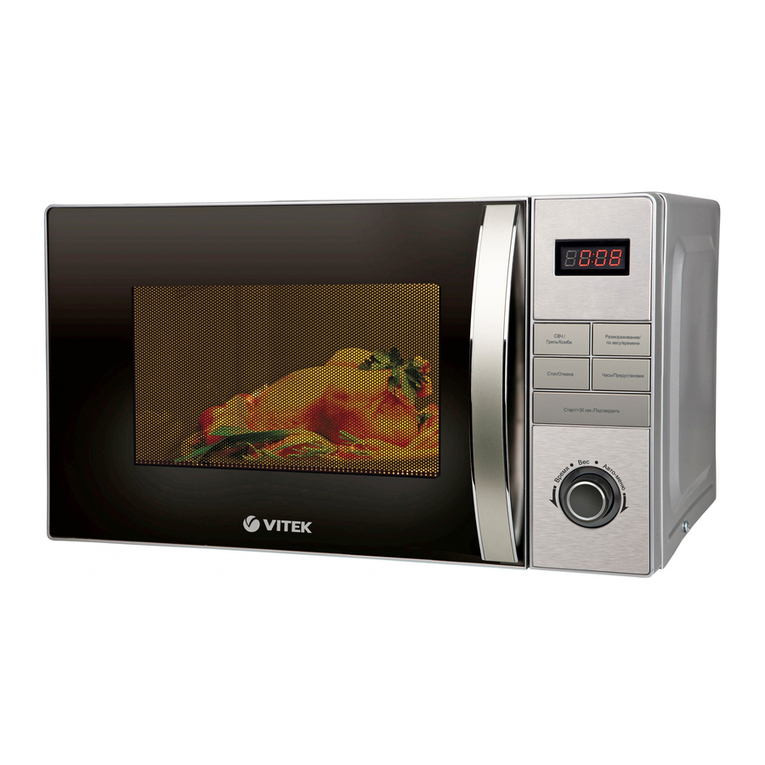
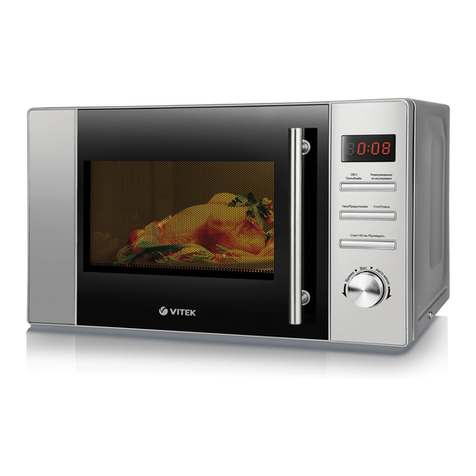
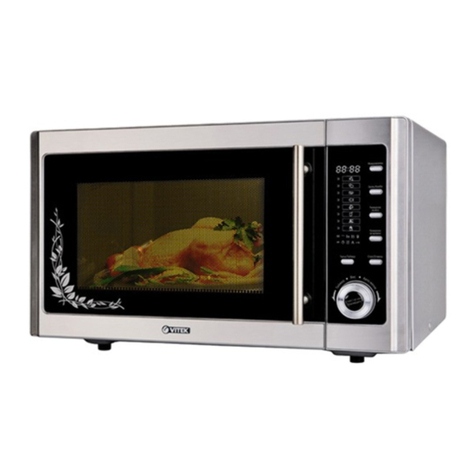
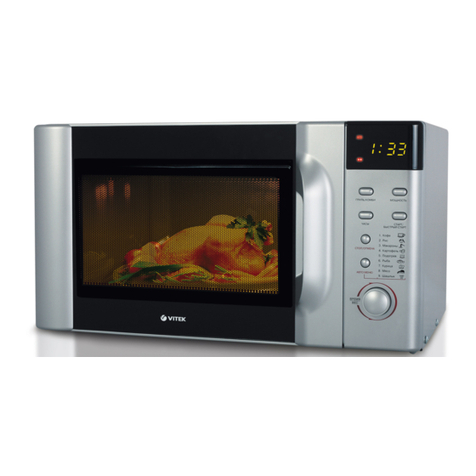
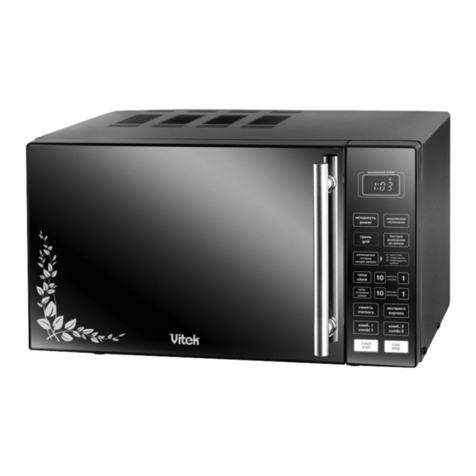
Vitek VT-1693 User manual

3
15
29
43
57
69
82
96
110
MANUAL INSTRUCTION
www.vitek-aus.com
VT-1693
1693.indd 11693.indd 1 12.03.2008 17:33:1912.03.2008 17:33:19

2
1693.indd 21693.indd 2 12.03.2008 17:33:2112.03.2008 17:33:21

3
ENGLISH
3
MICROWAVE OVEN
Description
1. Safety block system for breaking power
supply by opening the door during oven
operation
2. View window
3. Glass tray
4. Microwaves output
5. Control panel
6. Glass tray support
7. Roller ring
8. Display
9. Button for switching on grill/combined
cooking mode
10. Button for switching on automatic cook-
ing/warming mode
11. Button for selecting weight defrost
mode
12. Button for selecting speed defrost
mode
13. Button for switching on/increasing time
of cooking
14. Knob for setting up power/weight/time
15. Button for setting up cooking mode/re-
set wrong input data
16. Button for setting up current time/cook-
ing start time
17. Button for switching on microwave
mode and selecting power
18. Blocking-against-children mode icon
19. Grill (applicable in Grill mode only)
Safety guards to avoid exposure to
dangerous microwave radiation
• It is forbidden to operate this oven with
open door as this leads to exposure to
dangerous microwave radiation
• Do not modify electric circuits of safety
locking of the oven door.
• Do not put any objects in between the
housing of the oven and its door, remove
dirt and remnants of detergent from in-
ner surface of the door.
• Do not operate damaged oven, it is par-
ticularly important that the door should
be duly closed, and there must be no
damages of:
- doors (bending),
- joints and latches (broken or loose).
• Oven adjustment or repair should be un-
dertaken by qualified professionals at
authorized service centers only.
Important safety rules
Following safety rules is necessary while
operating electrical appliances.
Attention! In order to avoid burns, electric
shock, fire, exposure to microwave radia-
tion and any other injuries:
1. Read all instructions carefully before
using this appliance.
2. Before switching on make sure, the
supply line voltage corresponds to the
voltage specified on the appliance
3. Use microwave oven only for its intend-
ed purpose as stated in these instruc-
tions.
4. Microwave oven is intended for cooking
foodstuff and warming up ready dishes
only.
5. So, not switch the oven on without any
foodstuff loaded in.
6. Do not use the oven in case its power
cord or plug is damaged, the appliance
malfunctions, or was dropped down.
Attention! Children are allowed using
this appliance in your presence only af-
ter they are given appropriate instruc-
tions. They should realize danger of in-
correct usage of the oven and be able
to operate it following safety guards.
7. To avoid risk of fire starting inside the
operating chamber of the oven:
- Watch the process of warming any
foodstuff in paper or plastic wrapping
to avoid risk of fire.
- Remove wire ties from paper or plas-
tic bags before putting them into the
oven.
- In case of fire starting inside the oven,
switch it off immediately and discon-
1693.indd 31693.indd 3 12.03.2008 17:33:2112.03.2008 17:33:21

4
ENGLISH
nect from the wall outlet. Do not open
the door, otherwise fire would break
out.
- Do not use operating chamber as stor-
age, do not leave paper or foodstuff in-
side it.
Attention! Do not reheat liquids or
foodstuff in tightly closed package or
containers.
8. Be careful taking cookware out of the
oven, as boiling of beverages reheated
in a microwave oven could continue
even after reheating process is over.
9. It is forbidden frying foodstuff in the
oven.
10. It is forbidden cooking or reheating
shell eggs in microwave oven as they
could explode even after reheating.
11. Pierce hard skin of fruits and vegetables
such as potato, marrow, and apple.
12. Shake baby bottle and check tempera-
ture of its contents before feeding chil-
dren to avoid burns.
13. Cookware could get very hot through
hot foodstuff, thus use mittens and
oven gloves.
14. Cookware should be examined before
placing it into the microwave oven.
15. Do not block ventilation outlets located
on the housing of microwave oven.
16. Do not store or use microwave oven
outdoors.
17. Do not use microwave oven near water,
close to kitchen sink, in humid base-
ments or near swimming pool.
18. Do not immerse power cord or power
cord plug into water.
19. Avoid touching hot surfaces by power
cord or plug.
20.Do not allow power cord hanging over
table edge.
21. Use soft non-abrasive detergents and
sponge or soft cloth for cleaning doors
and surfaces of microwave oven.
Attention! It is very dangerous to carry out
any repair or maintenance procedures con-
nected with removal of protecting housings
preventing exposure to harmful microwave
radiation on your own. Do not do it!
Rules on cooking foodstuff in micro-
wave ovens
• While cooking bacon do not put it on the
glass tray, as local overheating of glass
could result in cracks.
• Use cookware recommended for micro-
wave ovens for cooking. Install it on the
glass tray.
• For uniform heating put thicker pieces
closer to walls of cookware.
• Keep an eye on the time of cooking. Set
shorter time, and increase it if required.
Do not exceed time of preparation, as it
may result in foodstuff burning or even
fire starting.
• Cook under glass cover to prevent juice
or fat from spraying out and provide uni-
form cooking.
• Turn over once such light foodstuff as
chicken or hamburger to speed up the
process of cooking. If pieces of meet are
big, turn them over twice or even three
times while cooking.
• Mix foodstuff while cooking, move them
up and down, from center to the edges
of cookware.
Cookware election guide
• Ideal material suitable for microwave
oven should be transparent for micro-
waves, thus allowing their energy going
through cookware inside foodstuff.
• Microwaves can not penetrate through
metal, so do not use metal ware or ca-
pacities with metallic finish.
• Do not put any objects produced out of
reused paper, as it could contain metal
inclusions and result in starting fire.
• Circle and oval plates are preferable for
using inside microwave oven than rec-
tangular ones.
4
1693.indd 41693.indd 4 12.03.2008 17:33:2112.03.2008 17:33:21

5
ENGLISH
Checking cookware before using inside
microwave oven
• Put cookware to be tested into the oper-
ating chamber of the oven (for example,
a plate), and place glass filled with water
on it.
• Switch microwave oven to maximum
power and set time of operation for not
more then 30 seconds.
• Touch the cookware carefully, if it is hot,
and water in the glass is cold, do not
use such ware for cooking in microwave
oven.
• Avoid increasing time of testing, do not
set more then 30 sec.
Materials and cookware suitable for using inside microwave oven
Aluminum foil
Foil could be used only in grill operating mode. The distance between
foil and the wall of microwave oven should be at least 2.5 cm. Small
pieces of foil could be used for covering meat or chicken slices to
avoid over frying.
If foil is located too close to oven walls in microwave mode,
sparking, burning of screening grating on the door and oven
damage is possible. In this case you lose the free warranty
servicing and repair.
Ware for frying
Follow manufacturer directions.
Bottom of ware for frying should be 5 mm thicker then rolling glass
tray. Inappropriate usage of cookware for frying can result in cracks
appearing in ware or glass tray.
Dinner ware
Intended for using inside microwave oven only. Follow manufacturer
directions.
Do not use cracked cookware.
Glass containers
Only containers produced out of heatproof glass and intended for
using in microwave oven. Make sure there is no metallic finish. Do not
use cracked cookware.
Glass ware
Only containers produced out of heatproof glass and intended for
using in microwave oven. Make sure there is no metallic finish. Do not
use cracked cookware.
Cooking in
microwave oven
using special bags
Follow manufacturer’s directions. Do not fasten the bags by metallic
strings or ties. Pierce one or more holes in a bag to provide steam
outlet.
Paper plates and
cups
Use for short term cooking or for warming only. Do not leave the
microwave oven unattended while cooking/warming foodstuff in such
ware.
Paper towels
You can cover foodstuff with such a towel to keep heat inside or for
preventing fat from splashing. Keep under continuous control and for
short term cooking/warming only.
Parchment paper
Use for preventing fat from splashing or as wrapper.
Keep under continuous control and for short term cooking/warming
only.
1693.indd 51693.indd 5 12.03.2008 17:33:2112.03.2008 17:33:21
6
ENGLISH
Plastic
Only plastic tools having an appropriate marking, “For microwave
oven”. Follow manufacturer’s instructions.
Some plastic containers could become soft because of heating of
foodstuff inside. Hermetically sealed container should be pierced or
cut through as mentioned on the container.
Plastic wrapping Only plastic tools having an appropriate marking.
Use for covering foodstuff to keep moisture inside.
Wax paper Use for preventing fat from splashing and for keeping moisture inside.
Materials and cookware not suitable for using inside microwave oven
Aluminum trays It may cause sparking.
Use cookware intended for microwave oven specially.
Cardboard cap with
metallic handle
It may cause sparking.
Use ware intended for microwave oven specially.
Metallic ware or ware
with metallic rim
Metal screens microwaves energy. Metallic rim could provoke spark-
ing.
Metallic spins It may cause sparking and starting fire of packing during cooking/
warming foodstuff.
Paper bags It may cause fire starting in microwave oven.
Soap Soap would be fused and cause dirtying of microwave oven operating
chamber.
Wood Wooden ware could become dried out, cracked all over and flared up.
Oven grounding directions
Microwave oven should be grounded se-
curely. In case of any short circuit, the
grounding prevents the risk of electric
shock, as current would be discharged
through grounding cable. Power cable with
grounding wire and power cord plug with
grounding pin are provided with this micro-
wave oven. The plug should be inserted into
the wall outlet with corresponding ground-
ing contact.
Warning: Inserting plug with grounding
pin into a slot without grounding contact
can lead to electric shock. Consult a quali-
fied electrician if you do not understand
instructions on grounding or in case of any
doubts about the security of the microwave
grounding.
In order to prevent power cable from tan-
gling, this microwave oven is provided with
short power cable.
In case of using extension cord, use only
3-wire extension cords with grounding con-
tacts in its plug and slots.
- Marking on the wire section of microwave
oven power cable and on the extension
cord should be the same.
- There must be a grounding wire in the ex-
tension cord.
- Extension power cable should not hang
over the edges of a table, where children
could pull it; it should be placed in such
1693.indd 61693.indd 6 12.03.2008 17:33:2112.03.2008 17:33:21
7
ENGLISH
a way as to prevent people from walking
over it.
Setting up
• Make sure the operating voltage of the
power supply line meets the voltage
marked on the housing of the appliance.
• Make sure that all elements of packing
are removed from the operating chamber
of the oven.
• Do not remove light-gray mica plate from
inside of the operating chamber, located
at the place of microwave radiation out-
put (4). It serves as magnetron protec-
tion.
Attention! Make sure there are not any
damages, such as the following: door is
bent or broken, fastening or latch joints
are broken or loose, there are dents in-
side the oven or on the door. It is forbid-
den using the microwave oven in case of
any damage.
• Install the microwave oven on a firm flat
surface, able to bear its weight and maxi-
mum weight of foodstuff to be prepared.
The place for installation should be not
accessible by small children.
• Do not install the oven at any places with
excessive humidity or temperature, and
also near highly inflammable objects.
• Good ventilation is essential for normal
operation of this appliance. Provide free
space: 30 cm above the oven and 7-8 cm
behind and at both sides. Do not cover
or block any openings on the appliance
housing. Do not detach small legs on the
bottom of the oven.
• It is forbidden using the oven in case the
glass tray and rolling ring is absent.
• Make sure power cable is not damaged
and does not run under the oven or on
any hot surfaces or over any sharp ob-
jects.
Assembling microwave oven
Remove packing material and accessories
out of the operating chamber of the oven.
Examine the oven in order to detect any
damages if any. Pay special attention to
the door, make sure it is functioning prop-
erly. Do not install and switch on the oven in
case there are any damages.
Protective coating
Housing: Remove protective film from the
surface of the housing if any.
Do not remove light-gray mica plate lo-
cated inside the housing, at the place
of microwaves output (4), it serves as
magnetron protection.
Glass tray installation
1. Insert the support of glass tray (6) into
the opening on the bottom of the oper-
ating chamber.
2. Install the rolling ring (7) on the bottom
of the operating chamber.
3. Carefully install glass tray (3) on the roll-
ing ring (7) uniting its lugs with the slots
of the support (6).
• Never install glass tray upside down.
• Do not interfere with free rotation of the
glass tray during microwave oven opera-
tion.
• Always use glass tray and rolling ring for
cooking any foodstuff.
• Place cookware on the glass tray only.
• Glass tray could rotate clockwise or anti-
clockwise. It is normal.
• If any cracks or cleavages on the glass
tray, stop using the oven immediately
and replace the tray.
Operation
• Before switching on, make sure the oper-
ating voltage of power supply line meets
the voltage marked on the housing of the
appliance.
• Put foodstuff into the operating chamber
and close the door.
1693.indd 71693.indd 7 12.03.2008 17:33:2112.03.2008 17:33:21
8
ENGLISH
1. Setting time
After switching on the oven sound signal
will be played and time "0:00" will appear
on the display. You can set the time in range
0:00-23:59;
1.1 Press button (16) «clock/preset»,
blinking digits «0:» will appear on the
display.
1.2 Set the hour by rotating knob (14).
1.3 Press button (16) «clock /preset»
blinking digits «:00» will appear on the
display.
1.4 Set the minutes by rotating knob (14).
1.5 Press button (16) «clock /preset»» to
complete setting current time. Current
time will appear on the display with
blinking separator (:).
Notice:
- If the clock is not set, current time will not
be displayed.
- In case of wrong clock setting, press
button (1) “stop” to reset the display and
repeat steps 1.1-1.5.
2. Cooking in microwave oven
Choose microwave oven power level and
set the time of operation.
2.1 Open the door of the oven, put food-
stuff inside the operating chamber,
and close the door.
2.2 Press button (17) «microwave», indi-
cation "Р-100" starts blinking on the
display. Press button (17) «micro-
wave» to choose required power level
or rotate knob (14). Power mode will be
displayed.
Number of
strokes
Display
indication Oven power
1 Р100 100%
2 Р80 80%
3 Р50 50%
4 Р30 30%
5 Р10 10%
2.3 Press button (13) «start/+30 s» to
confirm the power mode you have
chosen.
2.4 Set time of cooking by rotating knob
(14). Chosen time will be displayed.
You can set up cooking time in range
0:05 – 95:00 with step mentioned in
the table below.
Time interval Time setting step
0 - 1 min 5 sec
1 - 5 min 10 sec
5 - 10 min 30 sec
10 - 30 min 1 min
30 – 95 min 5 min
2.5 Press button (13) « start/+30 s» to
start cooking, indication of remaining
time is displayed. After the operation is
over, the oven will be stopped and five
sound signals will be played.
3. Cooking using grill mode
3.1 Open the door of the oven, put food-
stuff inside the operating chamber,
and close the door.
3.2 Press button (9) « grill/comb», symbol
"G" will be blinking on the display.
Notice: You can also choose cooking
in grill mode by pressing button (9)
consequently or by rotating knob (14)
after pressing this button.
3.3 Press button (13) « start/+30 s», to
confirm the mode you have chosen.
3.4 Set time of cooking by rotating knob
(14). Preset time will be displayed.
3.5 Press button (13) « start/+30 s», to
start cooking, indication of remaining
time will be displayed.
Notice: In order to have the best effect of
using grill, turn over foodstuff several times
during cooking. After half of preset cook-
ing time is over, you hear two sound signals
reminding you about the necessity to turn
1693.indd 81693.indd 8 12.03.2008 17:33:2112.03.2008 17:33:21
over the dish. Open the door, turn the food
over, close the door and press button (13)
«start/+30 s», to continue cooking. It is
not necessary turning foodstuff over if you
do not want doing it.
3.6 After the operation is over, the
oven will be stopped and five sound signals
will be played.
4. Combined cooking mode
4.1 Open the door of the oven, put food-
stuff inside the operating chamber,
and close the door.
4.2 Press button (9) « grill/comb», symbol
"G" will be blinking on the display.
4.3 Pressing button (9) consequently or by
rotating knob (14) after pressing this
button choose one of the two modes
of combined cooking. Chosen mode
«С-1» or «С-2» will be displayed.
4.4 Press button (13) « start/+30 s», to
confirm the mode you have chosen.
4.5 Set time of cooking by rotating knob
(14). Preset time will be displayed.
4.6 Press button (13) « start/+30 s», to
start cooking, indication of the remain-
ing time will be displayed. After the op-
eration is over, the oven will be stopped
and five sound signals will be played.
Combined cooking variants
Mode Display indi-
cation
Oven
power
Grill
power
1 С-1 55% 45%
2 С-2 36% 64%
5. Defrost foodstuff by weight
5.1 Open the door of the oven, put food-
stuff inside the operating chamber,
and close the door.
5.2 Press button (11) «weight defrost»,
indication "dЕF-1" (weight defrost) will
be displayed.
5.3 Set foodstuff weight by rotating knob
(14). You could input weight in range
from 100 up to 2000 g.
5.4 Press button (13) « start/+30 s» to
start defrost process. Remaining time
is displayed. It is set up automatically
depending on chosen weight. After the
operation is over the oven will stop and
five sound signals will be played.
6. Speed defrost
6.1 Open the door of the oven, put food-
stuff inside the operating chamber,
and close the door.
6.2 Press button (12) «speed defrost» in-
dication "dЕF-2" (speed defrost) will
be displayed.
6.3 Set foodstuff weight by rotating knob
(14). You could input weight in range
from 100 up to 2000 g.
6.4 Press button (13) «start/+30с
start/+30 s» to start defrost process.
Remaining time is displayed. It is set
up automatically depending on chosen
weight. After the operation is over, the
oven will be stopped and five sound
signals will be played.
7. Multi-stage cooking
This oven allows cooking in two steps.
When first step is completed, you hear
sound signal, after which the second step
is initiated.
Notice: Defrost mode could be set up only
for the first step. Automatic modes cannot
be chosen for any step of cooking.
For example, you need to defrost 500g of
foodstuff and then cook it in microwave
mode at power 80% fir 7 minutes. To ac-
complish it do the following:
7.1 Open the door of the oven, put food-
stuff inside the operating chamber,
and close the door.
7.2 Press button (11) «weight defrost»,
indication "deF-1" (weight defrost) will
be displayed.
7.3 Set foodstuff weight (500g) by rotating
knob (14).
9
ENGLISH
1693.indd 91693.indd 9 12.03.2008 17:33:2112.03.2008 17:33:21
10
7.4 Press button (17) «microwave», in-
dication "Р-100" is displayed. To se-
lect power level 80 % press button
(17) once more or rotate knob (14).
Indication «P-80» will be displayed.
7.5 Press button (13) «start/+30 s», to
confirm the mode you have chosen.
7.6 Set time of cooking (7 minutes) by ro-
tating knob (14). Indication «07:00» will
be displayed.
7.7 Press button (13) «start/+30 s», to
start cooking process. Remaining time
is displayed. It is set up automatically
depending on chosen weight. After the
operation is over, the oven will stop and
five sound signals will be played.
8. Setting up cooking tart time
8.1 Open the door of the oven, put food-
stuff inside the operating chamber,
and close the door.
8.2 Check if preset time is correct, and
choose cooking program according to
your preference.
Notice: You can set up maximum two steps
of cooking. If you delay time of cooking
start up, defrost mode cannot be chosen
as a program of cooking.
For example, you need to cook something
in microwave mode at power level 80% for
7 minutes. To accomplish it do the follow-
ing:
• Press button (17) «microwave», indi-
cation "Р-100" is displayed. To select
power level 80 % press button (17) once
more or rotate knob (14). Indication «P-
80» will be displayed.
• Press button (13) «start/+30 s», to con-
firm the mode you have chosen.
• Set time of cooking (7 minutes) by rotat-
ing knob (14). Indication «07:00» will be
displayed.
8.3 Press button (16) «clock/preset»,
blinking hour digits will be displayed.
8.4 Set the hours by rotating knob (14).
8.5 Press button (16) «clock/preset»
blinking minute digits will be dis-
played.
8.6 Set the minutes by rotating knob (14).
8.7 Press button (13) «start/+30 s», to
complete setting the time.
When current time meets the preset time,
you hear two sound signals and cooking
process is started. Remaining time is dis-
played. It is set up automatically depend-
ing on chosen weight. After the operation
is over, the oven will stop and five sound
signals will be played.
You can check out preset time of cooking
by pressing button (16) «clock/preset».
9. Automatic cooking mode
You can choose one of the next modes by
pressing the corresponding button:
• «reheat»
• «vegetable»
• «fish»
• «meat»
• «pasta»
• «potato»
• «pizza»
• «soup»
• «porridge»
ENGLISH
Automatic cooking table
Button / automatic mode Weight (g) Number of
strokes Display indication
(reheat) / А-1
150 Once 150
250 Twice 250
350 Trice 350
400 Four times 400
1693.indd 101693.indd 10 12.03.2008 17:33:2112.03.2008 17:33:21
(vegetable) / А-2
150 Once 150
350 Twice 350
500 Trice 500
(fish) /А-3
150 Once 150
250 Twice 250
350 Trice 350
400 Four times 400
450 Five times 450
(meat) / А-4
150 Once 150
300 Twice 300
450 Trice 450
600 Four times 600
(pasta) / А-5
50 (450 g воды) Once 50
100 (800 g of wa-
ter) Twice 100
150 (1200 g of
water) Trice 150
(potato) / А-6
1 (about 200 g) Once 1
2 (about 400 g) Twice 2
3 (about 600 g) Trice 3
(pizza) / А-7
1 (about 80 g) Once 1
2 (about 160 g) Twice 2
3 (about 250 g) Trice 3
(soup) / А-8
500 Once 500
700 Twice 700
1000 Trice 1000
(porridge) / А-9 550 Once 550
1000 Twice 1000
Example: preparation of 350 g of vegetables:
• Open the door of the oven, put foodstuff inside the operating chamber, and close the
door.
• Press button vegetable, number of the automatic mode «А-2» is displayed,choose
required weight of vegetables by pressing button vegetable for second time and then
input required weight of foodstuff (350 g), which is displayed.
• Press button (13) «start/+30 s» to start automatic cooking. Time of preparation will
be set automatically. Remaining time is displayed. It is set automatically depending on
chosen weight. After the operation is over, the oven will be stopped and five sound sig-
nals will be played.
11
ENGLISH
1693.indd 111693.indd 11 12.03.2008 17:33:2112.03.2008 17:33:21

12
10. Speed cooking mode
• Press button (13) «start/+30 s» to start
cooking at full power for 30 sec, each
consequent pressing on this button adds
30 sec of operation. Maximal time of
cooking in this mode is 95 sec.
Notes
1.It is possible to add time of cooking using
button (13) «start/+30 s» in microwave
mode, grill mode and combined mode.
2.In multi-step cooking mode, automatic
cooking mode and defrost mode addi-
tion of time is not possible.
• After the operation is over, the oven
will stopp and five sound signals will be
played.
11. Blocking against children
Blocking: press and hold button (15)
«stop» for 3 sec, sound signal is played,
and pictogram (18) is displayed.
Canceling blocking: in blocking mode pres
and hold button (15) «stop» for 3 sec,
sound signal is played, and pictogram (18)
is deemed.
12. Viewing preset modes
• In microwave mode press button (17)
«microwave», preset power level value
will be displayed for 2-3 sec.
• In one-step mode of cooking press but-
ton (16) «clock/preset»», current time
will be displayed for 2-3 sec.
• If time of cooking start up is preset, press
button (16) «clock/preset»», cooking
start up time will be displayed for 2-3
sec.
13. Display indications
• In stand by mode current time with blink-
ing separator “:” is indicated on the dis-
play.
• In presets selection mode the corre-
sponding values are displayed.
• In blocking-against-children mode pic-
togram (18) is displayed.
• During operation remaining time of cook-
ing is displayed.
Notice: You can pause cooking proc-
ess by pressing button (15) «stop» or by
opening the door of the oven. To resume
current operating mode, press button (13)
«start/+30 s».
To switch off the mode of cooking press
button (15) «stop» twice.
Cleaning and Maintenance
• Switch off the oven before cleaning and
disconnect power cord plug from the wall
outlet.
• Do not allow moisture dropping on con-
trol panel. Clean control panel with soft
damp cloth.
• Keep operating chamber clean. If there
are pieces of foodstuff or drips of liquids,
remove them with damp cloth.
• In case of considerable dirtying of the
operating chamber, you could use soft
detergent.
• Do not use abrasive detergents, wire
brushes for cleaning the oven either in-
side, or outside.
• Watch water and detergent does not
drop inside through openings intended
for steam release of ventilation which are
located on oven lid.
• It is forbidden using detergents based on
ammonia.
• Clean outer surfaces with damp cloth.
• Door of the oven should always be clean.
Do not allow crumbs of food gathering
between the door and the face panel of
the oven, as this prevents the door from
closing in normal way.
• Clean ventilation openings through which
air for cooling is supplied located on the
surface of the housing, from dust and
dirt regularly.
• Detach and clean glass tray and its sup-
ENGLISH
1693.indd 121693.indd 12 12.03.2008 17:33:2212.03.2008 17:33:22

port regularly; wipe bottom of the operat-
ing chamber of the oven.
• Wash glass tray and rolling ring with neu-
tral soapy solution.
• Do not immerse hot glass tray into water,
it could be broken because of sudden
temperature drop.
• To remove unpleasant odors out of the
operating chamber put cup of water with
a little bit of lemon juice inside and boil
the water for several minutes. Wipe walls
of the chamber with soft cloth very care-
fully.
13
ENGLISH
MALFUNTIONS AND TROUBLE SHOOTING
Normal operation
Microwave oven inter-
feres with reception of
TV or radio signals.
Interference with reception of TV or radio signals could appear during
microwave oven operation. Similar interferences appear while operations
of small electrical appliances like mixer, vacuum cleaner and hair dryer.
This is normal.
Low intensity of back-
light
If low power level of microwave radiation is set on, intensity of backlight
could be low. This is normal.
There is steam conden-
sation on the door, hot
air is going out of the
ventilation outlets.
While cooking water is vaporized out of foodstuff, most of the steam is
released through ventilation outlets, but some steam could condensate
on the inner side of the door. This is normal.
Microwave oven is
switched on without any
foodstuff loaded in.
Switching microwave oven for short time without any foodstuff loaded in
would not result in any malfunction. Always check if there is any foodstuff
inside the operating chamber before switching on.
Trouble shooting
Problem Possible cause Removal
Oven cannot be turned on
Power cord plug is not inserted in
wall outlet
Unplug power cord from wall out-
let. After 10 sec insert it back.
Wall outlet’s malfunction Try connecting another appliance
to the same wall outlet for control
There is no heating Door is closed not tightly Close the door tightly
Rolling glass tray issues
strange noise during opera-
tion
Rolling ring or lower part of oper-
ating chamber is dirty
Detach glass tray and rolling ring.
Wash rolling ring and bottom of
operating chamber.
In case the malfunction is still there, apply to a service center, do not try to repair or adjust
the oven on your own.
Delivery set
Microwave oven – 1 item
Glass tray – 1 item
Roller ring – 1 item
Grill grating – 1 item
1693.indd 131693.indd 13 12.03.2008 17:33:2212.03.2008 17:33:22

14
Technical specifications
Supplied voltage: AC 220V ~ 50 Hz
Supplied power in microwave mode: 1270 W
Rated output power of microwave mode:
800 W
Grill output power: 1000 W
Oven capacity: 20 Litters
Glass tray: 245 mm
Specifications subject to change without
prior notice.
MINIMUM SERVICE LIFE - 5 YEARS
GUARANTEE
Details regarding guarantee conditions can
be obtained from the dealer from whom
the appliance was purchased. The bill of
sale or receipt must be produced when
making any claim under the terms of this
guarantee.
This product conforms to the
EMC-Requirements as laid down
by the Council Directive 89/336/
EEC and to the Law Voltage
Regulation (73/23 EEC)
ENGLISH
1693.indd 141693.indd 14 12.03.2008 17:33:2212.03.2008 17:33:22

15
DEUTSCH
15
BESCHREIBUNG
1. Sicherheitsverriegelungssystem zum
Abschalten der Netzspannung beim
Öffnen der Tür während des Betriebs
2. Sichtfenster
3. Glasdrehteller
4. Ausgang der Mikrowellenstrahlung
5. Steuerungsplatte
6. Halterung des Glasdrehtellers
7. Rollring
8. Bildschirm
9. Taste Grillbetrieb/Kombinierter Betrieb
10. Tasten zur Wahl der automatischen
Betriebsstufen der Zubereitung/
Aufwärmung
11. Taste des Betriebs des Auftauens nach
Gewicht
12. Taste des Betriebs des schnellen
Auftauens
13. Taste Start/Vergrößerung der
Zubereitungszeit
14. Schalter der Einstellung von Leistung/
Gewicht/Zeit
15. Tasten zur Unterbrechung der
Zubereitung/Freigabe von
Fehleingaben
16. Taste zur Einstellung der laufenden
Zeit/Zubereitungszeit
17. Taste zum Einschalten des
Mikrowellenbetriebs und der
Leistungswahl
18. Piktogramm des Kindersicherung
19. Grillrost (nur für Grillbetrieb)
SICHERHEITSMAßNAHMEN
ZUR VERMEIDUNG VON DER
SCHÄDLICHEN WIRKUNG DER
MIKROWELLENSTRAHLUNG
• Es ist nicht gestattet, die Mikrowelle mit
der geöffneten Tür zu betreiben, weil es
zur Erhöhung der schädlichen Wirkung
der Mikrowellenstrahlung führt.
• Es ist nicht gestattet, Änderungen im
Stromkreis der Schutzverriegelungen
der Mikrowellentür vorzunehmen.
• Es ist nicht gestattet, irgendwelche
Gegenstände zwischen dem Gehäuse
der Mikrowelle und ihrer Tür zu platzie-
ren, entfernen Sie Verschmutzungen und
Reste der Reinigungsmittel von der inne-
ren Seite der Tür.
• Benutzen Sie nie eine beschädigte
Mikrowelle, insbesondere ist es wichtig,
dieTürder Mikrowelleordnungsgemäßzu
schließen, damit keine Beschädigungen
entstehen:
An der Tür (gebogen),
Scharniere und Verriegelungen (sind be-
schädigt oder locker).
• Einstellung und Reparatur der Mikrowelle
sollen nur vom Fachpersonal eines auto-
risierten Kundenservicedienstes durch-
geführt werden.
WICHTIGE SICHERHEITSMAßNAHMEN
Beim Gebrauch der elektrischen Geräte
sind wichtige Sicherheitsmaßnahmen zu
beachten: ACHTUNG! Um das Risiko der
Verbrennungen, Stromschläge, Brandfälle,
Einwirkung der Mikrowellenstrahlung und
Gesundheitsschaden zu vermeiden:
1. Lesen Sie aufmerksam die
Bedienungsanleitung vor der Nutzung
des Geräts.
2. Vor dem Einschalten des Geräts verge-
wissern Sie sich, ob die Netzspannung
mit der Spannung Ihres Geräts überein-
stimmt.
3. Nutzen Sie die Mikrowelle nur be-
stimmungsgemäß, wie es in dieser
Bedienungsanleitung dargestellt ist.
4. Die Mikrowelle ist für die Zubereitung
und Aufwärmung von fertigen Gerichten
bestimmt.
5. Es ist nicht gestattet, die Mikrowelle
ohne Nahrungsmittel einzuschalten.
6. Es ist nicht gestattet, das Gerät zu
nutzen, wenn das Netzkabel, der
Netzstecker beschädigt ist, wenn das
Gerät nicht ordnungsgemäß funktio-
niert oder wenn Sie diese fallen gelas-
sen haben.
1693.indd 151693.indd 15 12.03.2008 17:33:2212.03.2008 17:33:22

16
DEUTSCH
ACHTUNG! Kindern darf die Benutzung
der Mikrowelle ohne Aufsicht nur er-
laubt werden, wenn eine angemessene
Anweisung gegeben wurde, die das
Kind in die Lage versetzt, die Gefahren
einer falschen Bedienung zu verstehen,
und die Mikrowelle in sicherer Weise zu
nutzen.
7. Um das Entzündungsrisiko des
Garraums zu vermeiden:
Passen Sie beim Aufwärmen in Plastik
oder Papierverpackung auf den
Aufwärmungsprozess auf, um das
Entzündungsrisiko der Verpackung zu
vermeiden.
Entfernen Sie Drähte vor der
Unterbringung der Papier oder
Plastikpaketen in der Mikrowelle.
Falls die Entzündung innen der
Mikrowelle passiert ist, schalten Sie di-
ese sofort vom Stromnetz ab, ohne die
Tür der Mikrowelle zu öffnen, um die
Verbreitung des Feuers zu vermeiden.
Es ist nicht gestattet, den Garraum der
Mikrowelle zur Aufbewahrung zu nut-
zen, lassen Sie drin kein Papier oder
Produkte.
ACHTUNG! Es ist nicht gestattet,
Flüssigkeiten oder Nahrungsmittel in
dichten Verpackungen oder Behältern
aufzuwärmen, weil diese explodieren
können.
8. Seien Sie vorsichtig, wenn Sie das
Geschirr aus der Mikrowelle herausneh-
men, die Kochung von Getränken, die
in der Mikrowelle aufgewärmt werden,
kann nach dem Aufwärmungsprozess
folgen.
9. Es ist nicht gestattet, Nahrungsmittel in
der Mikrowelle zu braten.
10. Es ist nicht gestattet, Eier mit Eierschale
in der Mikrowelle zu bereiten oder auf-
zuwärmen, diese können auch nach
dem Aufwärmen explodieren.
11. Stechen Sie dicke Nahrungsmittel vor
der Zubereitung, wie z.B. Kartoffeln,
Auberginen oder Äpfel durch.
12. Vor dem Ernähren der Kinder, schütteln
Sie die Flasche gut durch und prüfen
Sie die Temperatur der Flüssigkeit, um
Verbrennungen zu vermeiden.
13. Das Geschirr kann sehr stark durch
die Wärmeaufnahme von den zuberei-
tenden Nahrungsmitteln aufheizen, da-
durch nutzen Sie spezielle Handschuhe
und Handgriffe fürs Geschirr.
14. Vor dem Gebrauch prüfen Sie dass
Geschirr auf ihre Nutzungstauglichkeit
in der Mikrowelle.
15. Sperren Sie nie Entlüftungslöcher am
Gehäuse der Mikrowelle ab.
16. Es ist nicht gestattet, das Gerät außer-
halb der Räumlichkeiten zu benutzen
und aufzubewahren.
17. Nutzen Sie nie das Gerät in der Nähe
von Wasser, Küchenspülbecken, in
feuchten Kellern oder neben dem
Schwimmbecken.
18. Es ist nicht gestattet, das Netzkabel und
den Netstecker ins Wasser zu tauchen.
19. Vermeiden Sie die Berührung des
Netzkabels und des Netsteckers mit
heißen Oberflächen.
20.Lassen Sie das Netzkabel vom Tisch
frei nicht hängen.
21. Nutzen Sie bei der Reinigung von der
Tür und inneren Seiten der Mikrowelle
weiche nicht abrasive Waschmittel, die
auf einen Schwamm oder ein weiches
Tuch aufgetragen werden.
ACHTUNG! Es ist gefährlich, Reparaturen
und Wartung selbständig auszuführen, die
die Entfernung einer Abdeckung erfordern,
die den Schutz gegen Strahlenbelastung
durch Mikrowellenenergie sicherstellt. Es
ist nicht gestattet, die Mikrowelle selbstän-
dig zu reparieren!
1693.indd 161693.indd 16 12.03.2008 17:33:2212.03.2008 17:33:22

17
DEUTSCH
ZUBEREITUNG VON
NAHRUNGSMITTELN IN
MIKROWELLEN
• Es ist nicht gestattet, Bacon bei der
Zubereitung direkt auf den Glasdrehteller
zu legen, die Überhitzung kann zur
Entstehung von Rissen am Glasdrehteller
führen.
• Nutzen Sie während der Zubereitung das
Geschirr, das für Mikrowellengebrauch
geeignet ist, indem Sie es auf den
Glasdrehteller aufstellen.
• Um eine bessere Zubereitung von
Nahrungsmitteln zu erzielen, legen
Sie dickere Stücke an den Rand des
Geschirrs.
• Passen Sie auf die Zubereitungsdauer
auf. Stellen Sie die kürzes-
te Zubereitungsdauer, und bei der
Notwendigkeit erhöhen Sie diese. Es ist
nicht gestattet, die Zubereitungsdauer
von Nahrungsmittel zu überschreiten, es
kann zu ihrer Entzündung führen.
• Bereiten Sie das Essen unter einem
Glasdeckel. Der Deckel verhindert
das Abspritzen des Saftes oder Fettes
und gewährleistet eine gleichmäßige
Zubereitung von Nahrungsmitteln.
• Um die Zubereitung zu beschleunigen,
drehen Sie einmal Nahrungsmittel der
leichten Zubereitungsgrades um, so
wie Hähnchen oder Hamburgers. Wenn
Fleischstücke zu groß sind, sollen diese
während der Zubereitung als Minimum
zweimal umgedreht werden.
• Rühren Sie während der Zubereitung
Nahrungsmitteln um, indem Sie diese
von oben nach unten und von Zentrum
zum Rand des Geschirrs mischen.
ANWEISUNGEN ZUR
GESCHIRRAUSWAHL
• Ein ideales Material des Geschirrs für den
Gebrauch in der Mikrowelle soll „durch-
sichtig" für Mikrowellenstrahlung sein,
indem ihre Energie durch das Geschirr
strömt und Nahrungsmittel aufwärmt.
• Mikrowellen können durch Metall
nicht durchdringen, deswegen darf
Metallgeschirr oder Geschirr mit
Metalldekor nicht verwendet werden.
• Es ist nicht gestattet, Gegenstände in die
Mikrowelle hineinzulegen, die aus dem
Recyclingpapier hergestellt sind, da es
Metalleinprägungen enthalten kann, die
die Entzündung der Verpackung hervor-
rufen können.
• Im Vergleich zum rechteckigen ist rundes
und ovales Geschirr für die Verwendung
in der Mikrowelle vorteilhafter.
Prüfung des Geschirrs vor der Nutzung
in der Mikrowelle
• Stellen Sie das zu prüfende Geschirr in
den Garraum der Mikrowelle (z.B. einen
Teller), stellen Sie darauf ein Glas mit kal-
tem Wasser auf.
• Schalten Sie die Mikrowelle auf den ma-
ximalen Betriebsstufe ein und stellen Sie
die Zeitdauer auf 30 Sekunden ein.
• Berühren Sie vorsichtig das zu prüfen-
de Geschirr. Falls es aufgewärmt ist,
und das Wasser im Glas kalt blieb, darf
solches Geschirr in der Mikrowelle nicht
verwendet werden.
• Die Prüfdauer soll 30 Sekunden nicht
überschreiten.
1693.indd 171693.indd 17 12.03.2008 17:33:2212.03.2008 17:33:22

18
DEUTSCH
Stoffe und Geschirr, die für die Nutzung in der Mikrowelle geeignet sind.
AluFolie
Die AluFolie kann nur im Grillbetrieb verwendet werden. Der Abstand
zwischen der AluFolie und den Wänden der Mikrowelle soll nicht
weniger als 2,5 cm betragen. Kleine AluFolienstücke können für die
Abdeckung von dünnen Stücken von Fleisch und Geflügel verwendet
werden, um ihre Verbrennung zu vermeiden.
In der Mikrowellenbetrieb, wenn die AluFolie zu nah am
Rand der Wände der Mikrowelle liegt, kann das Funken, die
Durchbrennung der Abschirmgitter der Tür der Mikrowelle und
den Ausfall des Geräts hervorrufen. In diesem Fall verlieren
Sie den Anspruch auf den kostenlosen Garantieservice und die
kostenlose Reparatur.
Geschirr fürs Braten
Befolgen Sie die Anweisungen der Herstellers.
Der Boden des Geschirrs fürs Braten soll 5 mm dicker als der des
Glasdrehtellers sein. Nicht ordnungsgemäße Nutzung des Geschirrs
fürs Braten kann zur Entstehung der Risse im Geschirr und im
Glasdrehteller führen.
Geschirr fürs
Mittagsessen
Das Geschirr, das für die Nutzung in der Mikrowelle geeignet ist.
Befolgen Sie die Anweisungen der Herstellers des Geschirrs. Nutzen
Sie nie das Geschirr mit Rissen oder Ausbrüchen.
Glasbehälter
Nutzen Sie nur Glasbehälter, die aus dem hitzebeständigen Glas
hergestellt wird und für die Nutzung in der Mikrowelle geeignet ist.
Vergewissern Sie sich, dass das Geschirr keine Metallränder hat.
Nutzen Sie nie das Geschirr mit Rissen oder Ausbrüchen.
Glasgeschirr
Nutzen Sie nur das Glasgeschirr, das aus dem hitzebeständigen Glas
hergestellt wird und für die Nutzung in der Mikrowelle geeignet ist.
Vergewissern Sie sich, dass das Geschirr keine Metallränder hat.
Nutzen Sie nie das Geschirr mit Rissen oder Ausbrüchen.
Zubereitungsprozess
in der Mikrowelle mit
der Nutzung von spe-
ziellen Säckchen
Befolgen Sie die Anweisungen der Herstellers. Es ist nicht gestattet,
Säckchen mit Metallknebeln oder Überziehen zu verschließen. In
den Säckchen sollen kleine Löcher für den Dampfaustritt gemacht
werden.
Papierteller und
Papiertassen
Nutzen Sie diese nur für kurzzeitige Zubereitung/Aufwärmung.
Lassen Sie die Mikrowelle während der Zubereitung / Aufwärmung
von Nahrungsmitteln in solchem Geschirr nie unbeaufsichtigt.
Papiertücher
Die zubereitenden Nahrungsmittel können zwecks der
Wärmeerhaltung und der Vermeidung der Abspritzung von Fett mit
Papiertüchern abgedeckt werden. Nutzen Sie Papiertücher nur unter
Kontrolle und nur für kurzzeitige Zubereitung/Aufwärmung.
Pergamentpapier
Nutzen Sie das Pergamentpapier zur Vermeidung der Abspritzung
von Fett oder als Einschlagpapier. Nutzen Sie das Pergamentpapier
nur unter Kontrolle und nur für kurzzeitige Zubereitung/Aufwärmung.
1693.indd 181693.indd 18 12.03.2008 17:33:2212.03.2008 17:33:22

19
DEUTSCH
Kunststoffgeschirr
Nutzen Sie nur jenes Kunststoffgeschirr, das aus dem hitzebeständi-
gen Glas hergestellt wird und für die Nutzung in der Mikrowelle geeig-
net ist. Befolgen Sie die Anweisungen der Herstellers.
Einige Kunststoffbehälter können infolge der Erhitzung der darin ent-
haltenen Nahrungsmitteln erweichen.
Hermetisch geschlossene Kunststoffpakete sollen durchgestochen
oder durchgeschnitten werden, wie es auf der Verpackung angege-
ben ist.
Einschlagpapier aus
Kunststoff
Nutzen Sie nur jenes Einschlagpapier aus Kunststoff, das eine ent-
sprechende Markierung hat. Die zubereitenden Nahrungsmittel
können mit solchem Einschlagpapier aus Kunststoff zwecks der
Erhaltung darin von Feuchtigkeit abgedeckt werden.
Gewachstes Papier Nutzen Sie gewachstes Papier zur Vermeidung der Abspritzung von
Fett und für die Erhaltung der Feuchtigkeit.
Stoffe und Geschirr, die für die Nutzung in der Mikrowelle geeignet sind.
Alutabletts Können das Funken hervorrufen.
Nutzen Sie das Geschirr, das für die Mikrowelle geeignet ist.
Kartontasse mit Metallgriff
Kann das Funken hervorrufen.
Nutzen Sie das Geschirr, das für die Mikrowelle geeignet ist.
Metallgeschirr und Geschirr
mit Metallrand
Das Metall schirmt die Energie von Mikrowellen ab. Der
Metallrand des Geschirrs kann das Funken hervorrufen.
Metallknebeln
Können das Funken und Entzündung der Verpackung während
der Zubereitung / Aufwärmung von Nahrungsmitteln hervor-
rufen.
Papierpakete Können Entzündung in der Mikrowelle hervorrufen.
Seife Seife kann verschmelzen und die Verschmutzung des
Garraums der Mikrowelle hervorrufen.
Holz Das Holzgeschirr kann austrocknen, rissig werden und sich
entzünden.
ANWEISUNG ZUR ERDUNG DER
MIKROWELLE
Die Mikrowelle soll sicher geerdet wer-
den. Im Falle eines Kurzschlusses, senkt
die Erdung das Stromschlagrisiko, weil
die Stromableitung über die Erdung
erfolgt. In der Mikrowelle wird ein
Erdungsnetzkabel und der Netzstecker
mit einem Erdungskontakt verwendet. Der
Netzstecker wird an die Steckdose ange-
schlossen, die auch den Erdungskontakt
haben sollte.
WARNUNG: Die Nutzung des Netzsteckers
mit der Kontakterdung, der in die Steckdose
ohne Erdung angeschlossen ist, kann zum
Stromschlag führen. Lassen Sie sich bei
einem qualifizierten Elektriker beraten,
wenn Sie einige Erdungsanweisungen nicht
verstehen oder wenn Sie zweifeln, ob die
Mikrowelle sichere Erdung hat.
1693.indd 191693.indd 19 12.03.2008 17:33:2212.03.2008 17:33:22

20
DEUTSCH
Zwecks der Verhinderung der Verwicklung
des Netzkabels verfügt die Mikrowelle über
einen kurzen Netkabel.
Bei der Notwendigkeit verwenden Sie den
Verlängerungskabel mit drei Steckdosen
mit Erdung an der Steckdose und dem
Netzstecker.
Die Markierung des Drahtquerschnittes
des Netzkabels der Mikrowelle und die
Markierung am Verlängerungskabel sol-
len übereinstimmen.
Das Verlängerungskabel soll immer mit
Erdung sein.
Das Netzkabel der Verlängerung darf
vom Tischrand nicht frei hängen, wo
Kinder daran ziehen können, das Kabel
soll auch so verlegt werden, dass die
Menschen es nicht übergehen sollen.
AUFSTELLUNG DER MIKROWELLE
• Vor dem Einschalten des Geräts verge-
wissern Sie sich, ob die Netzspannung
mit der Spannung Ihres Geräts über-
einstimmt, die am Gehäuse des Geräts
steht.
• Vergewissern Sie sich, dass alle
Verpackungsmaterialien aus der
Mikrowelle entfernt sind.
• Es ist nicht gestattet, die weißgraue
Folienplatte von der inneren Seite des
Garraums zu entfernen, wo sich die
Strahlungsausgangstelle (4) befindet,
die zum Schutz des Magnetrons dient.
ACHTUNG! Vergewissern Sie sich, dass
das Gerät folgende Beschädigungen nicht
hat: Die Tür der Garraums soll nicht be-
schädigt oder gebogen sein, Scharniere
der Halterung oder Verriegelungen
nicht beschädigt oder gelockert sein,
Verbeulungen innerhalb der Mikrowelle
oder an der Tür sollen fehlen. Es nicht ge-
stattet, bei beliebigen Beschädigungen die
Mikrowelle zu nutzen.
• Stellen Sie die Mikrowelle auf eine harte
flache Oberfläche auf, die ihr Gewicht und
den maximalen Gewicht der Lebensmittel
aushalten kann, die darin zubereitet wer-
den. Stellen Sie die Mikrowelle in einem
für Kinder unzugänglichem Ort auf.
• Es ist nicht gestattet, die Mikrowelle
in den Orten mit erhöhter Feuchtigkeit
und hoher Temperatur, und auch neben
leichtentflammbaren Gegenständen auf-
zustellen.
• Es soll eine gute Durchlüftung für
den ordnungsgemäßen Betrieb der
Mikrowelle vorgesehen werden. Sichern
Sie eine freie Aufstellung der Mikrowelle:
30 cm über der Mikrowelle, 78 cm hin-
ten und an den Seiten. Sperren Sie nie ir-
gendwelche Öffnungen am Gehäuse der
Mikrowelle ab. Es ist nicht gestattet, die
Füße am Boden der Mikrowelle abzuneh-
men.
• Es ist verboten, die Mikrowelle ohne
Glasdrehteller und Rollring zu nutzen.
• Vergewissern Sie sich, dass das
Netzkabel keine Beschädigungen ent-
hält und unter dem Ofen oder anderen
heißen oder scharfen Gegenständen
nicht liegt.
MONTAGE DER MIKROWELLE
EntfernenSiedasVerpackungsmaterialund
Zubehör aus dem Garraum der Mikrowelle.
Prüfen Sie die Mikrowelle auf Mängel von
allen Seiten. Seien Sie besonders aufmerk-
sam bei der Prüfung der Mikrowellentür. Es
nicht gestattet, das Gerät aufzustellen und
einzuschalten, wenn es beschädigt ist.
Schutzabdeckung
Gehäuse: Beim Vorhandensein der
Schutzfolie, entfernen Sie diese vom
Gehäuse des Geräts.
Es ist nicht gestattet, die weißgraue
Folienplatte von der inneren Seite des
Garraums zu entfernen, wo sich die
Strahlungsausgangstelle (4) befindet,
die zum Schutz des Magnetrons dient.
Aufstellung des Glasdrehtellers
1693.indd 201693.indd 20 12.03.2008 17:33:2212.03.2008 17:33:22
Table of contents
Languages:
Other Vitek Microwave Oven manuals

Vitek
Vitek VT-1654 W User manual

Vitek
Vitek VT-1699 SR User manual

Vitek
Vitek VT-1689 SR User manual

Vitek
Vitek Sagitta VT-1691 User manual

Vitek
Vitek VT-1684 Simple manual

Vitek
Vitek Capella User manual

Vitek
Vitek VT-1655 User manual

Vitek
Vitek VT-2452 W User manual

Vitek
Vitek VT-1684 User manual

Vitek
Vitek VT 1661 User manual

Vitek
Vitek VT-1681 User manual

Vitek
Vitek VT-1652 User manual

Vitek
Vitek VT-1666 User manual

Vitek
Vitek VT-1662 BK User manual

Vitek
Vitek VT-1659 User manual

Vitek
Vitek VT-1692 User manual

Vitek
Vitek Crystal VT-1653 User manual

Vitek
Vitek VT-1683 User manual

Vitek
Vitek VT-1650 W User manual

Vitek
Vitek Pleasuer User manual