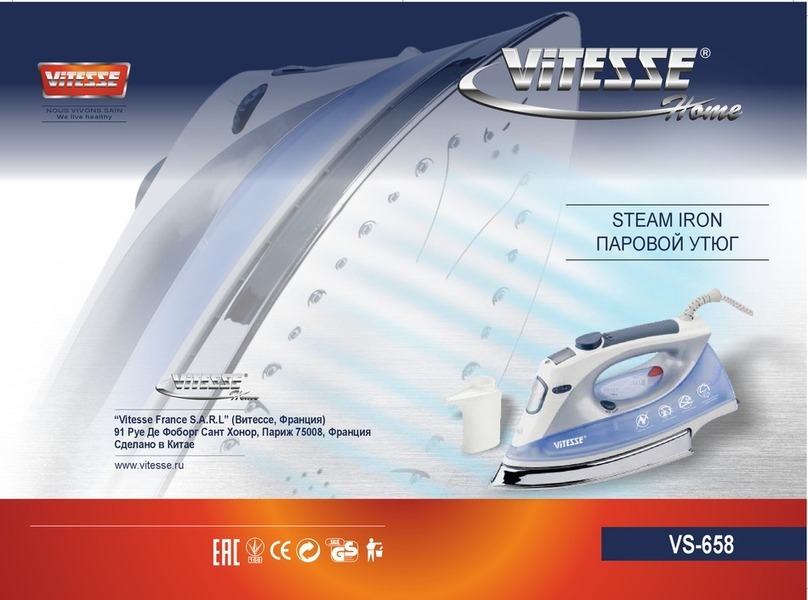
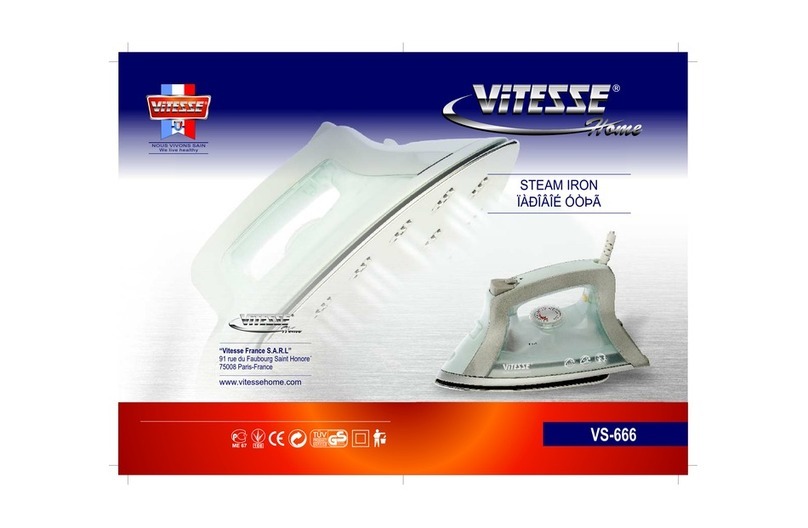
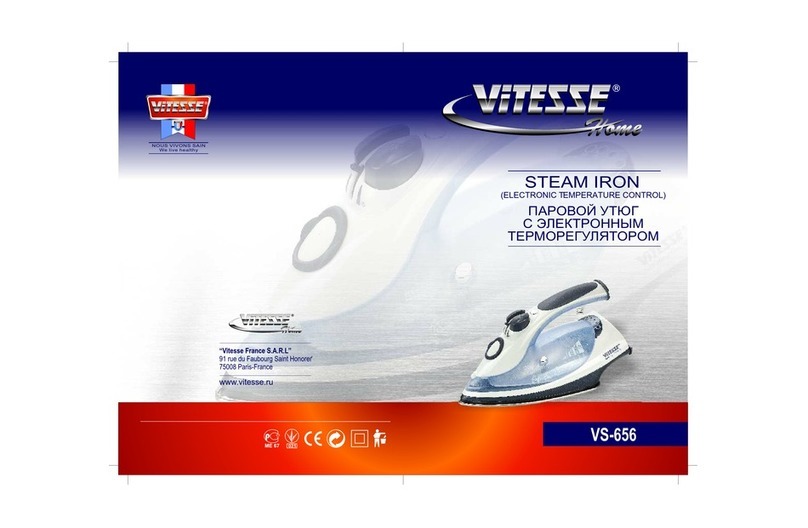
Vitesse Home VS-662 User manual

VS-662
STEAM IRON
ПАРОВОЙ УТЮГ
Ca
www.vitesse.ru
“Vitesse France S.A.R.L” (Витессе, Франция)
91 Руе Де Фоборг Сант Хонор, Париж 75008, Франция
Сделано в Китае
ВНИМАНИЕ! Все материалы данного руководства были тщательно проверены. При
обнаружении опечаток, опущений инесоответствий компания оставляет за собой
право окончательной трактовки. Дизайн ихарактеристики прибора могут быть
изменены без предварительного уведомления. Перед приобретением ознакомьтесь
сфактическими характеристиками изделия.
Срок службы товара не менее 2-х лет при соблюдении условий эксплуатации.
По окончании срока эксплуатации электроприбора не выбрасывайте его вместе
с обычными бытовыми отходами, а передайте в официальный пункт сбора на
утилизацию. Таким образом Вы поможете сохранить окружающую среду.
NOUS VIVONS SAIN
We live healthy

Description of device
A. Spray organ
B. Filler door
C. Spray button
D. Shot-steam button
E. Auto-stop pilot light
F. Swivelling cord protector
G. Cord
H. Steam and cleanout knob
I. Temperature control dial
J. Water tank
K. Soleplate
L. Renewa
M. Water measure
P/1 P/2
A
B
C
DE
F
G
HI
J
K
L
M
max
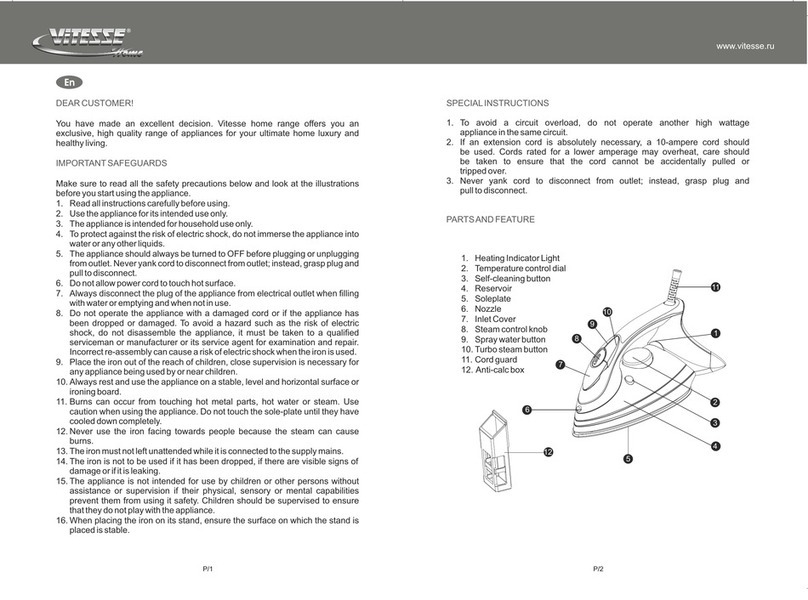
DEAR CUSTOMER!
You have made an excellent decision. Vitesse home range offers you an
exclusive, high quality range of appliances for your ultimate home luxury and
healthy living.
Important safety instructions
When using your flatiron, basic safety precautions should always be followed,
including the following:
Read all instructions before using
1. Use iron only for its intended use.
2. To protect against a risk of electric shock, do not immerse the iron in water
or other liquids.
3. The iron should always be turned to «0». before plugging or unplugging
from outlet. Never yank cord to disconnect from outlet; instead, grasp plug
and pull to disconnect.
4. Do not allow cord to touch hot surfaces. Let iron cool completely before
putting away. Loop cord loosely around iron when storing.
5. Always disconnect iron from electrical outlet when filling with water or
emptying and when not in use.
6. Do not operate iron with a damaged cord or if the iron has been dropped or
damaged. To avoid the risk of electric shock, do not disassemble the iron
take it to a qualified serviceman for examination and repair. Incorrect
reassembly can cause a risk of electric shock when the iron is used.
7. Close supervision is necessary for any appliance being used by or near
children. Do not leave iron unattended while connected or on an ironing
board.
8. Burns can occur from touching hot metal parts, hot water, or steam. Use
caution when you turn a steam iron upside down there may be hot water in
the reservoir.
9. If the malfunction indicator goes on, the flatiron is not operating normally.
Disconnect from the power supply and have the flatiron serviced by
qualified service personnel.
Special instructions
1. To avoid a circuit overload, do not operate another high wattage
appliance on the same circuit.
2. If an extension cord is absolutely necessary, a 10-ampere cord should be
used. Cords rated for less amperage may overheat. Care should be taken
to arrange the cord so that it cannot be pulled or tripped over.
Save these instructions
More specifically:
DO NOT let children or untrained persons use the appliance without
supervision.
NEVER immerse the iron, cable or plug in any liquid.
DO NOT leave the hot iron touching fabrics or very inflammable surfaces.
DO NOT leave the appliance unnecessarily plugged in. Disconnect the plug
from the mains when the appliance is not being used.
NEVER touch the appliance with wet or damp hands.
DO NOT use the power cord or the appliance in order to pull the plug out of the
socket.
DO NOT leave the appliance exposed to the weather (rain, sun, etc. ).
DO NOT leave the iron without supervision when it is connected to the power
supply.
DO NOT fill the reservoir with water before removing the plug from the socket.
Please note!
Do not use chemical additive, scented substances or decalcifiers. Failure to
comply with the above-mentioned regulations leads to the loss of guarantee.
www.vitesse.ru

Colorfull Water tank
Water tank can change the color against the different soleplate
temperature .There are five different water tank:Setting “0” blue setting 1
green,setting 2 orange;III setting,purple;MAX setting red.[Fig.7]
Renewable anti-calc system
A special resin filter inside the water reservoir softens the water and prevents
scale build-up in the plate. The anti-calc system can be changable,clockwise
the anti-calc box out by using the icon or similar equipment,and couterwise the
anti-calc box in by using the icon or similar equipment too. [Fig. 9]
Please note:
Use tap water only. Distilled and/demineralised water makes the anti-calc
system ineffective by altering its physicochemical characteristics.
Do not use chemical additives, scented substances or decalcifiers. Failure
to comply with the above-mentioned regulations leads to the loss of
guarantee.
Anti-drip system
With the anti-drip system, you can perfectly iron even the most delicate
fabrics.
Always iron these fabrics at low temperatures. The plate may cool down to
the point where no more steam comes out, but rather drops of boiling
water that can leave marks or stains. In these cases, the Anti-drip system
automatically activates to prevent vaporization, so that you can iron the
most delicate fabrics without risk of spoiling or staining them.
Automatic shut off
The automatic shut off device trips after the iron has been left for approx.
eight minutes in the upright position or unused for approx. Thirty seconds in
the horizontal position. The light comes on to indicate that shut off has
tripped. As soon as you move the iron, the device turns off and the iron
starts working again.
General Instructions
When using the iron for the first time, you may notice a slight emission of
smoke and hear some sounds made by the expanding plastics. This is quite
normal and it stops after a short time. We also recommend passing the
iron over an ordinary cloth before using it for the first time.
GARMENT
LABEL
FABRIC
TYPE
THERMOSTAT
REGULATION
synthetic
silk - wool
Cotton - linen
•
low temperature
••
medium temperature
Fabric not to be ironed
•••
high temperature
Preparations
Soft the laundry to be ironed according to the international symbols on the
garment label, or if this is missing, according to the type of fabric.
Start ironing the garments requiring a low temperature.
This reduces the waiting times (the iron takes less time to heat up than to
cool down) and eliminates the risk of scorching the fabric.
Steam ironing
Filling the reservoir
1. Check that the plug is disconnected from the socket.
2. Move the steam selector H to “ ” [Fig. 5].
3. Open the lid B.
4. Raise the tip of the iron to help the water enter the opening without
overflowing [Fig. 1].
5. Slowly pour the water into the reservoir using the special measure M
and taking care not to go over the maximum level (about 400ml)
indicated by “MAX” on the reservoir.
6. Close the lid B.
Selecting the temperature.
1. Put the iron in a vertical position.
2. Put the plug in the socket.
3. Adjust the thermostat knob I according to the international symbol on
the garment label [Fig. 3]. The plate temperature control light E
indicates that the iron is heating up. Wait until the plate temperature
control light goes off before ironing.
Warning: during ironing, the plate temperature control light E comes on at
intervals, indicating that the selected temperature is maintained. If you
lower the thermostat temperature after ironing at a high temperature, do not
start ironing until the plate temperature control light comes on again.
P/3 P/4
www.vitesse.ru

P/5 P/6
Selecting the steam.
The quantity of steam is regulated by the steam selector H.
1. Move the steam selector to a position between minimum and maximum
d epending on the quantity of steam required and the temperature
s elected [Fig. 5].
Warning: the iron gives off steam continuously only if you hold the iron
horizontally. You can stop the continuous steam by placing the iron in a
vertical position or by moving the steam selector to “ ”. As indicated on the
thermostat knob I and in the initial table, you can only use steam at the
highest temperatures. If the selected temperature is too low, water may drip
onto the plate.
Selecting Shot-steam and steam when ironing vertically.
Press the shot-steam button D to generate a powerful burst of steam that can
penetrate the fabrics and smooth the most difficult and tough creases.W ait for
a few seconds before pressing again [Fig. 4].
By pressing the shot-steam button at intervals you can also iron vertically
(curtains, hung garments, etc.) [Fig. 6].
Warning: the shot-steam function can only be used at high temperatures. Stop
the emission when the plate temperature control light E comes on, than start
ironing again only after the light has gone off.
Dry ironing
To iron without steam, follow the instructions in section “steam ironing”,
leaving the steam selector H on position “ ”.
Spray Function
Make sure that there is water in the reservoir. Press the spray button C
slowly (for a dense spray) or quickly (for a vaporized spray) [Fig. 2].
Warning: for delicate fabrics, we recommend moistening the fabric
beforehand using the spray function C, or putting a damp cloth between the
iron and the fabric. To avoid staining, do not use the spray on silk or synthetic
fabrics.
Self-cleaning
The self-cleaning feature cleans inside the plate, removing impurities. We
recommend using it every 10-15days. Directions:
1. Fill the reservoir up to the maximum level indicated and set the steam
selector
2. Set the thermostat knob I to the maximum temperature and wait for
the light E to turn off.
3. Pull the plug out of the socket and hold the iron horizontally over the
sink.
4. Hold the cleanout button H setting until all the boiling water, steam,
impurities come out [Fig. 5].
5. When the soleplate has cooled down, you can clean it with a damp cloth.
Cleaning
Please note: before cleaning the iron in any way, make sure that the appliance
plug is not connected to the socket.
Any deposits, starch residue or size left on the plate can be removed using a
damp cloth or an unabrasive liquid detergent.
Avoid scratching the plate with steel wool or metallic objects.
The plastic parts can be cleaned with a damp cloth then wiped over with a dry
cloth.
How to put it away
1. Disconnect the plug of the iron from the socket.
2. Empty the reservoir by turning the iron upside down and gently shaking
it.
3. Leave the iron to cool down completely.
4. Roll up the power cord with the rewinder [Fig. 8].
5. Always put the iron away in a vertical position.
Advice for good ironing
1. We recommend using the lowest temperatures with fabrics that have
unusual finishes (sequins, embroidery, flush, etc.).
2. If the fabric is mixed (e.g. 40% cotton 60% synthetics), set the
thermostat to the temperature of the fibre requiring the lower
temperature.
3. If you don't know the composition of the fabric, determine the suitable
temperature by testing on a hidden corner of the garment. Start with a
low temperature and increase it gradually until it reaches the ideal
temperature.
4. Never iron areas with traces of perspiration or other marks: the heat of
the plate fixes the stains on the fabric, making them irremovable.
5. The size is more effective if you use a dry iron at a moderate temperature:
excess heat scorches it with the risk of forming a yellow mark .
6. To avoid marking silk, woolen or synthetic garments shiny, iron them
inside out.
7. To avoid marking velvet garments shiny, iron in one direction (following
the fibre) and do not press down on the iron.
8. The heavier the washing machine is loaded, the more garments come out
creased.
9. This also happens when the spin drying revolutions are very high.
Technical Data
Power supply: 230V ~ 50HZ
Power consumption: 1800-2200W
1
2
3
max
min
4
5
6
8
7
Themo C ol o r
M A X
I I I
I I
I
0
9
coin
www.vitesse.ru

УВАЖАЕМЫЕ ПОКУПАТЕЛИ! ВЫ ПРИНЯЛИ БЛЕСТЯЩЕЕ РЕШЕНИЕ!
ФИРМА VITESSE ПРЕДЛАГАЕТ ВАМ ГАММУ ЭКСКЛЮЗИВНЫХ
ВЫ С О КОК АЧЕС ТВЕ ННЫ Х ПРИБ О РОВ ДЛ Я НЕ С ОМН ЕНН О
РОСКОШНОГО И ЗДОРОВОГО ОБРАЗА ЖИЗНИ.
Руководство по эксплуатации
Перед первым использованием прибора внимательно прочитайте
руководство по эксплуатации. Сохраните руководство для дальнейших
консультаций.
Техника безопасности
При использовании прибора, следует придерживаться основных мер
безопасности, включая следующие:
1. Перед первым использованием прибора внимательно прочитайте
руководство по эксплуатации.
2. Не касайтесь горячих поверхностей.
3. Во избежание поражения электрическим током, не погружайте прибор в
воду или в другую жидкость.
4. Утюг должен быть всегда выключен «Off», перед тем как вставить
штепсель в розетку. Никогда не тяните за шнур, чтобы достать
штепсель из розетки, вместо этого, четко возьмитесь за штепсель
рукой и достаньте его.
5. Не оставляйте работающий прибор без присмотра, следите чтобы
дети находились на безопасном расстоянии от прибора.
6. Не используйте прибор, если на шнуре или на вилке видны следы
повреждения, он падал или был поврежден. Обратитесь в сервисную
мастерскую для осмотра или ремонта.
7. Прибор предназначен только для домашнего использования.
8. Следите за тем, чтобы кабель питания не свисал со стола и не касался
горячих поверхностей.
9. Используйте прибор только по назначению.
10. Всегда используйте прибор на ровной и стабильной поверхности.
11. Прибор не предназначен для использования людьми с плохими
физическими и умственными способностями.
Важная информация
1. Чтобы избежать перегрузки сети, не включайте одновременно несколько
приборов с высоким напряжением.
2. При необходимости использования удлинительного шнура, убедитесь в
том, что напряжение шнура соответствует напряжению прибора.
3. Шнур с меньшим напряжением может нагреться. Следите, чтобы шнур
питания был расположен таким образом, чтобы за него нельзя было
зацепиться.
4. Не погружайте прибор в воду или в другую жидкость.
1. Распылитель
2. Отверстие для заполнения
водой
3. Кнопка распыления
4. Кнопка подачи пара
5. Лампа индикатор
6. Держатель шнура
7. Шнур питания
8. Кнопка самоочистки и
регулятор подачи пара
9. Регулятор температуры
10. Резервуар для воды
11. Подошва
12. Система против накипи
13. Резервуар для воды
ЭКСПЛУАТАЦИЯ
Резервуар для воды
Резервуар для воды меняет свой цвет в зависимости от температуры
подошвы. Установки: «0»- голубой цвет, «1»- зеленый, «3»-фиолетовый
цвет, «МАХ»- красный цвет.
Защита от накипи
Специальный фильтр внутри резервуара делает воду мягче и
предотвращает образование накипи на подошве утюга. Систему против
накипи можно заменить. Поверните по часовой стрелке и замените
аналогичной (Рис.9).
Внимание: используйте только чистую воду.
Система "Anti-drip"
Данный утюг оснащен механизмом защиты от случайного проливания
воды из подошвы утюга во время глаженья, в случае если температура
системы парообразования снижается настолько, что парообразование
становится невозможным. В этом случае система "Anti-drip"
предотвращает образование пара, и вы можете утюжить самые
деликатные вещи.
Система автоматического выключения
Эта система срабатывает, если вы оставили утюг и не пользовались им
на протяжении 8 минут в вертикальном положении, и после 30 секунд,
если утюг находится в горизонтальном положении. Как только вы
сдвинете утюг с места, он начнет работать снова.
Перед первым использованием
1. Удалите защитную пленку и наклейки с подошвы утюга.
2. Нагрейте утюг до максимальной температуры и прогладьте течение
нескольких минут кусочек влажной ткани, чтобы очистить подошву.
При первом включении утюга может появиться легкий запах дыма.
Это временное явление и не является поломкой или дефектом.
P/7 P/8
Описание
1
2
3
45
6
7
89
10
11
12
13
max
www.vitesse.ru

Рекомендации
1. Перед глажкой изучите ярлык на изделии. Всегда следуйте
инструкциям, нанесенным на ярлык.
2. Утюг нагревается быстрее, чем остывает. Следовательно, начинать
глажку надо с изделий, для которых требуется низкая температура,
а затем изделия, которые гладятся при более высокой температуре.
Внимание! Если на ярлыке изделия указано обозначение ,
это означает, что изделие гладить нельзя.
Обозначение Тип ткани
Положение терморегулятора Положение регулятора
подачи пара
Синтетика
Искусственный
шелк
Нейлон, шелк
Низкая
температура Сухая утюжка
Шерсть Средняя
температура Глажение с паром
Хлопок
Лен Высокая
температура Глажение с паром
Вертикальная глажка
Плотно нажав кнопку (4) вы сгенерируете мощный паровой удар,
который может разгладить самые трудные складки. Подождите
некоторое время, перед нажатием кнопки в очередной раз (Рис.4).
Нажимая кнопку подачи пара с интервалами, вы также можете гладить
вертикально (занавески, одежду) (Рис.6).
Сухая глажка
Установите регулятор подачи пара (4) в положение « ».
Распылитель
Чтобы смочить ткань, нажмите несколько раз кнопку распылителя (5),
установив любую температуру. Убедить в том, что в резервуаре есть
вода.
УХОД И ЧИСТКА
Перед чисткой, убедитесь, что вы достали штепсель из розетки.
Любые налеты и другие загрязнения вы можете очистить с помощью
мягкой ткани или с помощью абразивных моющих средств.
Избегайте царапаний подошвы металлическими предметами.
ФУНКЦИЯ САМООЧИСТКИ
Рекомендуется очищать утюг с помощью данной функции каждые две
недели, чтобы предотвратить скопление накипи, что засоряет прибор и
препятствует нормальной работе прибора - нагреванию подошвы и
выпуску пара.
1. Установите терморегулятор в положение «Мах».
2. Подключите прибор к сети.
3. После того как индикатор температуры загорится и погаснет,
отключите прибор от сети.
4. Нажмите кнопку самоочистки (8). После этого вода начнет кипеть и
начнет производиться пар. Двигайте утюг в перед и назад во время
очистки (Рис.5).
5. Поставьте регулятор температуры в положение «0»
6. Прогладьте утюгом чистую хлопчатобумажную ткань, чтобы очистить
подошву утюга от воды и загрязнений.
Хранение
1. Достаньте штепсель из розетки.
2. Вылейте воду из резервуара.
3. Подождите до тех пор, пока не остынет утюг.
4. Смотайте шнур вокруг утюга.
5. Всегда ставьте утюг в вертикальное положение.
P/9 P/10
Глажение с паром
Наполнение резервуара водой
1. Достаньте штепсель из розетки
2. Поставьте регулятор подачи пара (8) в положение « » (Рис.5).
3. Откройте крышку резервуара (2).
4. Залейте воду в резервуар до отметки «МАХ» с помощью мерной
чаши, не переполняйте резервуар водой (Рис.1).
5. Закройте резервуар.
Установка температуры
1. Поставьте утюг в вертикальное положение.
2. Вставьте штепсель в розетку
3. Установите регулятор выбора температуры (9) в соответствии с
символом на ярлыке одежды (Рис.3). Лампа индикатор (5)
указывает на то, что утюг нагревается. Подождите, пока не погаснет
лампа индикатор, после этого приступайте к глажке.
Регулировка подачи пара
Количество подачи пара регулируется с помощью регулятора подачи
пара (8).
Регулируйте подачу пара с помощью вращения регулятора между
отметками минимум и максимум (Рис.5).
Внимание: утюг вырабатывает пар беспрерывно только в
горизонтальном положении. Вы можете остановить подачу пара,
поставив утюг в вертикальное положение или установив регулятор
подачи пара в положение " ". Технические характеристики
Питание: 230В ~ 50Гц
Мощность: 1800-2200Вт
1
2
3
max
min
4
5
6
8
7
Th em o Co lo r
MA X
III
II
I
0
9
coin
www.vitesse.ru
Table of contents
Languages:
Other Vitesse Home Iron manuals

Vitesse Home
Vitesse Home Nouveau VS-685 User manual

Vitesse Home
Vitesse Home VS-655 User manual

Vitesse Home
Vitesse Home VS-664 User manual

Vitesse Home
Vitesse Home VS-655 User manual

Vitesse Home
Vitesse Home VS-654 User manual

Vitesse Home
Vitesse Home VS-661 User manual

Vitesse Home
Vitesse Home VS-658 User manual

Vitesse Home
Vitesse Home VS-695 Instruction Manual

Vitesse Home
Vitesse Home VS-666 User manual

Vitesse Home
Vitesse Home VS-656 User manual