VixNet LEOPARD 3 User manual

DocNo: 70272 Issue 1-0 – 25 February 2019 www.vixnet.co.za
LEOPARD 3 TRANSMITTER - USER GUIDE
Supported Inputs
Tip&Ring
Mains Fail/
Restore
Medical
Fire
Open/Close
Panic
Duress
Delay
Burglary
Burglary
The Leopard 3 radio transmitter provides the radio link between an alarm system and a
Control Room.
The Leopard 3 has a DTMF Tip & Ring interface for the transmission of standard
Contact-ID alarm event messages in addition to the telemetry inputs.
All telemetry inputs are configurable for signal polarity.
The Leopard 3 supports Contact-ID up to 99 partitions and 999 zones.
MOUNTING
Mount the Leopard 3 near to the installed control panel with the antenna in the
upright position.
CONNECTIONS
Inputs are located at the bottom edge of the PCB. The Leopard 3 is
fitted with 7 dry contact inputs (1-7), AC fail detect and +/- 12VDC. All
connections including 12VDC are made to the control panel. The
power supply input is protected against reverse voltage.
The alarm inputs except input 5 are triggered on either the rising or
falling edge, depending on the position of a link associated with each
input. Input 5 is level-triggered, also depending on the position of a
link. A change of status on any input will be communicated back to the
Vixnet network.
Connect the RING and TIP connections to the control panel.
The Leopard 3 operates from the battery backed up power supply of a
control panel. By monitoring the AC input, the Leopard 3 is able to
monitor and report on mains power (after a 10 minute wait), as long
as the control panel backup battery continues to supply power.
Two LEDs show the internal operation of the
Leopard 3 hardware. The green LED indicates
that the device is powered, whilst the red LED
indicates when the device is transmitting. At all
other times the red LED remains OFF.
OPERATION
The Leopard 3 has no user functions.
The Leopard 3 is factory configured to transmit a
health check every 23 hours.
The Leopard 3 communicates using the standard
Contact-ID event codes with the Vixnet CPSite via
Tip and Ring connections on a standard telephone
line.
Test Button
DocNo: 70272 Issue 1-0 – 25 February 2019 www.vixnet.co.za
Setting up a test through Footprint
Footprint is a web-based application for administration of users,
transceivers and mobile devices. Access to the application is
through username and password login. Login details are
provided by a security organisation to registered subscribers and
installers.
Here follow brief instructions on setting up a test using
Footprint. Complete instructions for use of Footprint are to be
found at footprint.vixnet.co.za. Click on the ‘?’ icon for
instructions.
The installer must be a registered Footprint tester and be set to
receive either or both of SMS and smartphone application test
messages.
Login to Footprint and select the Settings Menu by clicking the
Gear icon.
Select (All) Transceivers; search for transceiver by its number;
select Test; find User and select Assign User; schedule the test;
select Save; back out to main menu.
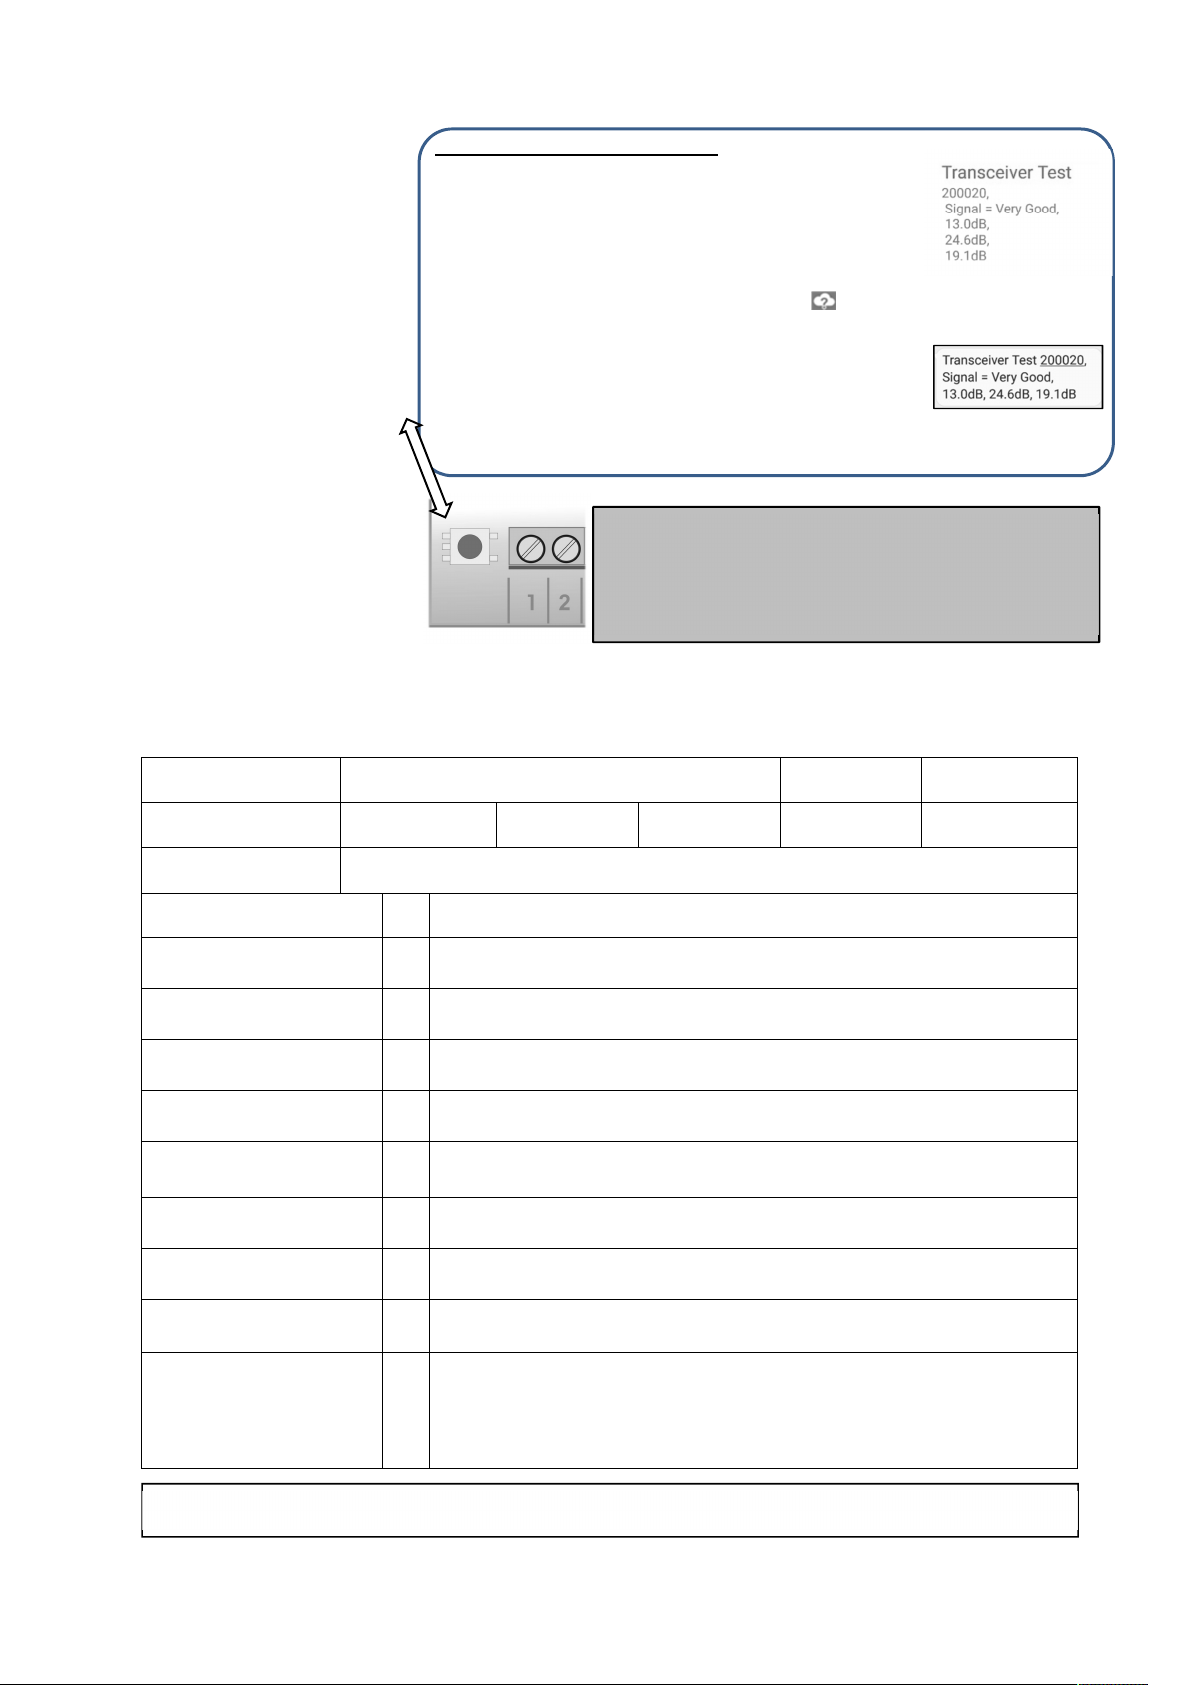
Smartphone Message
SMS Message
INSTALLATION
When installing the
control panel, program the
Leopard 3 ID Number (last
four least significant digits)
on the white sticker into the
Account Number field in the
alarm system.
Press the TEST push-
button for between one and
two seconds to send a test
transmission of test signal
31. Verify that the alarm was
successfully transmitted by
checking for a confirmation
SMS or, if available, by
checking on the Vixnet
Smartphone app designed
specifically for use by the
installer.
INSTALLATION Checklist
This checklist must be completed by the installer and returned to the Control Room.
Installer Name:
Date:
Leopard 3 ID No:
Account
Number:
Organisation:
Installation Address:
PROCEDURE
REMARKS
Mounting
Is the unit securely mounted? Record the Leopard 3 device number as
printed on the rear of the antenna.
CID-Messages
Make sure the control room receives the matching Contact ID messages for
the tests below as well.
Communications
Test successful transmission of a signal by pressing the TEST push-button.
Record signal strength: Excellent / Very Good / Good
Arm Alarm Local
When the alarm is armed from the control panel, does the control panel go
into the ARM state and is the Closed message received in the control room?
Disarm Alarm Local
When the alarm is disarmed from the control panel, does the control panel go
into the DISARM state and is the Open message received in the control room?
Burglary Alarm Signal
Trigger or simulate a Burglary signal and verify that it is received by the
control room.
Panic Alarm Signal
Trigger or simulate a Panic signal and verify that it is received by the control
room.
Other Signals
Trigger or simulate signals for the other inputs and verify that they are
received by the control room.
Mains Power
Switch off mains power to the control panel and verify that the control panel
and the Leopard 3 continue to operate on backup battery and that a Mains
Failure signal is received by the control room 10 minutes after the mains
failed. Switch mains power back on and verify that a Mains Restore signal is
received by the control room 10 minutes after the mains was restored.
NOTE: This guide only applies to the Leopard 3 transmitter. It does not test control panel function. The control panel has its own
instruction document.
If the cell phone app is to be used to ensure signal strength
and signal redundancy, ensure that the Leopard 3 has
been loaded and allocated under Footprint by the Technical
Manager or Co-ordinator. The details are needed for the
checklist below.
Other VixNet Transmitter manuals


