6
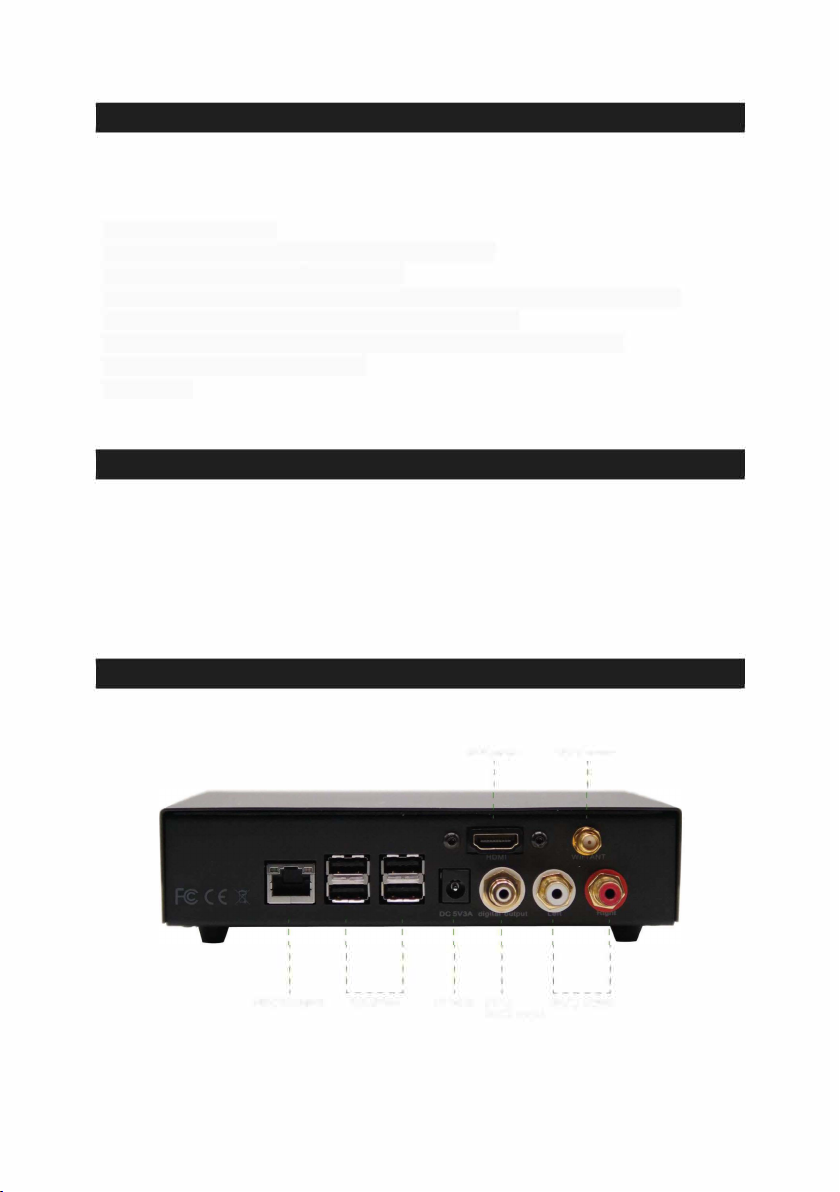
GIGABIT NETWORK: Wired Network interface. This is the suggested network connection for
playing Hi-Resolution content. Connect this interface to your router via an ethernet cable.
USB 2.0: These ports can be used to attach USB Accessories such as: thumb drives, USB storage
drives and SSD, keyboards, mice, smart remotes and USB CD-ROM drives.
Note: Any one of the four available USB ports can be used as output connecting to your external
DAC.
5V DC IN: Connect the power mains of the provided Power Supply Unit (or a compatible 5V 3A
power supply). By connecting Power the unit will turn on. To turn off the device, simply
disconnect the Power Supply (WARNING: To avoid data loss, remove the power supply after
selecting "Shutdown" from the settings menu. Do not remove power while updating or restoring
factory settings).
S/PDIF Digital Output: This output can be used to stream digital audio to an external DAC via
coax.
Analog Audio Output: RCA Output connection that will output 2V Analog Audio. This is the
recommended connectivity option for achieving optimal sound quality leveraging Primo's
integrated High resolution DAC.
HDMI Output: This output allows connection to TV or monitor and will display the User
lnterface. It can be used as an alternative to the smaller screen of a mobile device. Note: In
order to control the unit, the attached screen must be a touchscreen, unless a mouse and/or
keyboard is connected via USB.
Wi-fi Antenna: To ensure optimal Wireless performances, connect the provided wireless
antenna. Please note that wireless connection performances might not be optimal (as compared
to direct ethernet connection) for streaming high resolution audio. This may be the case if the
Primo is not physically located near your router or if there are many other wifi networks near you
.
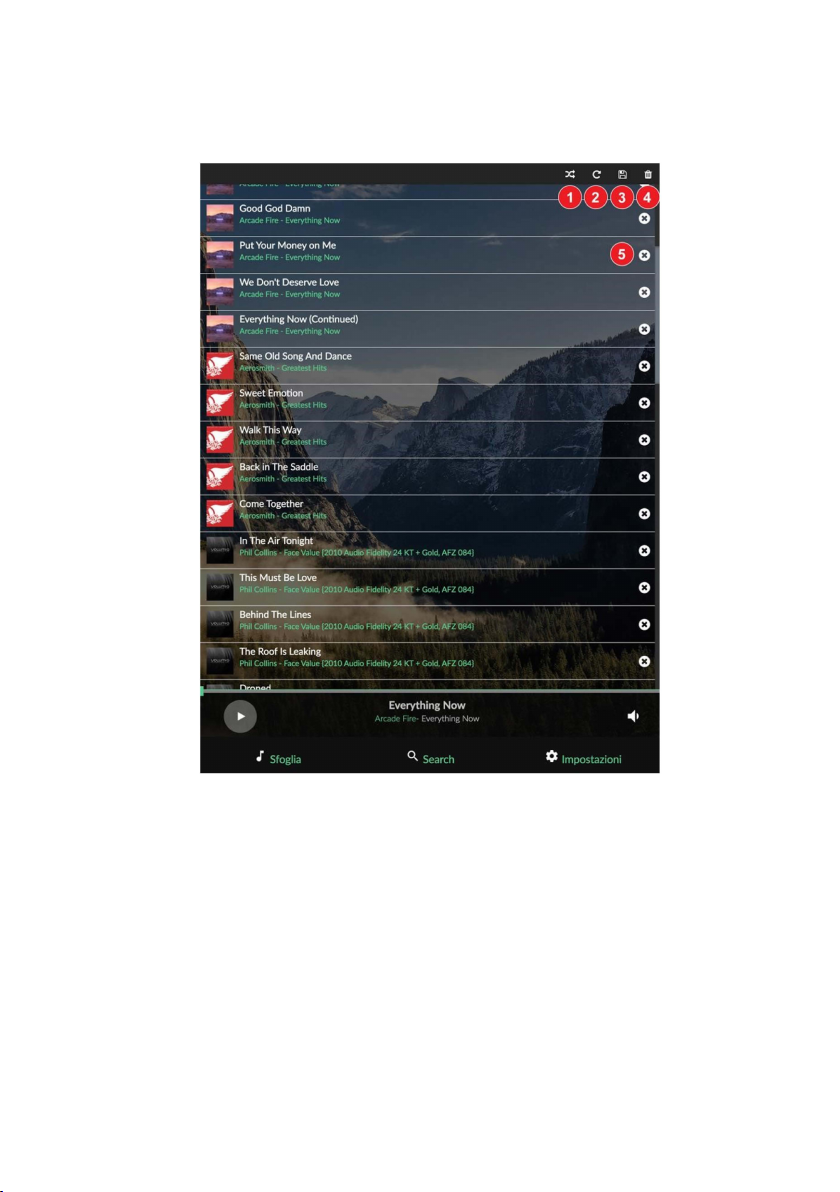
CONNECTION TO THE UNIT
Volumio PRIMO works best when it is connected to your network, since it is meant to be used as a
headless device: no monitor connected, and controlled via another device (PC, smartphone, tablet etc).
Volumio PRIMO can be controlled via its Web User Interface with a mobile phone, a tablet, a PC, a
Smart TV. More generally, Primo can be controlled with anything with a browser. For an optimal
experience, Google Chrome is recommended.
To reach Volumio's User Interface, first discover the IP address of your Primo. To do so, an easy way is
to use FING Android App, Net Analyzer for iOS. Note: By default, navigate to http://volumio.local. If you
have renamed your Primo, enter the name you selected in lieu of 'volumio'
Primo can also be controlled with available Android and iOS apps. These apps are not mandatory to use
Volumio Primo, but strongly recommended as they will automatically discover the Primo on your
Network.
Another easy way to connect to Volumio Primo, especially on first setup, is to connect in Hotspot Mode.
Upon first use, Primo will create an ad hoc wireless network called Volumio. Simply connect your
device,mobile phone or tablet to this Volumio network (password: volumio2) and the User Interface will
automatically pop up.