manuals.online logo
Brands
  1. Home
  2. •
  3. Brands
  4. •
  5. Vox
  6. •
  7. Musical Instrument Amplifier
  8. •
  9. Vox SIGNATURE Series User manual

Vox SIGNATURE Series User manual

EFGSCJ 1
En
Fr
De
Es
Zh
Ja
GET Owner’s Manual
voxamps.com/downloads/
AP-BM
1 Harrison Close, Knowlhill, Milton Keynes, MK5 8PA. UK www.voxamps.com
© 2022 VOX AMPLIFICATION LTD.
Vox Amplification Ltd.
Published 10/2022 Printed in Vietnam
© Copyright Duck Productions Ltd. 2022
Quick Start Guide
Guide de prise en main
Blitzstart
Guía de inicio rápido
入門指南
ク イ ック・ ス タ ー ト・ ガ イ ド
STANDBY/ON/CH ボタン、ランプ
ボタンを長押しして、電源をオン / オフします。
ボタンを押すと、チャンネルが切り替わります。
・CH1(緑):VOX 伝統のクランチ・サウンド
・CH2(赤):トレブル・ブースター回路を通ったブ
ライアン・メイの特徴的なサウンド
注意 : CH2 ではノイズが増え、設定によっては発振
する場合があります。音量に気をつけてご使用くだ
さい。
FX/RHYTHM レバー・スイッチ
リズムを再生 / 停止するにはこのスイッチを長押しします。
・ リズム停止中:スイッチを押してエフェクト・タイプを切り替
えます。左右に倒してエフェクトのかかり具合を調節します。
・ リズム再生中:スイッチを押してリズム・パターンを切り替え
ます。左右に倒してリズムの音量を調節します。
GAIN
ゲイン調整
TONE
音色調整
VOLUME
音量調整
TAP ボタン
・ リズム停止中:2 回以上押して、エフェクトのタ
イムやスピードを設定します。
・ リズム再生中:2 回以上押して、リズムのテンポ
を設定します。
このたびは VOX amPlug Brian May HEADPHONE GUITAR
AMPLIFIER をお買い上げいただきまして、まことにありが
とうございます。本製品を末永くご愛用いただくためにも、
取扱説明書をよくお読みになって、正しい方法でご使用く
ださい。
詳細は「取扱説明書」(PDF) をご覧ください。
www.voxamps.com からダウンロードしてください。 PHONES 端子
ヘッドホンを接続します。
(3.5mm stereo)
クイック・スタート
注意
・ 本機をギターから外すときは、本体のインプット・プラグの
根本付近を手で持ってください。本体の端を持つと、本機が
壊れる恐れがあります。
・ ギターを壁などに立てかけたり、床に置いたりするときは、
本機をギターから外してください。本機やギターが床などに
ぶつかって壊れる恐れがあります。

電池の入れ方
背面の電池カバーを、三角マークを押しながらスライドさ
せて外します。電池の向きを間違えないように 2 本の単 4
形電池を入れます。
インプット・プラグ
ギターに接続します。

・ 誤動作等を防ぐため、3m 以下のケーブル
をご使用ください。
・ インプット・プラグに接続していないとき
は本機の VOLUME を絞ってください。入力
信号が不安定になり、大きなノイズが出力
される場合があります。
・ オート・パワー・オフ機能
ボタンなどを操作しない状態とインプット・
プラグから入力がない状態が約 30 分続く
と、自動的に電源が切れます。
仕様
電源 : 単 4 形乾電池 2 本、または単 4 形ニッケル水素充電池 2 本
電池寿命 :
10 時間 /16 時間(
アルカリ乾電池、FX または RHYTHM オン時 / オフ時)
、
3 時間 /5 時間
(マンガン乾電池、FX または RHYTHM オン時 / オフ時)
外形寸法(W×D×H): 87 ×33 × 39 mm(プラグ収納時)
質量 : 40 g(電池含まず)
* 製品の外観および仕様は予告なく変更することがあります。
プラグは図のように回
転します。ご使用のギ
ターに合わせて角度を
調節してください。
注意:残量が少なくなった電池は、
すぐに取り出してください(電池残
量が少なくなるとランプが暗くなり
ます)。そのままにしておくと、充電
池の劣化や液もれ等、故障の原因と
なります。
Ja
Precautions
Location
Using the unit in the following locations can result in a malfunction.
・ In direct sunlight ・ Locations of extreme temperature or humidity
・ Excessively dusty or dirty locations ・ Locations of excessive vibration
・ Close to magnetic elds
Power supply
Be sure to turn the power switch to OFF when the unit is not in use. Remove
the battery in order to prevent it from leaking when the unit is not in use for
extended periods.
Interference with other electrical devices
Radios and televisions placed nearby may experience reception interference.
Operate this unit at a suitable distance from radios and televisions.
Handling
To avoid breakage, do not apply excessive force to the switches or controls.
Care
If the exterior becomes dirty, wipe it with a clean, dry cloth. Do not use liquid
cleaners such as benzene or thinner, or cleaning compounds or ammable
polishes.
Keep this manual
After reading this manual, please keep it for later reference.
Keeping foreign matter out of your equipment
Never set any container with liquid in it near this equipment. If liquid gets into
the equipment, it could cause a breakdown, re, or electrical shock. Be careful
not to let metal objects get into the equipment.
Notice regardzing disposal (EU only)
If this symbol is shown on the product, manual, battery, or package,
you must dispose of it in the correct manner to avoid harm to human
health or damage to the environment. Contact your local administrative
body for details on the correct disposal method. If the battery contains
heavy metals in excess of the regulated amount, a chemical symbol
is displayed below the symbol on the battery or battery package.
THE FCC REGULATION WARNING (for USA)
NOTE: This equipment has been tested and found to comply with the limits for
a Class B digital device, pursuant to Part 15 of the FCC Rules. These limits
are designed to provide reasonable protection against harmful interference
in a residential installation. This equipment generates, uses, and can radiate
radio frequency energy and, if not installed and used in accordance with
the instructions, may cause harmful interference to radio communications.
However, there is no guarantee that interference will not occur in a particular
installation. If this equipment does cause harmful interference to radio or
television reception, which can be determined by turning the equipment off
and on, the user is encouraged to try to correct the interference by one or
more of the following measures:
•Reorient or relocate the receiving antenna.
•Increase the separation between the equipment and receiver.
•Connect the equipment into an outlet on a circuit different from that to
which the receiver is connected.
•Consult the dealer or an experienced radio/TV technician for help.
If items such as cables are included with this equipment, you must use
those included items.
Unauthorized changes or modication to this system can void the user’s
authority to operate this equipment.
En
This device complies with Part 15 of the FCC Rules.
Operation is subject to the following two conditions: (1) This device may not cause
harmful interference, and (2) this device must accept any interference received,
including interference that may cause undesired operation.
CAN ICES-3 B / NMB-3 B
IMPORTANT NOTICE TO CONSUMERS
This product has been manufactured according to strict specications and voltage
requirements that are applicable in the country in which it is intended that this
product should be used. If you have purchased this product via the internet,
through mail order, and/or via a telephone sale, you must verify that this product
is intended to be used in the country in which you reside.
WARNING: Use of this product in any country other than that for which it
is intended could be dangerous and could invalidate the manufacturer’s or
distributor’s warranty. Please also retain your receipt as proof of purchase otherwise
your product may be disqualied from the manufacturer’s or distributor’s warranty.
Queen “We Will Rock You”
Hollywood Records, Inc. in the United States and Canada
Licensed by USM JAPAN, A UNIVERSAL MUSIC COMPANY except for United
States and Canada
Words & Music by Brian May
Published by Queen Music Ltd.
*All rights reserved. Any unauthorised copying, reproduction, rental or broadcast
of the information contained on thisproduct is a violation of applicable laws.
*All product names and company names are the trademarks or registered
trademarks of their respective owners.
Précautions
Emplacement
L’utilisation de cet instrument dans les endroits suivants peut en entraîner le
mauvais fonctionnement.
・ En plein soleil ・ Endroits très chauds ou très humides
・ Endroits sales ou fort poussiéreux ・ Endroits soumis à de fortes vibrations
・ A proximité de champs magnétiques
Alimentation
Lorsque vous n’utilisez pas l’appareil, n’oubliez pas de le mettre hors tension.
Retirez les piles pour éviter toute fuite lorsque l’appareil ne sera pas utilisé
pendant de longues périodes de temps.
Interférences avec d’autres appareils électriques
Les postes de radio et de télévision situés à proximité peuvent par conséquent
souffrir d’interférences à la réception. Veuillez dès lors faire fonctionner cet
appareil à une distance raisonnable de postes de radio et de télévision.
Maniement
Pour éviter de les endommager, manipulez les commandes et les boutons de cet
instrument avec soin.
Entretien
Lorsque l’instrument se salit, nettoyez-le avec un chiffon propre et sec. Ne vous
servez pas d’agents de nettoyage liquides tels que du benzène ou du diluant, voire
des produits inammables.
Conservez ce manuel
Après avoir lu ce manuel, veuillez le conserver soigneusement pour toute référence
ultérieure.
Evitez toute intrusion d’objets ou de liquide
Ne placez jamais de récipient contenant du liquide près de l’instrument. Si le
liquide se renverse ou coule, il risque de provoquer des dommages, un court-
circuit ou une électrocution. Veillez à ne pas laisser tomber des objets métalliques
dans le boîtier (trombones, par ex.).
Note concernant les dispositions (Seulement EU)
Si ce symbole apparait sur le produit, le manuel, les piles ou les packs
de piles, cela signie que vous devez le recycler d’une manière correcte
an de prévenir les dommages pour la santé humaine et les dommages
potentiels pour l’environnement. Contactez votre administration locale
pour de plus amples renseignements concernant la bonne méthode
de recyclage. Si la pile contient des métaux lourds au-delà du seuil
réglementé, un symbole chimique est afché en dessous du symbole de
la poubelle barrée d’une croix sur la pile ou le pack de piles.
REMARQUE IMPORTANTE POUR LES CLIENTS
Ce produit a été fabriqué suivant des spécications sévères et des besoins en tension
applicables dans le pays où ce produit doit être utilisé. Si vous avez acheté ce produit
via l’internet, par vente par correspondance ou/et vente par téléphone, vous devez
vérier que ce produit est bien utilisable dans le pays où vous résidez.
ATTENTION: L’utilisation de ce produit dans un pays autre que celui pour lequel il a
été conçu peut être dangereuse et annulera la garantie du fabricant ou du distributeur.
Conservez bien votre récépissé qui est la preuve de votre achat, faute de quoi votre
produit ne risque de ne plus être couvert par la garantie du fabricant ou du distributeur.
* Tous les noms de produits et de sociétés sont des marques commerciales ou
déposées de leur détenteur respectif.
Fr
Vorsichtsmaßnahmen
Aufstellungsort
Vermeiden Sie das Aufstellen des Geräts an Orten, an denen
・ es direkter Sonneneinstrahlung ausgesetzt ist; ・ hohe Feuchtigkeit oder
Extremtemperaturen auftreten können; ・ Staub oder Schmutz in großen Mengen
vorhanden sind; ・ das Gerät Erschütterungen ausgesetzt sein kann. ・ in der Nähe
eines Magnetfeldes.
Stromversorgung
Stellen Sie den Netzschalter auf OFF, wenn das Gerät nicht benutzt wird. Wenn Sie das
Gerät über einen längeren Zeitraum nicht benutzen, nehmen Sie die Batterien heraus,
damit sie nicht auslaufen.
Störeinflüsse auf andere Elektrogeräte
Dieser kann bei in der Nähe aufgestellten Rund-funkempfängern oder Fernsehgeräten
Empfangsstörungen hervorrufen. Betreiben Sie solche Geräte nur in einem geeigneten
Abstand von diesem Erzeugnis.
Bedienung
Vermeiden Sie bei der Bedienung von Schaltern und Reglern unangemessenen
Kraftaufwand.
Reinigung
Bei auftretender Verschmutzung können Sie das Gehäuse mit einem trockenen,
sauberen Tuch abwischen. Verwenden Sie keinerlei Flüssigreiniger wie beispielsweise
Reinigungsbenzin, Verdünnungs- oder Spülmittel. Verwenden Sie niemals brennbare
Reiniger.
Bedienungsanleitung
Bewahren Sie diese Bedienungsanleitung gut auf, falls Sie sie später noch einmal
benötigen.
Flüssigkeiten und Fremdkörper
Stellen Sie niemals Behältnisse mit Flüssigkeiten in der Nähe des Geräts auf. Wenn
Flüssigkeit in das Gerät gelangt, können Beschädigung des Geräts, Feuer oder ein
elek-trischer Schlag die Folge sein. Beachten Sie, daß keinerlei Fremdkörper in das
Gerät gelangen.
Hinweis zur Entsorgung (Nur EU)
Wenn Sie das Symbol mit der „durchgekreuzten Mülltonne“ auf Ihrem
Produkt, der dazugehörigen Bedienungsanleitung, der Batterie oder der
Verpackung sehen, müssen Sie das Produkt in der vorgeschriebenen
Art und Weise entsorgen um Schäden an der menschlichen Gesundheit
und der Umwelt zu vermeiden. Batterien oder Akkus, die Schadstoffe
enthalten, sind auch mit dem Symbol einer durchgekreuzten Mülltonne
gekennzeichnet. In der Nähe zum Mülltonnensymbol bendet sich
die chemische Bezeichnung des Schadstoffes. Cd oder NiCd steht für
Cadmium, Pb für Blei und Hg für Quecksilber.
WICHTIGER HINWEIS FÜR KUNDEN
Dieses Produkt wurde unter strenger Beachtung von Spezikationen und
Spannungsanforderungen hergestellt, die im Bestimmungsland gelten. Wenn
Sie dieses Produkt über das Internet, per Postversand und/oder mit telefonischer
Bestellung gekauft haben, müssen Sie bestätigen, dass dieses Produkt für Ihr
Wohngebiet ausgelegt ist.
WARNUNG: Verwendung dieses Produkts in einem anderen Land als dem, für
das es bestimmt ist, verwendet wird, kann gefährlich sein und die Garantie des
Herstellers oder Importeurs hinfällig lassen werden. Bitte bewahren Sie diese
Quittung als Kaufbeleg auf, da andernfalls das Produkt von der Garantie des
Herstellers oder Importeurs ausgeschlossen werden kann.
* Alle Firmen- und Produktnamen usw. sind Warenzeichen oder eingetragene
Warenzeichen der betreffenden Eigentümer.
Precauciones
Ubicación
El uso de la unidad en las siguientes ubicaciones puede dar como resultado un
mal funcionamiento:
・ Expuesto a la luz directa del sol ・ Zonas de extremada temperatura o humedad
・ Zonas con exceso de suciedad o polvo ・ Zonas con excesiva vibración
・ Cercano a campos magnéticos
Fuente de alimentación
Apague la unidad cuando no la use la batería. Retire las baterías si no va a usar la
unidad durante un tiempo largo.
Interferencias con otros aparatos
Las radios y televisores situados cerca pueden experimentar interferencias en la
recepción. Opere este dispositivo a una distancia prudencial de radios y televisores.
Manejo
Para evitar una rotura, no aplique excesiva fuerza a los conmutadores o controles.
Cuidado
Si exterior se ensucia, límpiese con un trapo seco. No use líquidos limpiadores
como disolvente, ni compuestos inflamables.
Guarde este manual
Después de leer este manual, guárdelo para futuras consultas.
Mantenga los elementos externos alejados del equipo
Nunca coloque ningún recipiente con líquido cerca de este equipo, podría causar
un cortocircuito, fuero o descarga eléctrica. Cuide de que no caiga ningún objeto
metálico dentro del equipo.
De
Es
Nota respecto a residuos y deshechos (solo UE)
Si aparece el símbolo del cubo de basura tachado sobre un producto,
su manual del usuario, la batería, o el embalaje de cualquiera de
éstos, significa que cuando tire dichos artículos a la basura, ha de
hacerlo en acuerdo con la normativa vigente de la Unión Europea para
prevenir daños a la salud pública y al medioambiente. Le rogamos que
se ponga en contacto con su oficina o ministerio de medioambiente
para más detalles. Si la batería contiene metales pesados por encima
del límite permitido, habrá un símbolo de un material químico, debajo
del símbolo del cubo de basura tachado.
NOTA IMPORTANTE PARA EL CONSUMIDOR
Este producto ha sido fabricado de acuerdo a estrictas especificaciones y
requerimientos de voltaje aplicables en el país para el cual está destinado.
Si ha comprado este producto por internet, a través de correo, y/o venta
telefónica, debe usted verificar que el uso de este producto está destinado
al país en el cual reside.
AVISO: El uso de este producto en un país distinto al cual está destinado
podría resultar peligroso y podría invalidar la garantía del fabricante o
distribuidor.
Por favor guarde su recibo como prueba de compra ya que de otro modo el
producto puede verse privado de la garantía del fabricante o distribuidor.
* Todos los nombres de productos y compañías son marcas comerciales o
marcas registradas de sus respectivos propietarios.
注意事项
使用场所
在以下地方使用本乐器将导致乐器故障:
・ 阳光直接照射下 ・ 极端温度或湿度条件下 ・ 有过量灰尘、肮脏的地方
・ 经常产生振动的地方 ・ 接近磁场的地方
电池
请确保电源开关关闭,当样板不用的时候,拆下电池,以防长时间不使用
时电池泄漏。
与其他电器设备的干扰
摆放在附近的收音机和电视可能会受到干扰。使用本乐器时,请保持乐
器与收音机和电视的适当距离。
操作
为了避免损坏,请不要过度用力操作开关或控制按钮。
保养
如果乐器表面有灰尘,用清洁的干布擦拭。不要使用如苯或稀释剂等液
体清洗剂或易燃的上光剂。
保存本手册
通读本手册后,请保管好以便日后参考之用。
将异物远离本乐器
不要在本乐器附近放置盛放液体的容器。如果液体进入本乐器,将导致
乐器损坏、燃烧或触电。注意不要使金属物体进入本乐器。
用户重要提示
本产品严格按照产品使用国家的生产标准和电压要求制造。
如果您通过网路、邮件或者电话销售购买本产品,您必须核实本产品
是否适于在您所在的国家使用。
警告:在本产品适用国家之外的其他国家使用本产品极其危险,同时
制造商和经销商将不再履行质量担保。
请妥善保存您的购买收据作为购买凭证,否则您的产品将不能享有制
造商或经销商的质量担保。
* 所有产品名称及公司名称均为其各自所有者的商标或注册商标。
Zh
安全上のご注意
火災・感電・人身傷害の危険を防止するには
以下の指示を守ってください
警告
この注意事項を無視した取り扱いをすると、死亡や重傷を負う可能性があります
 ・ 次のような場合には、直ちに電源を切る。
  ○異物が内部に入ったとき
  ○製品に異常や故障が生じたとき
  修理が必要なときは、お客様相談窓口へ依頼してください。
 ・ 本製品を分解したり改造したりしない。
 ・
 修理、部品の交換などで、取扱説明書に書かれていること以外は絶対にし
ない。
 ・ 大音量や不快な程度の音量で長時間使用しない。
大音量で長時間使用すると、難聴になる可能性があります。万一、聴力
低下や耳鳴りを感じたら、専門の医師に相談してください。
 ・ 本製品に異物(燃えやすいもの、硬貨、針金など)を入れない。
 ・ 温度が極端に高い場所(直射日光の当たる場所、暖房機器の近く、発熱
する機器の上など)での使用や保管をしない。
 ・ 振動の多い場所で使用や保管をしない。
 ・ ホコリの多い場所で使用や保管をしない。
 ・ 風呂場、シャワー室で使用や保管をしない。
 ・ 雨天時の野外のように、湿気の多い場所や水滴のかかる場所で、使用
や保管はしない。
 ・ 本製品の上に、花瓶のような液体が入ったものを置かない。
 ・ 本製品に液体をこぼさない。
 ・ 濡れた手で本製品を使用しない。
注意
この注意事項を無視した取り扱いをすると、傷害を負うまたは
物理的損害が発生する可能性があります
 ・ ラジオ、テレビ、電子機器などから十分に離して使用する。
ラジオやテレビ等に接近して使用すると、本製品が雑音を受けて誤作
動する場合があります。また、ラジオ、テレビ等に雑音が入ることがあり
ます。
 ・ 外装のお手入れは、乾いた柔らかい布を使って軽く拭く。
 ・ 長時間使用しないときは、電池の液漏れを防ぐために電池を抜く。
 ・ 電池は幼児の手の届かないところへ保管する。
 ・ 電池を過度の熱源(日光、火など)にさらさない。
 ・ スイッチやツマミなどに必要以上の力を加えない。
故障の原因になります。
 ・ 外装のお手入れに、ベンジンやシンナー系の液体、コンパウンド質、強
燃性のポリッシャーは使用しない。
*すべての製品名および会社名は、各社の商標または登録商標です。
Ja
保証規定(必ずお読みください)
本保証書は、保証期間中に本製品を保証するもので、付属品類(ヘッドホ
ンなど)は保証の対象になりません。保証期間内に本製品が故障した場合は、
保証規定によって無償修理いたします。
1. 本保証書の有効期間はお買い上げ日より1 か年です。
2. 次の修理等は保証期間内であっても有償となります。
・消耗部品(電池、スピーカー、真空管、フェーダーなど)の交換。
・お取扱い方法が不適当のために生じた故障。
・天災(火災、浸水等)によって生じた故障。
・故障の原因が本製品以外の他の機器にある場合。
・不当な改造、調整、部品交換などにより生じた故障または損傷。
・保証書にお買い上げ日、販売店名が未記入の場合、または字句が書
き替えられている場合。
・本保証書の提示がない場合。
 尚、当社が修理した部分が再度故障した場合は、保証期間外であっても、
修理した日より 3 か月以内に限り無償修理いたします。
3. 本保証書は日本国内においてのみ有効です。
 ThiswarrantyisvalidonlyinJapan.
4. お客様が保証期間中に移転された場合でも、保証は引き続きお使いい
ただけます。詳しくは、お客様相談窓口までお問い合わせください。
5. 修理、運送費用が製品の価格より高くなることがありますので、あらかじ
めお客様相談窓口へご相談ください。発送にかかる費用は、お客様の負
担とさせていただきます。
6. 修理中の代替品、商品の貸し出し等は、いかなる場合においても一切行っ
ておりません。
本製品の故障、または使用上生じたお客様の直接、間接の損害につきまし
ては、弊社は一切の責任を負いかねますのでご了承ください。
本保証書は、保証規定により無償修理をお約束するためのもので、これより
お客様の法律上の権利を制限するものではありません。
■お願い
1. 保証書に販売年月日等の記入がない場合は無効となります。記入できな
いときは、お買い上げ年月日を証明できる領収書等と一緒に保管してく
ださい。
2.
保証書は再発行致しませんので、紛失しないように大切に保管してください。
アフターサービス
修理または商品のお取り扱いについてのご質問、ご相談は、お客様相談窓口
へお問い合わせください。
お客様相談窓口
一部の電話ではご利用になれません。固定電話または携帯電話
からおかけください。
受付時間月曜~金曜10:00 ~ 17:00(祝日、窓口休業日を除く)
● サービス・センター:〒 168-0073東京都杉並区下高井戸 1-15-10
輸入販売元 :KORGImportDivision
〒 206-0812東京都稲城市矢野口 4015-2
www.korg-kid.com
SUPPLIER’S DECLARATION OF CONFORMITY (for USA)
Responsible Party : KORG USA INC.
Address : 316 SOUTH SERVICE ROAD, MELVILLE, NY
Telephone : 1-631-390-6500
Equipment Type : HEADPHONE GUITAR AMPLIFER
Model : AP-BM
This device complies with Part 15 of FCC Rules. Operation is subject to the
following two conditions:
(1) This device may not cause harmful interference, and (2) this device must
accept any interference received, including interference that may cause
undesired operation.
VOX amPlug Brian May 保 証 書
本保証書は、保証規定により無償修理をお約束する
ものです。
お買い上げ日 年 月 日
販売店名
STANDBY/ON/CH 按钮、灯
长按此按钮可开启 / 关闭设备。
按此按钮可切换通道。
- CH1(绿色):传统的 VOX 脆响
- CH2(红色):通过高音升压电路传递信号,发出
标志性的“Brian May”声音。
注意:使用 CH2 时,您可能会注意到一些额外的
噪声,并且根据设置可能会出现一些馈音。注意音
量设置。
FX/RHYTHM 控制杆开关
长按此开关可播放 / 停止节奏。
- 当节奏停止时,按下此开关可在效果类型之间切换。左右转动
开关,调节效果强度。
- 当节奏播放时,按下此开关可在节奏模式之间切换。左右转动
开关,调节节奏音量。
GAIN
调整
TONE
调整
VOLUME
调整
TAP 按钮
- 当节奏停止时,按下此键两次或两次以上以调整
效果时间和速度。
- 当节奏播放时,按下此键两次或两次以上以调整
节奏速度。
感谢您购买 VOX amPlug Brian May 耳机吉他音箱。
要充分利用本产品并确保无故障运行,请仔细阅读本使用
说明书并按照说明使用本产品。
请参阅“用户手册 (PDF)”了解详细信息。您可以通过以下
网址下载此文件:www.voxamps.com。
PHONES 插孔
连接耳机。(3.5 mm 立体声)
入门指南

输入插头
将此插头连接到您的
吉他。

如图所示旋转插头。根据您使
用的吉他调整插头的角度。
安装电池
按下装置后部电池盖上的三角形标记并滑动,卸下电池
盖。如图所示,装入两节 AAA 电池,并确保正负极正确。
产品规格
电源:
两节 AAA 电池或镍氢电池
电池寿命:
10 小时 /16 小时(使用碱性电池,FX/RHYTHM 开启 / 关闭时),
3 小时 / 5 小时(使用锌碳电池,FX/RHYTHM 开启 / 关闭时)
尺寸(宽 × 深 × 高):87 × 33 × 39 mm,插头可折叠
重量:40 g (不包括电池)
* 规格和外观如有改良,恕不另行通知。
注意:电池电量耗尽时应立即从设备
中取出(电池电量较低时,灯会变暗)。将
电量耗尽的电池留在电池匣内可能会导
致设备故障,如可充电电池退化、电解液
泄漏或其他问题。
警告
•
将 amPlug 从吉他中拔出时,必须握住其输入插头底部附近的
插头。握住插头的末端可能会损坏插头。
•
将吉他靠在墙上或将其放在地板上之前,断开 amPlug 与吉他
的连接。如果您没有断开连接,这个插头或您的吉他可能会因
接触到地板或其他表面而损坏。
•
使用长度不超过 3 米的线缆,以防止出现故障。
•
设备未与输入插头连接时,应始终保持将
amPlug 的音量调低。否则,可能会使输入
信号不稳定,导致噪音过大。
•
自动关机功能
amPlug 配备自动断电功能。如果没有使用
按钮或控件,或者大约 30 分钟没有通过
输入插头输入的信号,设备会自动关闭。
En Fr
De Es
Zh
STANDBY/ON/CH button, lamp
Long-press the button to turn the unit on/off.
Press this button to switch between channels.
- CH1 (green): traditional VOX crunch sound
- CH2 (red): routes the signal through a treble
booster circuit for a distinctive “Brian May” sound
NOTE: When using CH2, you may notice some
additional noise, and some feedback may occur
depending on the settings. Use caution with the
volume settings.
FX/RHYTHM lever switch
Long-press this switch to play back/stop the rhythm.
- While the rhythm is stopped, press to switch between effect types.
Turn the switch to the left and right to adjust the effect intensity.
- While the rhythm is playing, press to switch between rhythm
patterns. Turn the switch to the left and right to adjust the rhythm
volume.
GAIN
adjustment
TONE
adjustment
VOLUME
adjustment
TAP button
- When the rhythm is stopped, press this two or more
times to adjust the effect time and speed.
- When the rhythm is playing, press this two or more
times to adjust the rhythm tempo.
Thank you for purchasing the VOX amPlug Brian May
Headphone Guitar Amplifier. To take full advantage of this
product and to ensure trouble-free operation, please read this
manual carefully and use the product as directed.
See the Owner’s Manual (PDF) for details. You can download
this file at www.voxamps.com.
PHONES jack
Connect headphones.
(3.5 mm stereo)
Quick Start
CAUTION
• When unplugging the amPlug from your guitar, grasp the unit
near the base of its input plug. Grasping it at the end may break
the unit.
• Disconnect the amPlug from your guitar before leaning your guitar
against a wall or laying it on the floor. If you fail to do so, this
unit or your guitar may come into contact with the floor or other

Installing batteries
Push and slide on the triangular mark on the battery cover
at the rear of the unit to remove the cover. Insert two AAA
batteries as shown in Fig, while making sure they are
correctly oriented.
Input plug
Connect this to your guitar.

surface and break.
• Use a cable that’s no more than 3 m long to
prevent malfunctions.
• Turn the volume of the amPlug all the way
down if the unit is not connected to a input
plug. Failure to do so may make the input
signal unstable, resulting in loud noise.
• Auto power-off function
The amPlug is equipped with an auto power-off
function. If no buttons or controls are used or
there is no signal input via the input plug for
approximately 30minutes, the unit
automatically turns off.
Specifications
Power supply:
Two AAA batteries or AAA nickel-metal hydride batteries
Battery life:
10 hours/16 hours
(using alkaline batteries, when FX/RHYTHM is on/off),
3 hours/5 hours
(using zinc-carbon batteries, when FX/RHYTHM is on/off)
Dimensions (W × D × H):
87 × 33 × 39 mm (3.43″× 1.3″× 1.54″),
with plug folded down
Weight: 40 g (1.41 oz.), not including batteries
* Specifications and appearance are subject to change without
notice for improvement.
Swivel the plug as shown in
Fig. Adjust the plug angle
according to the guitar
you’re using.
NOTE: Remove depleted batteries from
the unit immediately (The lamp lights
dimly when the battery power is low).
Leaving depleted batteries in could
result in malfunctions such as
degradation of rechargeable batteries,
electrolyte leakage or other problems.
Bouton et témoin STANDBY/ON/CH
Appliquez une longue pression sur ce bouton pour
mettre l’unité sous/hors tension.
Ce bouton permet de changer de canal.
- CH1 (vert): Crunch traditionnel du son VOX
- CH2 (rouge):
Achemine le signal à un circuit Treble
Boost pour produire le son caractéristique de Brian May.
REMARQUE : Avec le CH2, vous remarquerez
peut-être, selon les réglages, l’apparition de bruit
supplémentaire et de Larsen. Soyez donc prudent
quand vous réglez le volume.
Sélecteur FX/RHYTHM
Appliquez une longue pression sur ce sélecteur pour lancer/arrêter
la lecture du motif rythmique.
- Quand la lecture du motif rythmique est arrêtée, enfoncez-le
pour changer de type d’effet. Réglez l’intensité de l’effet en
tournant le sélecteur à gauche et à droite.
- Pendant la lecture du motif rythmique, enfoncez-le pour changer
de motif rythmique. Réglez le volume du motif rythmique en
tournant le sélecteur à gauche et à droite.
Reglage de
GAIN
Reglage de
TONE
Reglage de
VOLUME
Bouton TAP
- Quand la fonction rythmique est à l’arrêt, appuyez
deux fois ou plus sur ce bouton pour régler la durée
et la vitesse de l’effet.
- Quand la fonction rythmique est active, appuyez
deux fois ou plus sur ce bouton pour régler le tempo
du rythme.
Merci d’avoir choisi l’amplificateur de guitare pour casque
amPlug Brian May de VOX. Pour profiter pleinement de ce
produit et vous assurer un fonctionnement sans problème,
veuillez lire attentivement ce manuel et suivre ses consignes.
Pour des détails, voyez le manuel d’utilisation (PDF). Ce
fichier est téléchargeable sur le site www.voxamps.com.
Prise PHONES
Branchez-y un casque.
(avec fiche stéréo de 3,5 mm)
Prise en main
ATTENTION
• Lorsque vous débranchez l’amPlug de votre guitare, saisissez
l’unité près de la base de sa fiche d’entrée. Si vous la saisissez à
l’extrémité de sa fiche, cela pourrait casser l’unité.
• Débranchez l’amPlug de votre guitare avant de la poser contre un
mur ou sur le sol. Sans cela, l’unité ou votre guitare pourrait
toucher le sol ou d’autres surfaces et être endommagée.

Mise en place des piles
Poussez sur la flèche imprimée sur le couvercle du
compartiment à pile au dos de l’unité pour glisser et retirer
le couvercle. Insérez deux piles AAA comme illustré sur la
Fig., en veillant à respecter les indications de polarité.
Fiche d’entrée
Branchez cette fiche à votre
guitare.

• Utilisez un câble d’une longueur maximum de
3 m pour prévenir tout dysfonctionnement.
• Réduisez le volume de l’amPlug au minimum
si l’unité n’est branchée à aucun instrument.
Le non-respect de cette consigne pourrait
compromettre la stabilité du signal d’entrée,
produisant un bruit fort.
• Fonction de mise hors tension automatique
L’amPlug est doté d'une fonction de coupure
automatique de l'alimentation. Si vous
n’utilisez aucun bouton ni commande,
ou si aucun signal n’est transmis via la
fiche d’entrée pendant environ 30 minutes,
l’unité se met automatiquement hors tension.
Fiche technique
Alimentation électrique:
Deux piles AAA ou piles AAA à l’hydrure métallique de nickel
Autonomie des piles:
10 heures/16 heures (avec des piles alcalines, quand la fonction
FX/RHYTHM est activée/coupée),
3 heures/5 heures (avec des piles au zinc-carbone, quand la
fonction FX/RHYTHM est activée/coupée)
Dimensions (L × P × H) : 87 × 33 × 39 mm, avec la fiche repliée
Poids: 40 g (sans les piles)
* Les caractéristiques et l’aspect du produit sont susceptibles
d’être modifiés sans avis préalable en vue d’une amélioration.
Faites pivoter la fiche comme
illustré sur la Fig. Réglez
l’angle de la fiche en fonction
de la guitare utilisée.
REMARQUE: Retirez immédiatement des
piles plates de l’unité (la luminosité du
témoin diminue quand les piles sont presque
plates). La présence de piles plates dans
l’unité pourrait provoquer des
dysfonctionnements, comme une dégradation
des piles rechargeables, une fuite
d’électrolyte des piles ou d’autres problèmes.
STANDBY/ON/CH-Taste, Lampe
Drücken Sie die Taste für einige Sekunden, um das
Gerät ein-/auszuschalten.
Drücken Sie diesen Taster, um zwischen den Kanälen
zu wechseln.
- CH1 (grün): Traditioneller VOX Crunch-Sound
- CH2 (rot): Leitet das Signal durch eine
Höhenverstärkerschaltung für einen
unverwechselbaren „Brian May“-Sound
HINWEIS: Wenn Sie CH2 verwenden, bemerken Sie
möglicherweise zusätzliches Rauschen, und es kann
je nach Einstellung zu Rückkopplungen kommen.
Die Einstellung der Lautstärke sollte vorsichtig
vorgenommen werden.
FX/RHYTHM-Hebelschalter
Drücken Sie diesen Schalter für einige Sekunden, um den
Rhythmus wiederzugeben/zu stoppen.
- Drücken Sie den Schalter bei gestopptem Rhythmus, um
zwischen den Effekttypen umzuschalten. Drehen Sie den Schalter
nach links und rechts, um die Intensität des Effekts einzustellen.
-
Drücken, während der Rhythmus spielt, um zwischen den
Rhythmusmustern umzuschalten. Drehen Sie den Schalter nach
links und rechts, um die Lautstärke des Rhythmus einzustellen.
GAIN
Einstellung
TONE
Einstellung
VOLUME
Einstellung
TAP-Taste
- Wenn der Rhythmus gestoppt ist, drücken Sie diese
Taste zwei- oder mehrmals, um die Zeit und
Geschwindigkeit des Effekts einzustellen.
-
Wenn der Rhythmus spielt, drücken Sie diese Taste zwei-
oder mehrmals, um Tempo des Rhythmus einzustellen.
Vielen Dank, dass Sie sich für den VOX amPlug Brian May
Kopfhörer-Gitarrenverstärker entschieden haben. Bitte lesen
Sie diese Anleitung sorgfältig durch und verwenden Sie das
Gerät wie beschrieben, um das Maximum aus diesem Produkt
herauszuholen und es problemlos zu verwenden.
Mehr hierzu finden Sie in der Bedienungsanleitung (PDF). Sie
können diese Datei unter www.voxamps.com herunterladen.
PHONES-Buchse
Kopfhörer anschließen
(3,5 mm Stereo)
Blitzstart
VORSICHT
• Beim Lösen der Verbindung zwischen dem amPlug und der Gitarre
sollten Sie den amPlug am Sockel in der Nähe des Input-Steckers
fassen. Wenn Sie ihn beim Ziehen am Ende festhalten, kann der
amPlug beschädigt werden.
• Ziehen Sie den amPlug aus der Gitarrenbuchse, bevor Sie die
Gitarre an die Wand lehnen oder flach auf den Boden legen.

Einsetzen der Batterien
Drücken und schieben Sie die dreieckige Markierung auf der
Batterieabdeckung auf der Rückseite des Geräts, um die
Abdeckung zu entfernen. Legen Sie zwei AAA-Batterien wie in Abb.
gezeigt ein und achten Sie dabei auf die richtige Ausrichtung.
Input-Stecker
Verbinden Sie dies mit Ihrer
Gitarre.

Wenn Sie das nämlich vergessen, kann das Gerät
oder die Gitarre bei Berührung des Bodens oder
einer Oberfläche beschädigt werden.
• Verwenden Sie ein Kabel von nicht mehr als 3 m
Länge, um Fehlfunktionen zu vermeiden.
• Drehen Sie die Lautstärke des amPlug ganz
herunter, wenn das Gerät nicht an einen
Input-Stecker angeschlossen ist. Andernfalls
kann das Eingangssignal instabil werden,
was zu lautem Rauschen führt.
• Energiesparfunktion
Der amPlug besitzt eine Energiesparfunktion.
Falls über etwa 30 Minuten hinweg keine
Tasten und Regler bedient werden und kein
Signaleingang über den Input-Stecker erfolgt,
schaltet sich der amPlug automatisch aus.
Technische Daten
Stromversorgung:
Zwei AAA-Batterien oder AAA-Nickel-Metallhydrid-Akkus
Batterielebensdauer:
10 Stunden/16 Stunden (mit Alkalibatterien, wenn FX/RHYTHM
ein-/ausgeschaltet ist),
3 Stunden/5 Stunden (mit Zink-Kohle-Batterien, wenn
FX/RHYTHM ein-/ausgeschaltet ist)
Abmessungen (B x T x H) :
87 × 33 × 39 mm mit heruntergeklapptem Stecker
Gewicht: 40 g ohne Batterien
* Änderungen der technischen Daten und des Designs ohne
vorherige Ankündigung vorbehalten.
Der Stecker ist drehbar (siehe
Abb.). So können Sie den
Winkel des Steckers an die
verwendete Gitarre anpassen.
HINWEIS:
Entfernen Sie leere Batterien sofort
aus dem Gerät (Die Lampe leuchtet schwach,
wenn die Batterieleistung niedrig ist).
Verbleiben leere Batterien im Fach, kann dies
zu Fehlfunktionen führen, z.B.
Verschlechterung wiederaufladbarer Batterien,
Auslaufen oder sonstigen Problemen.
Botón y lámpara STANDBY/ON/CH
Pulse prolongadamente el botón para encender/apagar
la unidad.
Pulse este botón para cambiar entre canales.
- CH1 (canal 1) (verde): Sonido “crunch” tradicional
de VOX
- CH2 (canal 2) (rojo): Enruta la señal a través de un
circuito de realce de agudos para obtener el sonido
distintivo “Brian May”.
NOTA: Cuando utilice el canal 2 (CH2), puede notar
algo de ruido adicional, y puede producirse algo de
retroalimentación dependiendo de los ajustes. Tenga
cuidado con los ajustes de volumen.
Interruptor de palanca FX/RHYTHM
Mantenga presionado este interruptor para reproducir/parar el ritmo
- Mientras el ritmo está parado, pulse para cambiar entre tipos de
efectos. Gire el interruptor a la izquierda y a la derecha para
ajustar la intensidad del efecto.
- Mientras el ritmo se está reproduciendo, pulse para cambiar entre
patrones rítmicos. Gire el interruptor a la izquierda y a la derecha
para ajustar el volumen del ritmo.
GAIN
(ajuste de
ganancia)
TONE
(ajuste de
tono)
VOLUME
(ajuste de
volumen)
Botón TAP
- Con el ritmo parado, pulse este botón dos o más
veces para ajustar el tiempo y la velocidad del efecto.
- Con el ritmo reproduciéndose, pulse este botón dos
o más veces para ajustar el tempo del ritmo.
Gracias por adquirir el amplificador de guitarra para
auriculares VOX amPlug Brian May. Para sacar el máximo
partido a este producto y para garantizar un uso sin problemas,
lea detenidamente este manual.
Consulte el Manual del usuario (PDF) para más información.
Puede descargar este archivo desde www.voxamps.com.
Jack PHONES
Conecte aquí unos auriculares.
(3,5 mm estéreo)
Inicio rápido
PRECAUCIÓN
• Cuando desconecte el amPlug de la guitarra, sujete la unidad
cerca de la base del conector de entrada. Si lo sujeta por el
extremo, se puede romper la unidad.
• Desconecte el amPlug de la guitarra antes de apoyar la guitarra
contra la pared o dejarla en el suelo. Si no lo hace, esta unidad o
la guitarra pueden entrar en contacto con el suelo u otra

Instalación de las pilas
Pulse y deslice sobre la marca triangular que hay en la tapa del
compartimento de las pilas situado en la parte posterior de la unidad
para quitar la tapa. Introduzca dos pilas AAA como se muestra en la
figura, y asegúrese de que están correctamente orientadas.
Conector de entrada
Conéctelo a la guitarra.

superficie y romperse.
• Utilice un cable que no tenga más de 3 m de
largo para evitar anomalías de funcionamiento.
•
Baje por completo el volumen del amPlug si la
unidad no está conectada a un conector de
entrada. Si no lo hace, la señal de entrada puede
resultar inestable y causar ruido a alto volumen.
• Función de apagado automático
El amPlug está equipado con una función de
apagado automático. Si no se utiliza ningún
botón o control o si no se introduce
ninguna señal a través del conector de
entrada durante aproximadamente 30 minutos,
la unidad se apagará automáticamente.
Especificaciones
Alimentación:
Dos pilas AAA o pilas de níquel-metal hidruro AAA
Duración de las pilas:
10 horas/16 horas (utilizando pilas alcalinas, cuando FX/RHYTHM
está activado/desactivado),
3 horas/5 horas (utilizando pilas de zinc-carbono, cuando
FX/RHYTHM está activado/desactivado)
Dimensiones (anch. × prof. × alt.):
87 × 33 × 39 mm, con el conector plegado
Peso: 40 g, sin incluir las pilas
* Las especificaciones y el aspecto están sujetos a cambios sin
previo aviso por mejora.
Gire el conector como se
muestra en la figura. Ajuste el
ángulo del conector según la
guitarra que esté utilizando.
NOTA:
Retire las pilas gastadas de la unidad
inmediatamente (la lámpara se ilumina
tenuemente cuando la carga de las pilas es baja).
Dejar pilas gastadas en el compartimento puede
originar problemas de funcionamiento, como por
ejemplo el deterioro de las baterías recargables,
fugas de electrolitos u otros problemas.

This manual suits for next models

2

Other Vox Musical Instrument Amplifier manuals

Vox AC4C1-MINI User manual

Vox

Vox AC4C1-MINI User manual

Vox MINI5 Rhythm User manual

Vox

Vox MINI5 Rhythm User manual

Vox Valvetronix AD120VTX Installation and operating instructions

Vox

Vox Valvetronix AD120VTX Installation and operating instructions

Vox VX II User manual

Vox

Vox VX II User manual

Vox AC15VR User manual

Vox

Vox AC15VR User manual

Vox MINI SUPERBEETLE User manual

Vox

Vox MINI SUPERBEETLE User manual

Vox Valvetronix VT20+ User manual

Vox

Vox Valvetronix VT20+ User manual

Vox Valvetronix VT Series Product information sheet

Vox

Vox Valvetronix VT Series Product information sheet

Vox AC15H1TV User manual

Vox

Vox AC15H1TV User manual

Vox AC1RV User manual

Vox

Vox AC1RV User manual

Vox AC15C1 User manual

Vox

Vox AC15C1 User manual

Vox Pathfinder 15SMR User manual

Vox

Vox Pathfinder 15SMR User manual

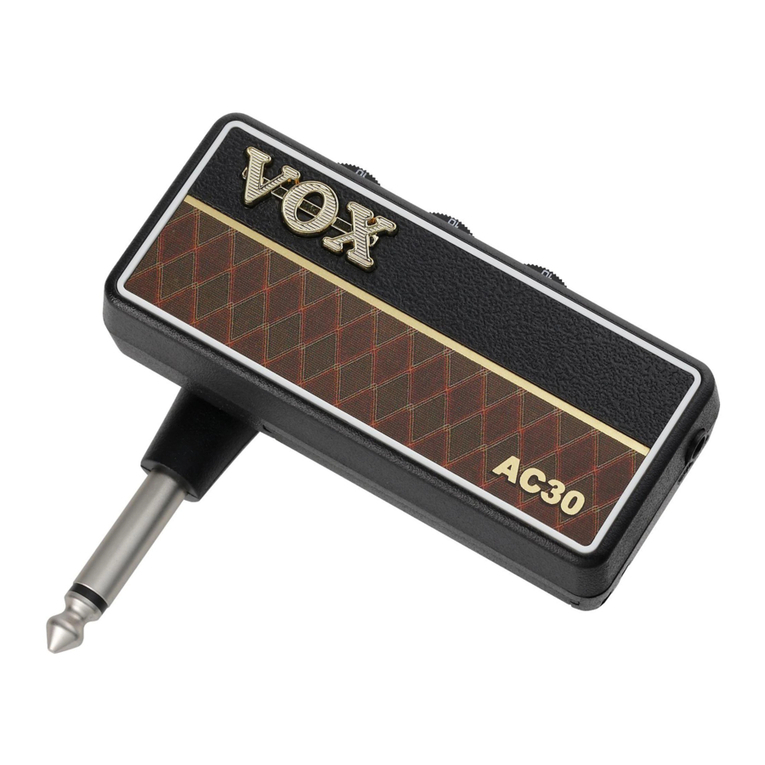
Vox amPlug2 AC30 User manual

Vox

Vox amPlug2 AC30 User manual

Vox DA15 User manual

Vox

Vox DA15 User manual

Vox AC30CC1 User manual

Vox

Vox AC30CC1 User manual

Vox AC15H1TV User manual

Vox

Vox AC15H1TV User manual

Vox Brian May MV50 Series User manual

Vox

Vox Brian May MV50 Series User manual

Vox AGA4-AT User manual

Vox

Vox AGA4-AT User manual

Vox AC4TVH User manual

Vox

Vox AC4TVH User manual

Vox AmPlug AC30 User manual

Vox

Vox AmPlug AC30 User manual

Vox AC30CC1 User manual

Vox

Vox AC30CC1 User manual

Vox T25 Bass Amplifier User manual

Vox

Vox T25 Bass Amplifier User manual

Vox AC4HW1 User manual

Vox

Vox AC4HW1 User manual

Vox AC30C2X User manual

Vox

Vox AC30C2X User manual

Popular Musical Instrument Amplifier manuals by other brands

Aguilar DB 751 manual

Aguilar

Aguilar DB 751 manual

ORANGE CR6S owner's manual

ORANGE

ORANGE CR6S owner's manual

Fender BLUES DE VILLE Service manual

Fender

Fender BLUES DE VILLE Service manual

Rocktron Rampage RB30 instruction manual

Rocktron

Rocktron Rampage RB30 instruction manual

Chord CG-60 user manual

Chord

Chord CG-60 user manual

Roland BOSS KATANA-50 Mk II Service notes

Roland

Roland BOSS KATANA-50 Mk II Service notes

Ashdown CTM 100 user manual

Ashdown

Ashdown CTM 100 user manual

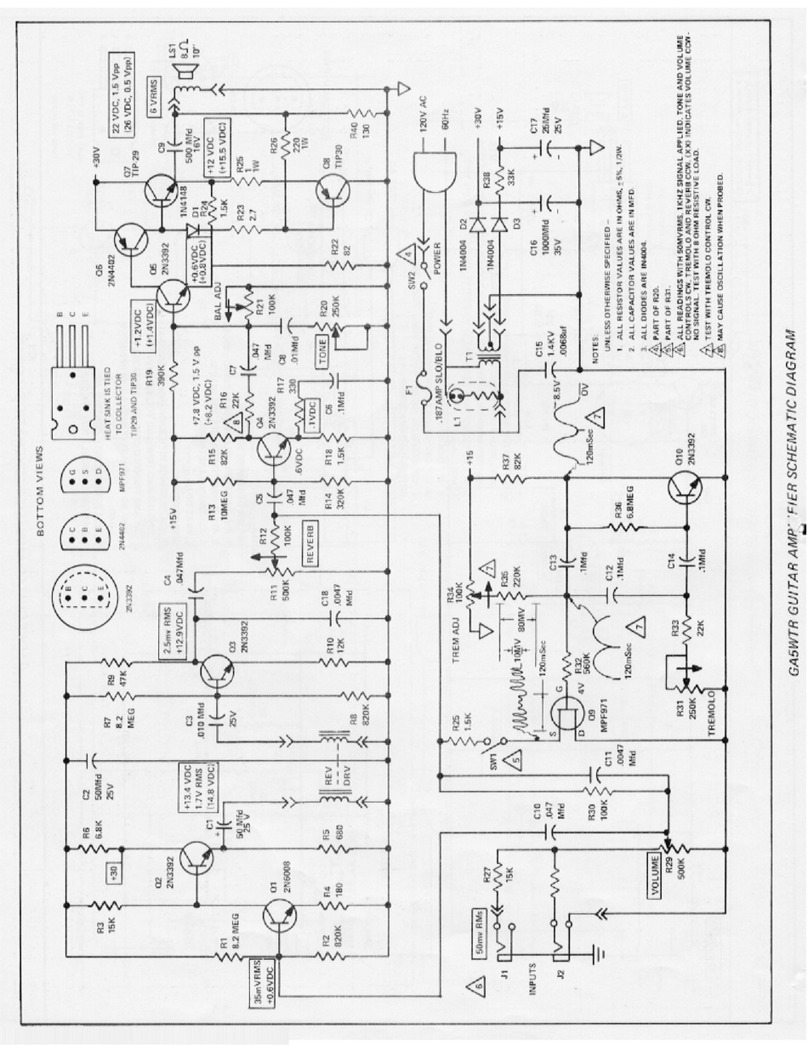
Gibson GA-5 Schematic diagram

Gibson

Gibson GA-5 Schematic diagram

Kustom KG100HFX owner's manual

Kustom

Kustom KG100HFX owner's manual

Kustom 36 coupe owner's manual

Kustom

Kustom 36 coupe owner's manual

Crate Amplifier CR19 Operation manual

Crate

Crate Amplifier CR19 Operation manual

Gibson Ga 86 Schematic diagram

Gibson

Gibson Ga 86 Schematic diagram

Rupert Musical Instruments Basswitch IQ DI user manual

Rupert Musical Instruments

Rupert Musical Instruments Basswitch IQ DI user manual

Peavey VTM-120 owner's manual

Peavey

Peavey VTM-120 owner's manual

ORANGE TERROR BASS 500 owner's manual

ORANGE

ORANGE TERROR BASS 500 owner's manual

Peavey Basic 50 operating guide

Peavey

Peavey Basic 50 operating guide

Fender KXR 200 owner's manual

Fender

Fender KXR 200 owner's manual

Kustom Defender V30 owner's manual

Kustom

Kustom Defender V30 owner's manual

manuals.online logo
manuals.online logoBrands
  • About & Mission
  • Contact us
  • Privacy Policy
  • Terms and Conditions

Copyright 2025 Manuals.Online. All Rights Reserved.