Voxx SB10MD1 User manual

Rear Seat Infortainment System
Owner's Manual
M/N: SB10MD1
M/N: SB10M1
10.1" IN-CAR SEATBACK MONITOR WITH DVD
10.1” IN-CAR SEATBACK MONITOR


Congratulations on your purchase of this Mobile Video Rear Seat Entertainment System! The SB10UHD has been designed to
provide passengers with unlimited content options delivering smiles for many miles. Please read the directions that follow to
familiarize yourself with the product to ensure that you obtain the best results from your equipment.
For safety reasons, when changing video media, it is recommended that the vehicle is not in motion, and that you do not allow
children to unfasten seat belts to change video media or make any adjustments to the system. System adjustments can be
accomplished using the voxx control, while seat belts remain fastened. Enjoy your entertainment system but remember the safety
of all passengers remains the number one priority.
• Do not use any solvents or cleaning materials when cleaning the video monitor.
• Do not use any abrasive cleaners, they may scratch the screen.
• Use only a lightly dampened lint free cloth to wipe the screen if it is dirty.
• Before putting on headphones always adjust the volume setting to the lowest position.
• Do not put pressure on the screen.
• Caution children to avoid touching or scratching the screen, as it may become dirty or damaged.
Patented, refer to www.voxxintl.com/company/patents
Congratulations
Safety Precaution
Warnings

TABLE OF CONTENTS
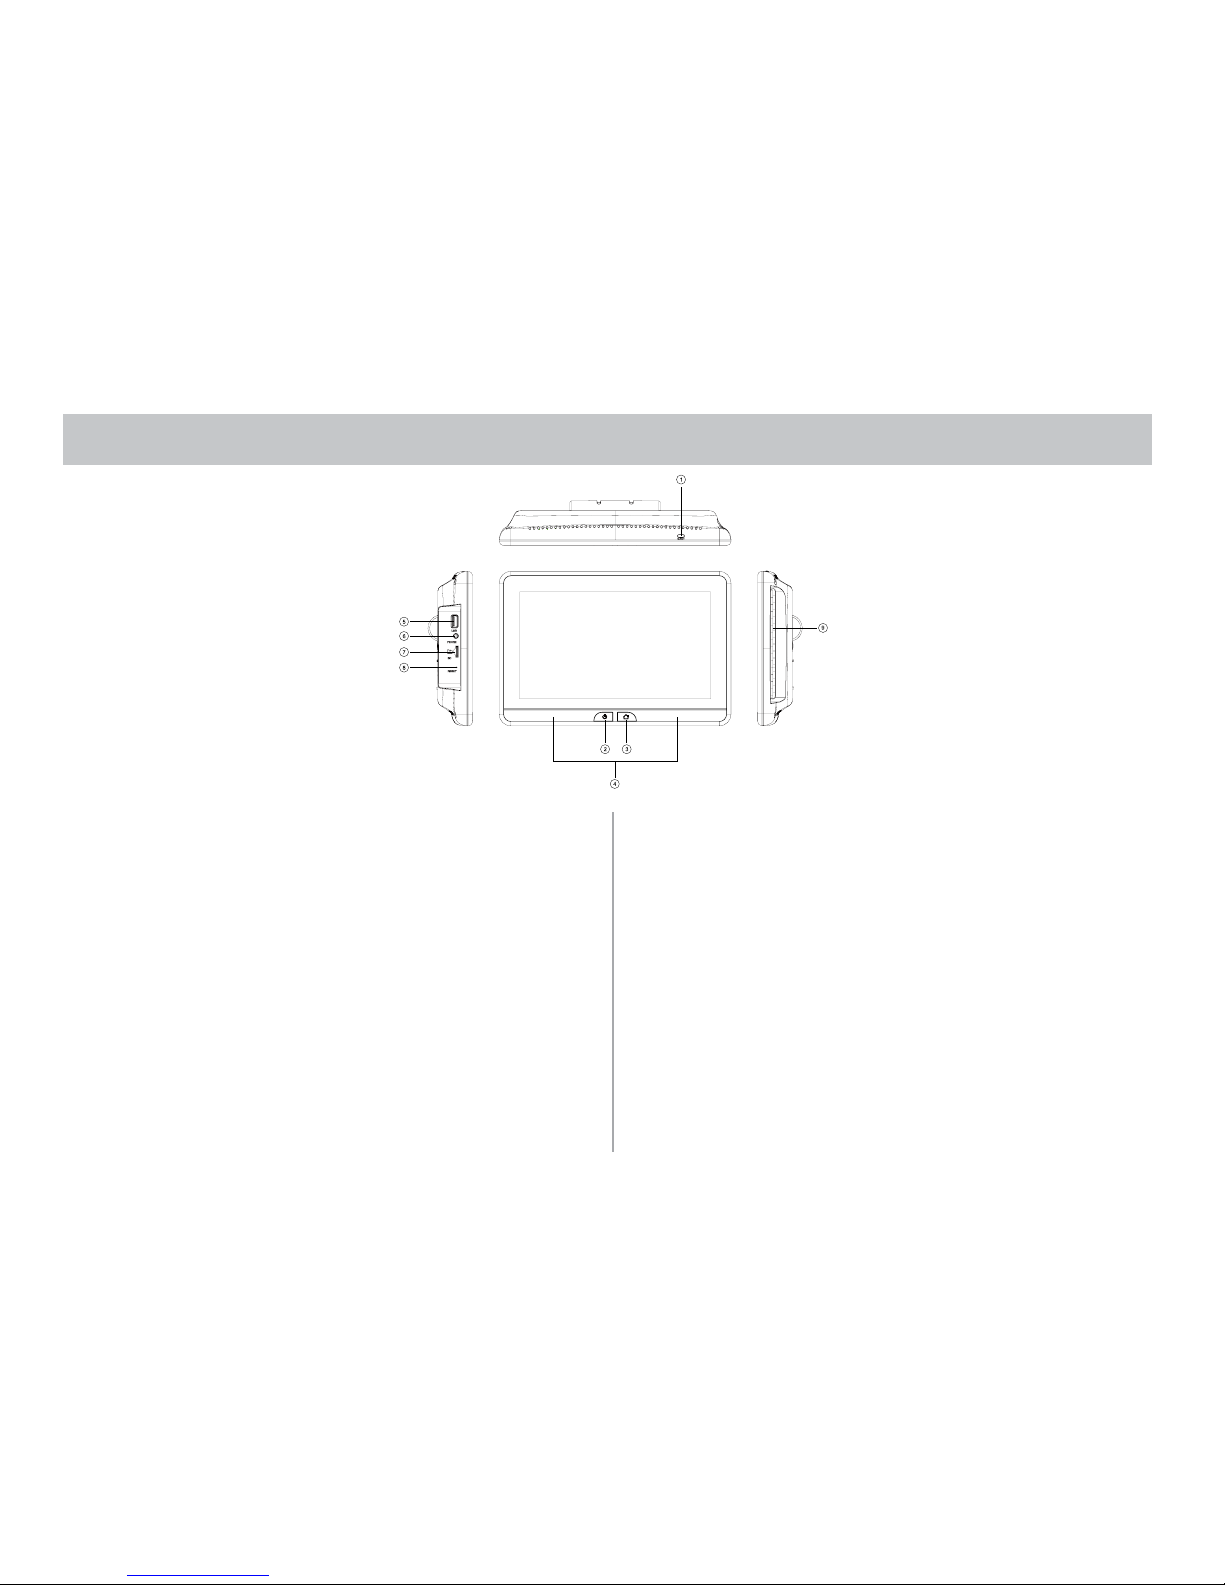
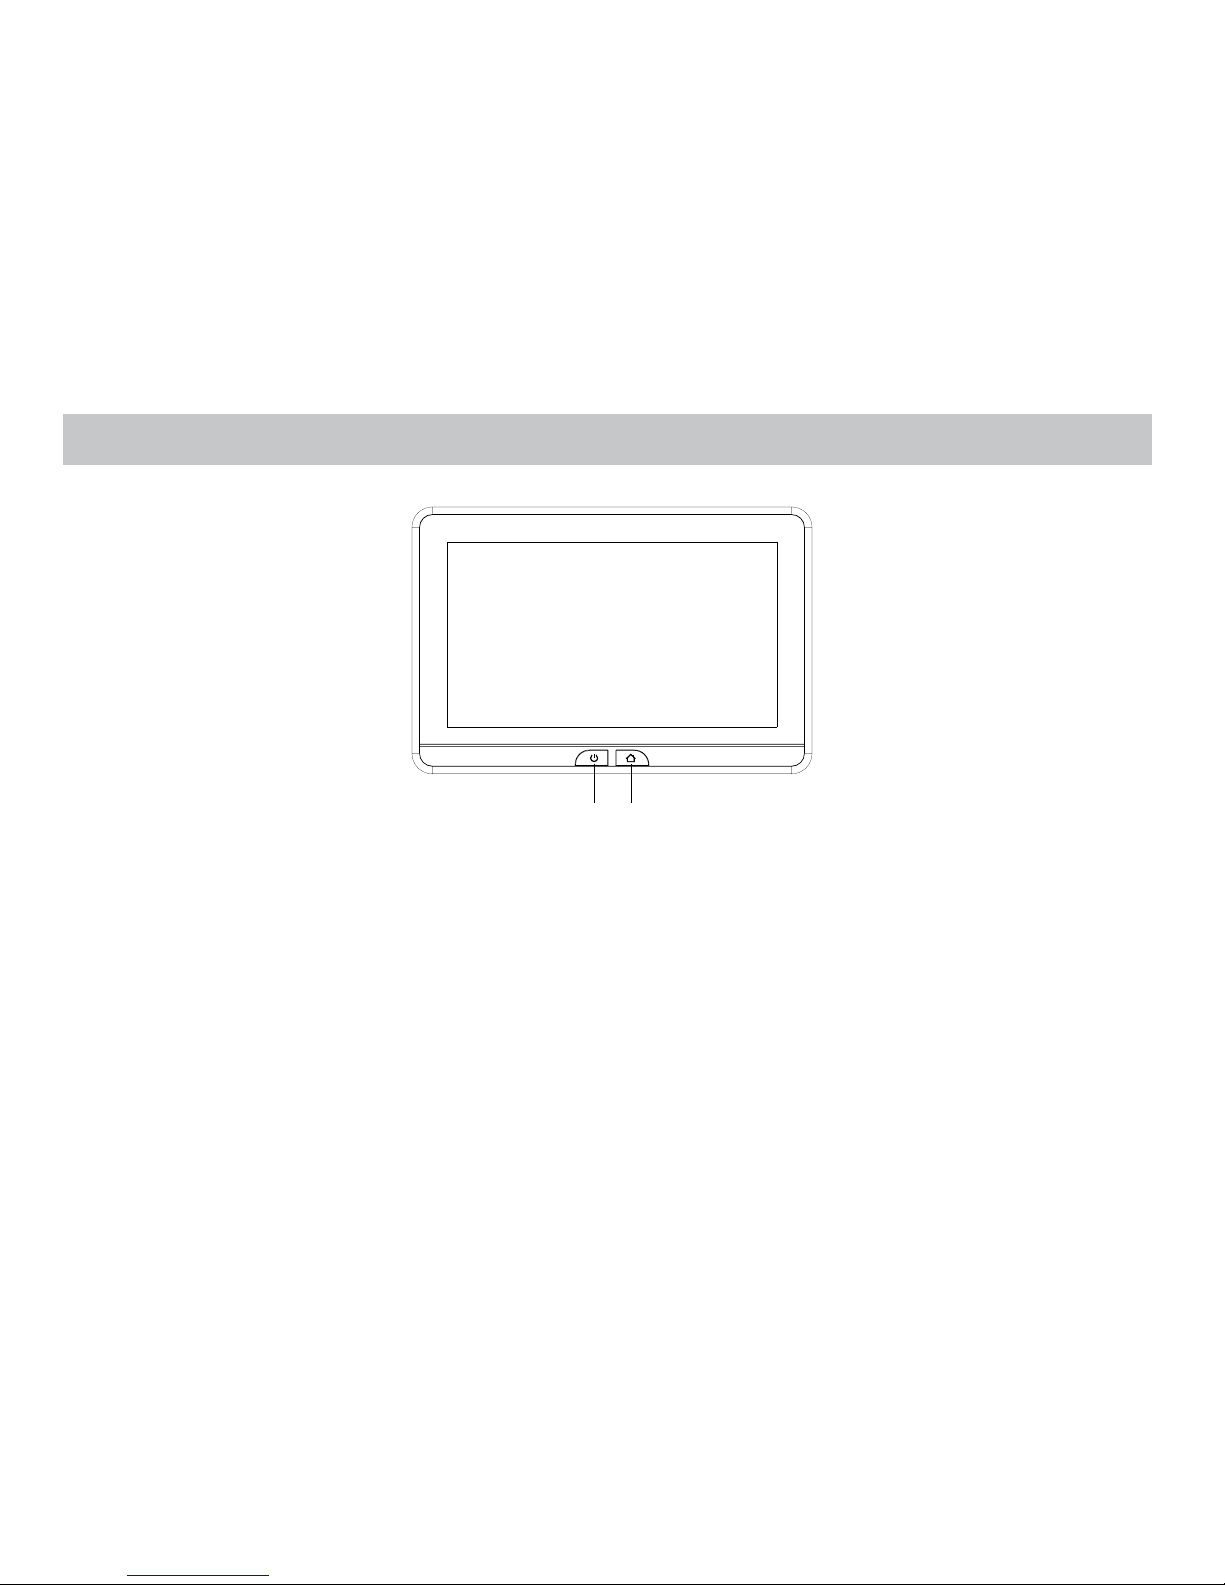
Description of parts (SB10MD1) ..................................................................................................................................................................................... 5
Description of parts (SB10M1)......................................................................................................................................................................................... 6
Getting Started ..................................................................................................................................................................................................................... 7
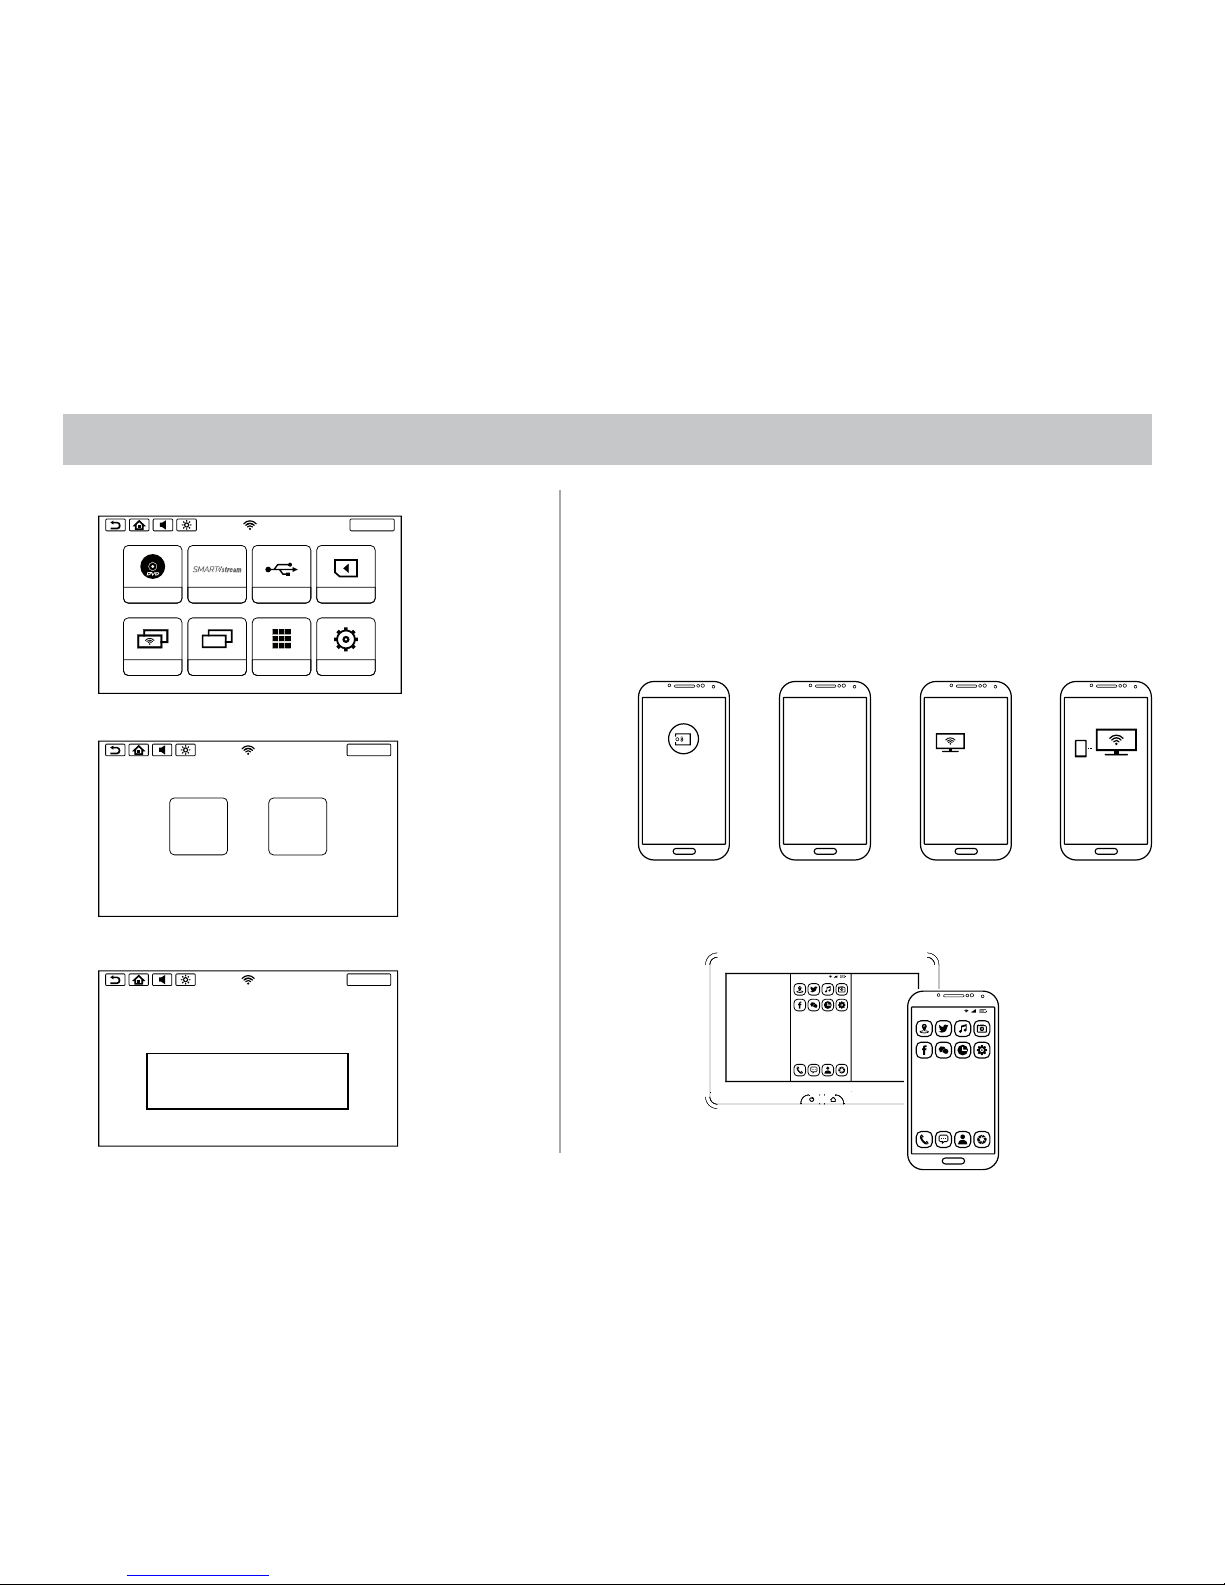
Home Main Menu ............................................................................................................................................................................................................... 8
SmartStream Android ........................................................................................................................................................................................................ 9
SmartStream iOS ............................................................................................................................................................................................................... 10
USB & SD Card Pla yback...................................................................................................................................................................................................12
WIFI Dual Screen..................................................................................................................................................................................................................13
Dual Screen............................................................................................................................................................................................................................15
WIFI Connection ..................................................................................................................................................................................................................16
VOXX LINK..............................................................................................................................................................................................................................17
WFMM .....................................................................................................................................................................................................................................19
IR TRANSMITTER ..................................................................................................................................................................................................................20
Language .............................................................................................................................................................................................................................. 21
About Device & Check for Update ............................................................................................................................................................................... 22
Reset........................................................................................................................................................................................................................................ 24
Volume & Brightness Control......................................................................................................................................................................................... 25
DVD Basics (SB10MD1)......................................................................................................................................................................................................26
General Specication.........................................................................................................................................................................................................27
Compliance Information.................................................................................................................................................................................................. 28

5
DESCRIPTION OF PARTS SB10MD1
1. DVD Disc Eject Button
This button is used for ejecting a disc from the disc compartment.
2. Power Button
This button is used for to turn the system ON/OFF.
3. Home Button
This button is used for to display the Home Menu Screen.
4. IR Transmitter
Used to broadcast the audio signal to the wireless headphone.
5. USB Port
This port support USB device up to 64GB and is used to connect a
USB device for playback of content. To view content, select USB as
the video source and insert a USB device. This port will also charge
a USB device that contain a battery.
6. Wired Headphone Jack
To produce audio signal output using Ø3.5mm plug wire
headphone.
7. Micro SD Card Slot
This input support Micro SD card up to 64GB and is used for
playback of content. To view content, select SD as the vidoe source
and insert a Micro SD card.
8. Reset
The Reset function allows user to reset all the setting options to
factory settings.
9. DVD Disc Insertion Slot
For loading and removing discs. The unit must be ON and in the
DVD source mode. Insert a disc with label side facing up.

6
DESCRIPTION OF PARTS SB10M1
1. Power Button
This button is used for to turn the system ON/OFF.
2. Home Button
This button is used for to display the Home Menu Screen.
3. IR Transmitter
Used to broadcast the audio signal to the wireless headphone.
4. Reset
The Reset function allows user to reset all the setting options to
factory settings.
5. Micro SD Card Slot
This input support Micro SD card up to 64GB and is used for
playback of content. To view content, select SD as the video source
and insert a Micro SD Card.
6. Wired Headphone Jack
To produce audio signal output using Ø3.5mm plug wire
headphone.
7. USB Port
This port support USB device up to 64GB and is used to connect a
USB device for playback of content. To view content, select USB as
the video source and insert a USB device. This port will also charge a
USB device that contain a battery.
8. HDMI Input
This port is used to connect device with HDMI output.

7
GETTING STARTED
1. To start the system, the vehicle ignition key switch must be in ACC or engine ON position.
2. The Power Button and Home Button LED backlight will ashing RED and BLUE when the system is in ignitial position. Upon ignitial completed the
Power Button and Home Button LED backlight will turn RED stay in Standby position. It will take approximately 12 seconds to 15 seconds to complete
the system ignitial.
3. To turn ON the system press the Power Button and logo image will appear on the screen. After the logo image display, Home Main Menu will appear
on the screen.
Power Button Home Button

8
HOME MAIN MENU
SB10MD1 SB10M1
SCREENOFF
DVD SmartStream USB SD
DUAL SCREENWIFI DUAL SCREEN APPS SETUP
SCREENOFF
HDMI SmartStream USB SD
DUAL SCREENWIFI DUAL SCREEN APPS SETUP

9
SMARTSTREAM ANDROID
1. Select the SmartStream icon on the Main Menu.
2. Select the Android icon on the screen.
3. Device Name: xxxxxx will appear on screen.
SCREENOFF
DVD SmartStream USB SD
DUAL SCREENWIFI DUAL SCREEN APPS SETUP
SCREENOFF
HDMI SmartStream USB SD
DUAL SCREENWIFI DUAL SCREEN APPS SETUP
SCREENOFF
ANDROID IOS
SCREENOFF
ANDROID IOS
SCREENOFF
Device Name : SB10M1_1234
Please Connect Mirroring Function From Your
Android Mobile Device
SCREENOFF
SmartStream does not support IOS devices due to Apple limitations in wireless
content transfer. Please connect your IOS device using HDMI input.
You must connect to SB10M1 monitor and select HDMI as the source to view HDMI
content on this monitor.
SCREENOFF
SmartStream does not support IOS devices due to Apple limitations in wireless
content transfer. Please connect your IOS device using HDMI input and press
the button above to select the HDMI source.
HDMI
SCREENOFF
ANDROID IOS
SCREENOFF
ANDROID IOS
SCREENOFF
Device Name : SB10M1_1234
Please Connect Mirroring Function From Your
Android Mobile Device
SCREENOFF
SmartStream does not support IOS devices due to Apple limitations in wireless
content transfer. Please connect your IOS device using HDMI input.
You must connect to SB10M1 monitor and select HDMI as the source to view HDMI
content on this monitor.
SCREENOFF
SmartStream does not support IOS devices due to Apple limitations in wireless
content transfer. Please connect your IOS device using HDMI input and press
the button above to select the HDMI source.
HDMI
4. Select Mirroring function on your Smartphone.
5. Your Smartphone will start searching for devices.
6. After searching completed device name will appear on your Smartphone
screen and then select the device to for your mirroring function.
7. After you selected the device your Smartphone will start connecting to
the device.
SB10M1
Connecting to SB10M1...
Screen
Mirroring
Searching for devices...
18:0080%
᱘᱘ ᱘
18:00 80%
8. After connected your Smartphone to the device you can start playing
content from your Smartphone to the device.

10
SMARTSTREAM IOS
1. Press the SmartStream icon on the Main Menu
2. Select the iOS icon on the screen.
SCREENOFF
DVD SmartStream USB SD
DUAL SCREENWIFI DUAL SCREEN APPS SETUP
SCREENOFF
HDMI SmartStream USB SD
DUAL SCREENWIFI DUAL SCREEN APPS SETUP
SCREENOFF
ANDROID IOS
SCREENOFF
ANDROID IOS
SCREENOFF
Device Name : SB10M1_1234
Please Connect Mirroring Function From Your
Android Mobile Device
SCREENOFF
SmartStream does not support IOS devices due to Apple limitations in wireless
content transfer. Please connect your IOS device using HDMI input.
You must connect to SB10M1 monitor and select HDMI as the source to view HDMI
content on this monitor.
SCREENOFF
SmartStream does not support IOS devices due to Apple limitations in wireless
content transfer. Please connect your IOS device using HDMI input and press
the button above to select the HDMI source.
HDMI
SCREENOFF
ANDROID IOS
SCREENOFF
ANDROID IOS
SCREENOFF
Device Name : SB10M1_1234
Please Connect Mirroring Function From Your
Android Mobile Device
SCREENOFF
SmartStream does not support IOS devices due to Apple limitations in wireless
content transfer. Please connect your IOS device using HDMI input.
You must connect to SB10M1 monitor and select HDMI as the source to view HDMI
content on this monitor.
SCREENOFF
SmartStream does not support IOS devices due to Apple limitations in wireless
content transfer. Please connect your IOS device using HDMI input and press
the button above to select the HDMI source.
HDMI
SCREENOFF
ANDROID IOS
SCREENOFF
ANDROID IOS
SCREENOFF
Device Name : SB10M1_1234
Please Connect Mirroring Function From Your
Android Mobile Device
SCREENOFF
SmartStream does not support IOS devices due to Apple limitations in wireless
content transfer. Please connect your IOS device using HDMI input.
You must connect to SB10M1 monitor and select HDMI as the source to view HDMI
content on this monitor.
SCREENOFF
SmartStream does not support IOS devices due to Apple limitations in wireless
content transfer. Please connect your IOS device using HDMI input and press
the button above to select the HDMI source.
HDMI
3. SmartStream does not support IOS devices due to Apple limitations in
wireless content transfer. Please connect your IOS device using HDMI
input. You must connect to SB10M1 monitor and select HDMI as the
source to view HDMI content on this monitor (SB10MD1).
4. SmartStream does not support IOS devices due to Apple limitations in
wireless content transfer. Please connect your IOS device using HDMI
input and press the button above to select the HDMI source (SB10M1).

11
SMARTSTREAM IOS CONTINUED
5. Please use original Apple HDMI Adaptor & HDMI Cable to connect your iOS device to SB10M1 HDMI Input and select HDMI as the video source to play
content from your iOS device
HDMI
<Apple HDMI Adapter>HDMI Cable<SB10M1<

12
USB & SD CARD PLAYBACK
USB PLAYBACK
1. Insert a USB device into monitor USB port.
SD CARD PLAYBACK
1. Insert a Micro SD Card into the monitor.
2. Select USB source in the Main Menu. 2. Select SD source in the Main Menu.
3. Select the playing mode Video, Music or Photo. 3. Select the playing mode Video, Music or Photo.
SCREENOFF
DVD SmartStream USB SD
DUAL SCREENWIFI DUAL SCREEN APPS SETUP
SCREENOFF
DVD SmartStream USB SD
DUAL SCREENWIFI DUAL SCREEN APPS SETUP
SCREENOFF
DVD SmartStream USB SD
DUAL SCREENWIFI DUAL SCREEN APPS SETUP
SCREENOFF
DVD SmartStream USB SD
DUAL SCREENWIFI DUAL SCREEN APPS SETUP
SCREENOFF
SD CARD
VIDEOMUSIC PHOTO
USB
SCREENOFF
VIDEOMUSIC PHOTO
SCREENOFF
SD CARD
VIDEOMUSIC PHOTO
USB
SCREENOFF
VIDEOMUSIC PHOTO

13
WIFI DUAL SCREEN
1. Transmitting monitor select WIFI Dual Screen in the main menu. Receiving monitor select WIFI Dual Screen in the main menu.
2. Transmitting monitor select TRANSMITTING MONITOR on the screen. Receiving monitor select RECEIVING MONITOR on the screen.
3. Transmitting monitor turn ON the WIFI Dual Screen. Receiving monitor Device Name: will appear on the screen.
SCREENOFF
DVD SmartStream USB SD
DUAL SCREENWIFI DUAL SCREEN APPS SETUP
SCREENOFF
HDMI SmartStream USB SD
DUAL SCREENWIFI DUAL SCREEN APPS SETUP
SCREENOFF
DVD SmartStream USB SD
DUAL SCREENWIFI DUAL SCREEN APPS SETUP
SCREENOFF
HDMI SmartStream USB SD
DUAL SCREENWIFI DUAL SCREEN APPS SETUP
SCREENOFF
TRANSMITTING
MONITOR
RECEIVING
MONITOR
SCREENOFF
TRANSMITTING
MONITOR
RECEIVING
MONITOR
SCREENOFF
ON
Available Device
SCREENOFF
Available Device
SB10M1_83f5
Wireless display
SCREENOFF
Device Name : SB10M1_83f5
Please Connect Mirroring Function From Your
Android Mobile Device
ON
SCREENOFF
Available Device
SB10M1_83f5
Connecting
ON
SCREENOFF
YouTube
Home Trending Subscriptions Shared Library
9:28
9:28
SCREENOFF
YouTube
Home Trending Subscriptions Shared Library
9:28
9:28
SCREENOFF
TRANSMITTING
MONITOR
RECEIVING
MONITOR
SCREENOFF
TRANSMITTING
MONITOR
RECEIVING
MONITOR
SCREENOFF
ON
Available Device
SCREENOFF
Available Device
SB10M1_83f5
Wireless display
SCREENOFF
Device Name : SB10M1_83f5
Please Connect Mirroring Function From Your
Android Mobile Device
ON
SCREENOFF
Available Device
SB10M1_83f5
Connecting
ON
SCREENOFF
YouTube
Home Trending Subscriptions Shared Library
9:28
9:28
SCREENOFF
YouTube
Home Trending Subscriptions Shared Library
9:28
9:28

14
WIFI DUAL SCREENCONTINUED
4. Transmitting monitor will search and display the receiving monitor Device Name: on screen. Select the receiving monitor device name on the screen
and transmittimg monitor will start connecting with the receving monitor.
SCREENOFF
TRANSMITTING
MONITOR
RECEIVING
MONITOR
SCREENOFF
TRANSMITTING
MONITOR
RECEIVING
MONITOR
SCREENOFF
ON
Available Device
SCREENOFF
Available Device
SB10M1_83f5
Wireless display
SCREENOFF
Device Name : SB10M1_83f5
Please Connect Mirroring Function From Your
Android Mobile Device
ON
SCREENOFF
Available Device
SB10M1_83f5
Connecting
ON
SCREENOFF
YouTube
Home Trending Subscriptions Shared Library
9:28
9:28
SCREENOFF
YouTube
Home Trending Subscriptions Shared Library
9:28
9:28
SCREENOFF
TRANSMITTING
MONITOR
RECEIVING
MONITOR
SCREENOFF
TRANSMITTING
MONITOR
RECEIVING
MONITOR
SCREENOFF
ON
Available Device
SCREENOFF
Available Device
SB10M1_83f5
Wireless display
SCREENOFF
Device Name : SB10M1_83f5
Please Connect Mirroring Function From Your
Android Mobile Device
ON
SCREENOFF
Available Device
SB10M1_83f5
Connecting
ON
SCREENOFF
YouTube
Home Trending Subscriptions Shared Library
9:28
9:28
SCREENOFF
YouTube
Home Trending Subscriptions Shared Library
9:28
9:28
5. After connected to the receiving monitor the transmitting monitor will start playing the same content to the receiving monitor in high resolution
video quality.

15
DUAL SCREEN
1. Select Dual Screen source in the Main Menu to watch the same content playing on the other monitor in CVBS video quality.
SCREENOFF
DVD SmartStream USB SD
DUAL SCREENWIFI DUAL SCREEN APPS SETUP
SCREENOFF
HDMI SmartStream USB SD
DUAL SCREENWIFI DUAL SCREEN APPS SETUP

16
WIFI CONNECTION
1. Select SETUP in the Main Menu.
SCREENOFF
DVD SmartStream USB SD
DUAL SCREENWIFI DUAL SCREEN APPS SETUP
SCREENOFF
HDMI SmartStream USB SD
DUAL SCREENWIFI DUAL SCREEN APPS SETUP
2. Select WIFI and turn ON the WLAN and then touch the WLAN Bar.
SCREENOFF
WIFI
VOXX LINK
WFMM
IR TRANSMITTER
LANGUAGE
ABOUT DEVICE
RESET
ONWLAN
SCREENOFF
Wi-Fi
On
AURICSON_MASTER
iptk1555
WKAN_DONG
CMCC-yaKK
HUWER-Roy
᱘

17
VOXX LINK
1. Download and install VOXX LINK APP from Play Store or App Store into your Android or iOS Smartphone.hone.
2. Select SETUP in the MainMenu.
3. Select VOXX LINK.
18:0080%
VOXX
LINK
Google Play
VOXX LINK
Kevin_Android_R&D
Tools
INSTALL
18:0080%
Personal Hotspot
18:0080%
VOXX
LINK
VOXX
REAR SEAT INFOTAINMENT
AVAILABLE NETWORK
SB10MD1_1a144
SCREENOFF
DVD SmartStream USB SD
DUAL SCREENWIFI DUAL SCREEN
APPS
SETUP
SCREENOFF
HDMI SmartStream USB SD
DUAL SCREENWIFI DUAL SCREEN APPS SETUP
᱘᱘
᱘
᱘᱘
᱘
᱘
SCREENOFF
WIFI
VOXX LINK
WFMM
IR TRANSMITTER
LANGUAGE
ABOUT DEVICE
RESET
SCREENOFF
Scan Searching...
TP-LINK_72DA
Secured with WPA/WPA2
TP-LINK_363C
Secured with WPA/WPA2
Thomas_S9
Secured with WPA/WPA2
TP-LINK_565A
Secured with WPA/WPA2
You must connect to WiFi first
SCREENOFF
ScanThomas_S9 Connected
TP-LINK_72DA
Secured with WPA/WPA2
TP-LINK_363C
Secured with WPA/WPA2
Thomas_59
Secured with WPA/WPA2
TP-LINK_565A
Secured with WPA/WPA2
Device Name: SB10MD1_1a44
SCREENOFF
DVD SmartStream USB SD
DUAL SCREENWIFI DUAL SCREEN
APPS
SETUP
18:0080%
VOXX
LINK
Google Play
VOXX LINK
Kevin_Android_R&D
Tools
INSTALL
18:0080%
Personal Hotspot
18:0080%
VOXX
LINK
VOXX
REAR SEAT INFOTAINMENT
AVAILABLE NETWORK
SB10MD1_1a144
SCREENOFF
DVD SmartStream USB SD
DUAL SCREENWIFI DUAL SCREEN
APPS
SETUP
SCREENOFF
HDMI SmartStream USB SD
DUAL SCREENWIFI DUAL SCREEN APPS SETUP
᱘᱘
᱘
᱘᱘
᱘
᱘
SCREENOFF
WIFI
VOXX LINK
WFMM
IR TRANSMITTER
LANGUAGE
ABOUT DEVICE
RESET
SCREENOFF
Scan Searching...
TP-LINK_72DA
Secured with WPA/WPA2
TP-LINK_363C
Secured with WPA/WPA2
Thomas_S9
Secured with WPA/WPA2
TP-LINK_565A
Secured with WPA/WPA2
You must connect to WiFi first
SCREENOFF
ScanThomas_S9 Connected
TP-LINK_72DA
Secured with WPA/WPA2
TP-LINK_363C
Secured with WPA/WPA2
Thomas_59
Secured with WPA/WPA2
TP-LINK_565A
Secured with WPA/WPA2
Device Name: SB10MD1_1a44
SCREENOFF
DVD SmartStream USB SD
DUAL SCREENWIFI DUAL SCREEN
APPS
SETUP
4. Turn ON your Smartphone Hotspot.
5. Connect the monitor to your Smartphone hotspot.
6. After connected to the Smartphone on the monitor will show the connected phone name and on the bottom will show the monitor device name.

18
VOXX LINK CONTINUED
18:0080%
VOXX
LINK
Google Play
VOXX LINK
Kevin_Android_R&D
Tools
INSTALL
18:0080%
Personal Hotspot
18:0080%
VOXX
LINK
VOXX
REAR SEAT INFOTAINMENT
AVAILABLE NETWORK
SB10MD1_1a144
SCREENOFF
DVD SmartStream USB SD
DUAL SCREENWIFI DUAL SCREEN
APPS
SETUP
SCREENOFF
HDMI SmartStream USB SD
DUAL SCREENWIFI DUAL SCREEN APPS SETUP
᱘᱘
᱘
᱘᱘
᱘
᱘
SCREENOFF
WIFI
VOXX LINK
WFMM
IR TRANSMITTER
LANGUAGE
ABOUT DEVICE
RESET
SCREENOFF
Scan Searching...
TP-LINK_72DA
Secured with WPA/WPA2
TP-LINK_363C
Secured with WPA/WPA2
Thomas_S9
Secured with WPA/WPA2
TP-LINK_565A
Secured with WPA/WPA2
You must connect to WiFi first
SCREENOFF
ScanThomas_S9 Connected
TP-LINK_72DA
Secured with WPA/WPA2
TP-LINK_363C
Secured with WPA/WPA2
Thomas_59
Secured with WPA/WPA2
TP-LINK_565A
Secured with WPA/WPA2
Device Name: SB10MD1_1a44
SCREENOFF
DVD SmartStream USB SD
DUAL SCREENWIFI DUAL SCREEN
APPS
SETUP
7. Open VOXX LINK app.
8. Logo image will display on the Smartphone screen.
9. After the logo image display, available device page will appear on the Samrtphone screen. And connected available device name will appear on the
Smartphone screen.Touch on the device name to connect the VOXX LINK to the avalable device and start the App control.
10. After connected the VOXX LINK to the monitor the Smartphone will mirror what is play on the monitor and this will allow you to full control.

19
WFMM
1. Select SETUP in the Main Menu.
2. Select WFMM inside the SETUP screen.
3. Touch the ON button to turn ON the WFMM, Touch the OFF
button to turn OFF the WFMM.
4. Touch the frequency button to select your prefer frequency and set you
radio FM to the same frequency to start listen to the audio from the
monitor through your radio speaker out.
5. Touch the button to go to previuos freqeuncy screen.
Touch the button to go to next frequency screen.
Remark: In total it will 100 dierent frequency for selection with 20
dierent frequency is each frequency screen.
SCREENOFF
HDMI SmartStream USB SD
DUAL SCREENWIFI DUAL SCREEN APPS SETUP
SCREENOFF
WIFI
VOXX LINK
WFMM
IR TRANSMITTER
LANGUAGE
ABOUT DEVICE
RESET
ON OFF
SCREENOFF
WIFI
VOXX LINK
WFMM
IR TRANSMITTER
LANGUAGE
ABOUT DEVICE
RESET
ON OFF
88.1MHz89.1MHz 90.1MHz 91.1MHz
88.3MHz 89.3MHz 90.3MHz 91.3MHz
88.5MHz 89.5MHz 90.5MHz 91.5MHz
88.7MHz 89.7MHz 90.7MHz 91.7MHz
88.9MHz 89.9MHz 90.9MHz 91.9MHz
FREQUENCY
SCREENOFF
WIFI
VOXX LINK
WFMM
IR TRANSMITTER
LANGUAGE
ABOUT DEVICE
RESET
ON OFF
92.1MHz93.1MHz 94.1MHz 95.1MHz
92.3MHz 93.3MHz 94.3MHz 95.3MHz
92.5MHz 93.5MHz 94.5MHz 95.5MHz
92.7MHz 93.7MHz 94.7MHz 95.7MHz
92.9MHz 93.9MHz 94.9MHz 95.9MHz
FREQUENCY
SCREENOFF
HDMI SmartStream USB SD
DUAL SCREENWIFI DUAL SCREEN APPS SETUP
SCREENOFF
WIFI
VOXX LINK
WFMM
IR TRANSMITTER
LANGUAGE
ABOUT DEVICE
RESET
ON OFF
SCREENOFF
WIFI
VOXX LINK
WFMM
IR TRANSMITTER
LANGUAGE
ABOUT DEVICE
RESET
ON OFF
88.1MHz89.1MHz 90.1MHz 91.1MHz
88.3MHz 89.3MHz 90.3MHz 91.3MHz
88.5MHz 89.5MHz 90.5MHz 91.5MHz
88.7MHz 89.7MHz 90.7MHz 91.7MHz
88.9MHz 89.9MHz 90.9MHz 91.9MHz
FREQUENCY
SCREENOFF
WIFI
VOXX LINK
WFMM
IR TRANSMITTER
LANGUAGE
ABOUT DEVICE
RESET
ON OFF
92.1MHz93.1MHz 94.1MHz 95.1MHz
92.3MHz 93.3MHz 94.3MHz 95.3MHz
92.5MHz 93.5MHz 94.5MHz 95.5MHz
92.7MHz 93.7MHz 94.7MHz 95.7MHz
92.9MHz 93.9MHz 94.9MHz 95.9MHz
FREQUENCY

20
IR TRANSMITTER
1. Select SETUP in the Main Menu.
2. Select IR Transmitter inside the SETUP screen.
3. Touch the ON or OFF button to turn ON or OFF the IR Transmitter.
4. Touch this button to select the Channel for the IR Transmitter.
It is recommended to select Channel A for SB10MD1 and Channel B for
SB10M1.
Select the same channel in your IR Headphone to listen to the audio
from the monitor you prefer.
SCREENOFF
WIFI
VOXX LINK
WFMM
IR TRANSMITTER
LANGUAGE
ABOUT DEVICE
RESET
ON
CHANNEL A
CHANNEL B
OFF
SCREENOFF
HDMI SmartStream USB SD
DUAL SCREENWIFI DUAL SCREEN APPS SETUP
SCREENOFF
WIFI
VOXX LINK
WFMM
IR TRANSMITTER
LANGUAGE
ABOUT DEVICE
RESET
ON OFF
SCREENOFF
WIFI
VOXX LINK
WFMM
IR TRANSMITTER
LANGUAGE
ABOUT DEVICE
RESET
ON OFF
88.1MHz89.1MHz 90.1MHz 91.1MHz
88.3MHz 89.3MHz 90.3MHz 91.3MHz
88.5MHz 89.5MHz 90.5MHz 91.5MHz
88.7MHz 89.7MHz 90.7MHz 91.7MHz
88.9MHz 89.9MHz 90.9MHz 91.9MHz
FREQUENCY
SCREENOFF
WIFI
VOXX LINK
WFMM
IR TRANSMITTER
LANGUAGE
ABOUT DEVICE
RESET
ON OFF
92.1MHz93.1MHz 94.1MHz 95.1MHz
92.3MHz 93.3MHz 94.3MHz 95.3MHz
92.5MHz 93.5MHz 94.5MHz 95.5MHz
92.7MHz 93.7MHz 94.7MHz 95.7MHz
92.9MHz 93.9MHz 94.9MHz 95.9MHz
FREQUENCY
SCREENOFF
WIFI
VOXX LINK
WFMM
IR TRANSMITTER
LANGUAGE
ABOUT DEVICE
RESET
ON
CHANNEL A
CHANNEL B
OFF
SCREENOFF
WIFI
VOXX LINK
WFMM
IR TRANSMITTER
LANGUAGE
ABOUT DEVICE
RESET
ON
CHANNEL A
CHANNEL B
OFF
This manual suits for next models
1
Table of contents
Other Voxx Automobile Accessories manuals
Popular Automobile Accessories manuals by other brands

Dynojet
Dynojet Power commander V installation instructions

Wallbox
Wallbox PULSAR installation guide

PUTCO
PUTCO Molle Panels Instruction guide

Safe Fleet
Safe Fleet PRIME DESIGN AAL-8012-BLK manual

Discount Car Stereo
Discount Car Stereo C5CD-HF Quick start installation guide

Car-Interface
Car-Interface TV-Free CI-TF-UCON22 manual

Xpresskit
Xpresskit Canmax Series manual

Lund Industries
Lund Industries PPJ-HDARM installation instructions

MSA
MSA Roof Top Bag QUICK-FIT INSTALLATION GUIDE

Torklift
Torklift C2205 Important owner-operator installation instructions

Thule
Thule Helium Aero quick start guide

Roadmaster
Roadmaster Sterling All Terrain owner's manual