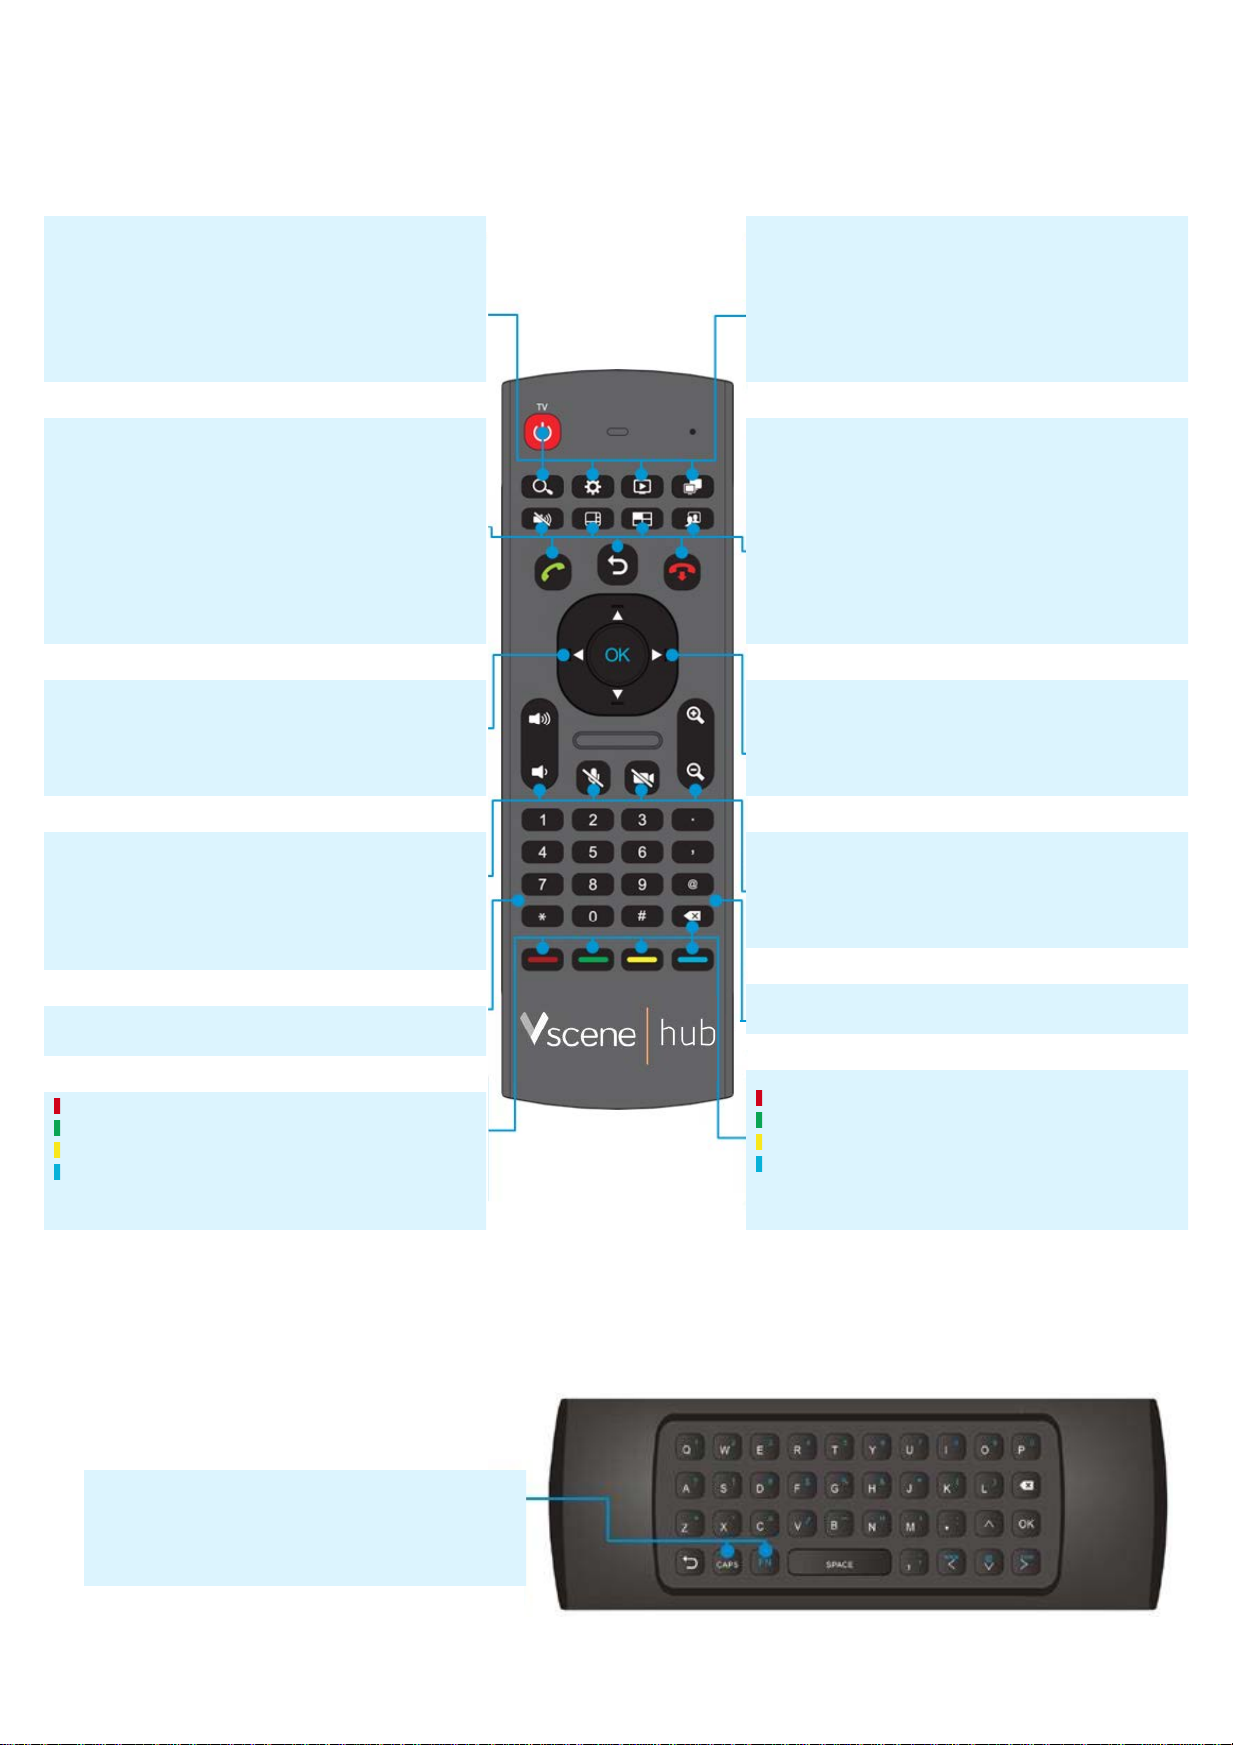
CAPS: Turns Caps Lock on and off.
FN: Turns the Function Keys on and off.
NOTE: Press the CAPS or FN button once to enable the desired mode.
Press the same button again to disable the mode.
TV: Turns supported televisions on and off.
SEARCH: Puts the cursor in the Search field on the Pre-Call menu.
SETTINGS: Turns the Settings menu on. Press Back to return to the Pre-
Call menu.
SHARE: Not applicable.
TOGGLE: Not applicable.
MUTE: Mutes the sound level when showing a video using Projection mode.
LAYOUT: Not applicable.
PRE-CALL MENU: Turns the Pre-Call menu off and on. Displays connected
content Shares in Projection Mode.
SELF-VIEW: Turns your own video on and off. When on, allows you to
control supported cameras using the Zoom and Arrow keys.
CONNECT: Not applicable.
BACK: Takes you to the previous field or menu.
DISCONNECT: Not applicable.
ARROWS: Use the arrow keys to navigate and highlight options for
selection. After hiding the Pre-Call menu, supported cameras may be
controlled as follows: left and right buttons pan; up and down buttons tilt.
OK: Press to select a highlighted option.
VOLUME: Adjusts the sound level.
MUTE MICROPHONE: Not applicable.
PRIVACY: Not applicable.
ZOOM: Zooms in and out for supported cameras after hiding menus or
when using self-view.
ALPHANUMERIC KEYPAD: Use the keys to enter field values on menus.
A: Swaps your displays when running dual screens.
B: Not applicable.
C: Turns Caps Lock on and off.
D: Not applicable.
DELETE: Acts as a backspace when typing in a field.
TV: Turns supported televisions on and off.
SEARCH: Not applicable.
SETTINGS: Press once to show the In-Call menu. Press twice to shown the
Pre-Call Settings menu.
SHARE: Turns connected Share sources on and off.
TOGGLE: Cycles through your shared sources, including none.
MUTE: Mutes the audio source.
LAYOUT: Turns Preferred mode (showing the speaker in the main tile) on
and off (known as Non-Preferred mode).
IN-CALL MENU: Turns the In-Call menu on and off.
SELF-VIEW: Turns your own video on and off. When on, enables you to
control supported cameras using the Zoom and Arrow keys.
CONNECT: Not applicable.
BACK: Takes you to the previous field or menu.
DISCONNECT: Ends the meeting.
ARROWS: Use the arrow keys to navigate and highlight options for
selection. Supported cameras may be controlled after using the Self-View
button as follows: left and right buttons pan; up and down buttons tilt.
OK: Press to select a highlighted option.
VOLUME: Adjusts the sound level.
MUTE MICROPHONE: Turns your microphone on and off.
PRIVACY: Turns your video feed off and on.
ZOOM: Zooms in and out for supported cameras.
ALPHANUMERIC KEYPAD: Use the keys to enter field values on menus.
A: Swaps your displays when running dual screens.
B: Enables DTMF dialing.
C: Turns Caps Lock on and off.
D: Depending on your display size, turns the remote participant layout from
stretch to letterbox.
DELETE: Acts as a backspace when typing in a field.
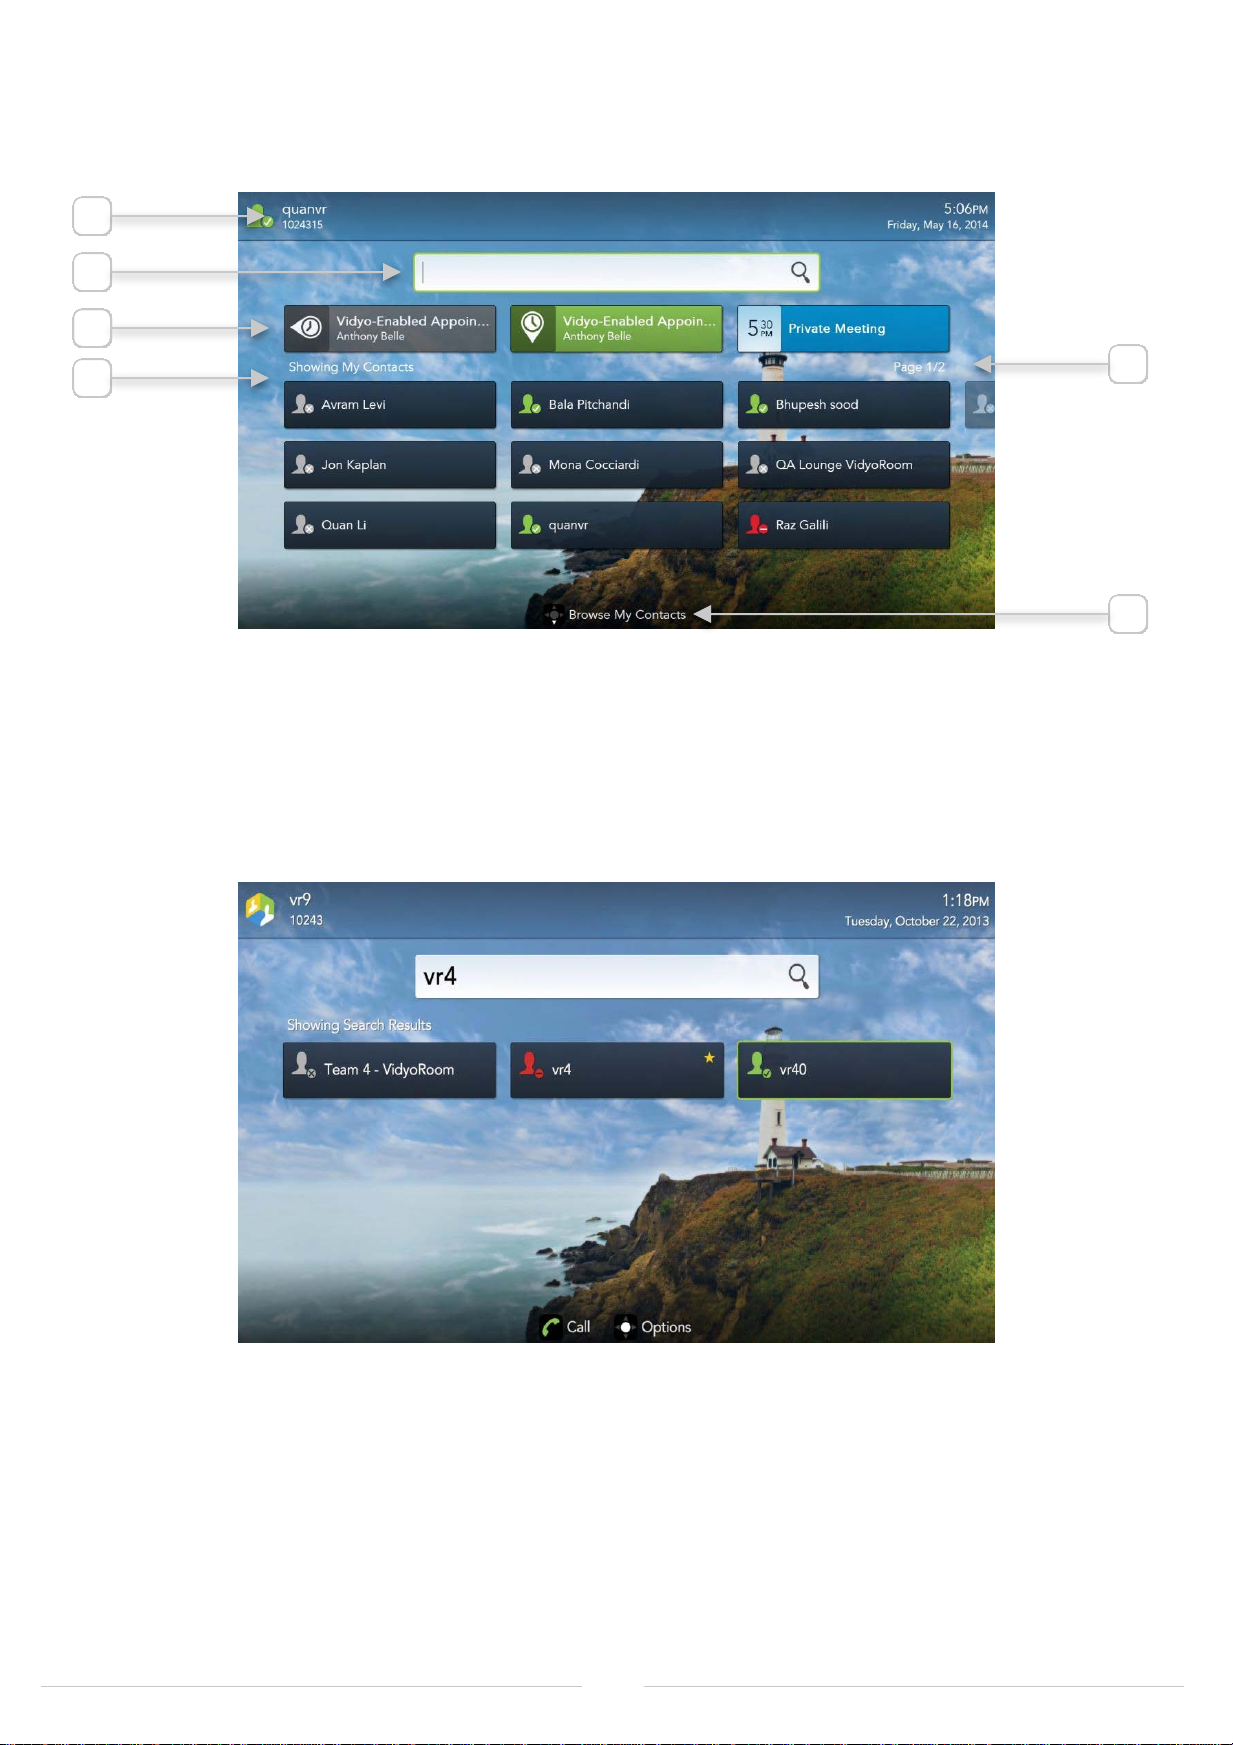
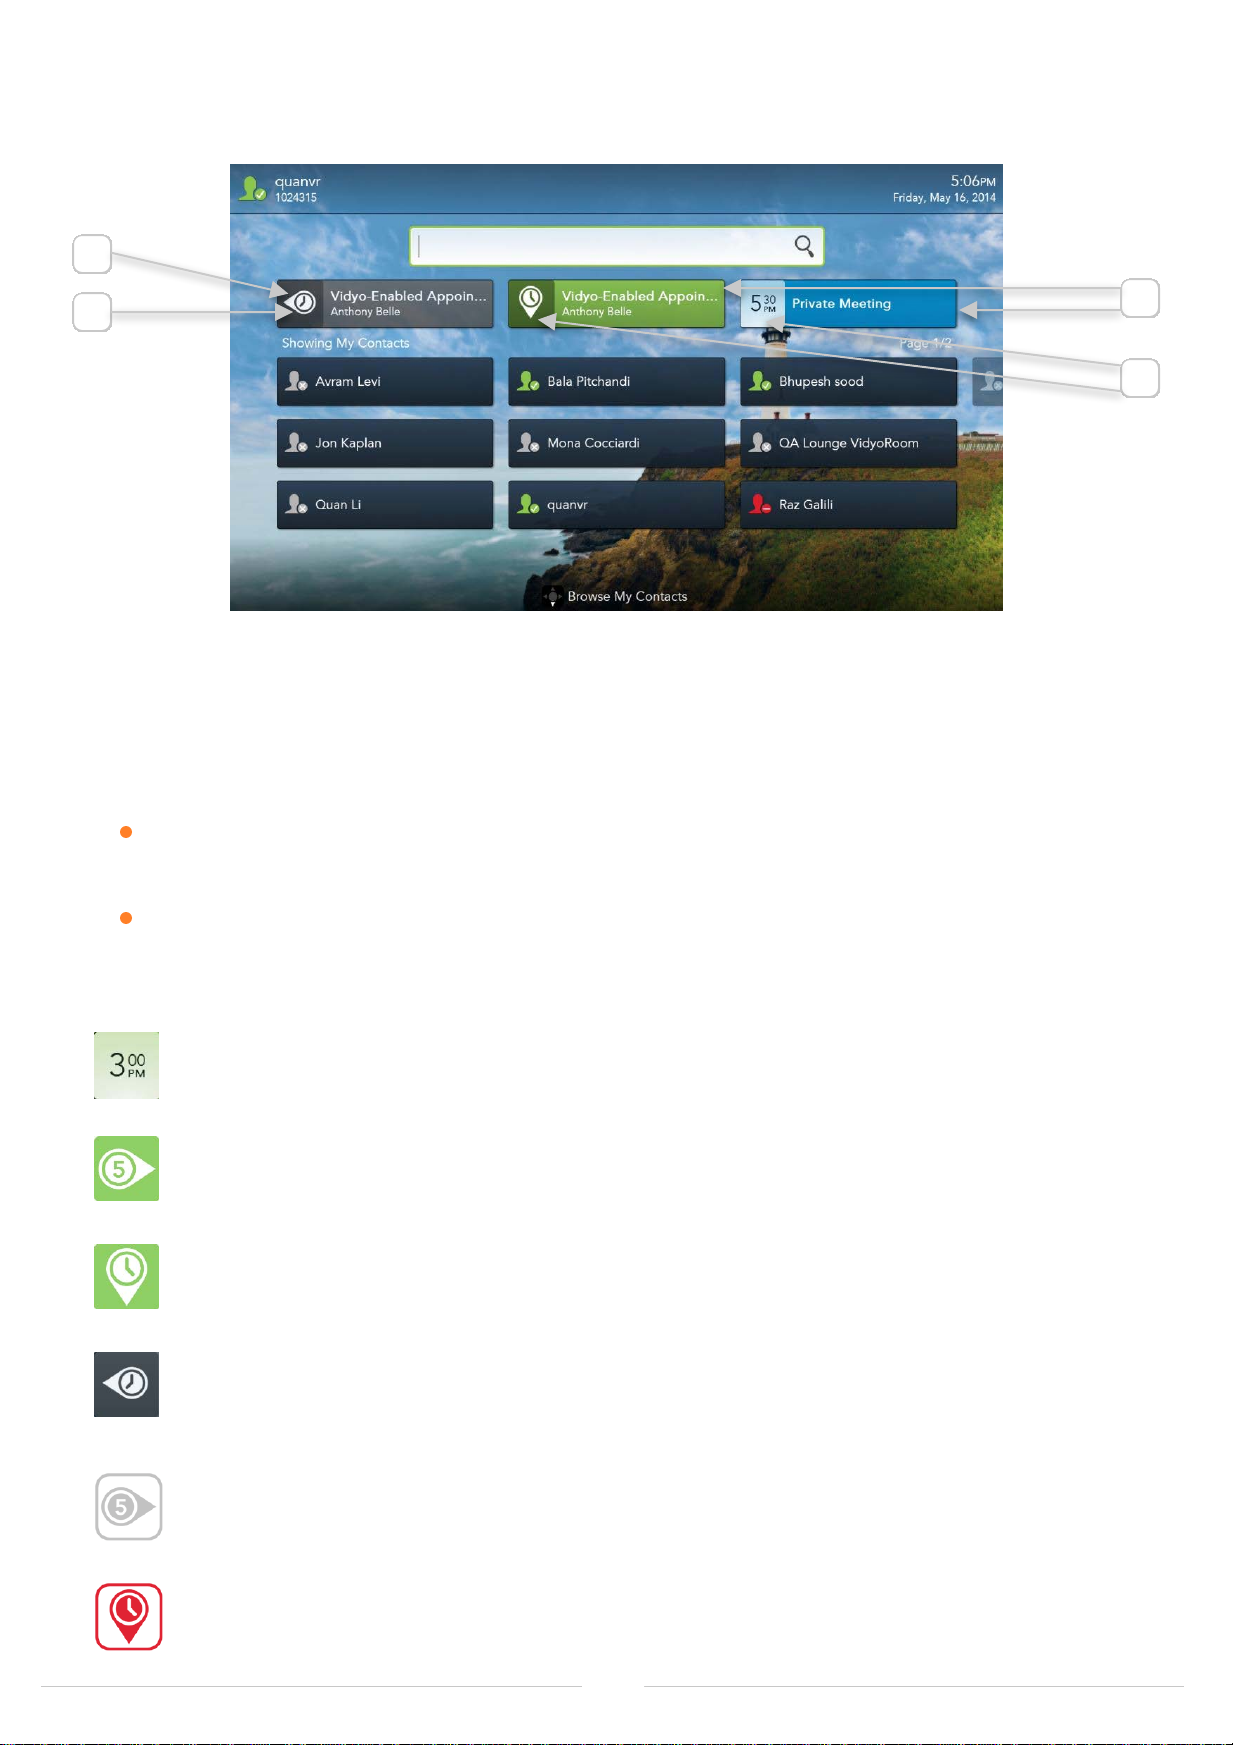
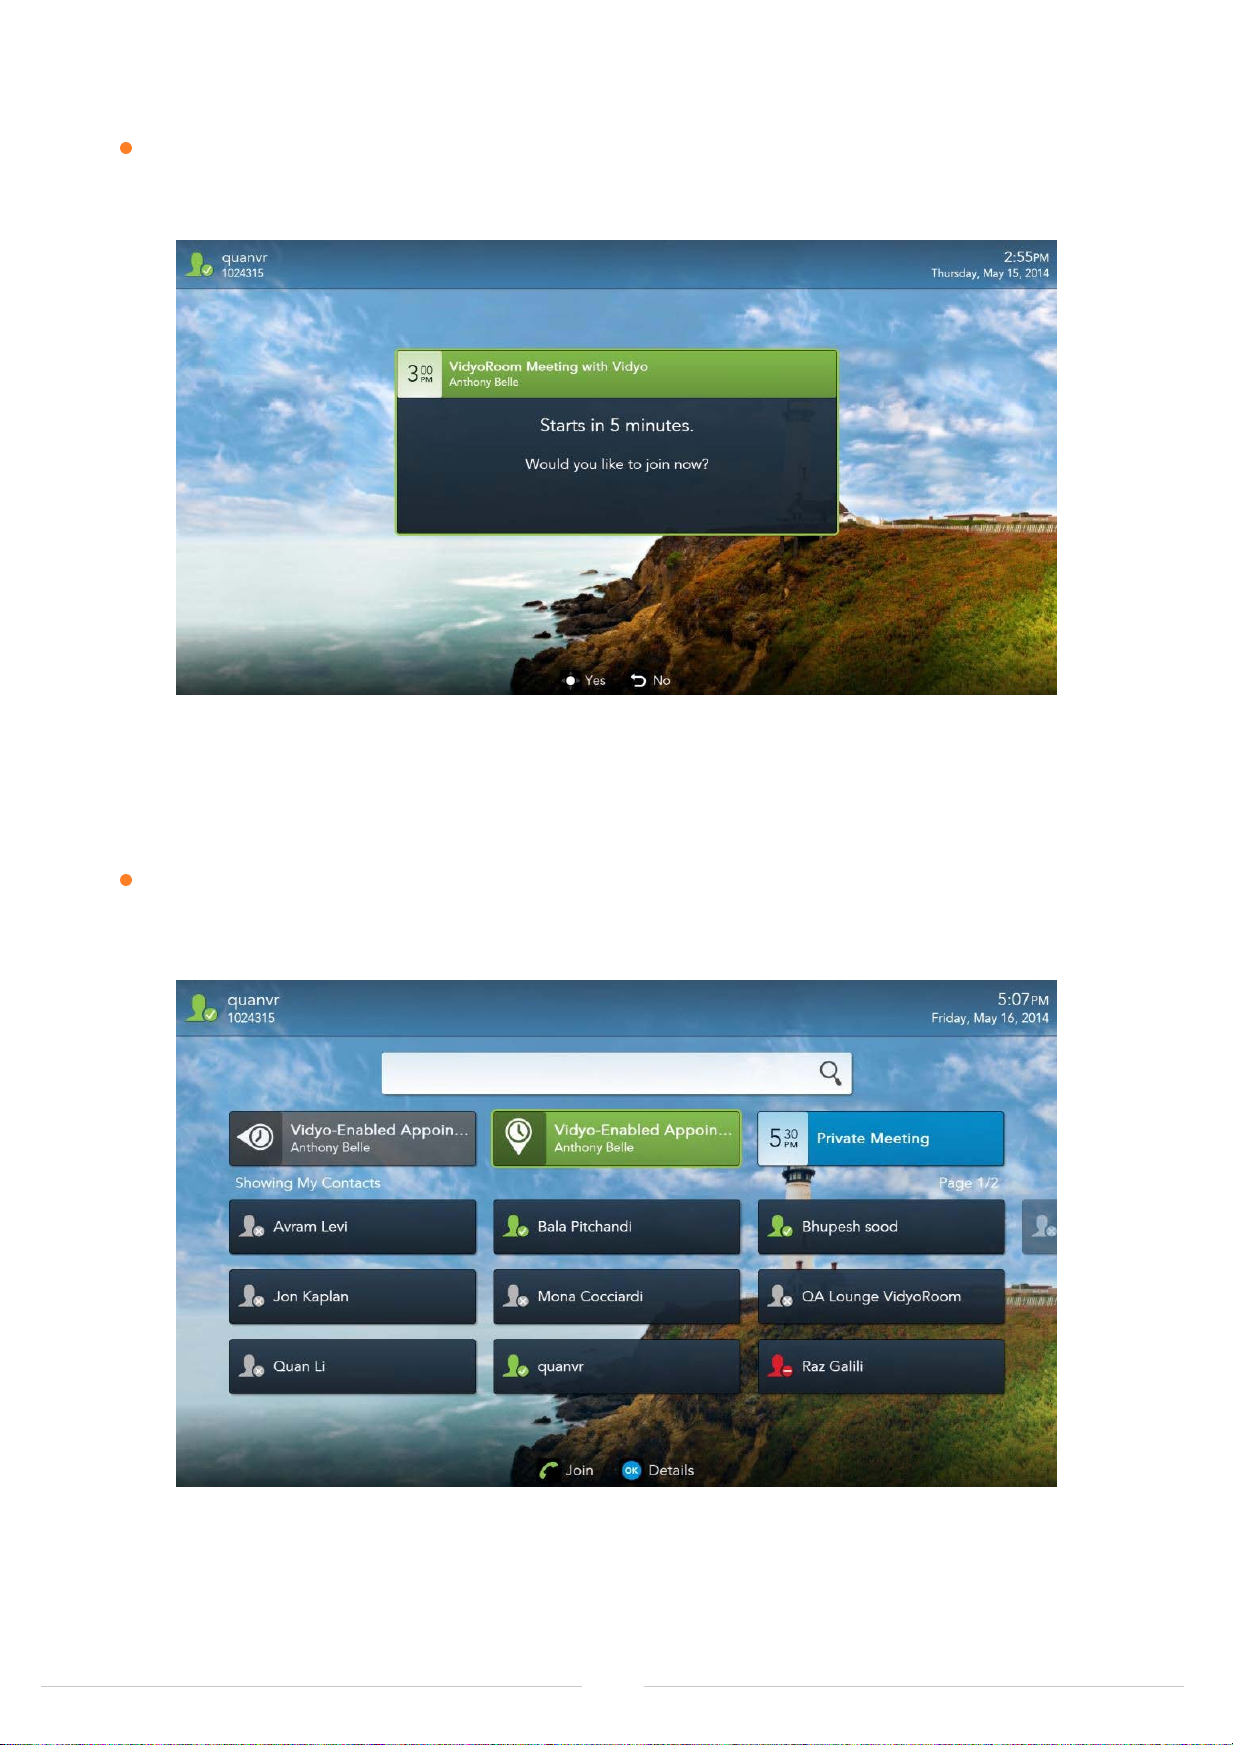
Pre-Call Functions
QWERTY Keyboard CAPS and Function Keys
In-Call Functions
The V-Room Remote Control