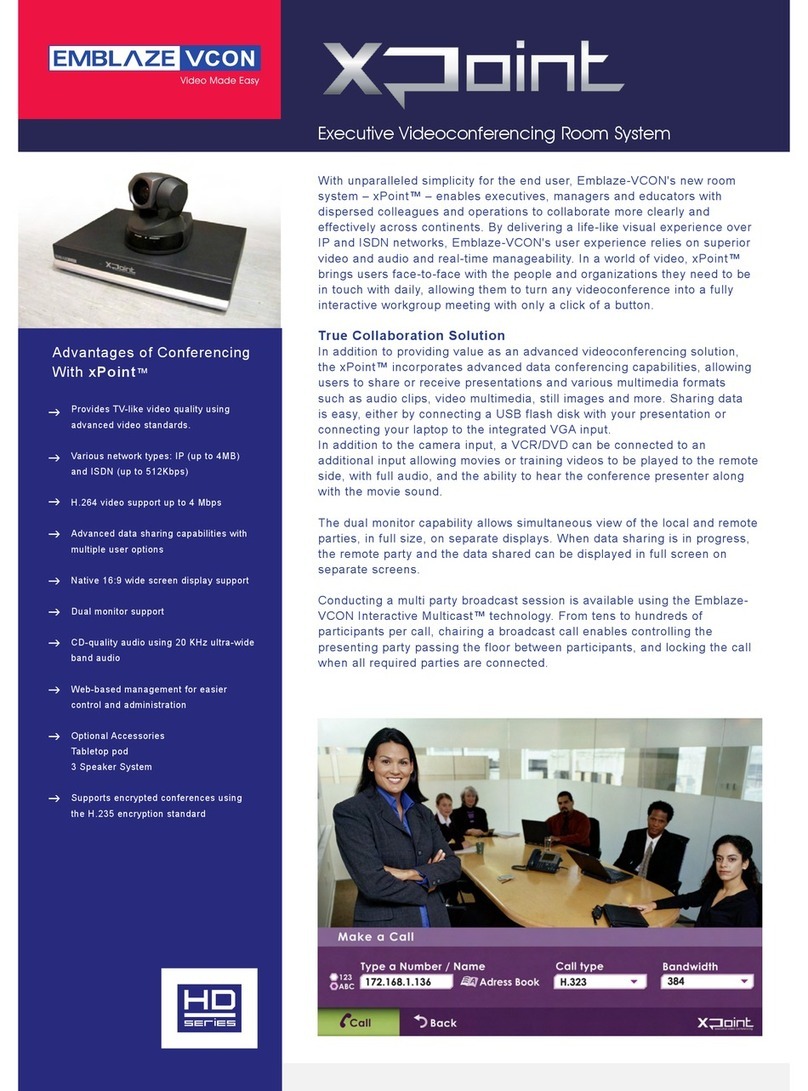
Emblaze-VCON xPointS User manual

xPointS
User Guide
Document Part No. DOC-02-003-09-10
Executive Videoconferencing System
Version 1.5

Disclaimer
The information contained in this document has been carefully examined and is
believed to be entirely accurate. However, Emblaze-VCON Ltd. assumes no
responsibility for errors or omissions. Emblaze-VCON Ltd. reserves the right to
make changes to this document without prior notification, in accordance with the
purpose of product support or improvement.
Emblaze-VCON Ltd. provides this publication “as is” without warranty of any
kind, either express or implied, including, but not limited to, the implied
warranties of merchantability or fitness for a particular purpose.
Copyright
© 2010 Emblaze-VCON Ltd. All Rights Reserved.
The contents of this document is the intellectual property of Emblaze-VCON Ltd.
and is protected under international copyright laws and treaties. Reproduction,
redistribution, translation, disassembling, or any editing of this document is
strictly prohibited without the written and explicit consent of Emblaze-VCON
Ltd.
VCON and Media Xchange Manager® (MXM) are registered trademarks of
Emblaze-VCON Ltd. xPoint, xPointS, xPointS, and xPointHD are trademarks of
Emblaze-VCON Ltd.
Microsoft Windows is a registered trademarks or trademarks of Microsoft
Corporation in the United States and other countries. All other trademarks are
the property of their respective holders.
Contact Us
For further information about this product or for technical support, use the
following methods to contact us:
Website: www.emblaze-vcon.com/contact
E-mail: [email protected]

xPoint Standard (S) Ver. 1.5 User Guide •2
Contents
Chapter 1. Introduction 5
xPointSOverview................................................................................................. 5
Main Features ..................................................................................................... 6
Comparison Table ............................................................................................... 6
Feature Highlights .............................................................................................. 7
Chapter 2. Getting Started 10
Using the Remote Control ................................................................................ 10
Alphanumeric Keypad ........................................................................... 11
Command Buttons.................................................................................12
Navigation Joystick and Additional Buttons ........................................13
Using the On-Screen Menu ...............................................................................13
Displaying System Information.........................................................................16
Chapter 3. Configuration Basics 19
Entering Your User Details................................................................................19
Configuring the Camera.....................................................................................19
Configuring the Audio........................................................................................21
Configuring the Display .................................................................................... 23
Chapter 4. Videoconferencing 25
Starting Calls ..................................................................................................... 25
Auto-Answering Calls ....................................................................................... 27
Ending Calls ...................................................................................................... 27
Muting the Video............................................................................................... 28
Switching Image Modes.................................................................................... 28
Display Mode ........................................................................................ 28
Far End Mode ....................................................................................... 28
Switching Call View Modes............................................................................... 28
Single Mode........................................................................................... 28
Dual Mode............................................................................................. 28
Presentation Mode................................................................................ 28
Using Picture-In-Picture (PIP) Modes............................................................. 29
Call State Indications ........................................................................................ 30
Using Call Tones ................................................................................................31
Operator Request for Password ............................................................31
Operator Request for Telephone Tone................................................. 32
Recording and Streaming ................................................................................. 32
Start Recording ..................................................................................... 32
Stop Recording...................................................................................... 32
View Recording..................................................................................... 33
Start Streaming ..................................................................................... 33
Stop Streaming ..................................................................................... 33

Contents
xPoint Standard (S) Ver. 1.5 User Guide •3
View Streaming..................................................................................... 34
Data Sharing...................................................................................................... 34
Choosing the Data Source .................................................................... 34
Connecting to a Laptop......................................................................... 34
Connecting a USB flash drive............................................................... 34
Viewing Recordings .............................................................................. 35
Chapter 5. Quick Dialing Methods 36
Using the Address Book.................................................................................... 36
Using the Address Book via the Remote Control ................................ 36
Using Address Book via the xPointS GUI ............................................. 37
Using the Address Book via the New Call Bar ..................................... 37
Adding Entries to the Address Book .................................................... 37
Editing Entries in the Address Book.................................................... 38
Deleting Entries from the Address Book .............................................38
Using the Call Log ............................................................................................. 38
Using the Call Log via the Remote Control.......................................... 38
Displaying the Call Log from the Address Book .................................. 39
Adding a Call Log Entry to the Address book...................................... 39
Clearing the Call Log............................................................................. 39
Using Speed Dial ............................................................................................... 39
Using Speed Dial via the Remote Control...........................................40
Using Speed Dial via the Address Book ...............................................40
Adding numbers to the Speed Dial ......................................................40
Editing Speed Dial Numbers ................................................................40
Deleting Speed Dial entries ...................................................................41
Using Online Directories ...................................................................................41
Accessing an Online Directory via the Remote Control .......................41
Accessing the Online Directory via the Address Book .........................41
Chapter 6. Interactive Multicast Videoconferencing 43
Interactive Multicast Overview ........................................................................ 43
Setting up Interactive Multicast Calls .............................................................. 44
Starting an Interactive Multicast...................................................................... 44
Adding Participants to the Interactive Multicast............................................. 45
Additional Interactive Multicast Options ........................................................ 46
On the Chair Side.................................................................................. 46
On the Remote Participant Side...........................................................48
Chapter 7. Advanced Settings 49
Display Adapter Settings .................................................................................. 49
Administration Settings.....................................................................................51
Call Settings....................................................................................................... 53
Call Security ...................................................................................................... 54
Online Directory Properties.............................................................................. 54
H.323 Protocol Settings .................................................................................... 56
Working in MXM Mode........................................................................ 58
Quality of Service (QoS) Settings ..................................................................... 59
License Settings.................................................................................................60
ISDN Settings....................................................................................................60

Contents
xPoint Standard (S) Ver. 1.5 User Guide •4
ISDN Lines Configuration .................................................................... 62
System Settings ................................................................................................. 63
Multicast Settings ............................................................................................. 65
Recording and Streaming Settings................................................................... 66
MCU Settings .................................................................................................... 67
Secure Connect Settings ................................................................................... 69
Chapter 8. Web Access and Management 70
Accessing the xPointSUnit via a Browser ........................................................ 70
Viewing a Stream Session..................................................................................71
Viewing a Multicast Videoconference .............................................................. 72
Importing/Exporting the xPointSLicense ....................................................... 72
Viewing the Recording Archive ........................................................................ 73
Sending Running Text in a Call ........................................................................ 75
Viewing Call Status ........................................................................................... 76
Performing System Upgrade .............................................................................77
Performing System Restore.............................................................................. 78

xPoint Standard (S) Ver. 1.5 User Guide •5
Chapter 1. Introduction
In this Chapter
This chapter introduces the xPointSvideoconferencing system and includes the
following sections:
xPointS Overview
Main Features
Feature Highlights.
xPointSOverview
The xPointS(xPoint Standard) is an all-in-one executive videoconferencing
system, featuring an embedded MCU, built-in recording capability, streaming of
live and recorded sessions, data sharing, interactive multicast, and more.
xPointSprovides an interface to videoconferencing via its plug-and-play
application-in-a-box, providing on-screen operation controls and advanced call
control options during conferencing. Utilizing the newest H.264 video standard
and clear, crisp audio, the xPointSbrings users face-to-face with other people and
organizations.
xPointS enables you to record and stream video calls to multiple locations with up
to 8 additional participants. Using Interactive Multicast™, VCON’s patented
technology, xPointSenhances user experience and allows different remote
locations to join a conversation.
xPointSincorporates advanced data sharing capabilities, allowing you to turn any
videoconference into a fully interactive meeting. It can display presentations or
DVD videos on large monitors, connect to an external laptop for data sharing,
and open various file types from USB storage devices.
xPointSis ideal for users who need a powerful videoconference solution, offering
point‐to‐point/multipoint capabilities, powered by VCON's xPoint software.
Various accessories, such as a PTZ camera, tabletop pod, omni-directional
microphone, extra remote control receiver, data point and ISDN adapters – can
be installed and integrated as part of the xPointSsystem.

Chapter 1. Introduction Main Features
xPoint Standard (S) Ver. 1.5 User Guide •6
¾For more information about the xPointSphysical installation, including
the connection of cables and devices to xPointS, refer to the xPointS
Installation and Setup Guide.
¾For the complete technical specifications, refer to the xPointS datasheet.
Main Features
xPointSallows you to call a destination via LAN or ISDN, and to interact via video
and data-sharing during calls. Some of the primary capabilities of the system
include:
Point-to-point or multipoint connections
Recording, streaming, and data sharing
Streaming via a Web interface
Downloading/sharing files via a USB flash drive
Interactive multicast chair/participant
Session multicast
Embedded broadcast viewer
Calling via address book, log entries or speed dial
Calling via online directories
Multipoint videoconferences support
Configurable audio, video and displays, and automatic answering
Communicating in standalone mode, MXM mode and GateKeeper mode
Embedded Microsoft Windows system
Web-based management
ISDN links (optional)
Incorporating IEEE 802.11 Wi-Fi technology
Regulatory Compliance: UL, CSA (cUL), TUV, TUV-CB, CE-LVD, CE, FCC
Class B, BSMi, VCCI, C-Tick, RoHS.
Comparison Table
The following table specifies the differences between xPointSand other xPoint
models.
Table 1. xPointSvs. Other xPoint Models
xPointLT xPointSxPointHD
Max Tx CIF 4CIF 720p

Chapter 1. Introduction Feature Highlights
xPoint Standard (S) Ver. 1.5 User Guide •7
xPointLT xPointSxPointHD
Max Rx CIF 720p 1080p
MCU 1+3 ; Voice Switch
only
1+5 1+8
Recording √√√
Streaming √√√
Data via USB √√√
Data POD
(Optional)
√√√
ISDN Point √√√Over LAN only
IMC √√√
Multiple
Cameras
Sony or Cannon
cameras only (not
VCON cameras)
Up to 2 cameras Sony cameras only
Bandwidth Up to 1 Mbps Up to 4 Mbps Up to 6 Mbps
Wireless √N/A
Requires external
Wi-Fi dongle*
H.239 Dual
Video support
√√√
PTZ camera+
Digitus + Mic
USB / Digitus √√
Feature Highlights
New features incorporated in version 1.5 of xPointS include:
Embedded MCU for multipoint sessions – The embedded MCU
(optional component) enables connecting up to 4 endpoints simultaneously
from various locations. This MCU capability includes the host system and 3
additional endpoints, one of which can be connected through ISDN.
To access the MCU settings via the remote control, select: Menu >
Settings > MCU , or via the xPointSWeb management: Configuration
> MCU Settings.
Recording and playback – The recording and playback functionality
allows you to record both point-to-point and multipoint (MCU based)
sessions, and view them at a later time. You can also download the recorded
session file from xPointSand share it during a session with the parties
connected, through the data sharing mechanism.

Chapter 1. Introduction Feature Highlights
xPoint Standard (S) Ver. 1.5 User Guide •8
To start recording via the remote control, select: Menu> Media> Start
Record, or via the xPointSWeb management: Call View> Start
Recording.
Session multicasting – Session multicasting allows you to broadcast your
session using the multicasting networking transport technology, which allows
users to send a video stream that can be received by multiple recipients, all
listening on a single multicast address. Multicasting a session from your
xPointSallows numerous passive viewers to view the session. This is typically
used at lectures, or any session that passive viewers can benefit from.
Multicast sessions can be viewed by all VCON endpoints, the free VCON
Broadcast Viewer, and the Apple QuickTime viewer.
To start session multicasting via the remote control, select: Menu>
Media> Start Multicast, or via the xPointSWeb management: Call
View> Start Multicast.
Streaming for Windows Media Player – Session streaming for Windows
Media Player allows any system with the Microsoft™ media player
application to view an ongoing session from the xPointS system.
To start the streaming via the remote control, select: Menu> Media>
Start Stream, or via the xPointSWeb management: Call View> Start
Streaming.
Side-by-side PIP view – A new side-by-side viewing option is available in
PIP (Picture-In-Picture) mode. The side-by-side view enables viewing both
the remote and local video streams at equal size on the screen, side by side.
To switch to side-by-side PIP view via the remote control, press the PIP
button on the remote control until you see both sides on the screen. If
data is shared, the remote video and the data are displayed side by side on
the screen.
System shutdown from the remote control – You can now turn off
(shut down) the xPointSunit from the remote control, in addition to the
ability to do so via the On/Off switch.
To turn off the unit, press and hold the red End Call button on the
remote control (see Figure 2) until the shutdown prompt appears. Select
“Yes” to confirm and turn off the unit.
Access files on a USB flash drive while in idle mode – You can display
files from a USB flash drive connected to xPointS, even while in idle mode.
You do not need to place a call to access files on the USB flash drive. The file
types are the same as for data sharing, including most image formats, video
formats and Microsoft Office files.
To view the files on the USB flash drive via the remote control, select:
Menu> Data Sharing> USB. The list of files and folders is presented,
and you can browse to the file you want to display using the joystick and
the OK button on the remote control, and then by selecting Open.
Display running text (on screen ticker) – You can display on the screen
a text message, which will be displayed to all participants, either in a point-to-
point call or on a multipoint call. This functionality is available only via the
Web management and only during a call.

Chapter 1. Introduction Feature Highlights
xPoint Standard (S) Ver. 1.5 User Guide •9
To enter the text using the Web-based management pages (for more
information, see Chapter 8. Web Access and Management), click on the
Call View button. This will open the call view window. In this page, click
on the “Running Text” button to open the running text window.
Far End mute indicator – An indication that the remote side has muted
its microphone is now available. The indication appears on the screen if it is
supported by the remote system.
¾Note: this option is not available in all videoconferencing systems.
Telnet interface – You can now use an external remote control system such
as Crestron® and AMX®. This functionality provides conference room
integrators utilizing touch panel screens with an easy-to-use programming
interface over a Telnet connection. The API specification can be found in a
separate document.

xPoint Standard (S) Ver. 1.5 User Guide •10
Chapter 2. Getting Started
In this Chapter
Once the xPointS unit is installed, connected and turned on, it is ready for use.
This chapter describes the following basic operations:
Using the Remote Control
Using the On-Screen Menu
Displaying System Information.
Using the Remote Control
You can navigate the xPointSon-screen graphic user interface (GUI) using the
infrared remote control, bundled with the unit. A separate infrared signal
receiver unit is connected to the xPointSunit, allowing it to receive your
input/commands from the remote control.
Pressing any button on the remote control activates the on-screen GUI, which
appears on top of the camera/videoconference picture.

Chapter 2. Getting Started Using the Remote Control
xPoint Standard (S) Ver. 1.5 User Guide •11
Figure 1. xPointSRemote Control
The remote control includes the following button types:
Alphanumeric Keypad
Command Buttons
Navigation Joystick and Additional Buttons.
Alphanumeric Keypad
The remote control includes an alphanumeric keypad with buttons from 0 to 9, as
well as '.' , '*' , '#', ‘^’, and Clear (ÅBackspace) buttons.
In different windows, you can toggle between numbers and letters, depending
on the field. Some fields accept numbers only.
Switch between letters and numbers by pressing a few times on the
corresponding key
Use Volume Up/Down buttons when you need to activate/deactivate CAPS
lock
When DTMF dialing is requested, use the numeric keypad.

Chapter 2. Getting Started Using the Remote Control
xPoint Standard (S) Ver. 1.5 User Guide •12
Command Buttons
The following command buttons are available on the remote control:
Table 2. Remote Control Command Buttons
Button Image Button Name Command
Status Display the current call status
Data Initiate data sharing
Address Book Open the address book
Help Show the on-screen online help
Far End Control the position (PTZ) of the
camera at the near/far end
Camera Control Configure the camera position settings
Preset: Recall Recall a camera PTZ preset position
Preset: Set Set a camera PTZ preset position
Picture-In-Picture (PIP) Toggle the PIP position (5 positions +
Side-by-Side)
Speed Dial Display the speed dial options
Call Log Display the current call log
Mute Mic Mute the local microphone
Display Toggle the local and remote displays
Settings Open the settings menu
Mute Video Temporarily disable the local video
camera and its transmission
Mute Speaker Mute the speaker

Chapter 2. Getting Started Using the On-Screen Menu
xPoint Standard (S) Ver. 1.5 User Guide •13
Navigation Joystick and Additional Buttons
Using the joystick of the OK button, you can navigate the GUI menus/options in
four directional movements: Up , Down , Left , and Right .
Figure 2. Remote Control Joystick and Controls
In addition to the joystick, the following buttons are available around it:
Back – Returns to the previous step/window without saving changes
Menu/OK – Selects/activates a highlighted GUI item/function (highlighted
in green on the screen)
Volume Up/Down – Increases/decreases the volume or switches between
lower and upper case
Zoom In/Out – Zooms in or out with the camera
Make Call – Start a new call
End Call – End the current call or close the GUI.
¾The red End Call button can also be used for turning off the unit. Press
and hold the button until the shutdown confirmation prompt appears.
Selecting “Yes” immediately shuts down the system.
Using the On-Screen Menu
The on-screen menu enables you to navigate xPointSoptions prior to and during
a videoconference call. The main menu is accessed using the remote control (see
‘Using the Remote Control’).
To display the xPointSmain menu:
Press OK on the remote control.

Chapter 2. Getting Started Using the On-Screen Menu
xPoint Standard (S) Ver. 1.5 User Guide •14
Figure 3. xPointSMain Menu
Navigate the xPointS menu using the remote control.
To expand menu options:
Press the right arrow () on the joystick when the expandable option is
selected.
¾Note: expandable menu options are marked with a side triangle sign ().

Chapter 2. Getting Started Using the On-Screen Menu
xPoint Standard (S) Ver. 1.5 User Guide •15
Figure 4. xPointSExpanded Menu Options
To access a category/option:
Press OK when the category/option is selected (highlighted in green).
To collapse the menu options:
Press the left arrow () on the joystick, or press Back.

Chapter 2. Getting Started Displaying System Information
xPoint Standard (S) Ver. 1.5 User Guide •16
The following menu buttons may appear occasionally in the GUI (appear in the
context of use):
Table 3. Common GUI Buttons
GUI Button Label Function
OK Save changes
Back Return to the previous window
without saving changes
Apply Apply changes or soft-start your
system
Restore Defaults Cancels all user-defined settings and
returns the unit to its factory default
settings
Shutdown Shut down the unit
Restart Reboot the unit
Open Open the selected folder/file
Next Continue to the next step
Finish Finish and close a configuration
wizard/dialog
Displaying System Information
Whenever the xPointSunit is turned on, you can view the system status details.
Different details are displayed when the unit is in idle state, in recording mode, or
in an ongoing videoconference session.
To display the current system status details:
Press Status ( ) on the remote control; the Status window
appears.

Chapter 2. Getting Started Displaying System Information
xPoint Standard (S) Ver. 1.5 User Guide •17
Figure 5. Status Window
When xPointSis in idle state, the Status window displays the following
information:
IP Address – IP address of the xPointSunit, as automatically assigned by
the DHCP server or as manually configured via Settings>System (static IP).
You can use this IP address to access and manage the unit via a browser (see
Accessing the xPointS Unit via a Browser)
Secure Connect IP – Indicates whether xPointSuses a secure IP
connection, if such is defined (see Secure Connect Settings)
Mode – The current operation mode:
oStand-Alone – The unit is not connected to an MXM server or a
gatekeeper
oMXM – The unit is connected to an MXM server
oGatekeeper – The unit is connected to a gatekeeper server.
User Number – The user number used to identify the unit if an MXM
server or a gatekeeper is used

Chapter 2. Getting Started Displaying System Information
xPoint Standard (S) Ver. 1.5 User Guide •18
DNS Suffix – Suffix used for the DNS addressing by xPointS
System Name – System name as defined in the system settings (see System
Settings)
ISDN Number – ISDN number that is currently being used
MAC Address – MAC address of the xPointSunit
Media – Indicates whether a recording/streaming session currently takes
place, and specifies the elapsed duration of the recording/streaming.
¾Note: during a videoconference call, you can display additional/different
relevant information by selecting Advanced in the Status window.

xPoint Standard (S) Ver. 1.5 User Guide •19
Chapter 3. Configuration Basics
In this Chapter
This chapter explains the basic configuration options and includes the following
sections:
Entering Your User Details
Configuring the Camera
Configuring the Audio
Configuring the Display.
Entering Your User Details
You can register your personal contact details so that they will appear publicly in
outgoing calls instead of your IP address.
To set the user settings:
1. Select Settings>General>User; the User Settings window appears.
2. In the User Settings window, enter the following details:
oFirst Name – Type your first name
oLast Name – Type your last name
oCompany – Type your company details
oEmail Address – Type your email address.
3. Select Apply.
Configuring the Camera
Before you begin videoconferencing, you need to make sure that the cameras
connected to xPointSare properly configured. Cameras are configured via the
Camera Settings window.
To access the camera settings:
1. Press OK on the remote control; the main menu appears.
Table of contents
Other Emblaze-VCON Conference System manuals
Popular Conference System manuals by other brands
Polycom
Polycom iPower 600 Series System installation guide

Zeus Phonstuff
Zeus Phonstuff Always n Touch manual
urmet domus
urmet domus 5330 manual
Cisco
Cisco SX80 Administrator's guide
AT&T
AT&T MERLIN LEGEND Release 2.0 Analog Multiline... Programming summary
Lucent Technologies
Lucent Technologies MERLIN LEGEND Release 6.1 System programming and maintenance
